Currency is not complicated here (unlike Argentina or Bolivia). You can pay by credit card most places and to get cash, just use any ATM. FYI ATM fees can be pricy (but doesn’t matter if you have a debit card that reimburses ATM fees like mine does).
When you cross the border into Chile, you will receive a slip of paper called the PDI. DO NOT LOSE IT. You need it to leave the country!
Chile is definitely a more expensive South American country, but the infrastructure is generally better.
In South America, domestic flights tend to be much, much cheaper than international ones so if you can try to fly domestically and then do border crossings by bus, you can often save money. For example, we fly from Santiago down to Patagonia but stay on the Chilean side (Puerto Natales). Then we will take a bus to El Calafate (Argentinean side) and will do the border crossing by bus. Then we fly to Ushuaia from there, successfully avoiding any international flights.
CITY: San Pedro de Atacama
HOW LONG: 5 Nights
ACCOMMODATION:
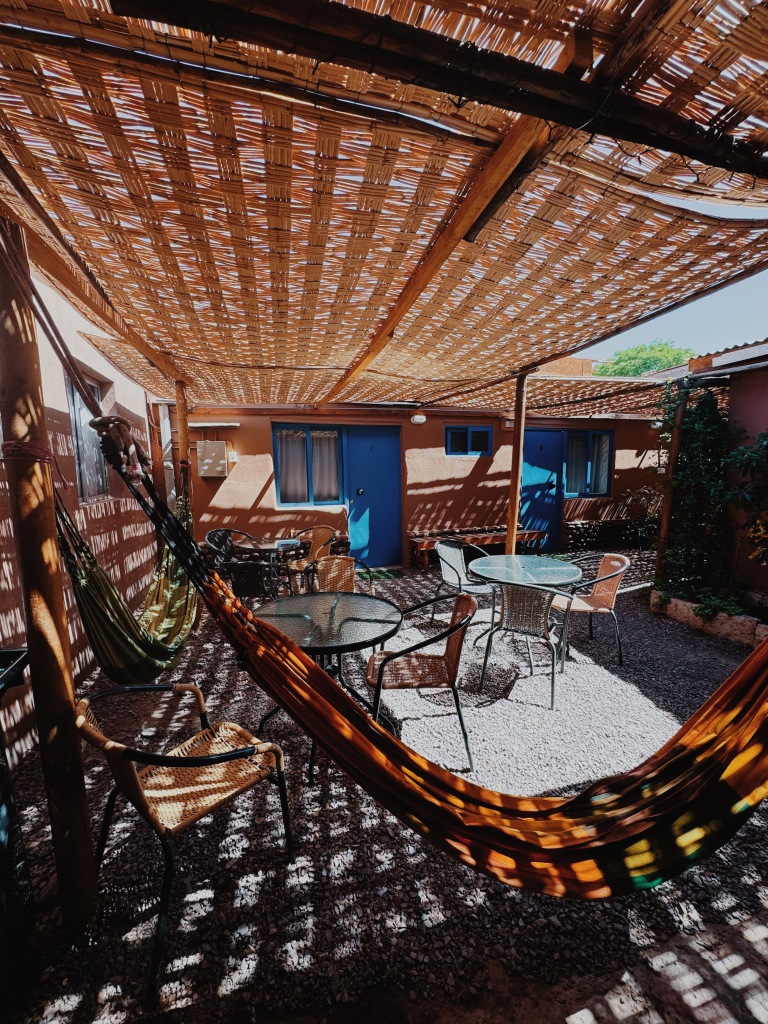
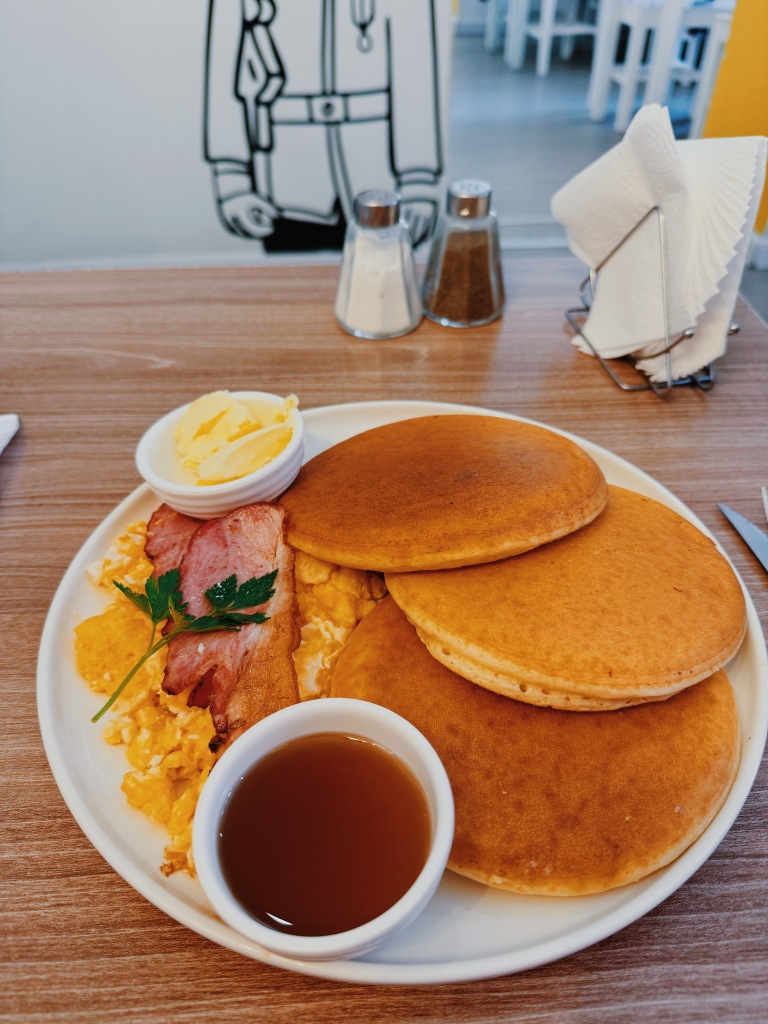
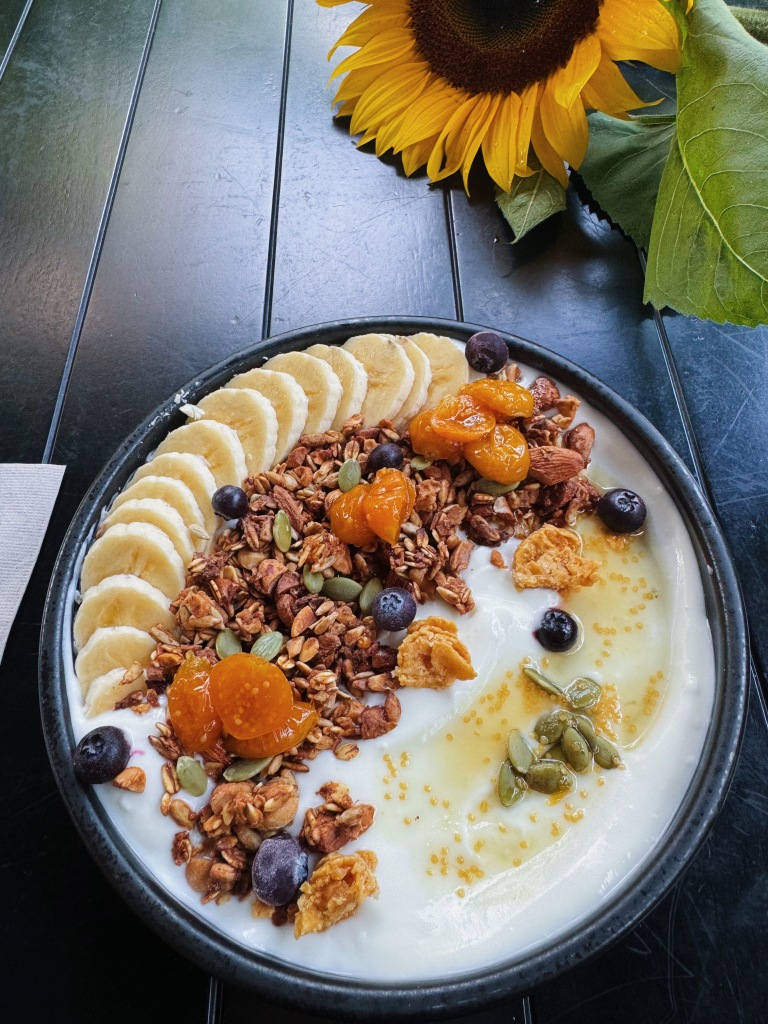
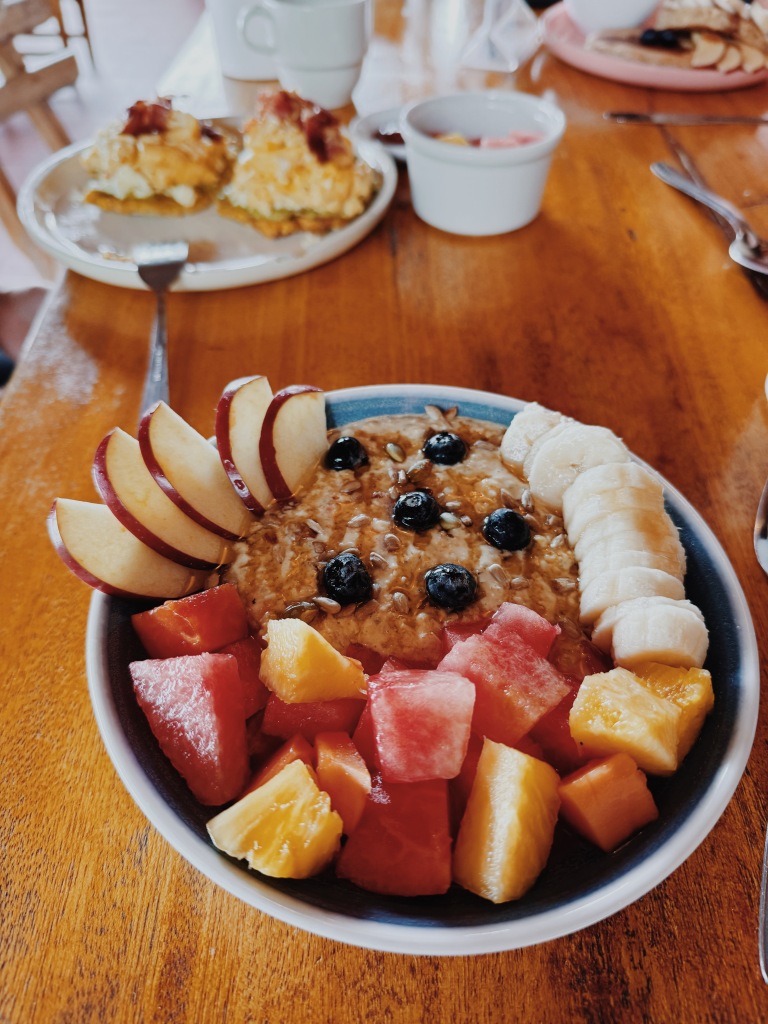
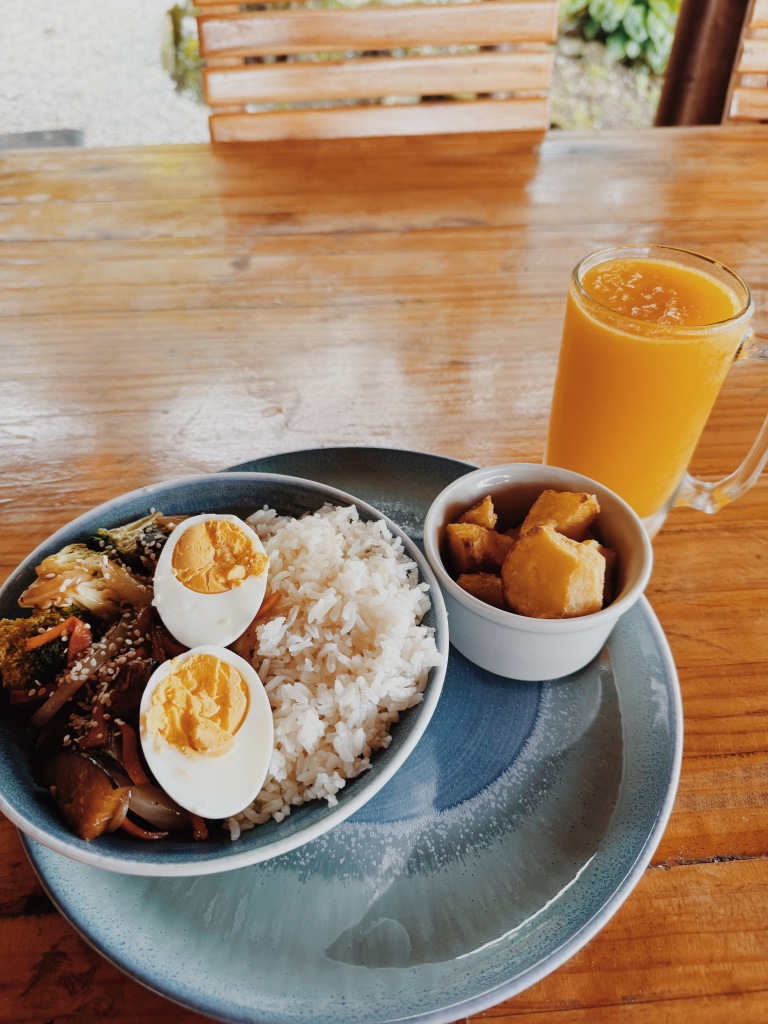
I loved my hostel here! When I began searching for the right spot, every review of Hostal Mamatierra mentioned how clean it was. It lived up to its reputation! It was so cozy, clean and had the best hostel breakfast I’ve had in a while. Pancakes, fruit, & eggs in addition to cereal & yogurt. Very easy to meet people and it’s small enough that you actually end up talking to almost everyone over breakfast or in one of the hammocks. Easy to book tours through the front desk as well. Beds were comfy and the rooms were cleaned every day! Overall a 10/10, can’t recommend enough!
The free breakfast spreadOutdoor hangout area
WHERE TO EAT:
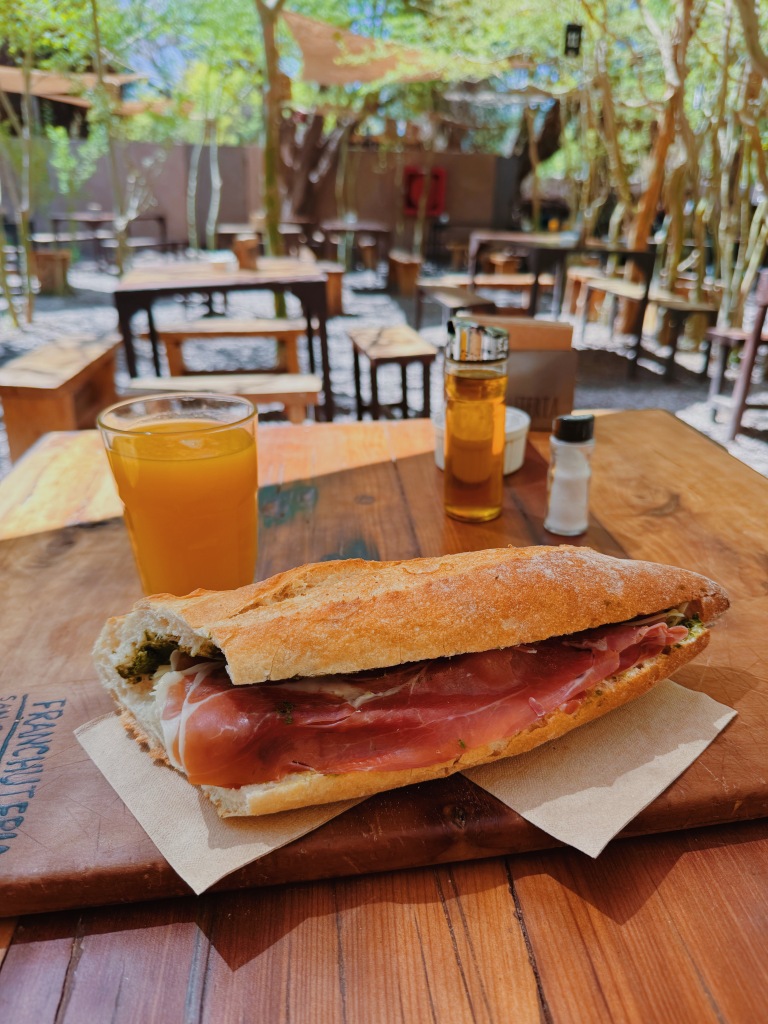
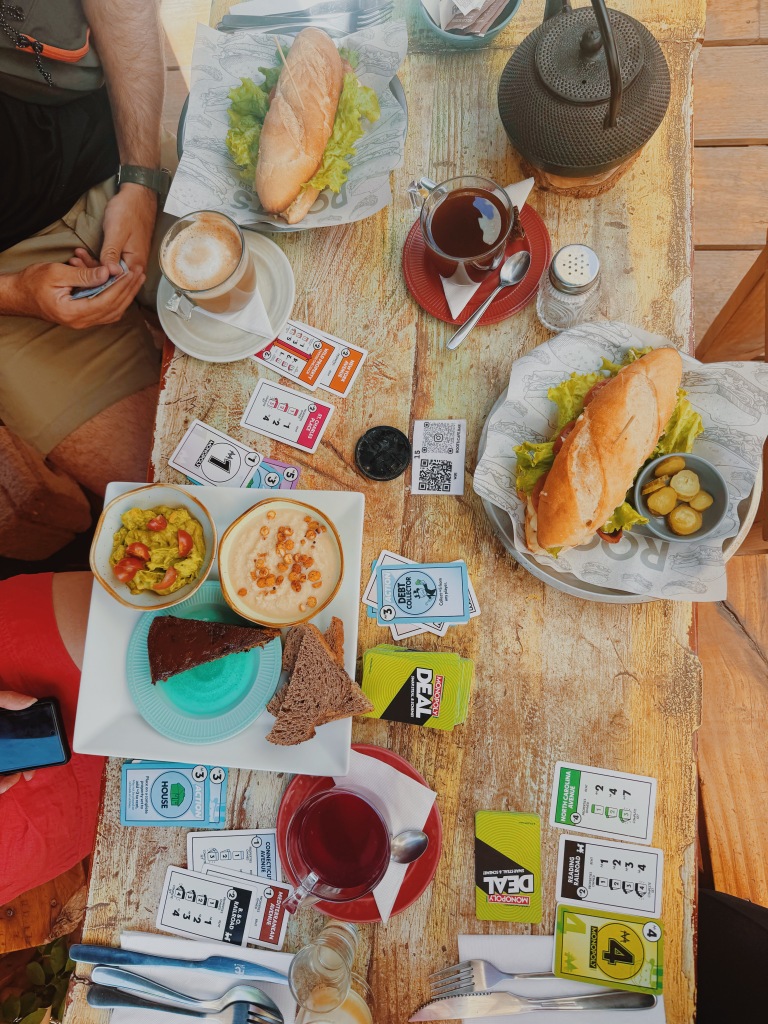
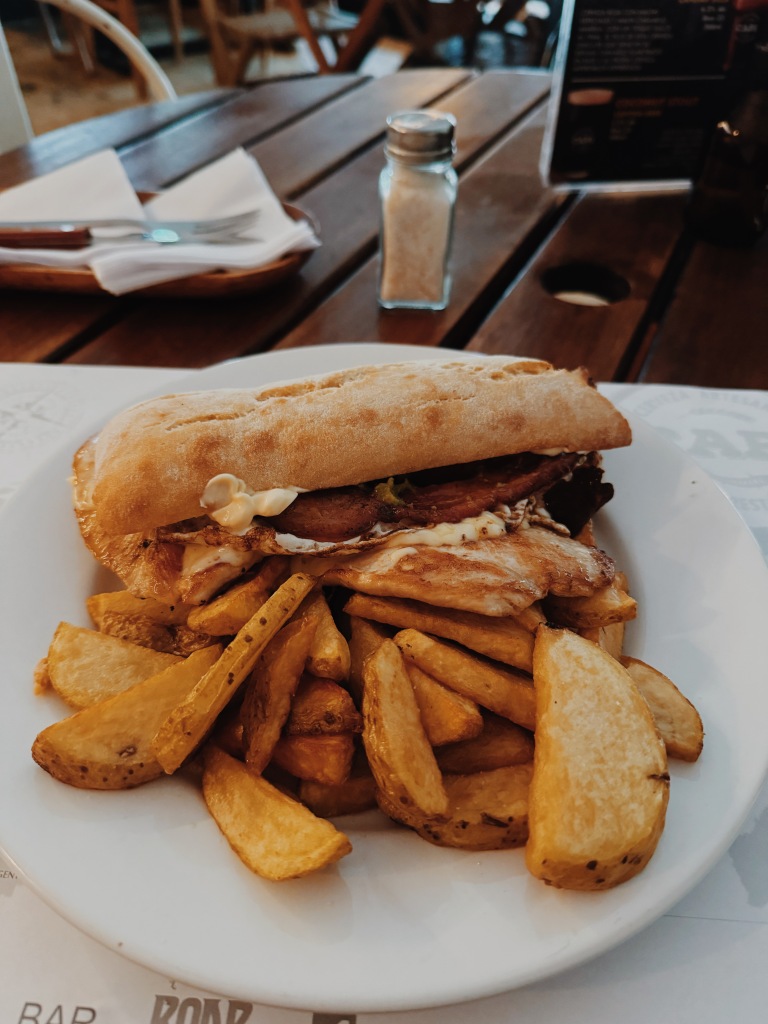
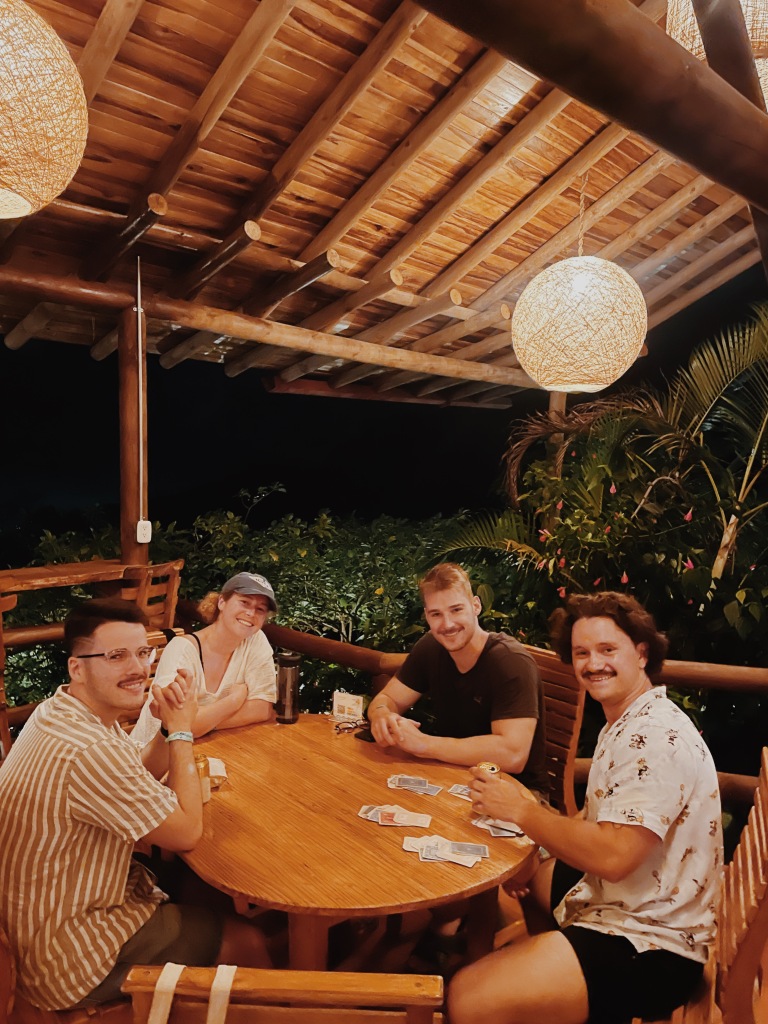
Franchuteria – cute cafe with outdoor seating. Two locations in town but I preferred the one with the outdoor seating. Delicious baguettes and sandwiches. Huge portions. I ate lunch and had enough leftover for dinner. Great spot to play cards or chat with new friends from the hostel. Definitely my favorite place in San Pedro.
Adobe – pretty expensive but very cute restaurant. Live music and food was delicious. I had a cheese, mushroom, and onion quesadillas. Again, I had a lovely experience but the price comes from it being touristy, rather than exceptional food.
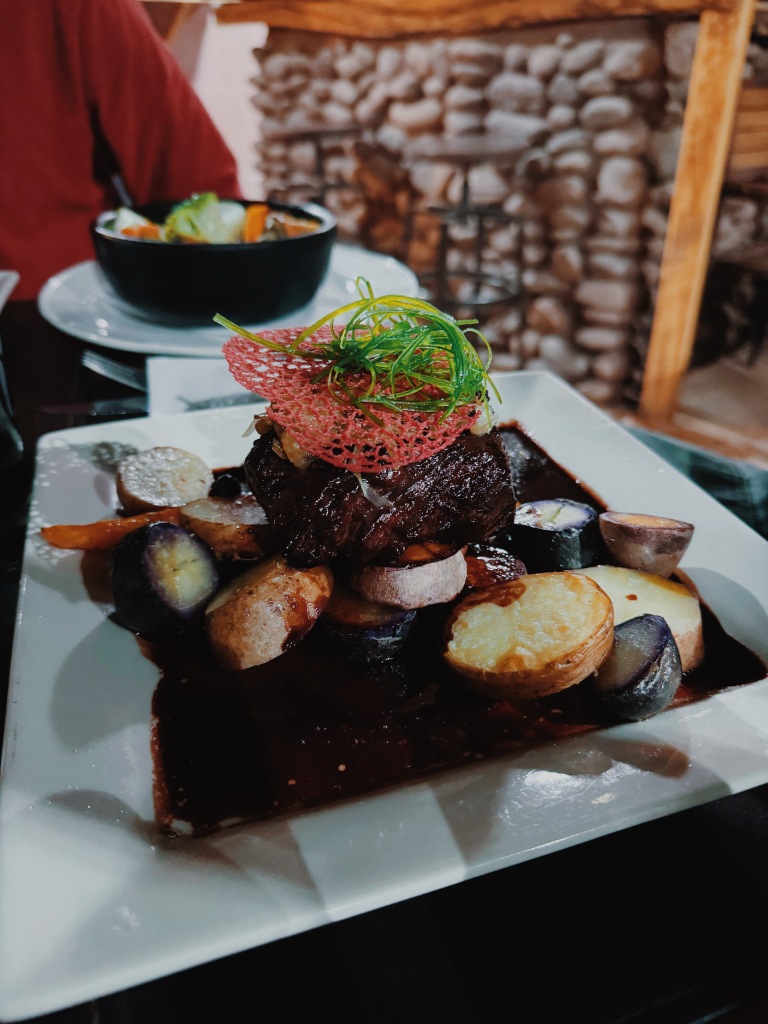
Ckunna – lovely spot slightly out of the main touristy bit. Pasta was delicious and my friends raved about their steaks. Great outdoor patio to enjoy dinner.
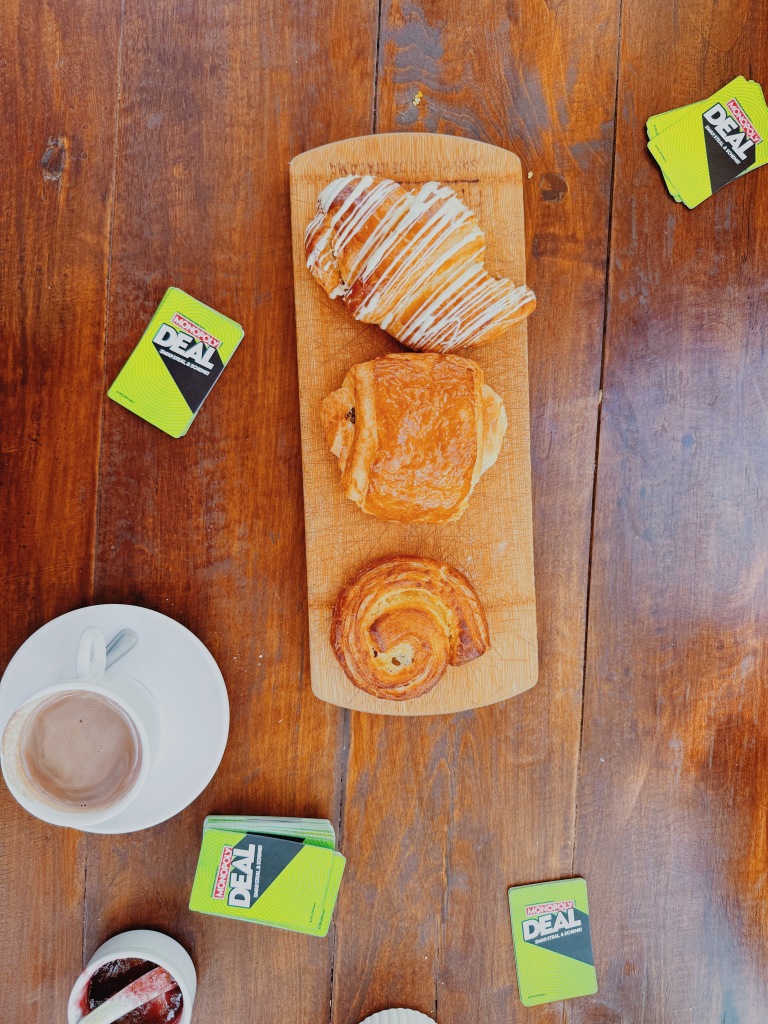
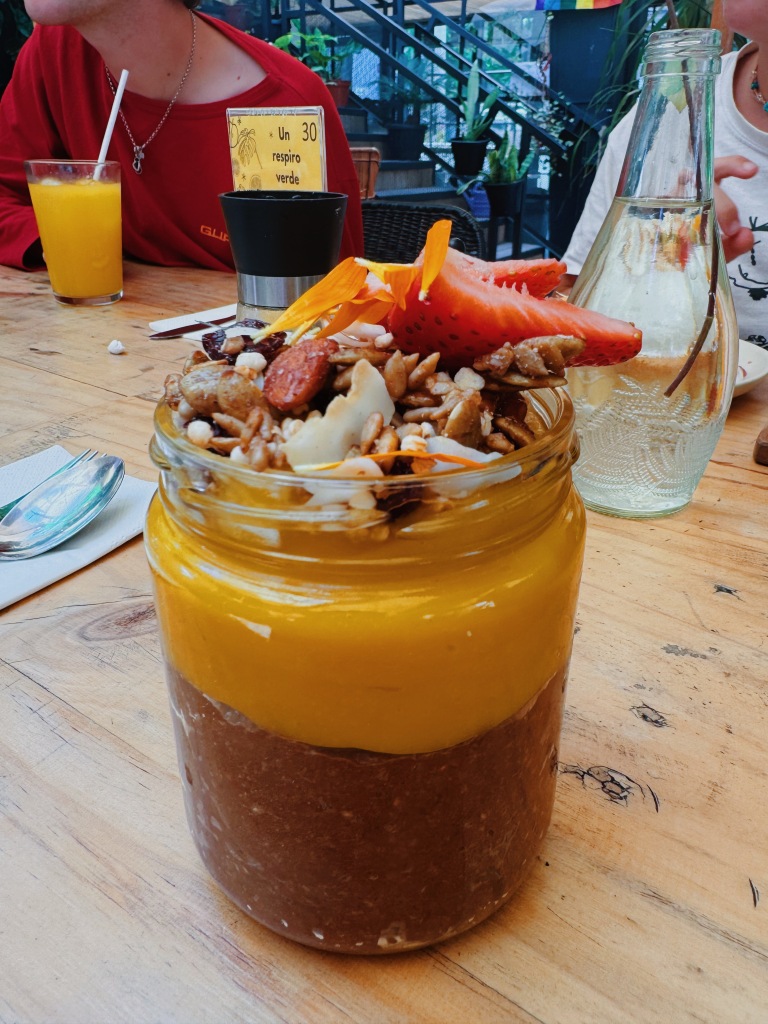
Roots Cafe Pizza – Went here for brunch/lunch & some monopoly deal with my new friends. Very cute outdoor space in the back. Really enjoyed it.
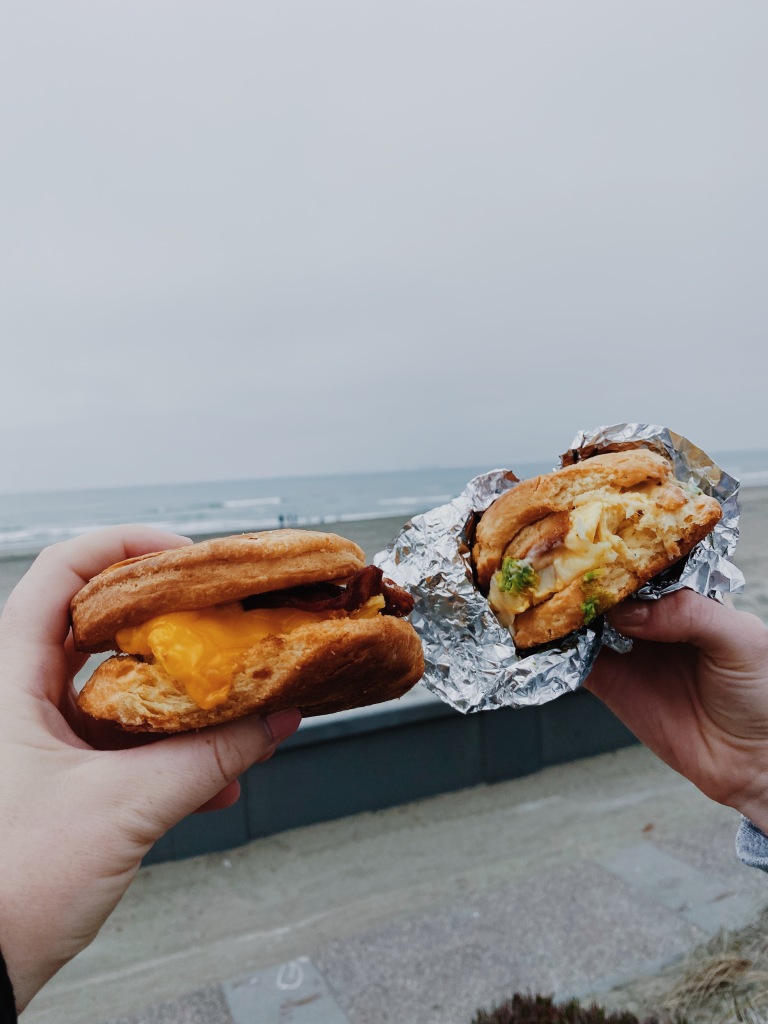
Astro Burger – A great burger in a kinda funky space. You don’t go for the ambiance 😉
There are sooooo many tours & activities in San Pedro! Your accommodation will likely have a booklet or packet for you to peruse with all the options. Also it felt like almost every other business in town was a travel agency who are happy to book you onto one of their tours.
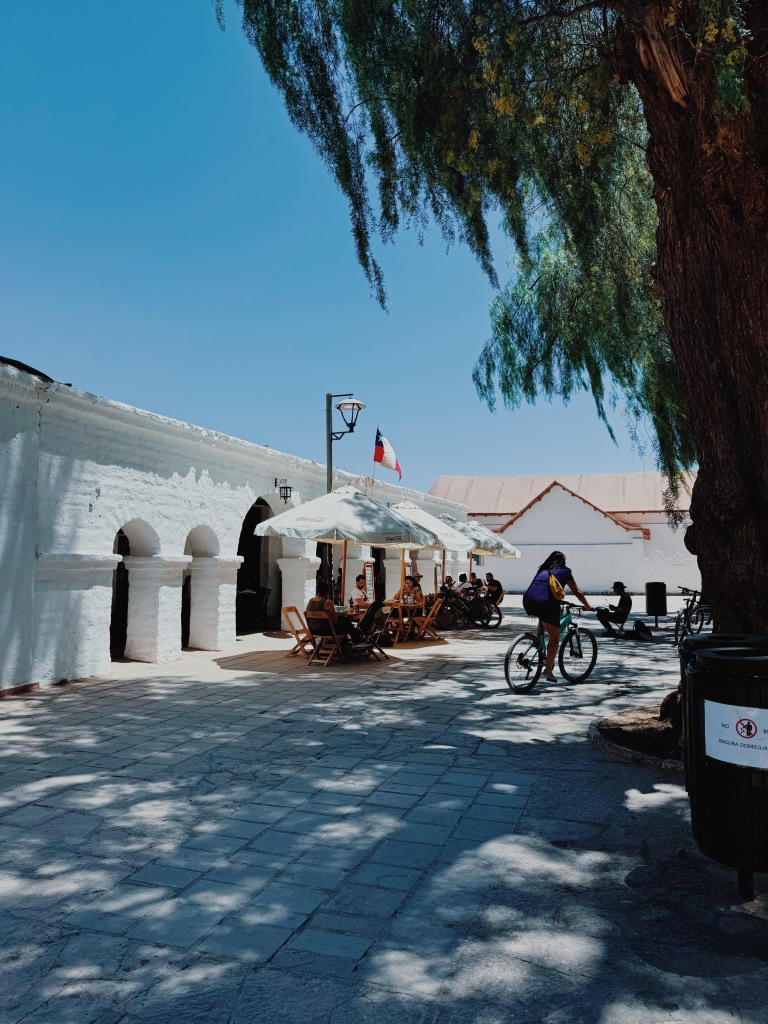
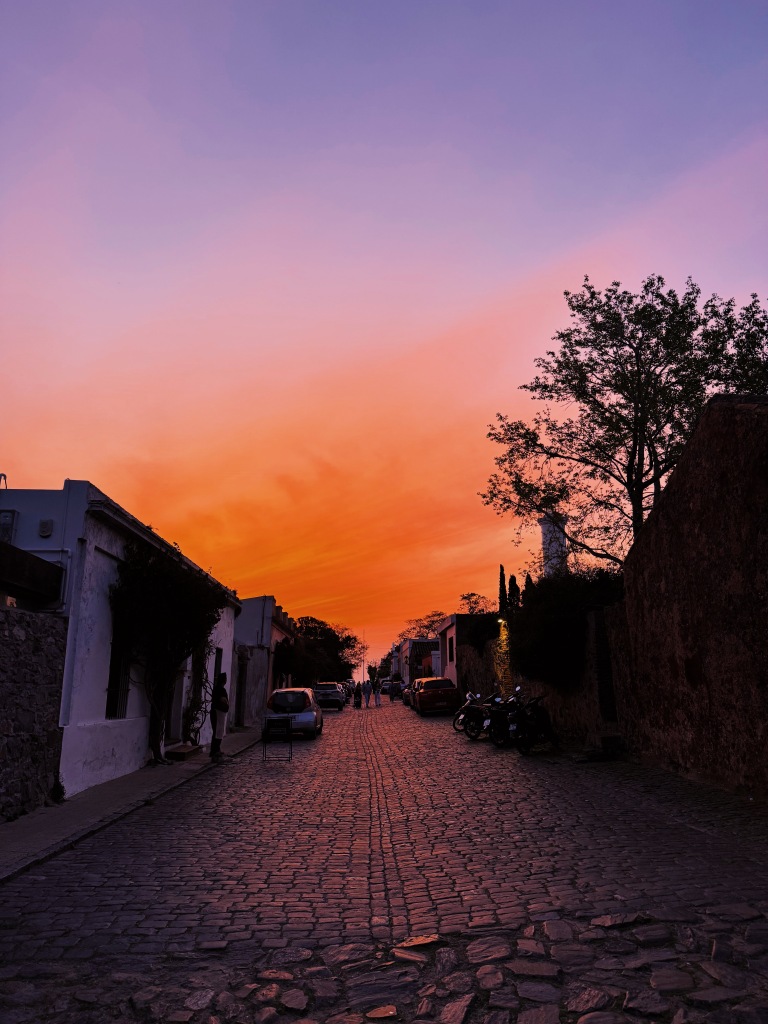
Cutest little town
Because the landscape is quite similar to that of Southern Bolivia, I opted to skip some of the (sometimes) pricy tours. The two I chose to do:
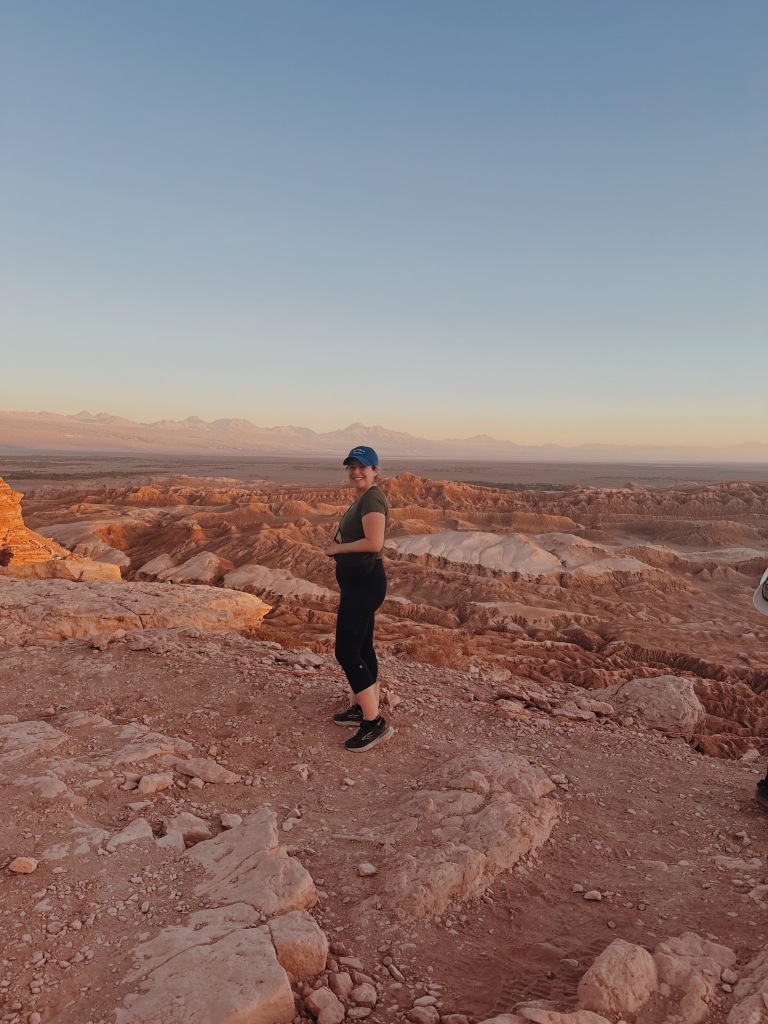
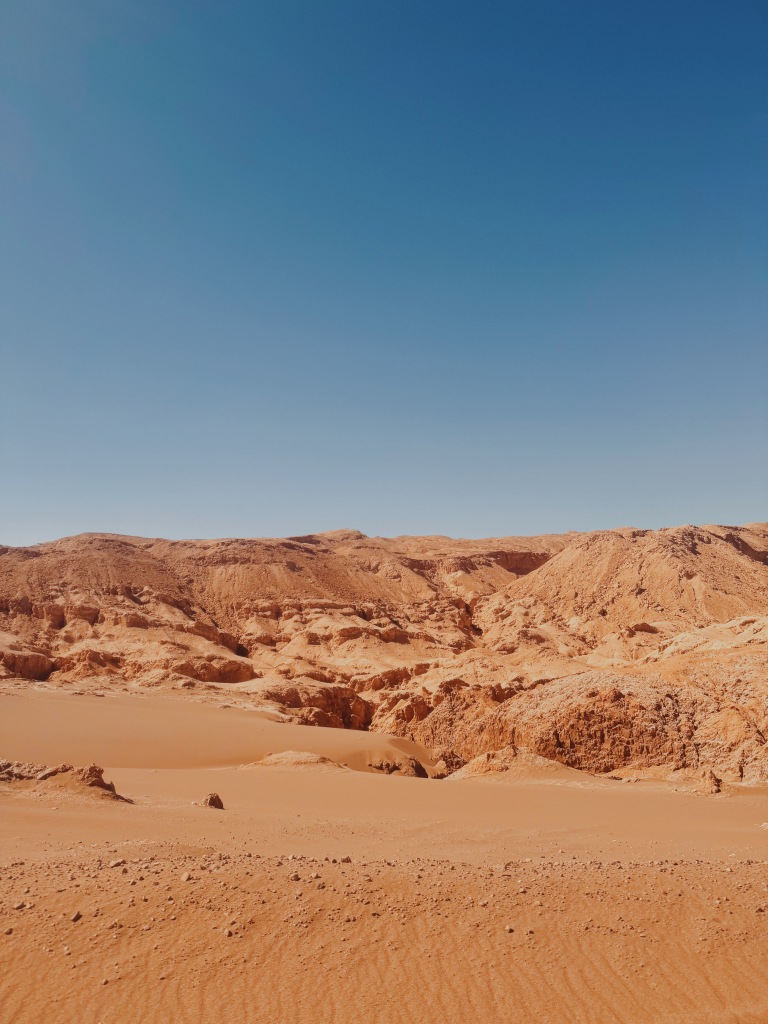
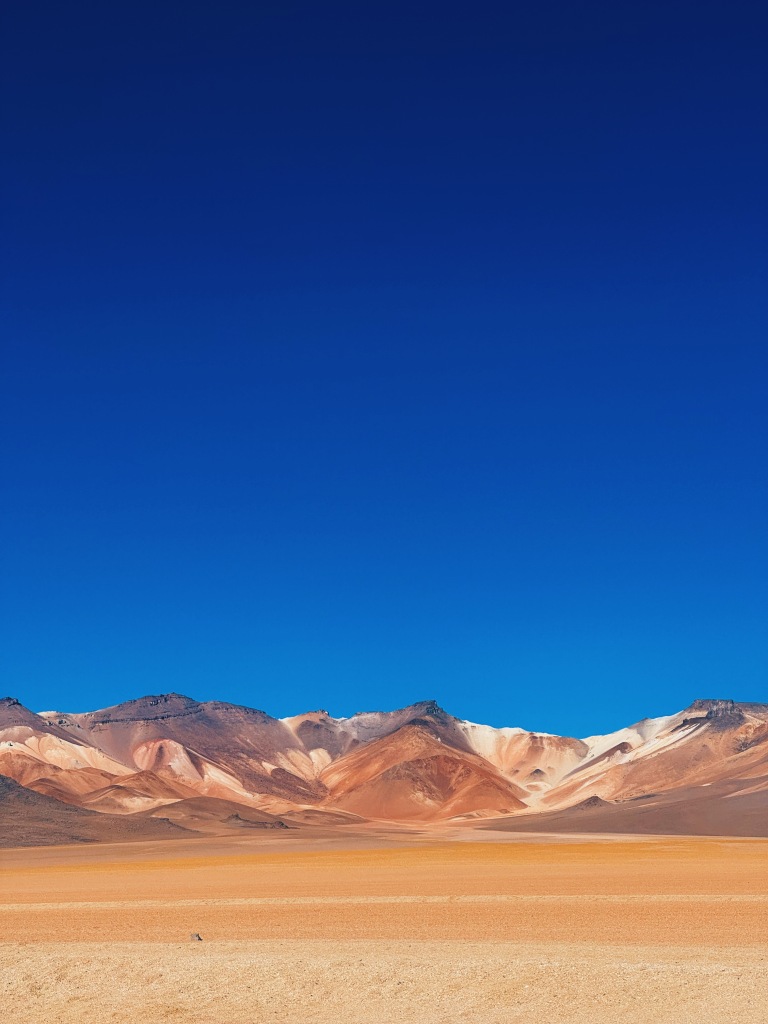
Valle de la Luna – was declared a Nature Sanctuary in 1982 for its natural environment and strange lunar landscape, from which its name is derived. It definitely has a Mars-like feel to it. It has various stone and sand formations which have been carved by wind and water. This tour usually includes a sunset stop + a little picnic which is fun. Pro tip: Make sure your tour will have an English speaking guide. I forgot to ask and my tour was in Spanish – whoops!
The Amphitheater
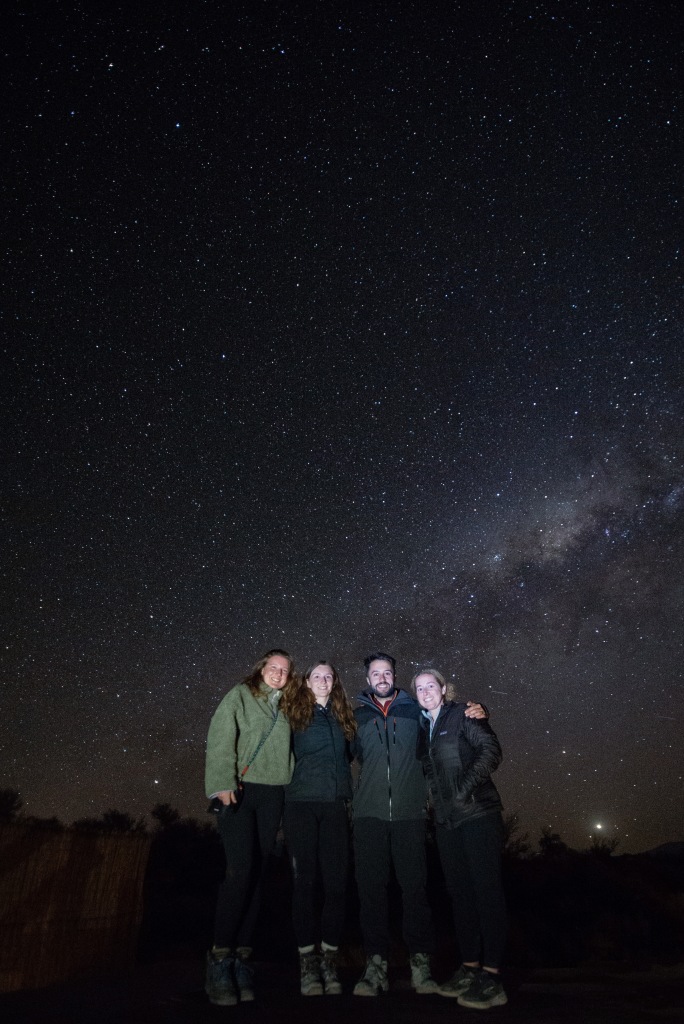
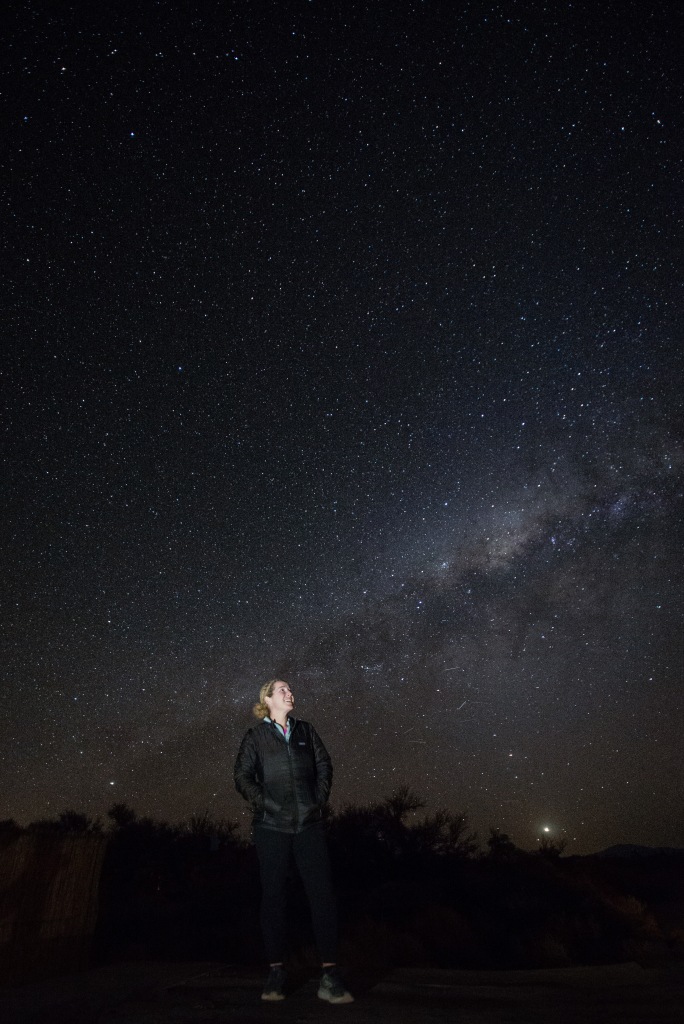
Astronomy Tour (Stargazing) – The Atacama Desert is one of the few locations on the globe with over 300 days of clear skies per year. When you add no light pollution and its high altitude, you have might have the best place for stargazing in the world. Do not skip this tour. We had a blast! It included a short film about astrology, naked eye stargazing, snacks + warm drinks, & stargazing through incredible telescopes! Pro tip: Pay attention how big/bright the moon will be and try to time your tour when it will be less obstructive.
New friendsMagical
There are many, many other tours like floating in a salty lagoon, hot springs, geysers and more. See here for a comprehensive overview of your options or just ask your hostel/hotel when you arrive 🙂
OVERALL THOUGHTS:
Atacama is a very cute, but touristy spot in the north of Chile. It’s fairly expensive, but I really enjoyed it. It was a fabulous spot to spend 5 days, soaking up the warmth & sun after the cold mountains in Bolivia. I met fun travelers and loved my hostel. Highly recommend this on any Chile itinerary as the nature is stunning!
CITY: Santiago
HOW LONG: 6 Nights
ACCOMMODATION:
We cannot recommend Ventana Sur more if you stay in Santiago! It’s basically a home converted into a hostel, which makes it so cozy and incredibly easy to meet people. Free breakfast is yummy and everyone sits at one of two large tables so you get to know everyone. Each night people are hanging out, drinking socially and playing games. The neighborhood is wonderful and incredibly safe (huge perk). We loved being here and Ivan is a wonderful host!
WHERE TO EAT:
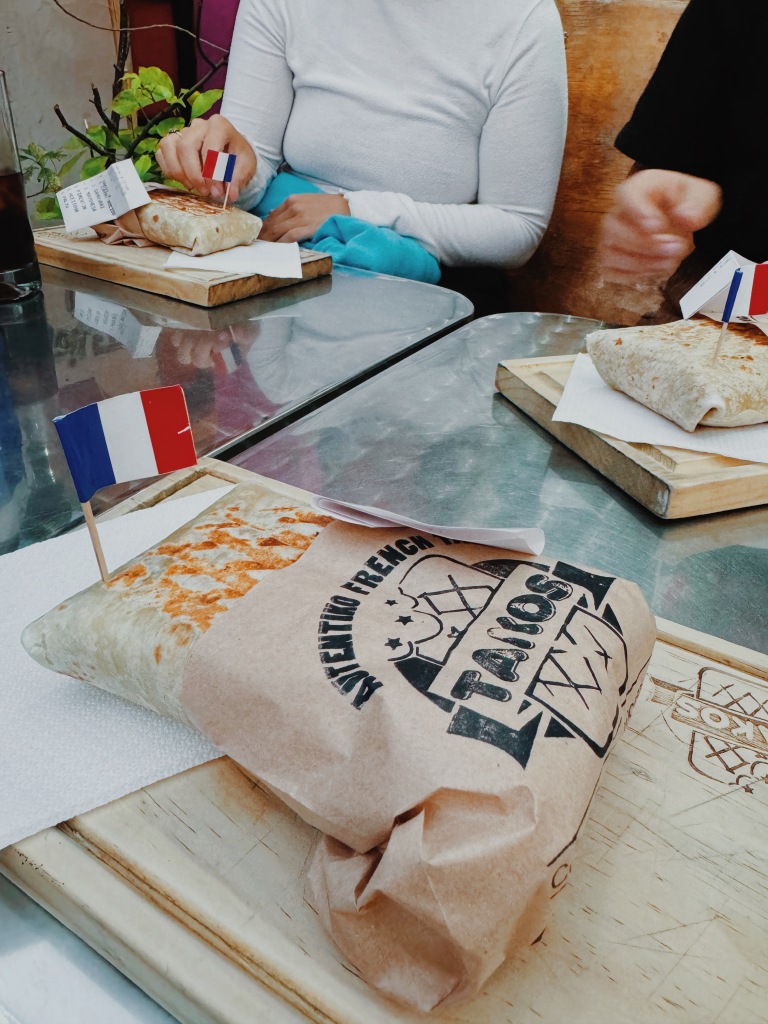
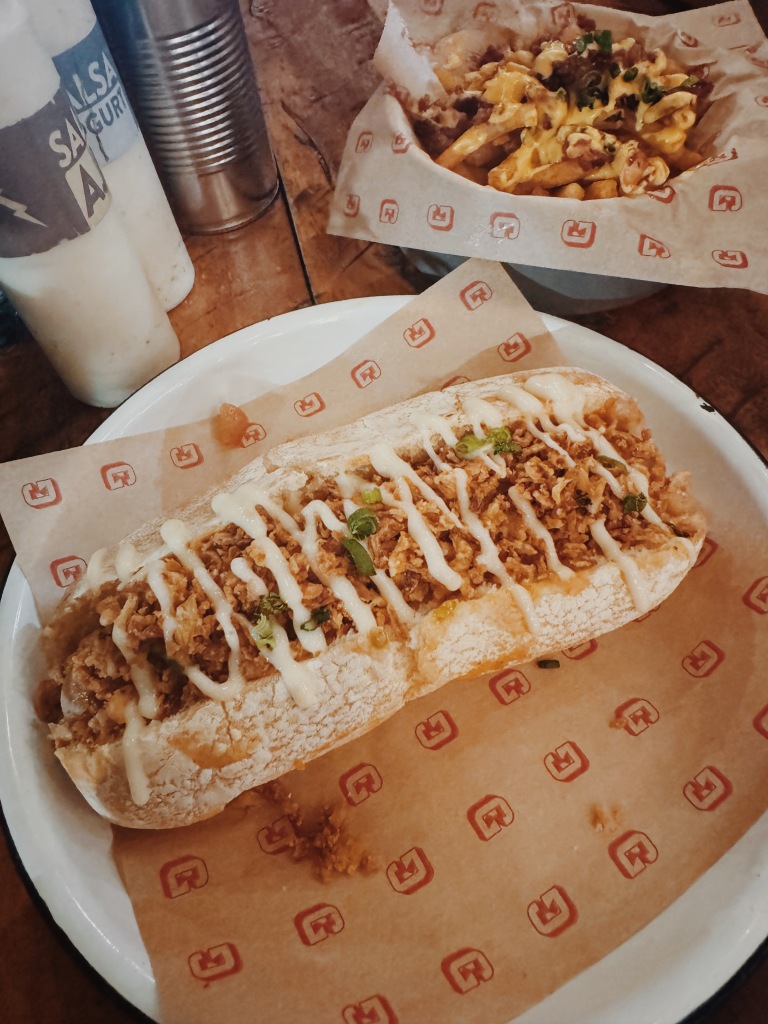
Auténtiko French Takos – weird fusion but it was pretty dang delicious. I had a cordon blue with avocado and there are French fries inside all wrapped up in a grilled tortilla. My friends didn’t love theirs but I quite enjoyed mine haha.
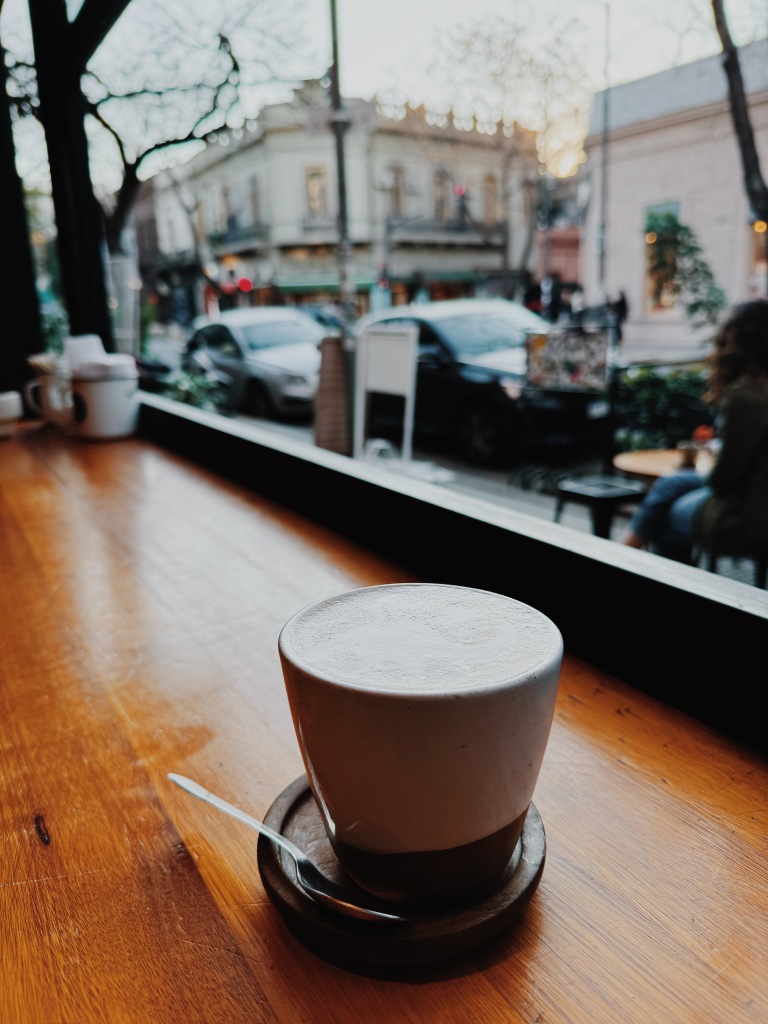
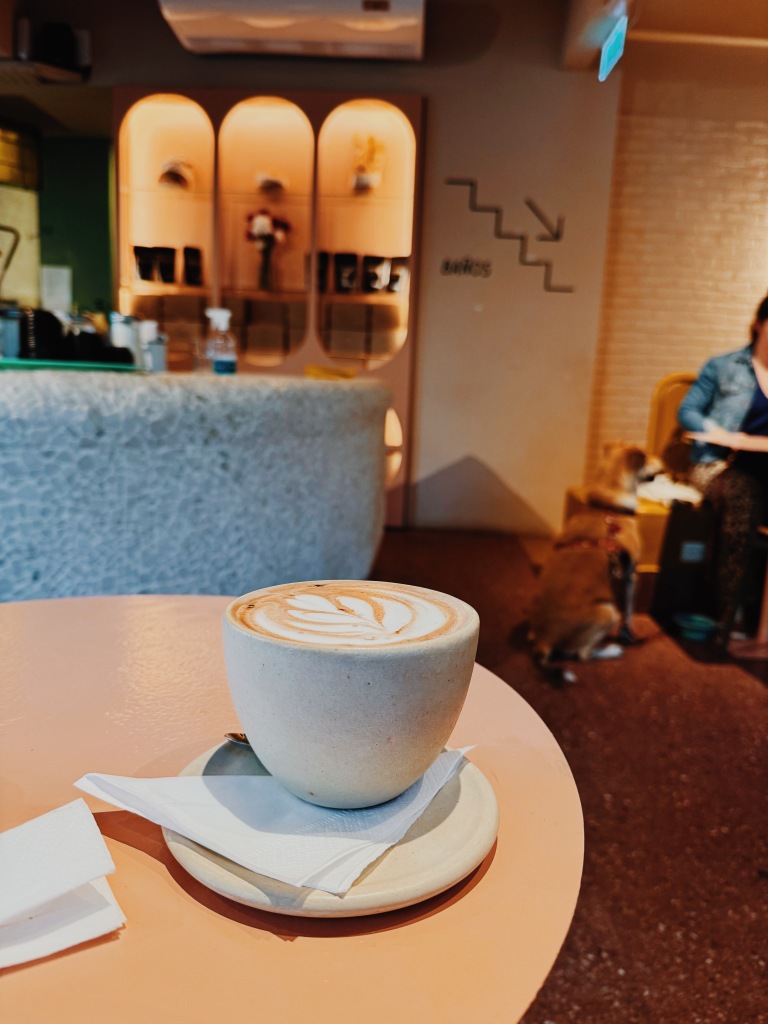
Bemvindo Cafe – cute cozy spot to work with a hot drink
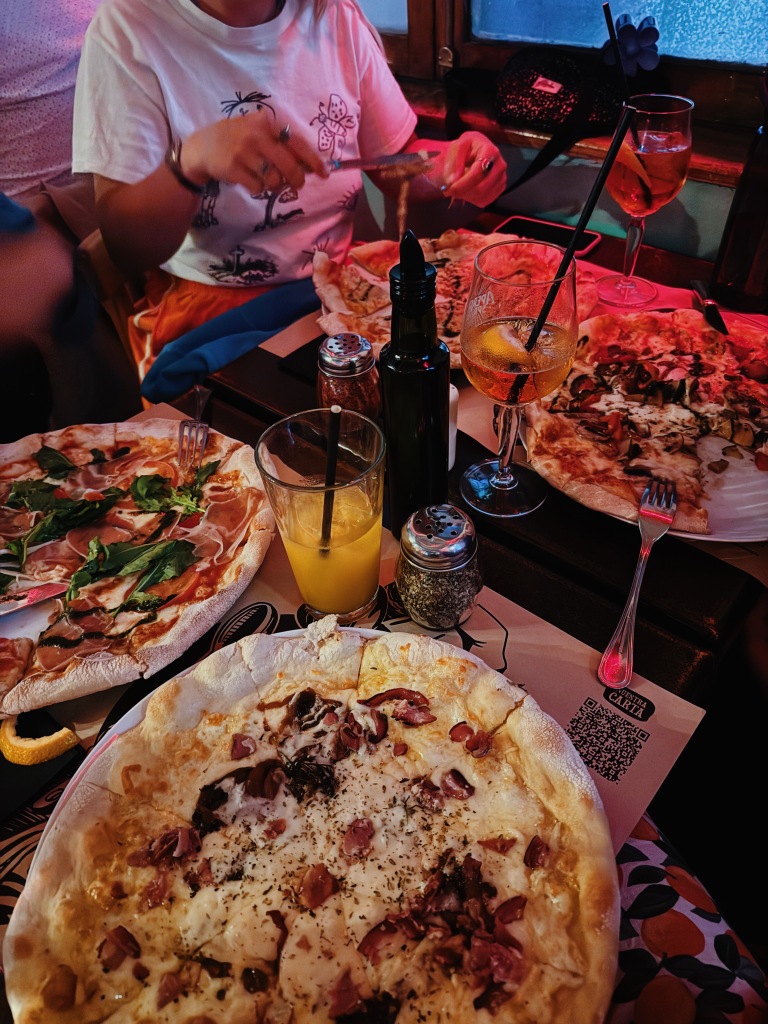
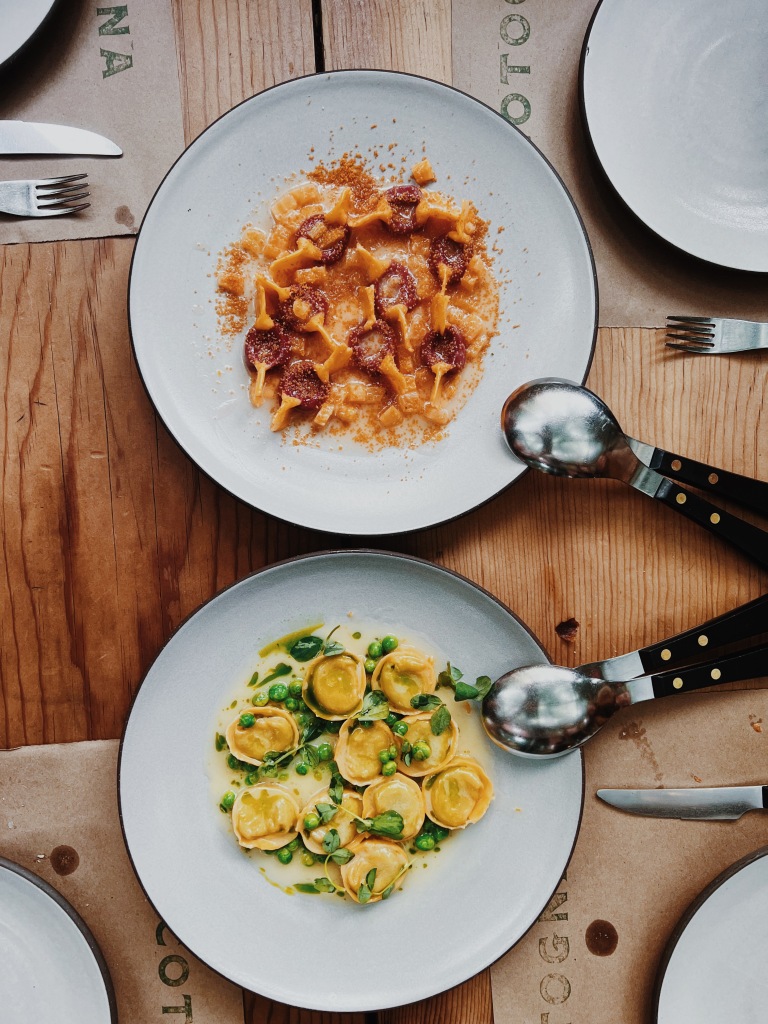
In Pasta – Fabulous Italian restaurant. We had yummy mushroom pasta and fun drinks.
I had been to Santiago before so I honestly didn’t do much. Last time I was here I did a day trip to Valparaíso (Sonja did this while we were here), which is popular. We did do a walking tour with two women from our hostel, which is always a great option while in a big city to efficiently get a bit of history.
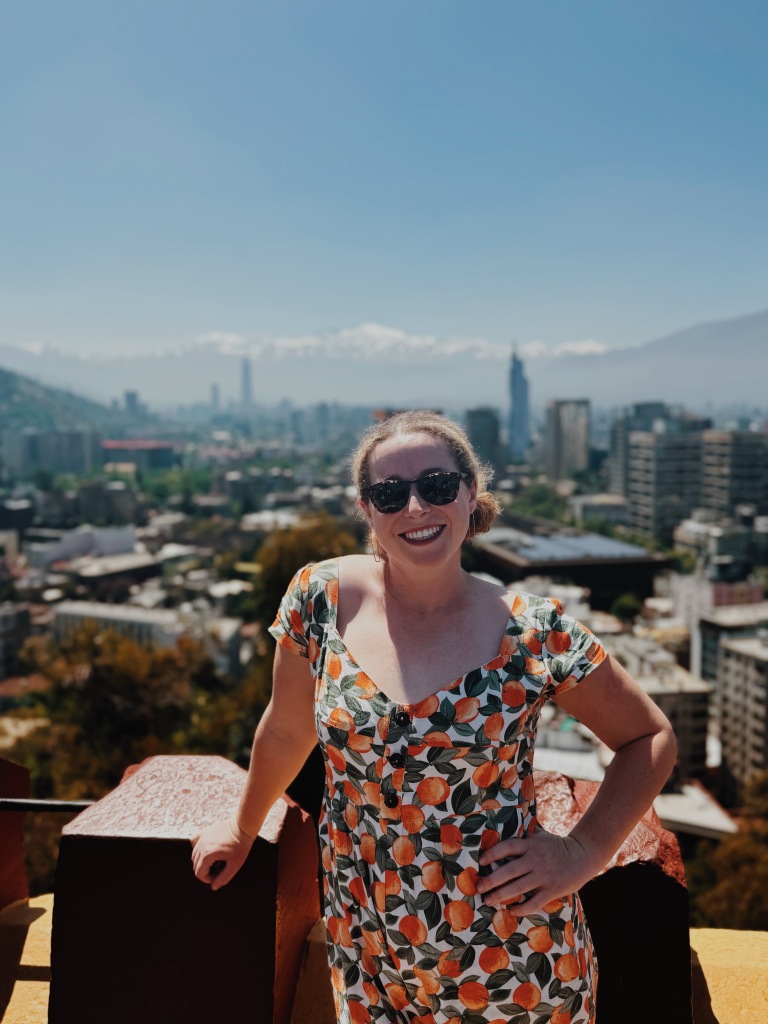
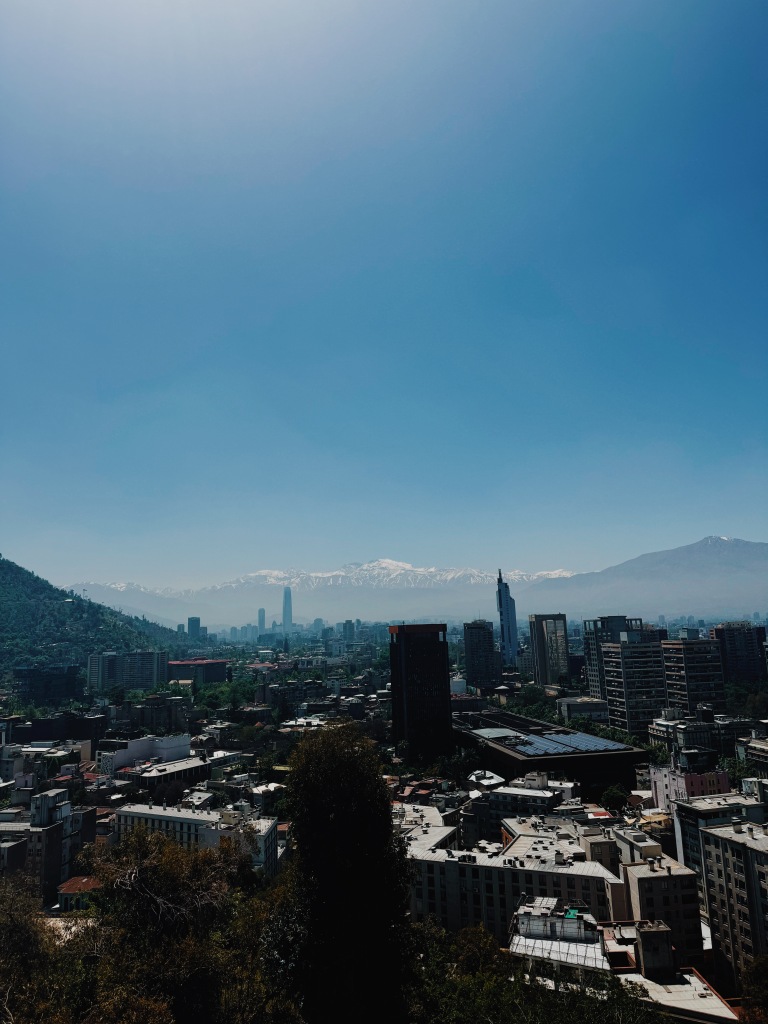
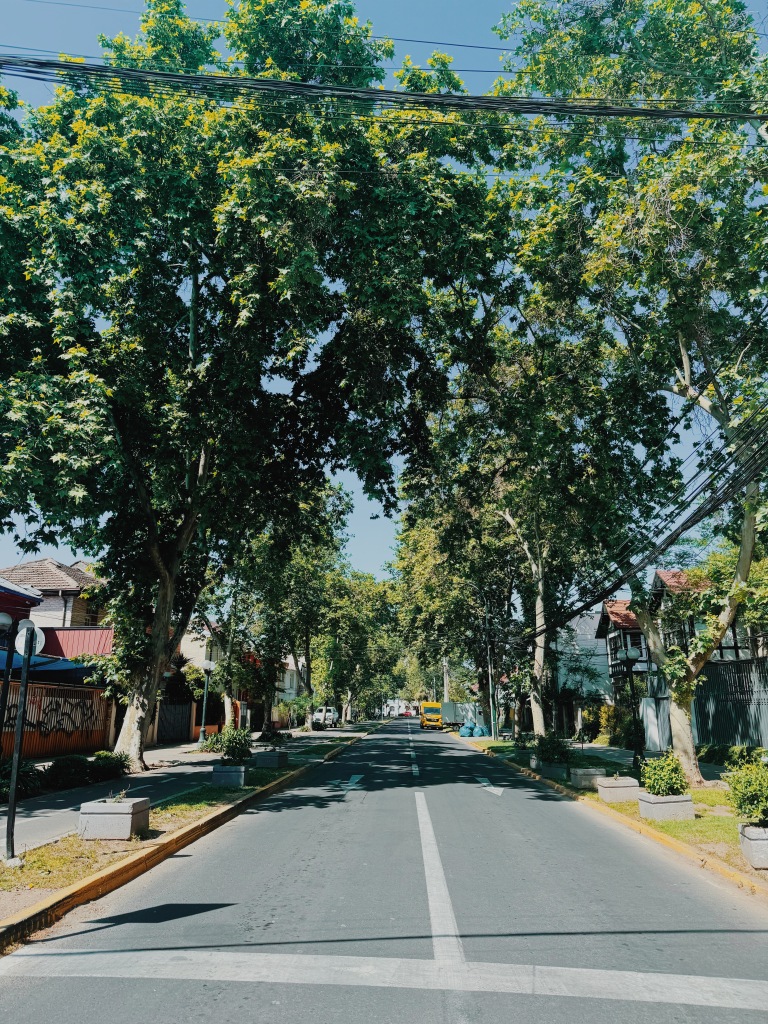
The highlight was accidentally stumbling upon Santa Lucia Hills. It’s a beautiful park with a peak offering 360 degree views of the city and surrounding mountains. Highly recommend visiting here.
Other friends from the hostel went on a wine tasting here that they raved about so might be worth checking out if that’s your thing.
OVERALL THOUGHTS:
Santiago was not my favorite place the first time I came here 6 years ago. This time I had a blast, mostly because of the peaceful, cafe filled neighborhood we stayed in & because the hostel was perfect! We met so many wonderful humans here.
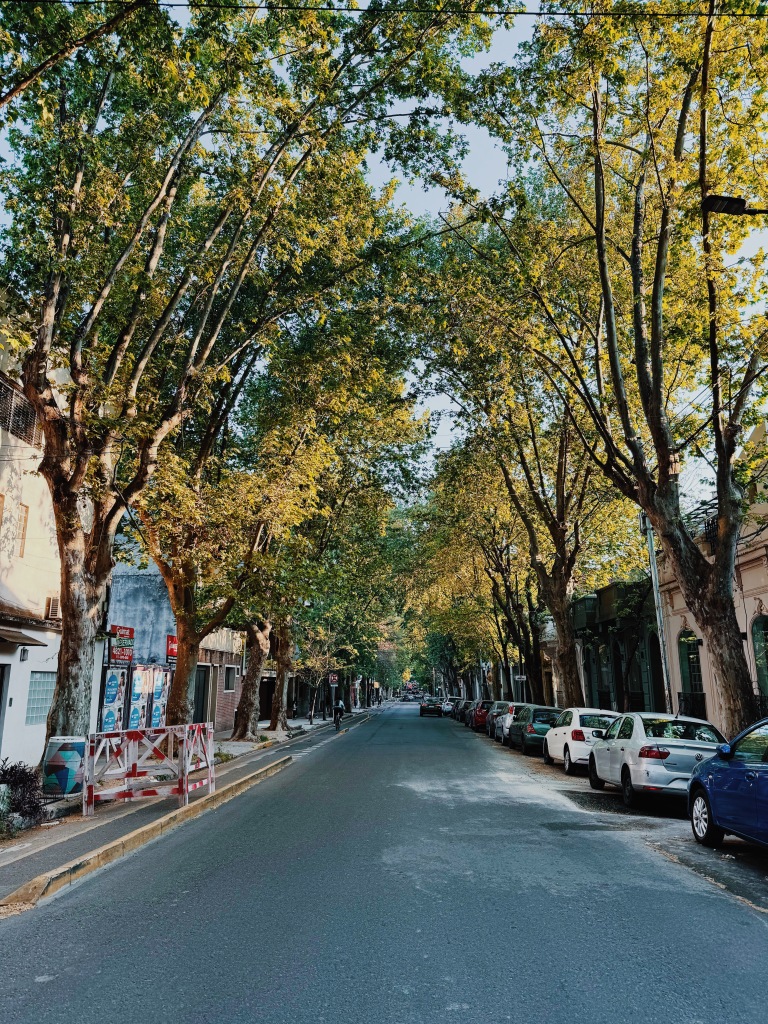
Cafes on every cornerTree lined streets of Santiago
BUDGET FOR 11 DAYS IN CHILE:
Chile is definitely not a cheap country in South America.
Accommodation: $240 ($21.8 per night)
Food: $251
Groceries: $15
Activities: $86
Local Transportation: $98
Miscellaneous: $77 (includes some gifts)
Total: $767 (Daily average: $70)
Transportation to next destination: $35 (bus to Mendoza)
Bolivia makes US citizens get a visa so be prepared. Everything online about US citizens getting visas made it seem complicated but it ended up not being too big of a deal. I had to stand in a different line and literally got a physical visa printed and put into my passport. It looks 20 min (but there was no one else in line at the Santa Cruz airport). They only asked me for my first accommodation and my proof of onward travel. I paid the (exorbitant) $160 visa fee by credit card (but 2 of my 3 credit cards were declined so bring crisp USD as a backup) and then I was stamped into the country. Please be prepared with the list of items that they list as requirements on official govt websites, but just know I expereinced a very smooth, relatively quick process that was very less intense than I was prepared for.
Be prepared for the altitude. The elevation is this country is no joke, so take excessive precautions with either building in rest days for when you arrive to acclimatize or bring medication with you. Some people are fine, but most feel some effects. I felt like I was hungover for 3 days when I arrived and was very happy that I was planning to stay over a week here so I had no rush to get things done.
Bring USD to exchange. This is by far the best way to get local currency. As of Oct 2024, officially exchange rates were $1 USD = 7 Bolivianos, but on the main street, there were people offering up to 10.5 Bolivianos for $1 USD, which means I got a 50% better rate using my USD vs taking money from an ATM. Don’t be fooled by people offering a 10% discount if you use cash to pay for things, go straight to the local folks exchanging on the street as you’ll get a way better rate. Folks did warn about counterfeit money being exchanged, but I exchanged money 8-10 times and never once had an issue. One trick is to exchange $20 (you’ll get the best rate by exchanging $100 bills FYI) and then testing it by buying breakfast to ensure it’s legitimate. Then you can go back to the same person and exchange more.
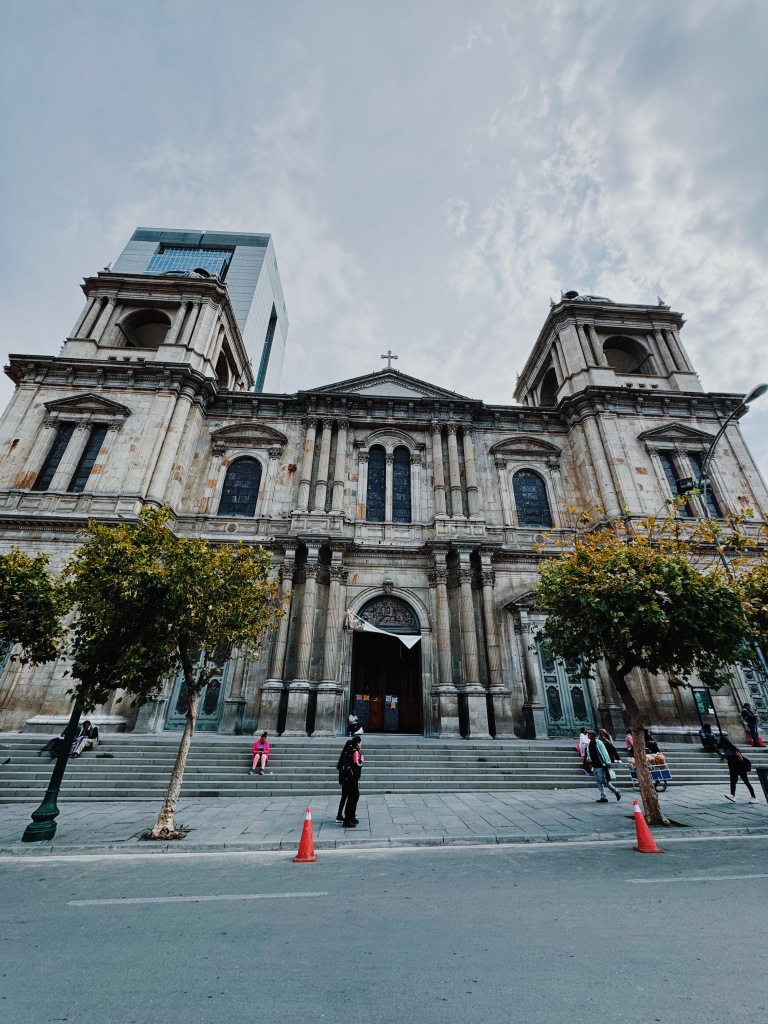
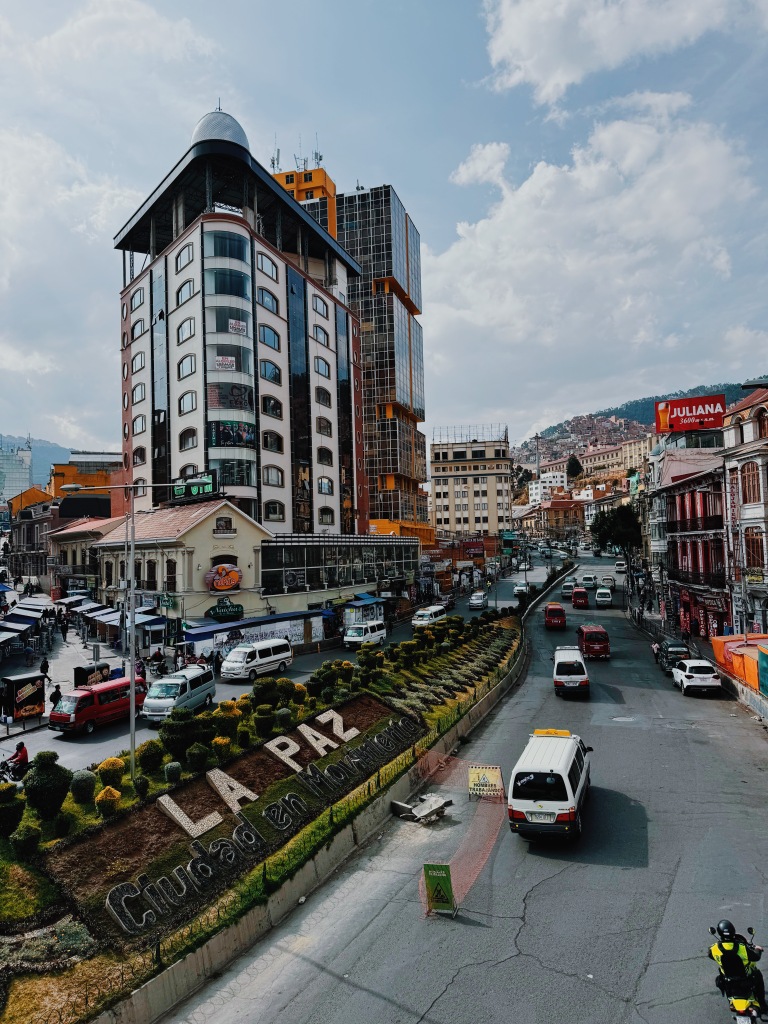
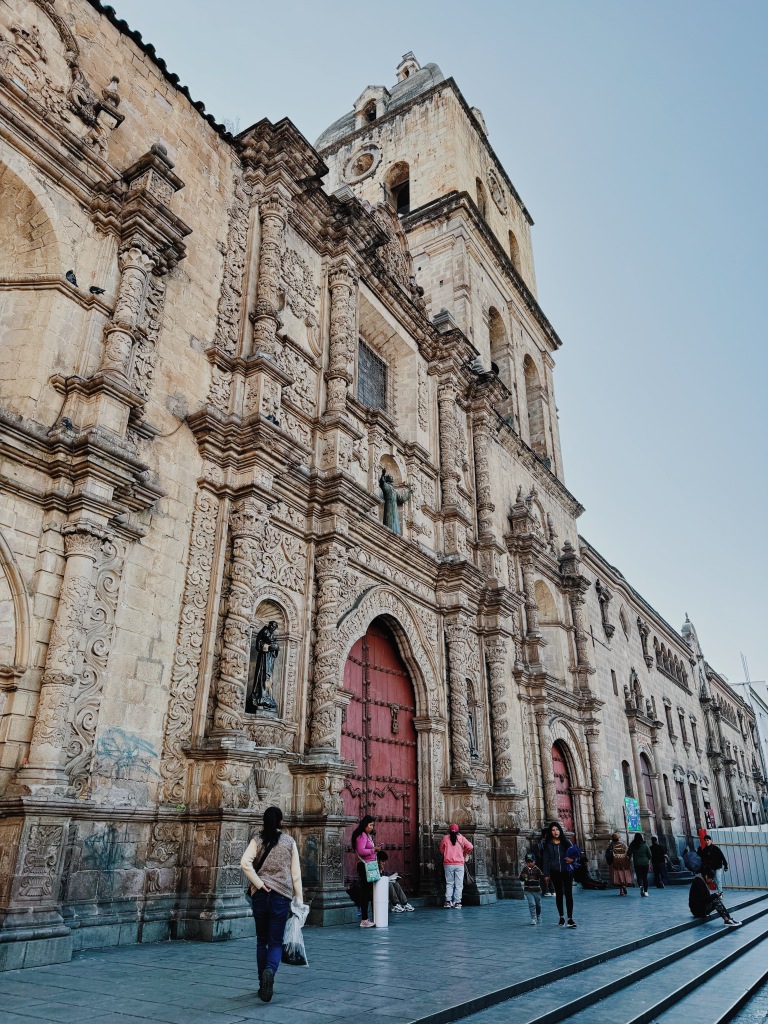
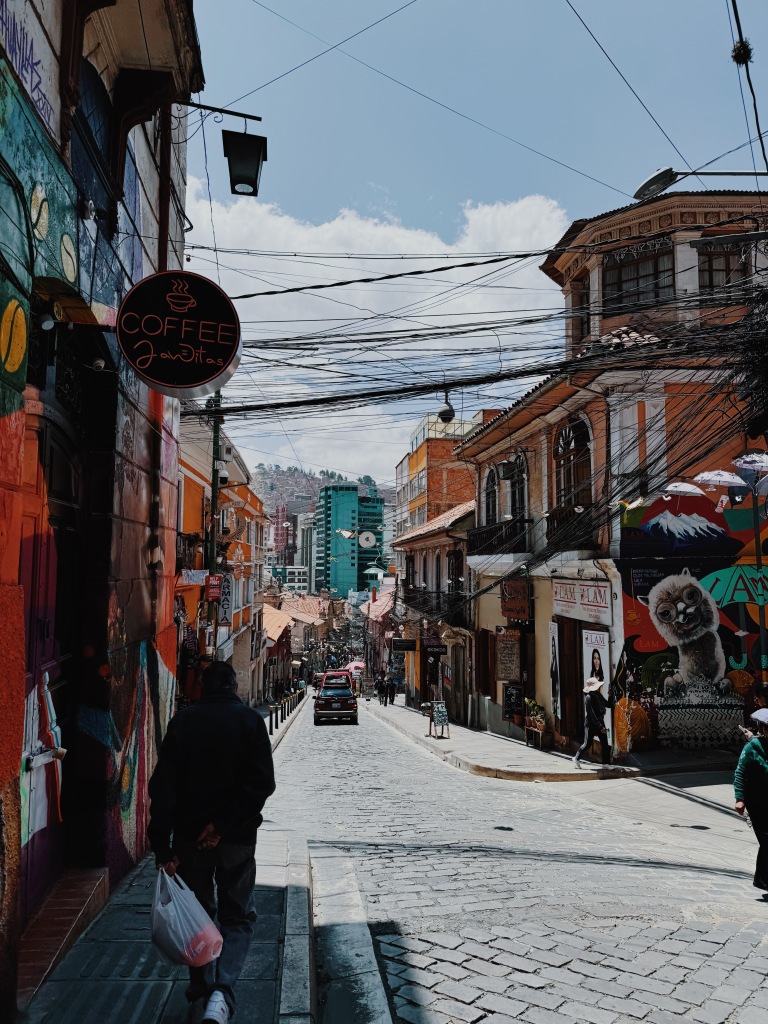
CITY: La Paz
HOW LONG: 9 NIGHTS
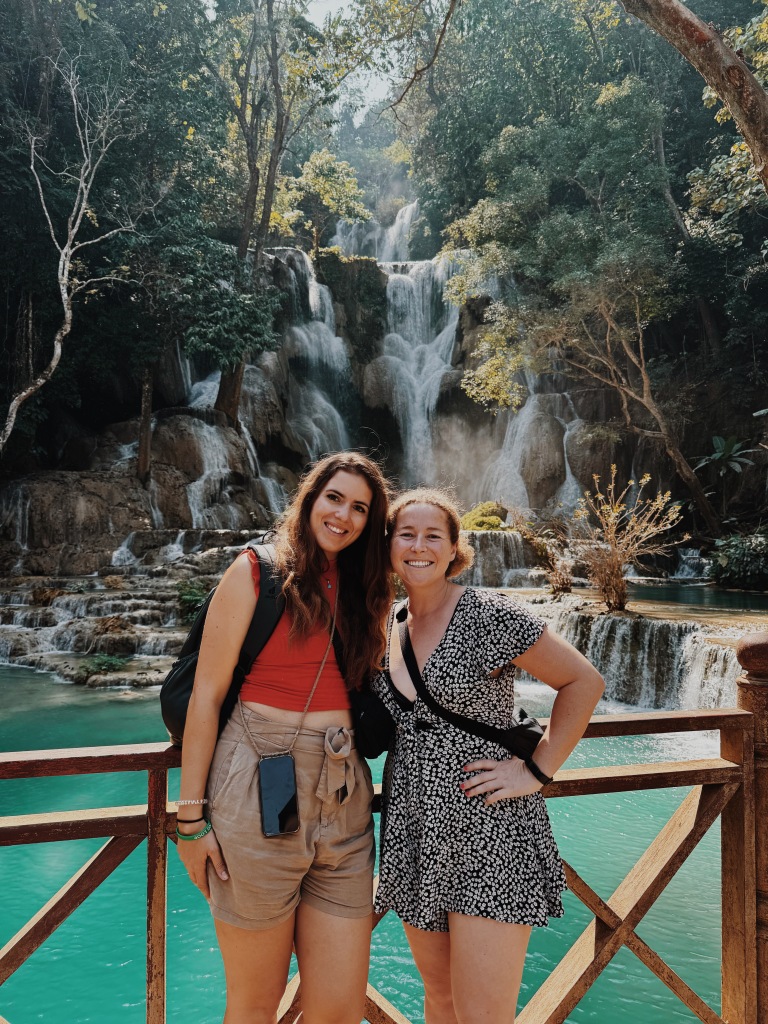
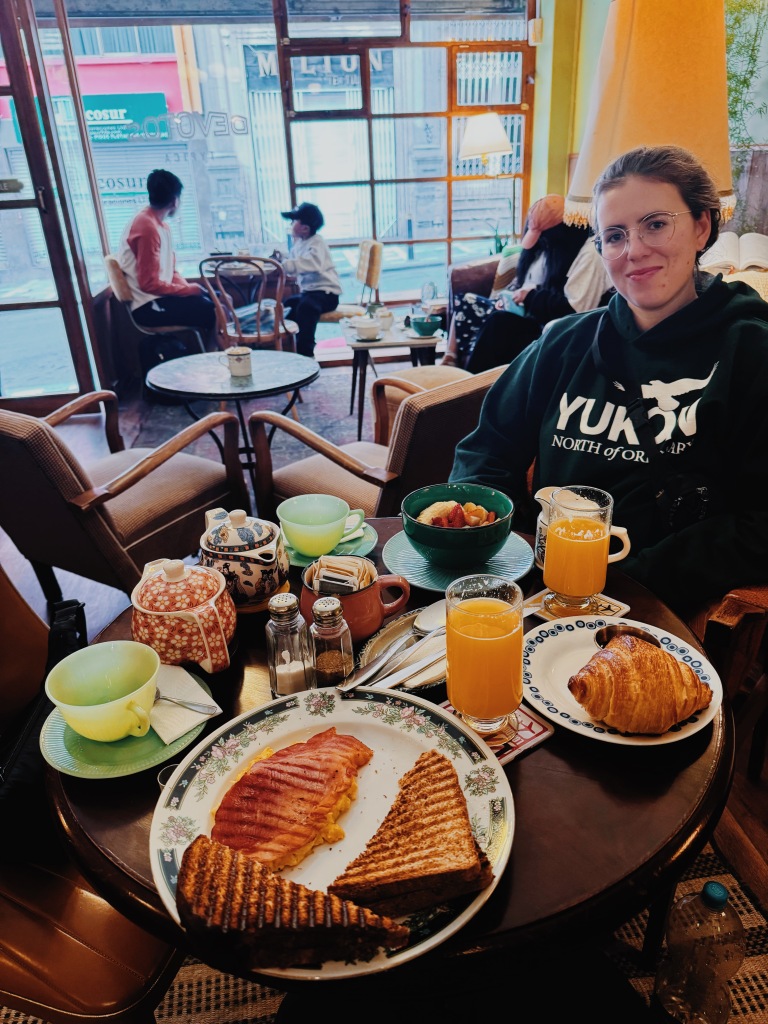
Side note: My friend, Sonja & I reunited in La Paz to begin our 2 month South America adventure together! A quick reminder: we met in a hostel in Thailand 8 months ago (Jan 2024) and realized we are both doing big around the world trips and coincidentally would be overlapping a few times throughout 2024. We began with a reunion in Laos in February, and then a meetup in Japan in March, where she met my cousin and Dad! Next up Sonja did a 3 month camper van trip around the US, Canada, & Alaska so I convinced her to come visit me in Lake Tahoe since I spent the summer there. Our final meetup is our most exciting: 2 months in South America through Bolivia, Chile, Argentina and ANTARCTICA!!
A pic of us in Laos
Accommodation:
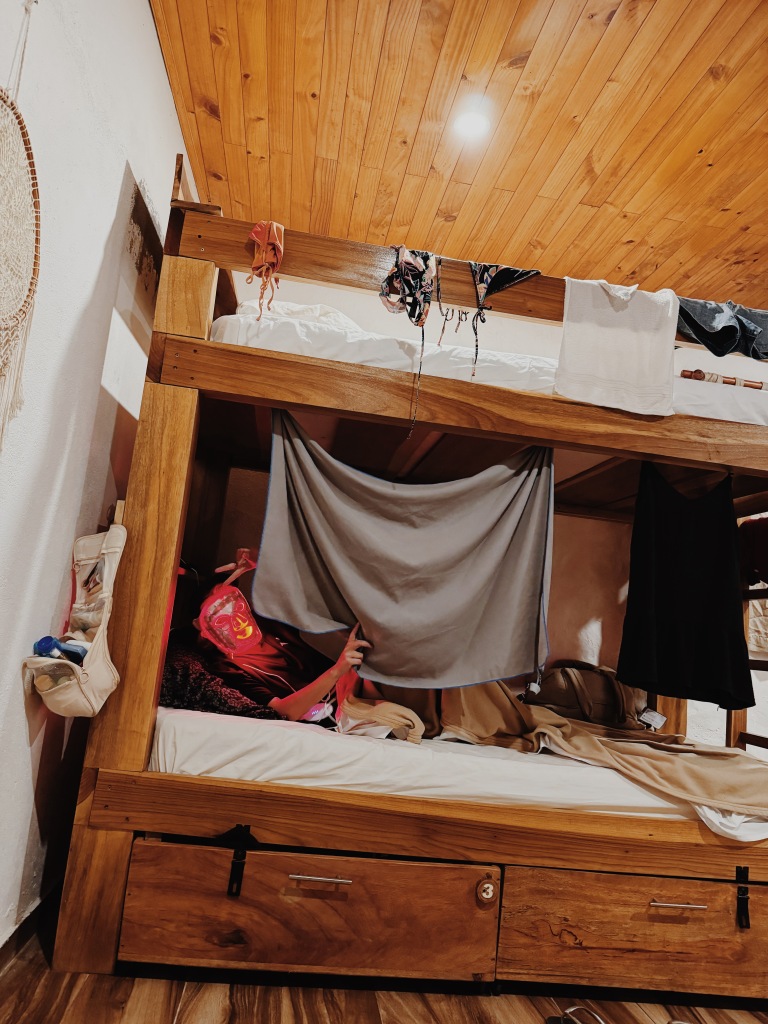
I stayed at Wild Rover La Paz, an Irish owned hostel in the heart of La Paz. It’s definitely a party hostel, but we actually didn’t mind it. There were tons of other backpackers and it was easy to make friends. We requested a room away from the bar so noise wasn’t an issue. There are shared coed bathrooms as a heads up, but it was fine for us. The beds were very comfy & had curtains and personal plugs. They were built in bunk beds so no wobbly movements when your bunkmate gets into bed!
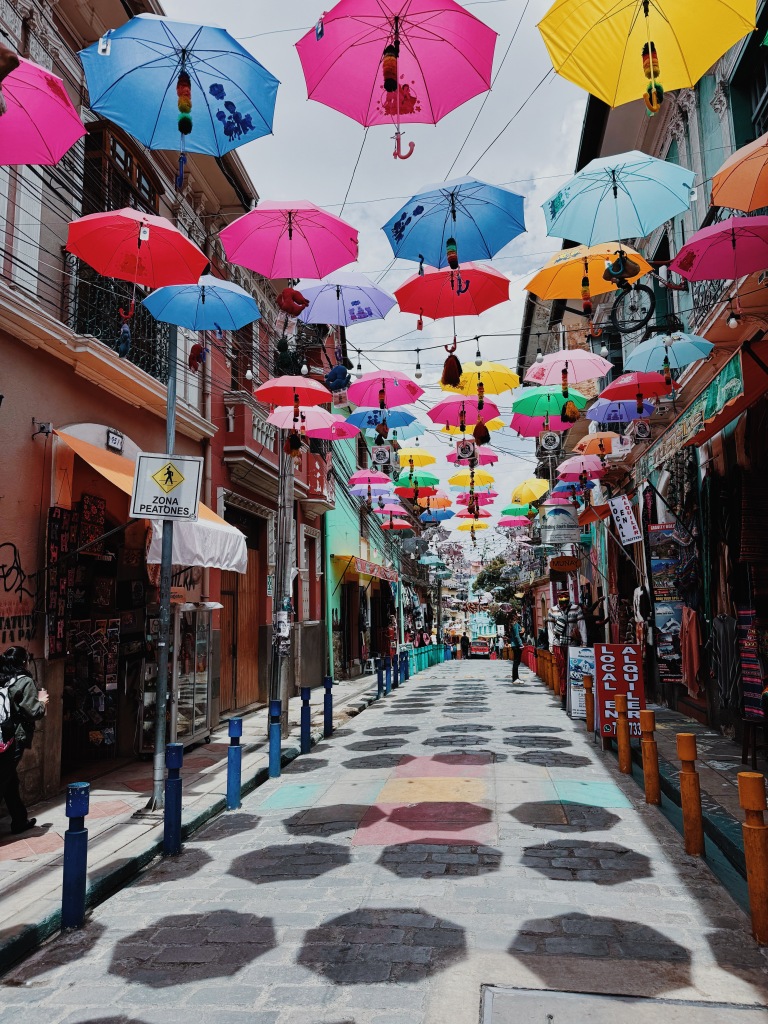
The location was great as it’s close to a supermarket, some cute restaurants and the gondolas. The cute walking street filled with tons of restaurants was only a 15 min away.
Where to Eat:
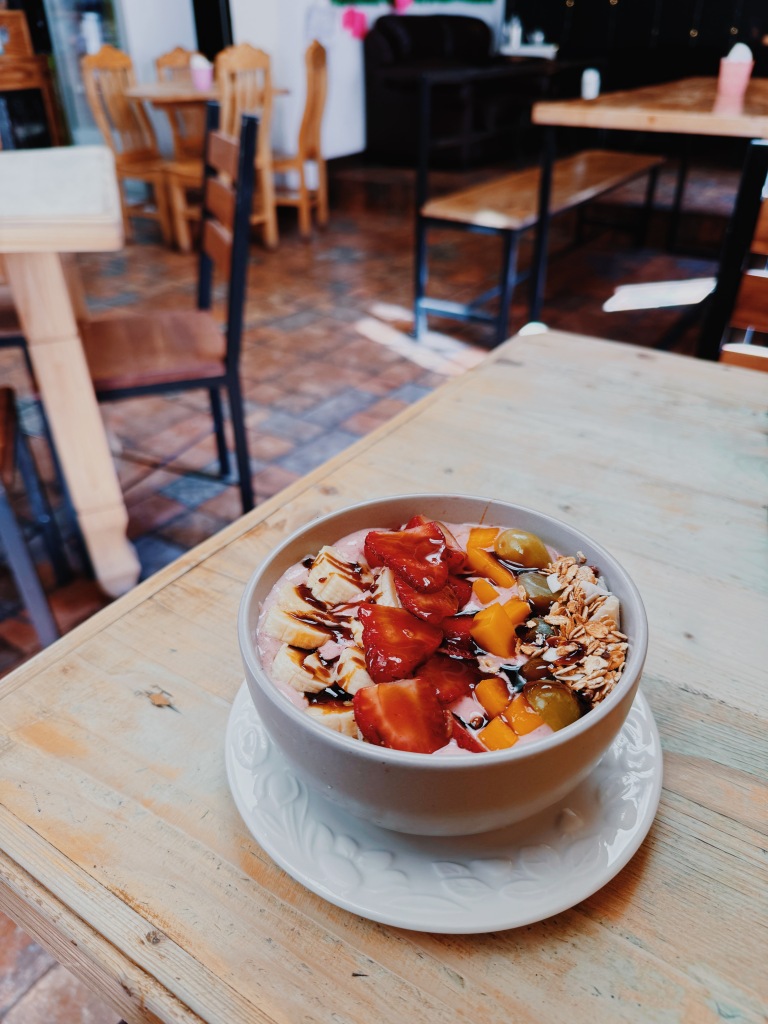
Well Sonja and I are obsessed with breakfast food & a cute cafe (you can see why we travel well with each other!) so we became creatures of habit and ate at the same 4 places over and over again 🙂
Cafe del Mundo – this is a staple backpacker spot with breakfast all day and plenty of other great options as menu items range from all around the world. It was started by a Swedish backpacker who fell in love with La Paz and started the cafe. Each room is decorated/inspired by a different continent (and her travels there).
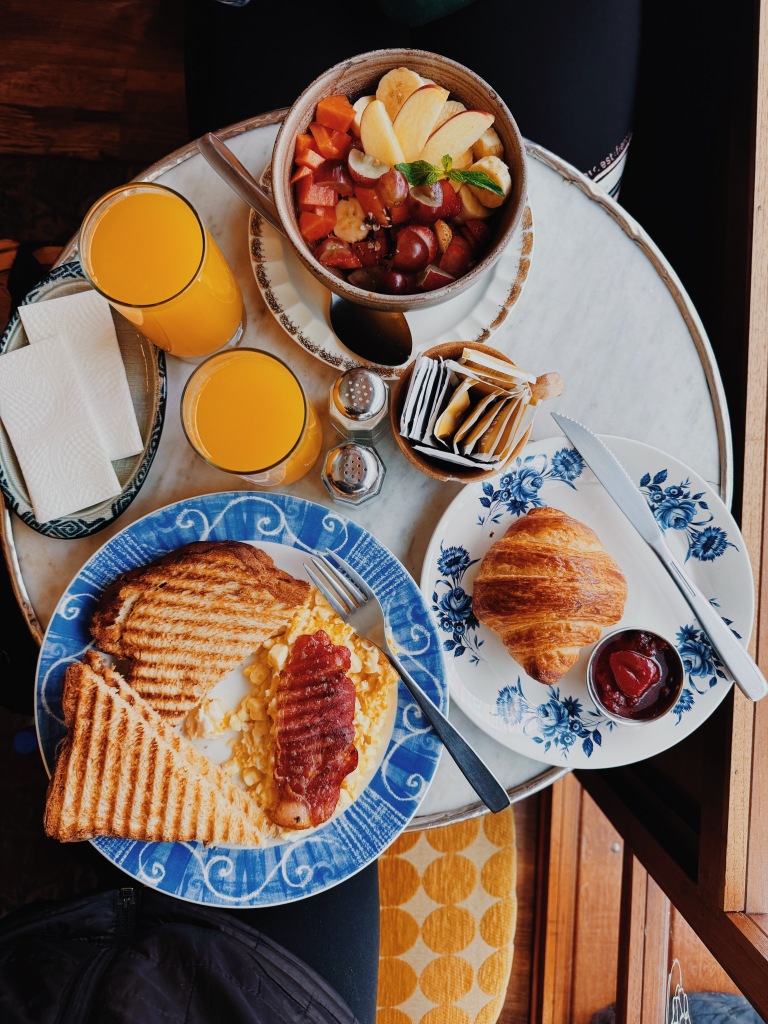
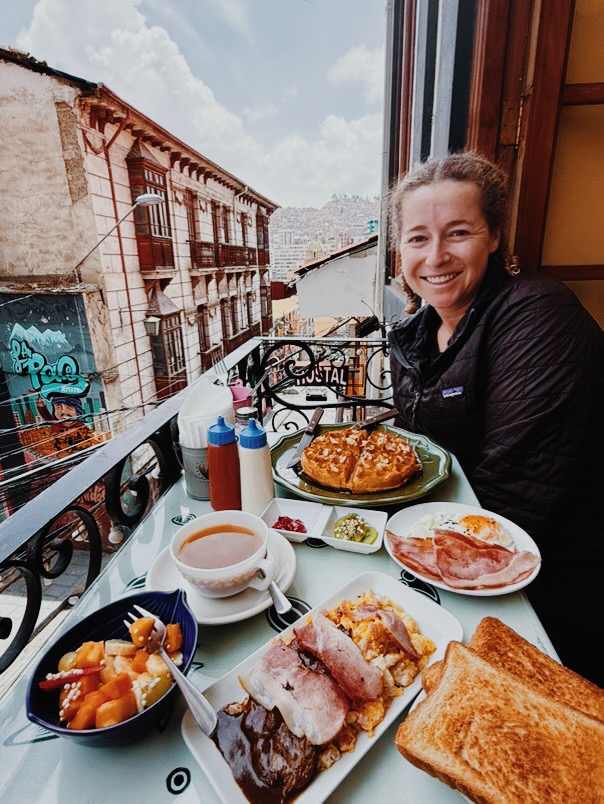
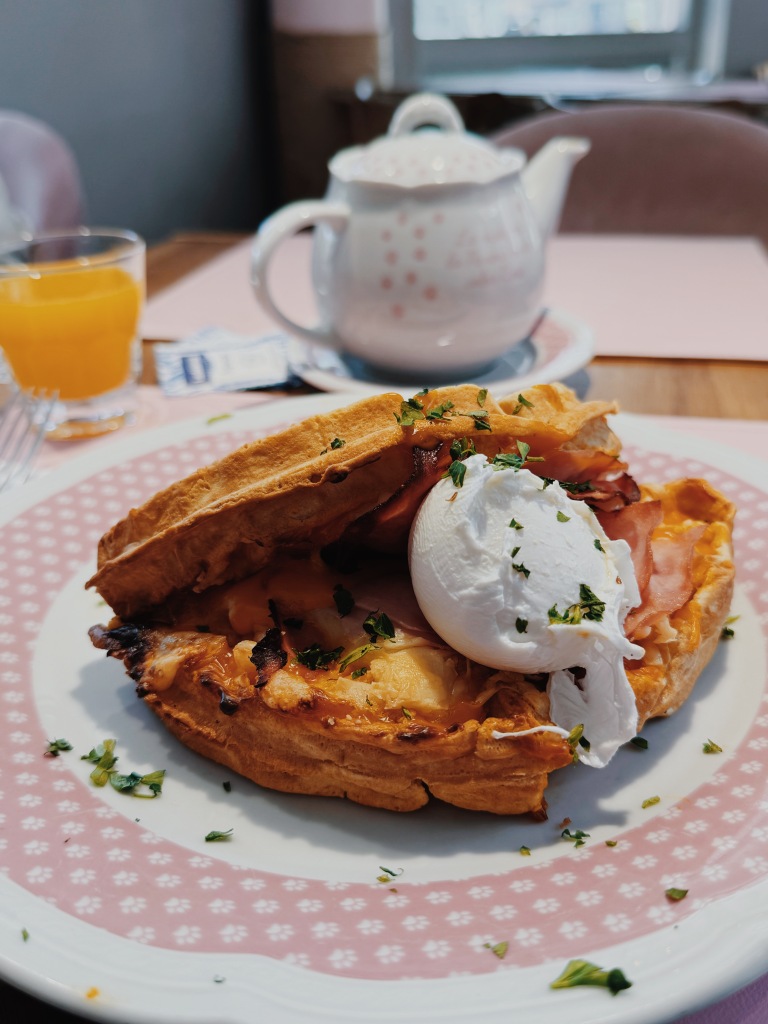
Devotos Typica – This is two blocks from the hostel and quickly became a favorite. Great coffee (according to Sonja) & their few breakfast menu offerings deliver. I loved their breakfast plate that included toast, scrambled eggs, bacon, croissant and hot drink. All for ~$3.5usd. Unreal! Also I became obsessed with their croissants. I felt like I was in France.
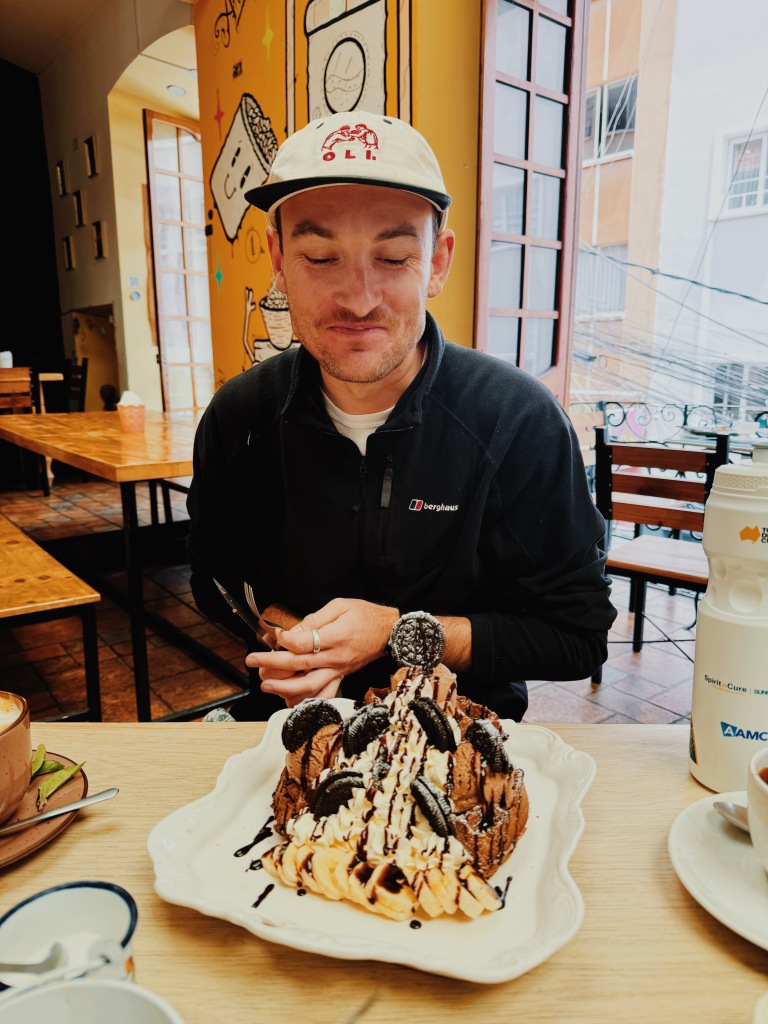
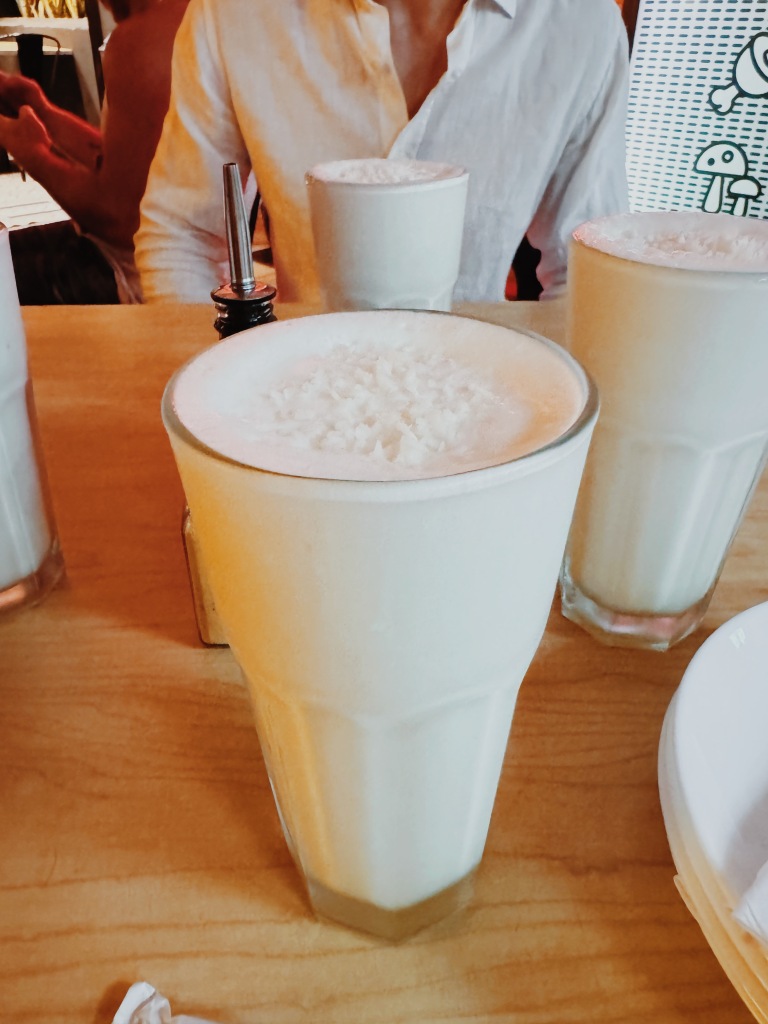
La Grosería – This is across the way from Cafe Del Mundo and we ate here just as often. Located on the second floor, their balcony tables offered a romantic view down the street of La Paz. They had an expansive menu and also breakfast all day. They had an incredible assortment of fancy, extravagant milkshake options, with some including brownies or donuts on top haha.
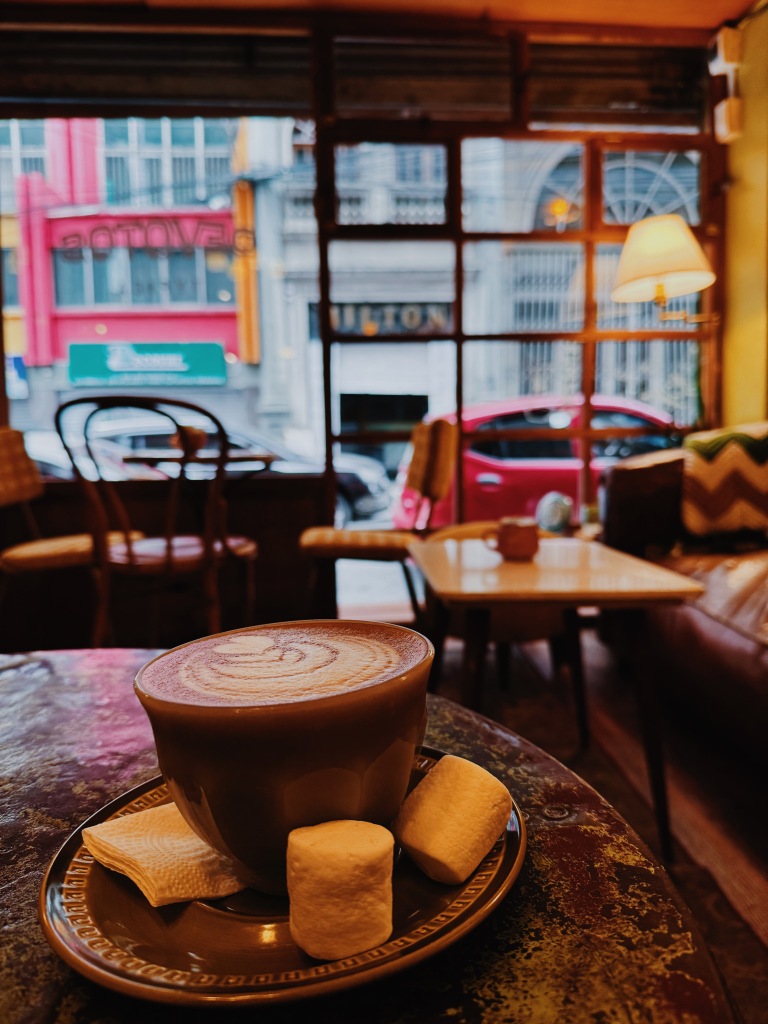
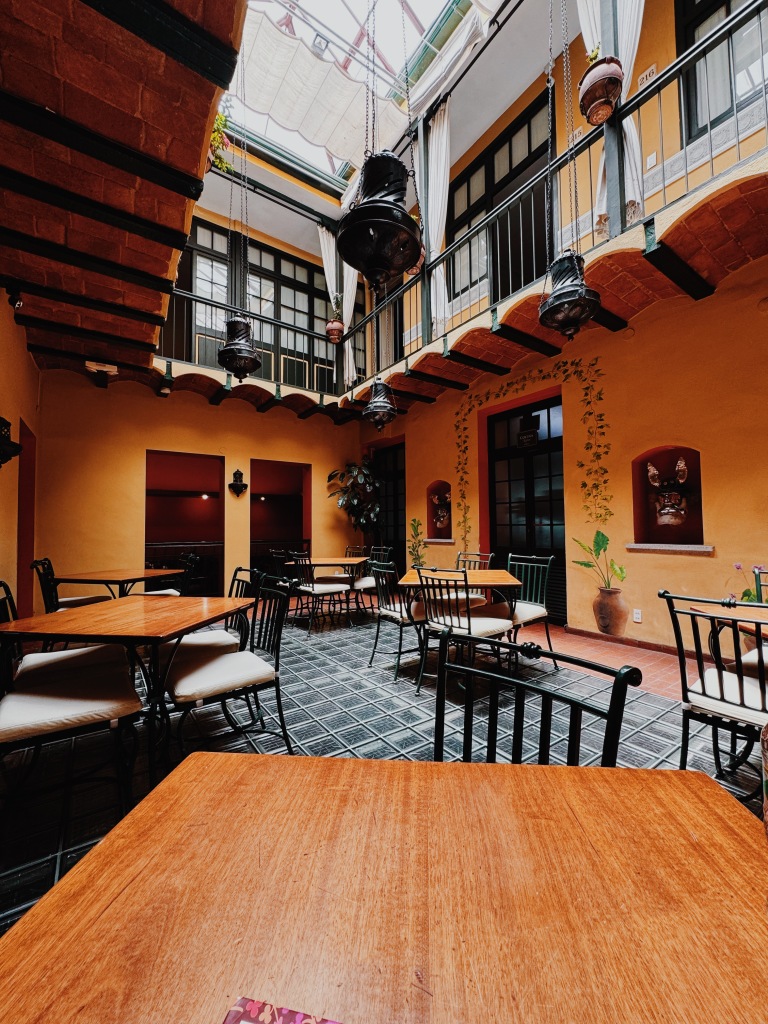
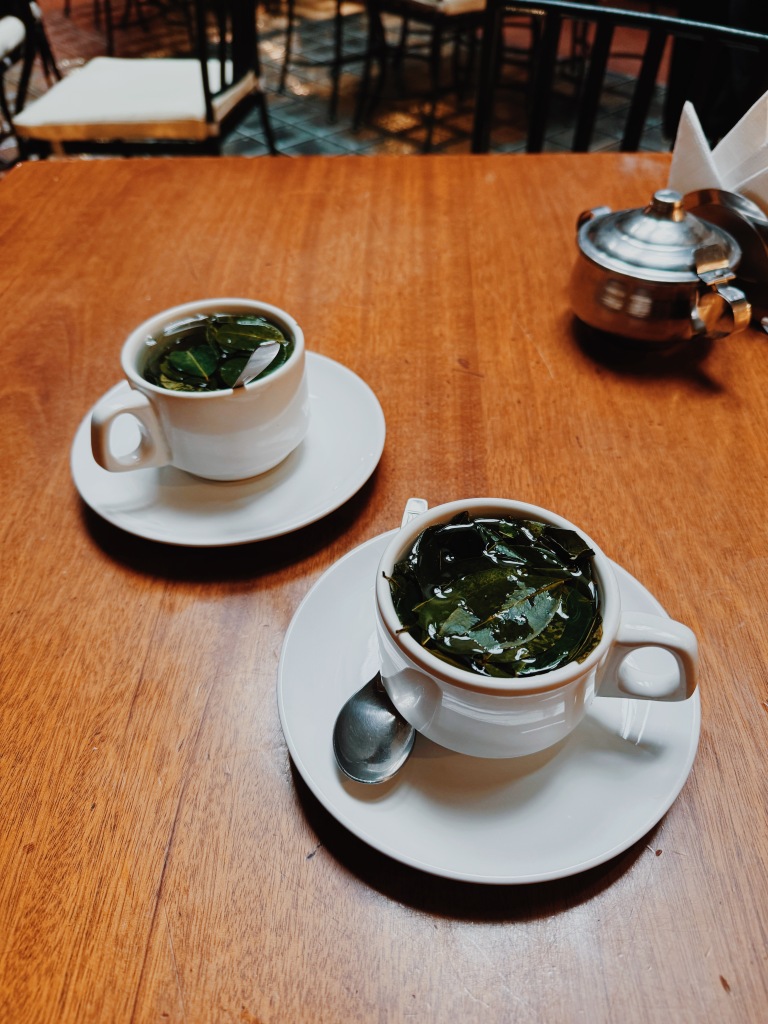
Café Restaurante Bañáis – we actually never ate anything here, but came here almost daily in the afternoon to enjoy a hot coca tea (to help with the altitude) and play some cards or do some admin. The cafe is lovely and we generally found it to be quiet. The service was excellent. If you need some down time to just be still in a tranquil environment with a hot drink, this is the place to be. Wifi was decent as well.
What to Do:
There is a TON to do in La Paz. There are mountains to climb, cable cars to traverse, Death Roads to bike down, & rock landscapes to check out. Walk into any agency (there are hundreds) and they will happily tell you what all your options are. Pro tip: Ask for a discount if you book a few tours through one agency, and don’t book through your accommodation as it will always be more expensive. Wild Rover offered tours that were 50-100% more expensive than the agency down the street
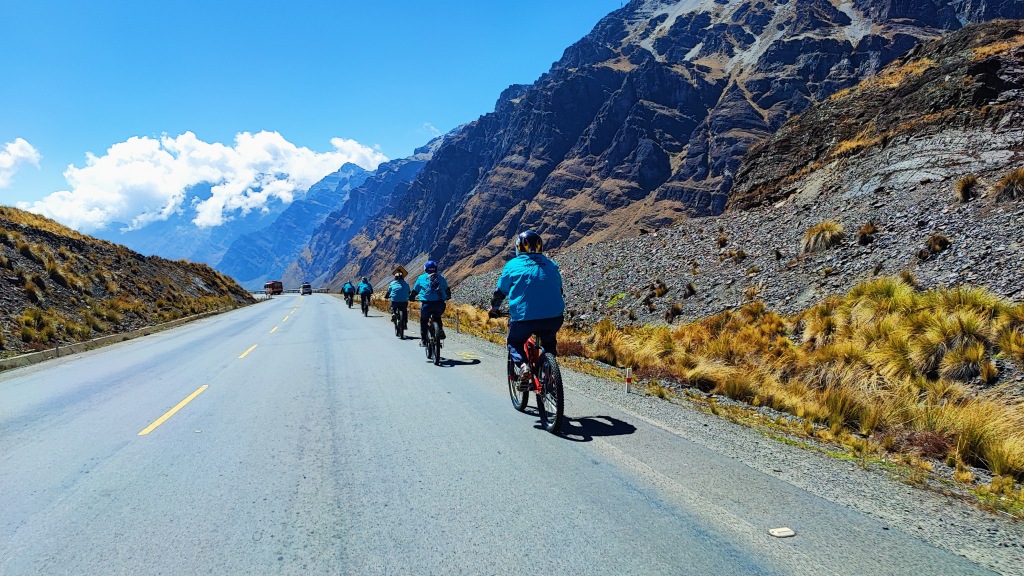
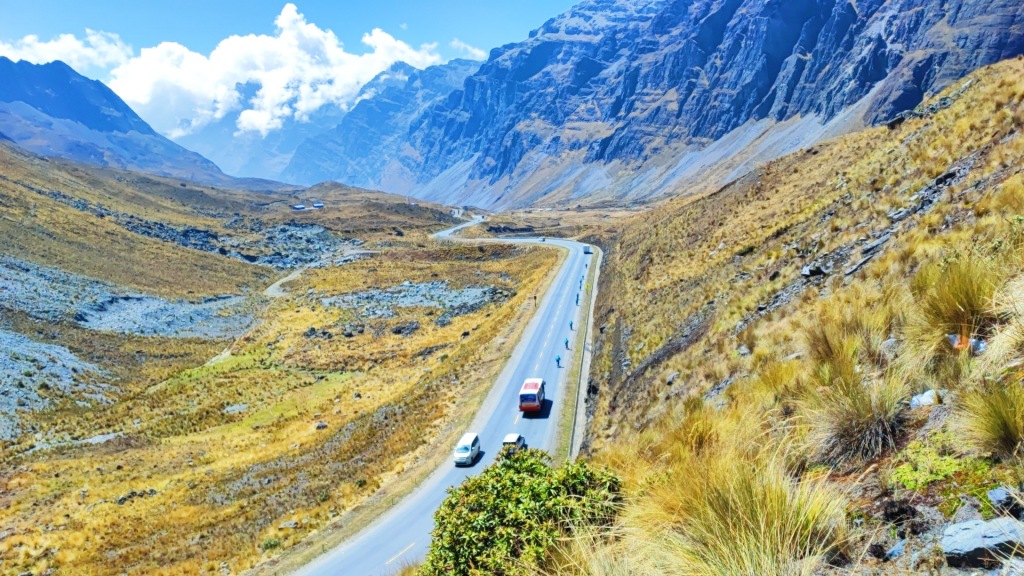
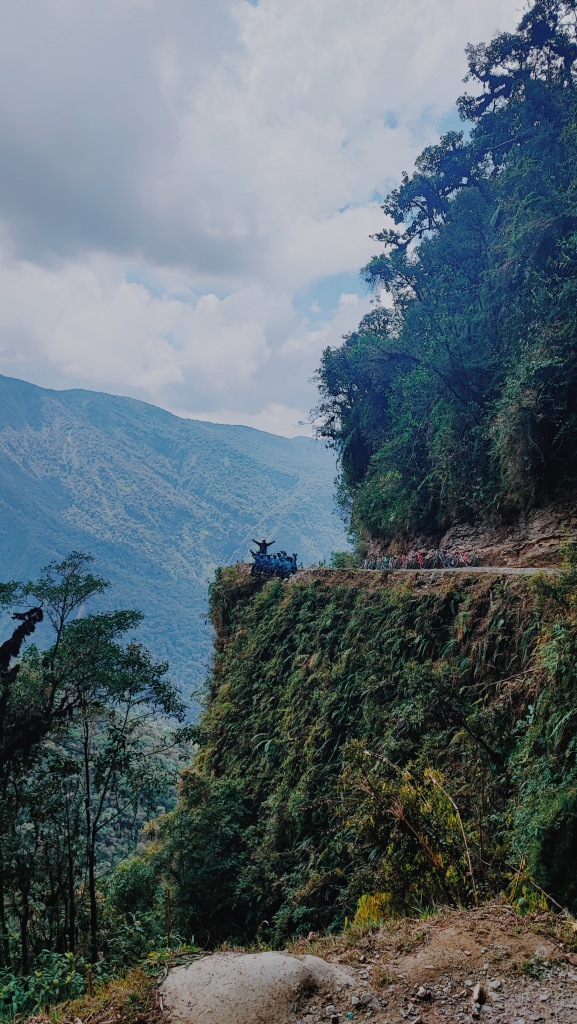
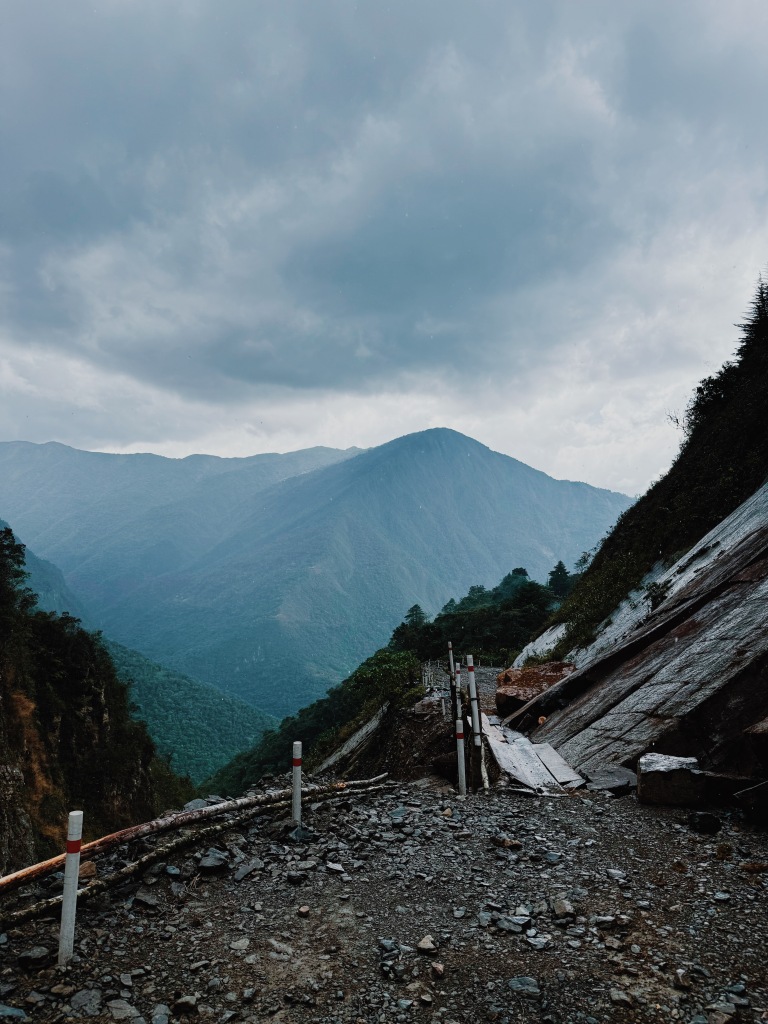
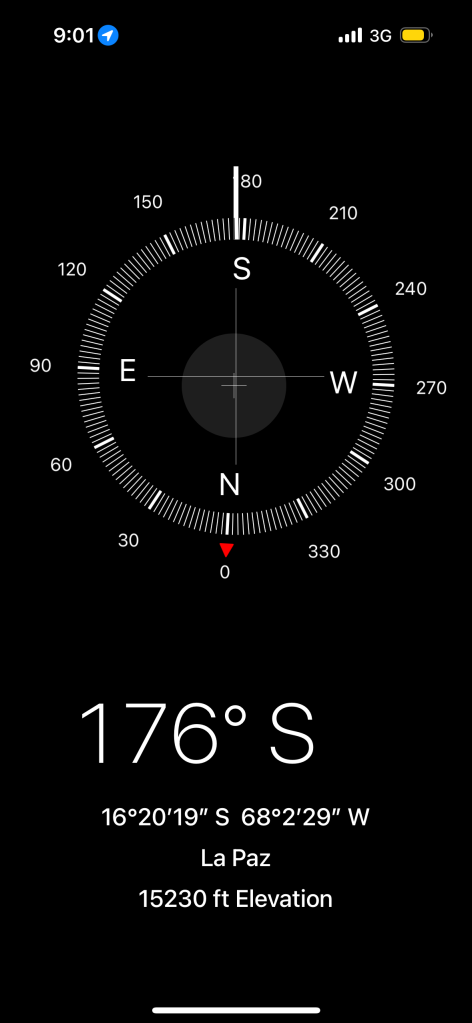
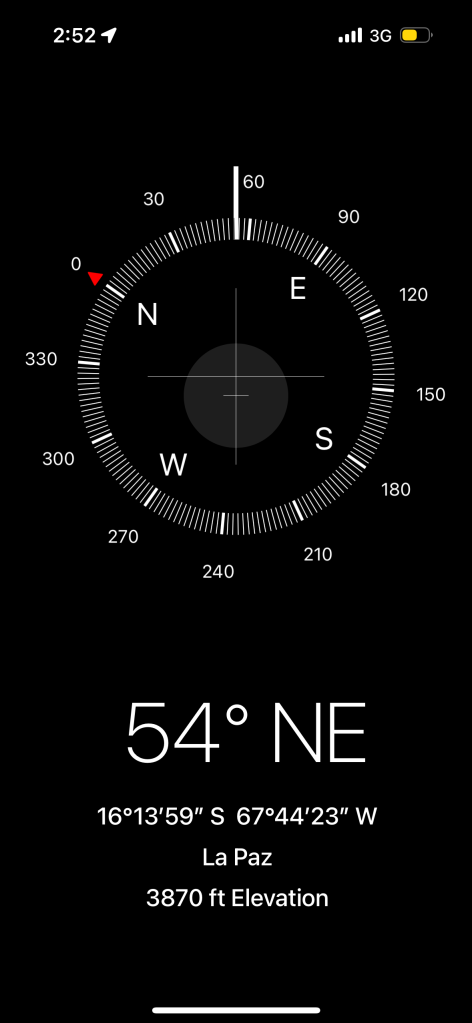
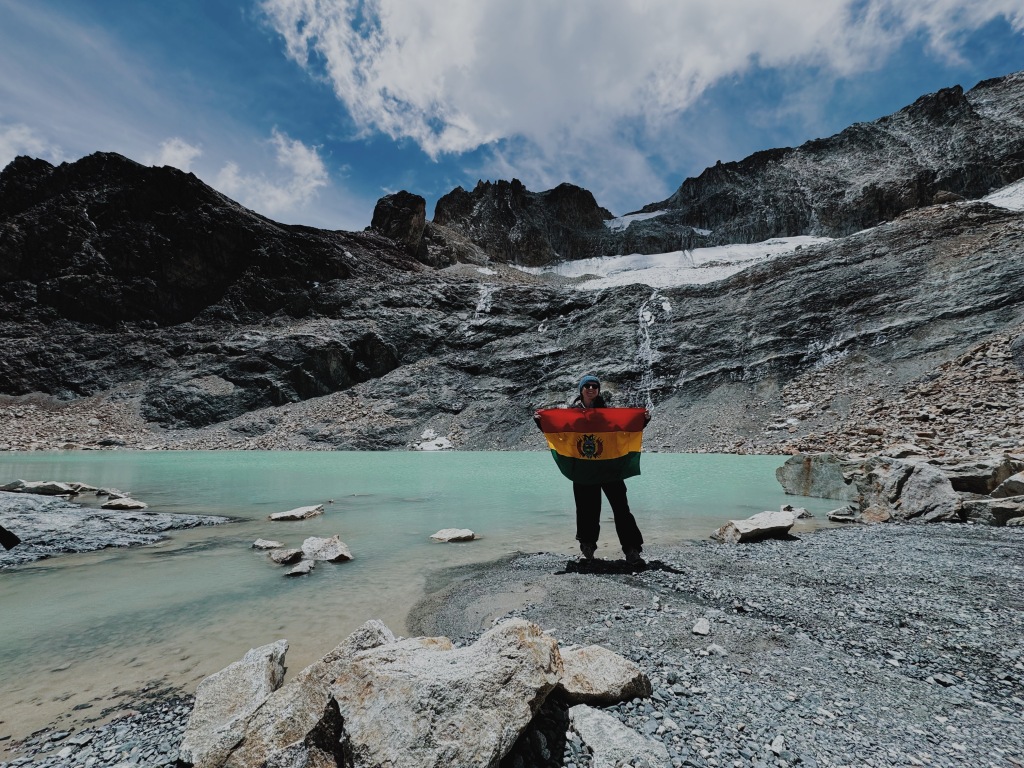
We spent a lot of time acclimatizing to the elevation (don’t underestimate the effects), but we enjoyed conquering the Death Road. The Death Road near La Paz in Bolivia is one gigantic winding snake of a road (specifically ~69 km/40 miles long) named Yungas Road. It was built in the 1930’s to connect the Amazonian jungle to La Paz. Before it was shut to cars, around 300 people died annually driving the road, thus its name as Death Road. At one point you can look down and see a bus that is still visible half way down the cliff. Very sad to see the remnants of all that the Death Road has taken from Bolivian families. At times, it’s only about 3 meters wide, and protective barriers are nonexistent. With the rain, fog, and landscapes, it is easy to see how it lives up to its name. Now, the only use is for tourists to mountain bike down as a group (and while there’s far fewer deaths for bikers than drivers, people do still die on this road so take precautions). You start at 15,230 ft (4600 m) and end at around 3870ft (1200m). This is like going from the base of Breckenridge Ski Resort all the way down to sea level & then add 2000 more feet. We had a blast, but it was definitely hard biking down steep gravel. I heard from lots of backpackers that we met that either they themselves or others on their group had fallen and gotten hurt. Luckily neither of us fell, and no one from our group fell either. I biked very, very slowly haha. I did not want to injure myself before our trip to Patagonia or Antarctica! It was wild going from the chilly, barren mountain tops all the way down to the hot and humid jungle in one day. It also definitely took a toll on our body – neither of us felt 100% the next day due to the extreme changes in elevation we put our body through. I’d still recommend it though!
Sheer drop offLandslide happened the day before we roadWe did it
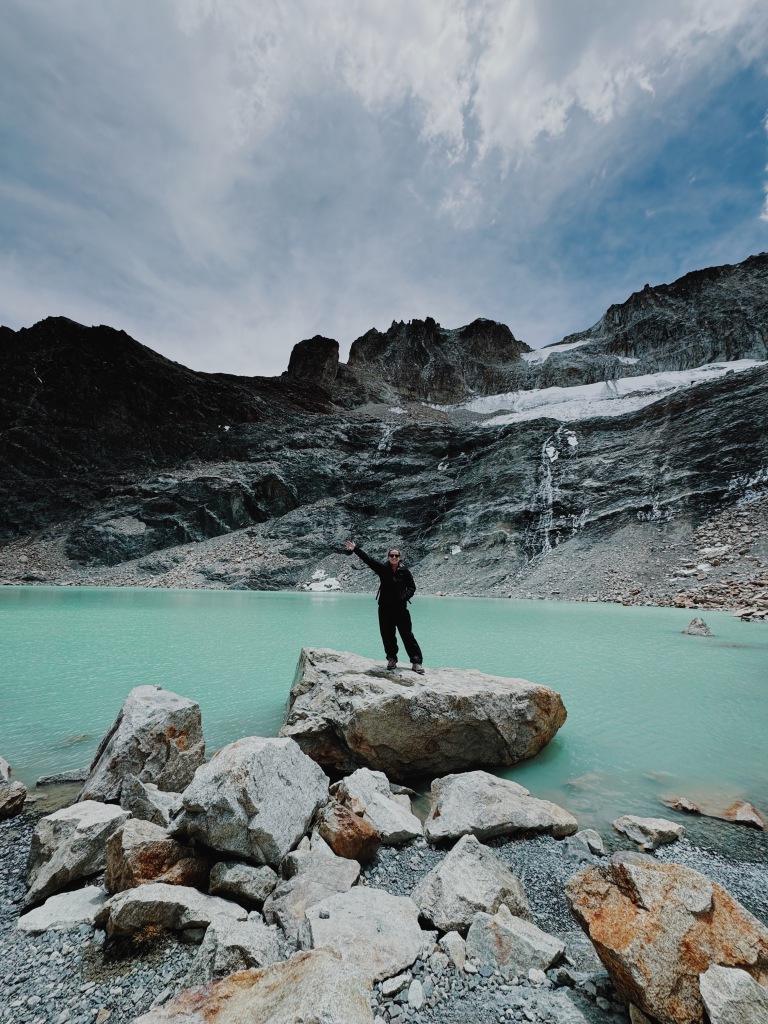
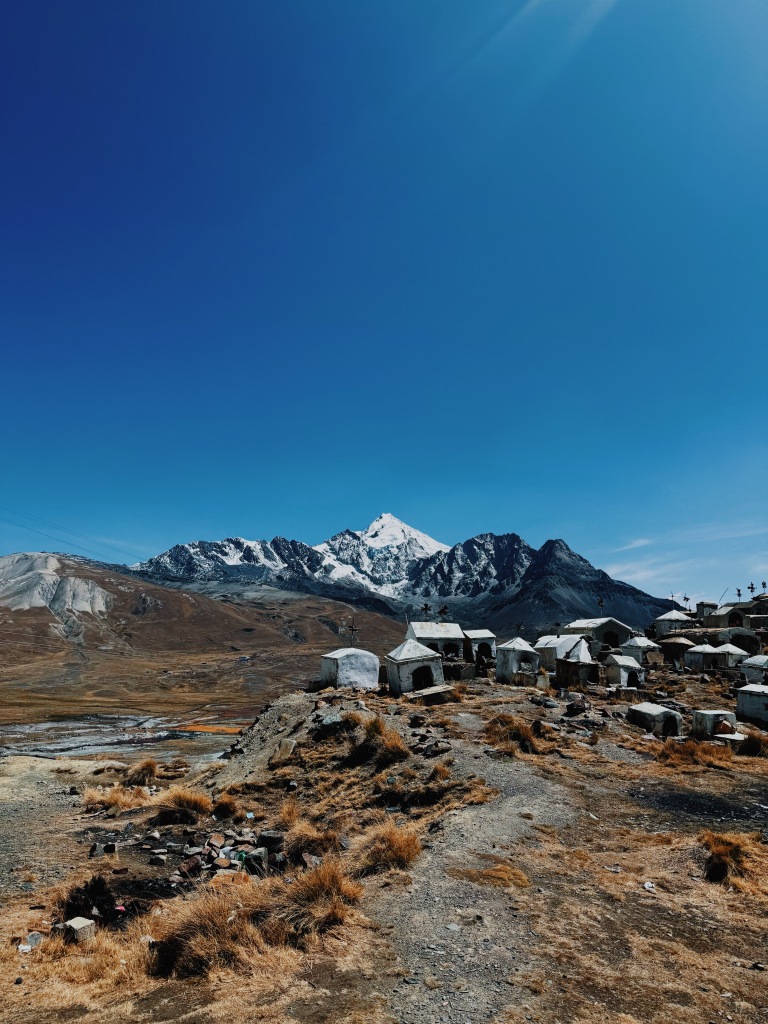
I also did a day hike to Charquini with a tour since I didn’t feel up to attempting Pico Austria (one full day hike) or Huayna Potosi (3 day tour/hike). It was high up (started at 15,560 ft & at the lagoon we were at 16,340 ft) but I surprisingly felt fine. It’s a short 1.5 hour hike (roundtrip) and while it was pretty, I think it would be better during the winter when there is a blanket of snow! I wouldn’t say it’s a can’t miss experience. Pico Austria & Huayna Potosi are more worthy of the bucket list if you are feeling up for it.
Huayna Potosi Peak
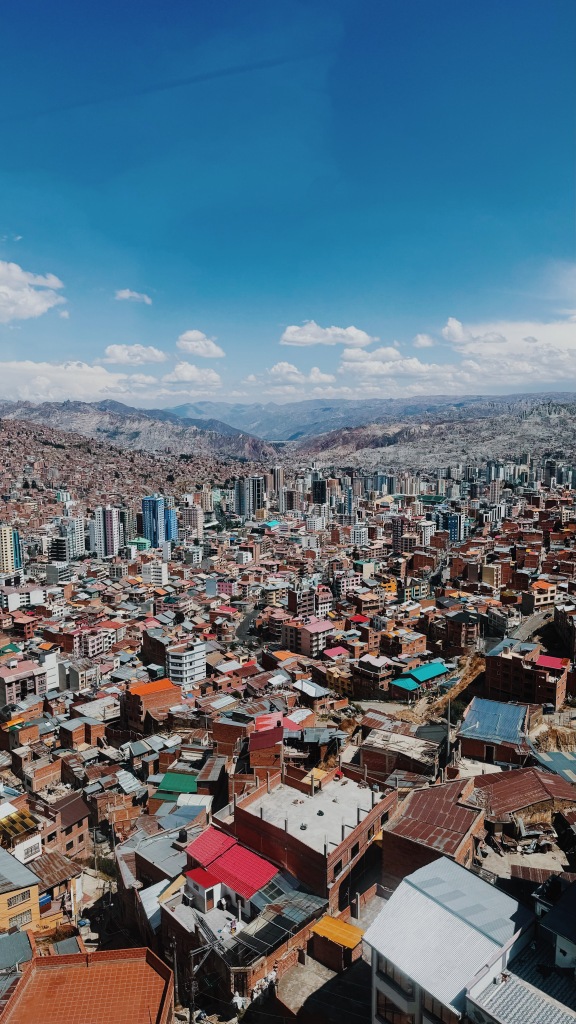
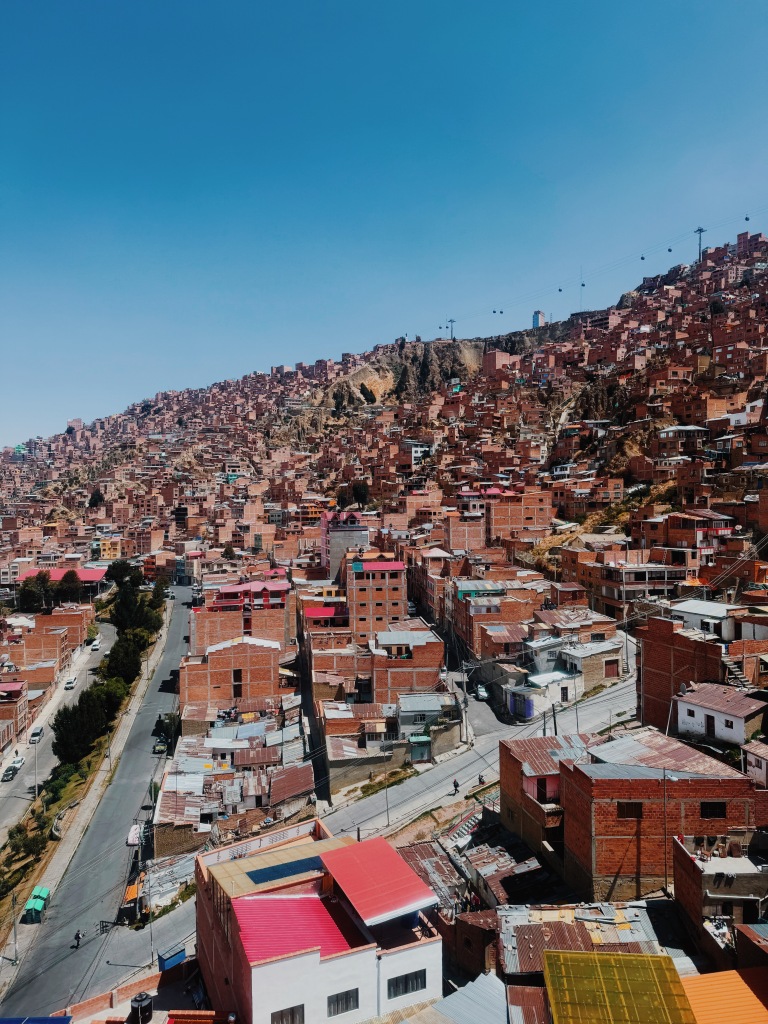
Another highlight was the spending an afternoon riding the Cable Car system around La Paz. Like Medellin, they use cable cars as a form of their public transit since the city is nestled within a valley. It cost me around $2usd to ride 4-5 different lines and I just made a huge circle around the city. It was such a fabulous way to see La Paz from a different perspective!
I had a self care day as well where I had my hair washed (such a backpacker luxury) and I had a massage at Spa Bolivia Home con Altura. The massage was $20 with tip and while it wasn’t the BEST massage i’ve had, for $20usd I can’t complain 🙂
Overall Thoughts:
I really enjoyed spending 9 days in La Paz, but you certainly don’t NEED that long here. The city is chaotic, more run down than Buenos Aires, but charming and the people are so friendly. I never felt unsafe here. I think 4-5 days would be a good amount (since you’ll need some time to acclimatize before jumping into all the fun activities).
Instagramvs reality
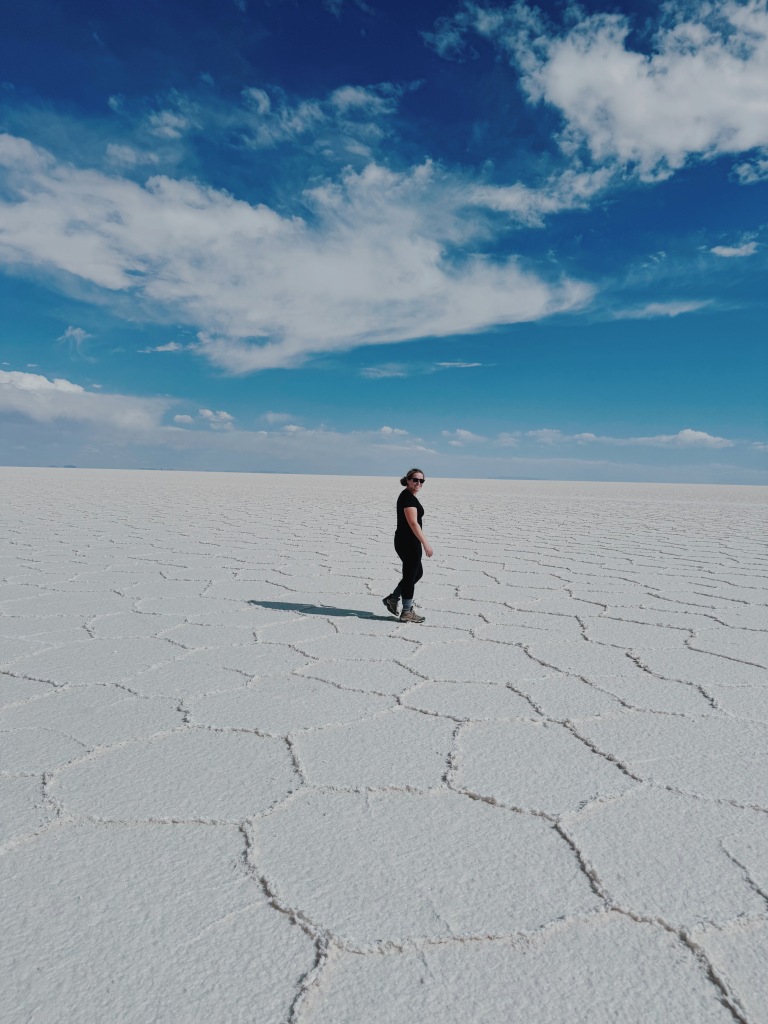
CITY: 3D/2N Uyuni Salt Flat Tour
HOW LONG: 2 NIGHTS
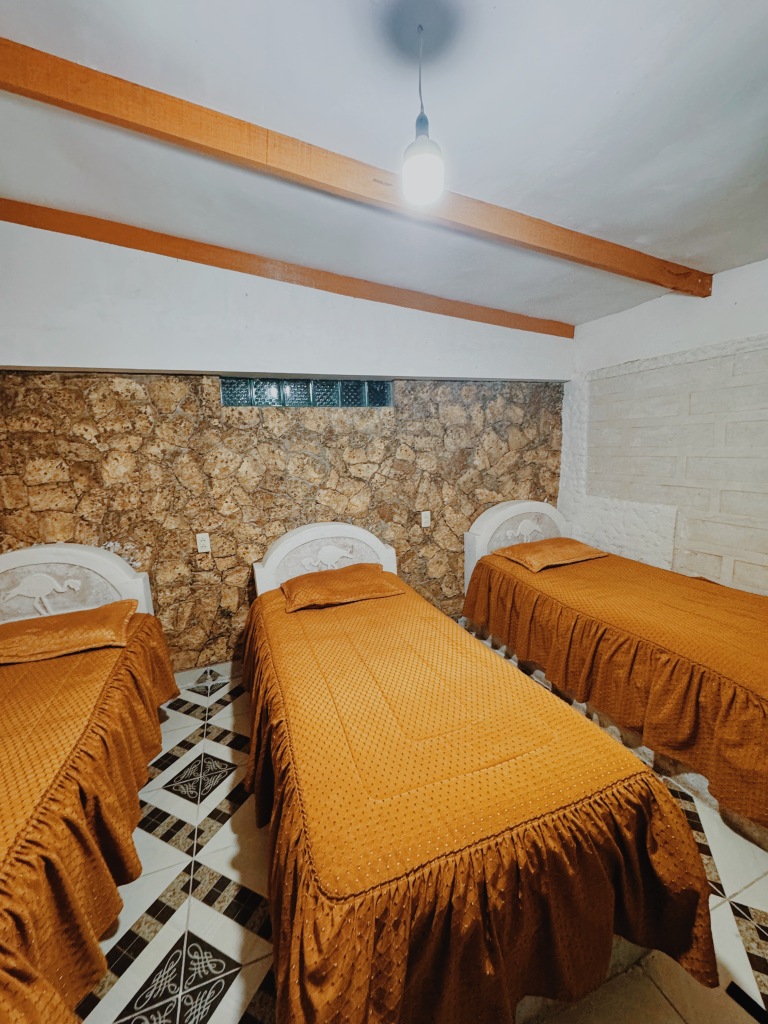
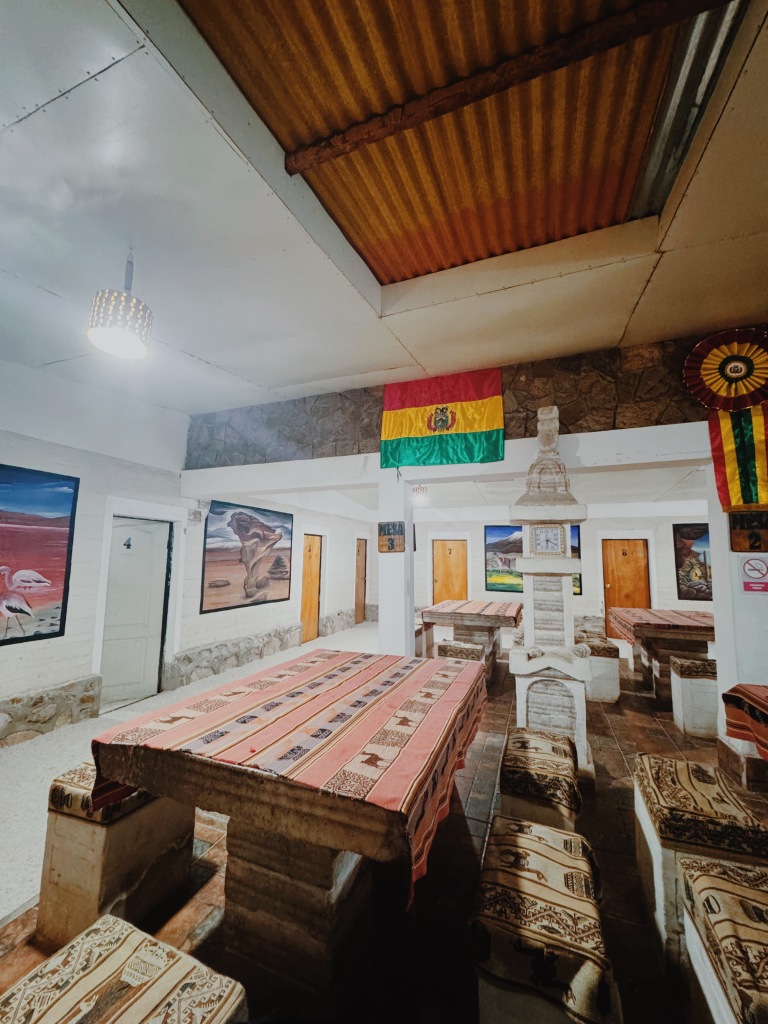
Accommodation:
The first night we stayed in a hotel made from salt, which was pretty cool! It was still quite basic, but we slept well after the first day of activities. Showers cost around $2USD. Wifi also cost extra. I enjoyed being unplugged and playing cards with one of the women from my group.
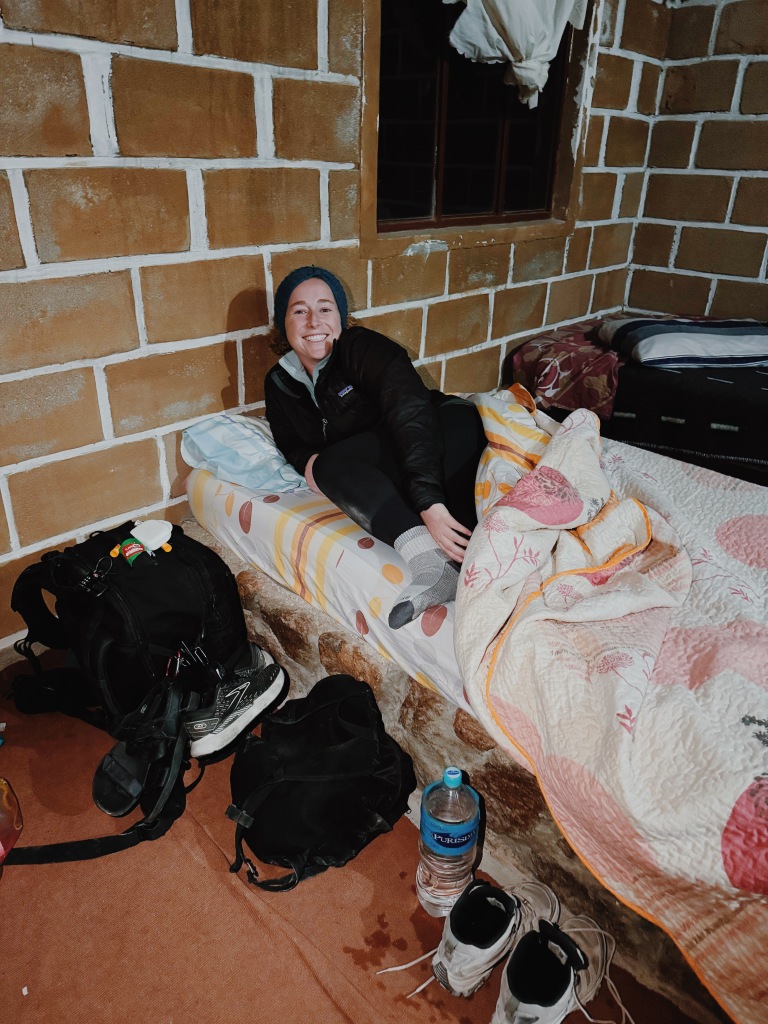
The second night we slept way high up (~14,500 ft), and it was COLD. I think I wore 3 layers to bed and I was still chilly. VERY basic accommodation, no heating (obviously), no shower, and paid wifi. We had dinner and breakfast here and it wasn’t executed as well as the first night, but we were in the middle of nowhere, so we just tried to embraced the experience 🙂
Wearing every layer of clothing possible
Where to Eat:
Obviously the tour provides all the food so not many choices to be made. Overall the food was decent and we didn’t go hungry. I would recommend bringing a few snacks in the car in case you need a chocolate pick me up (as I always do 🙂 )
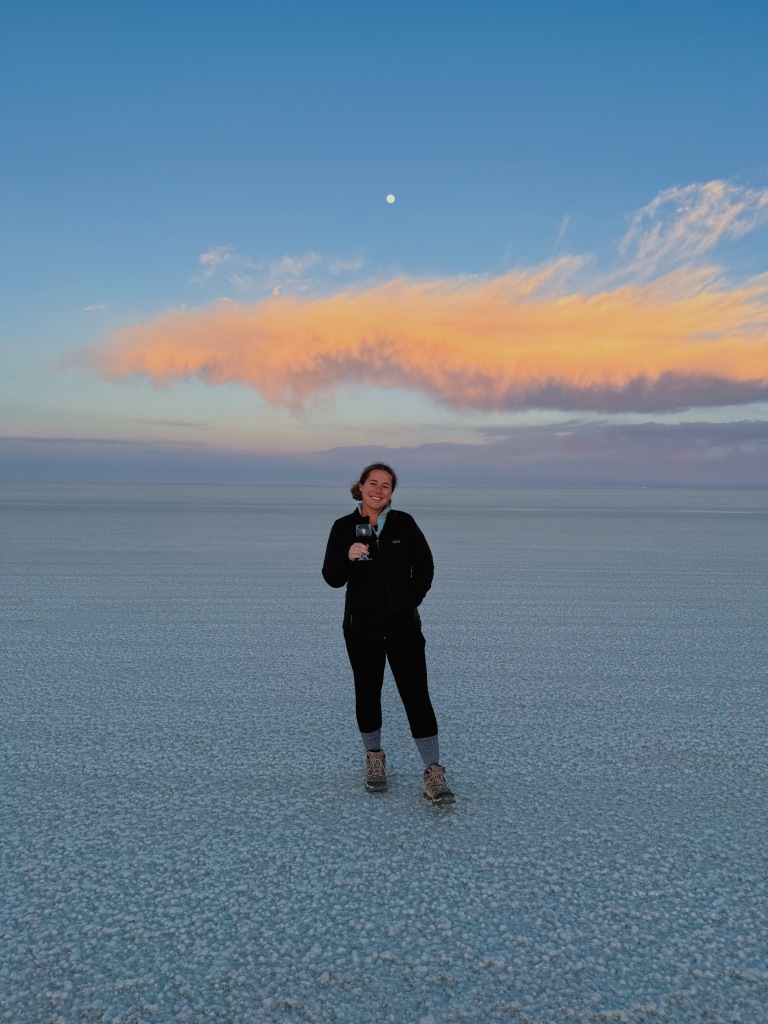
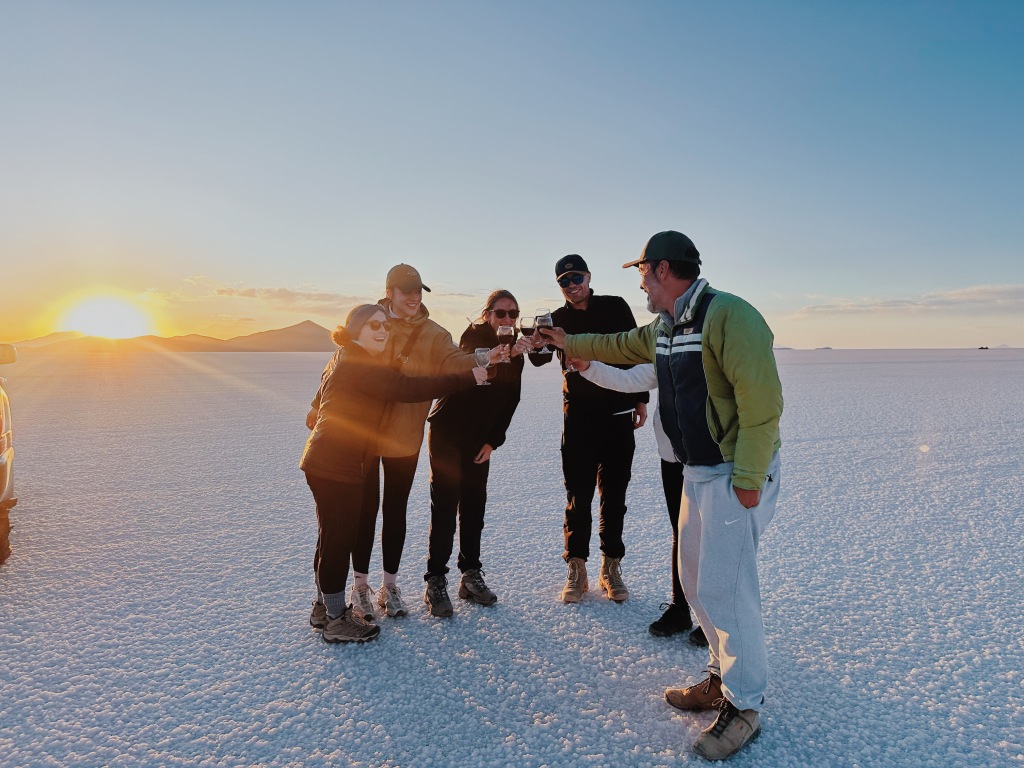
Happy hour at the Salt Flats
What to Do:
You cover a lot of ground over the 3 day tour:
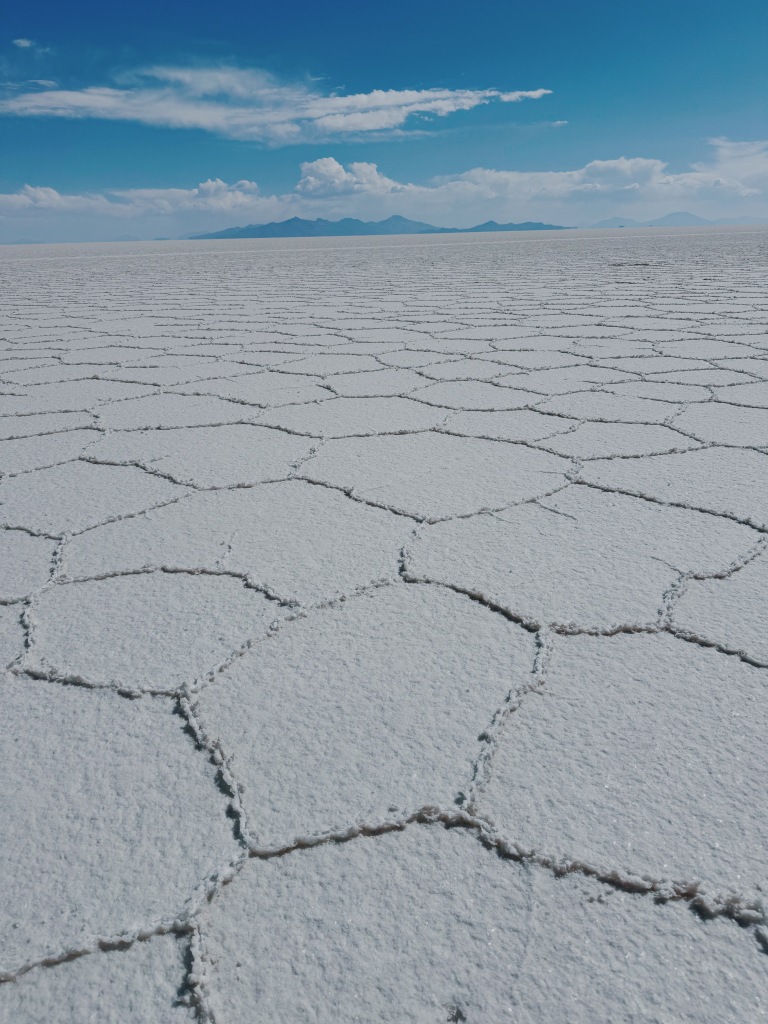
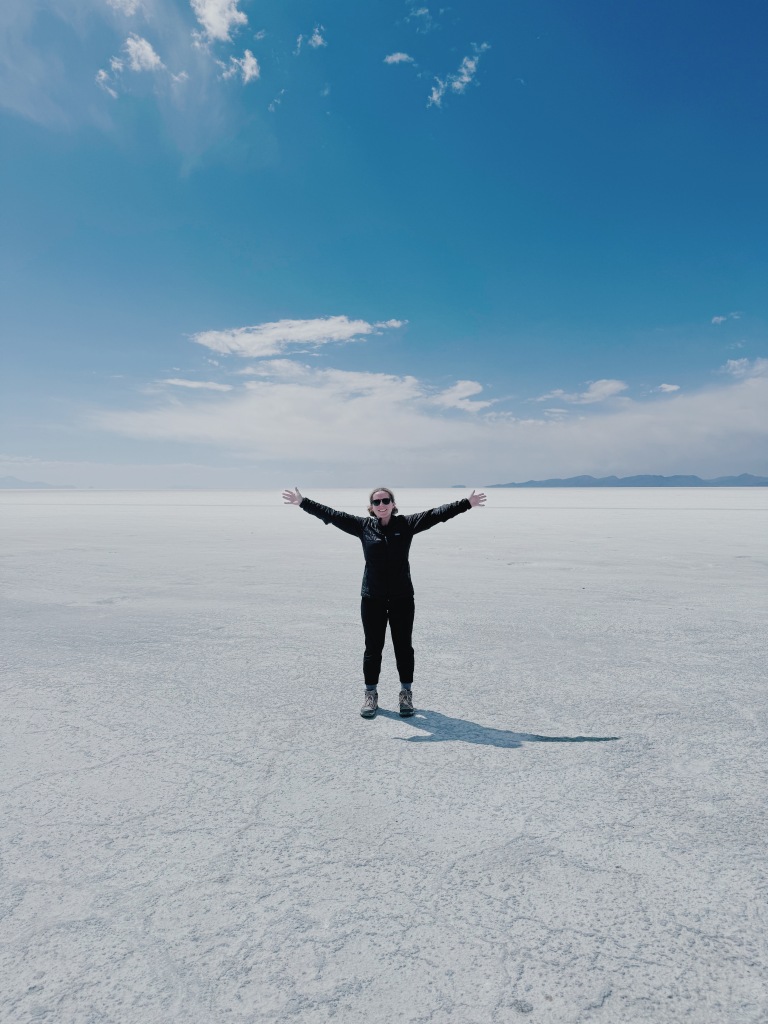
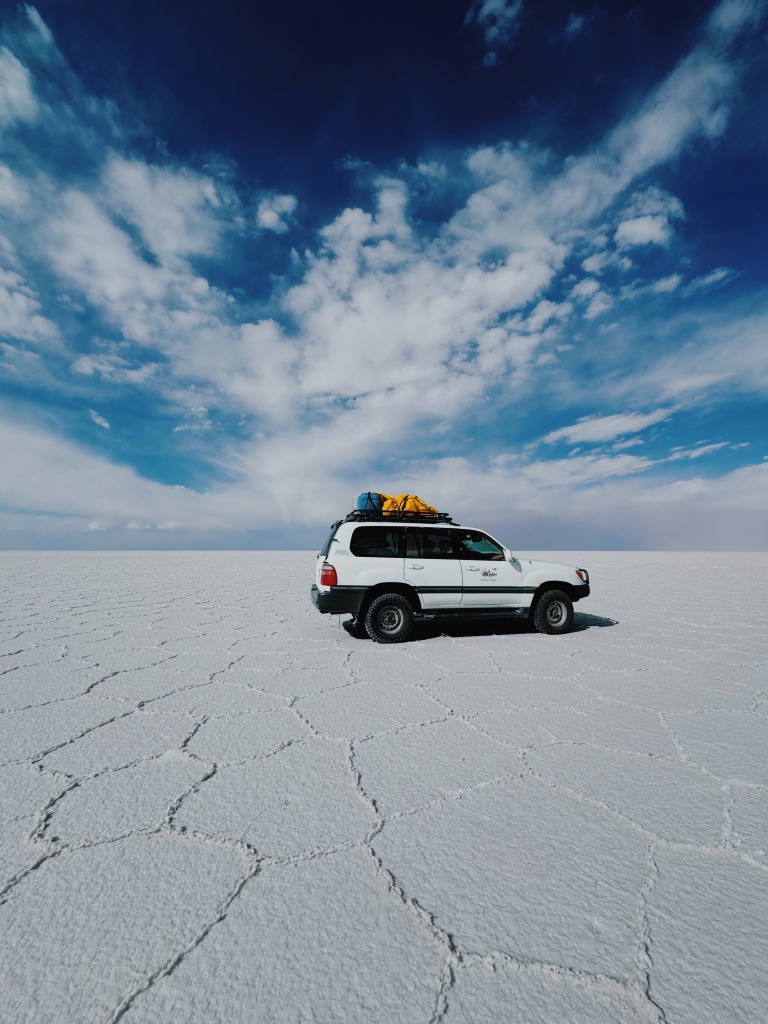
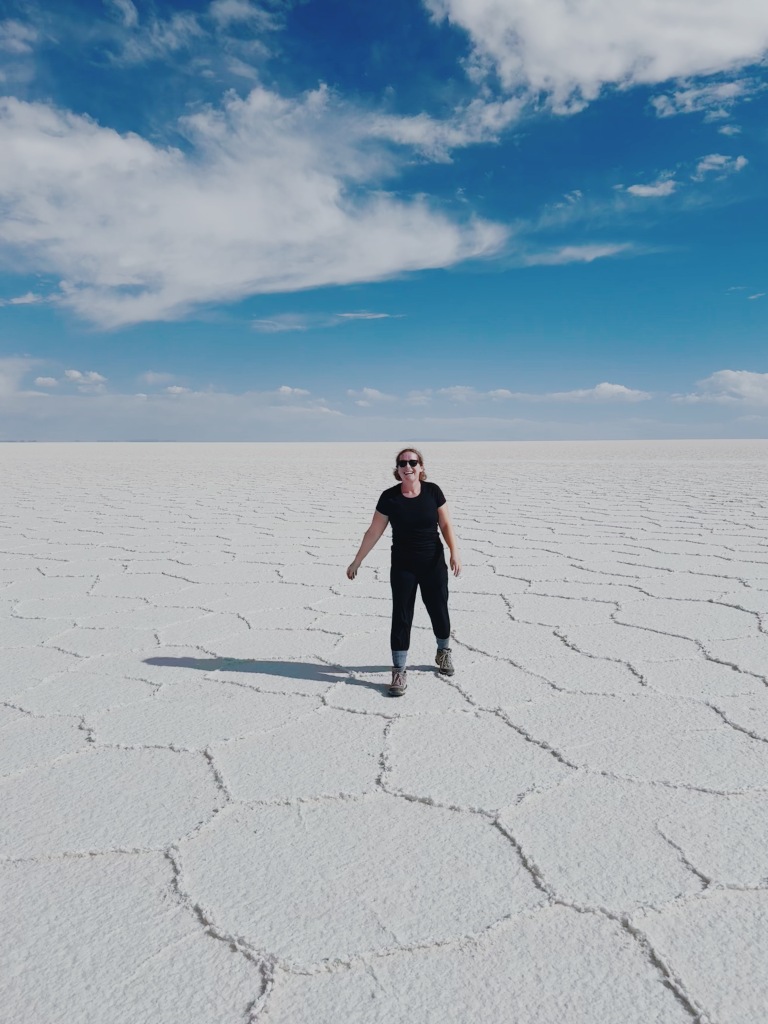
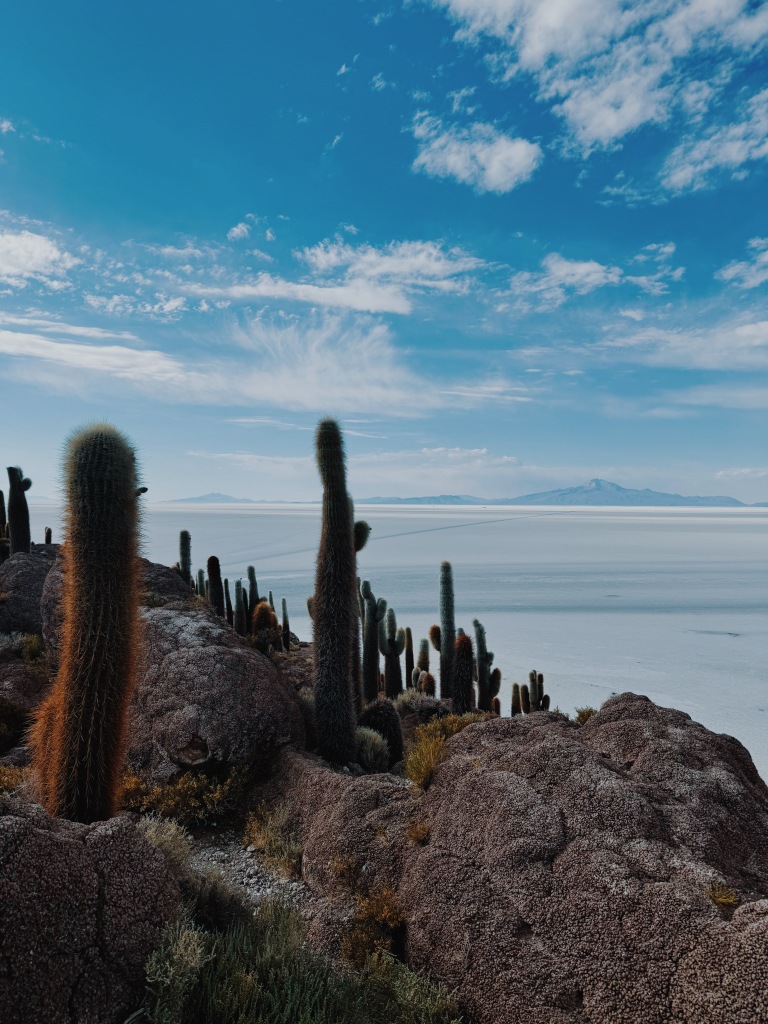
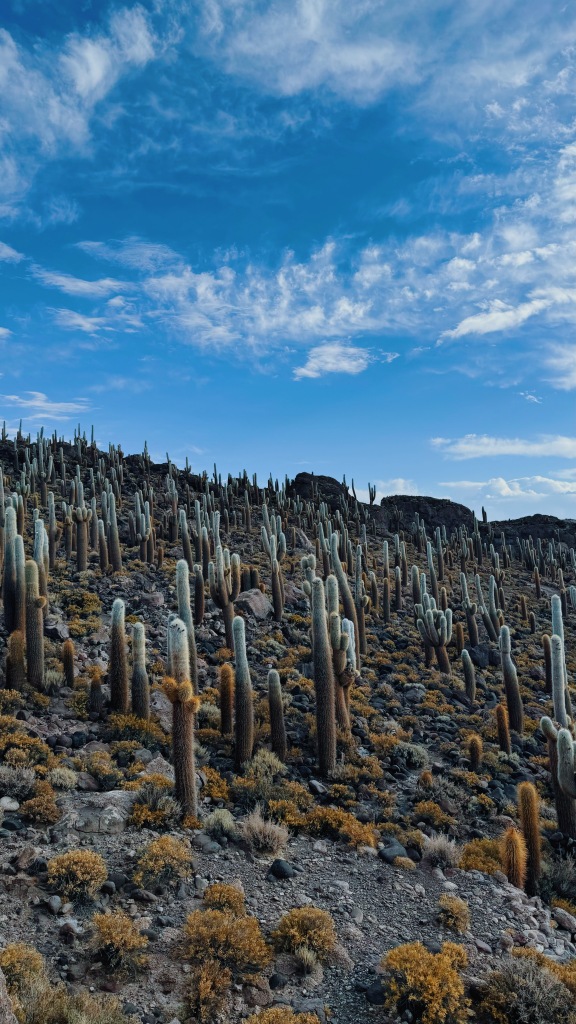
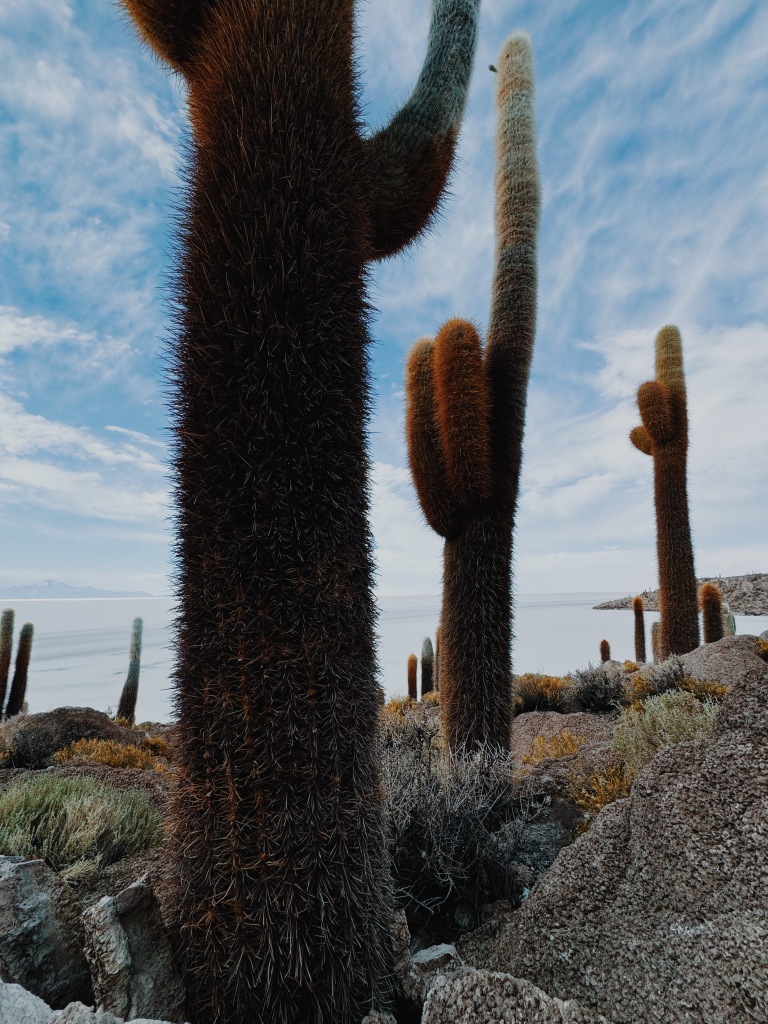
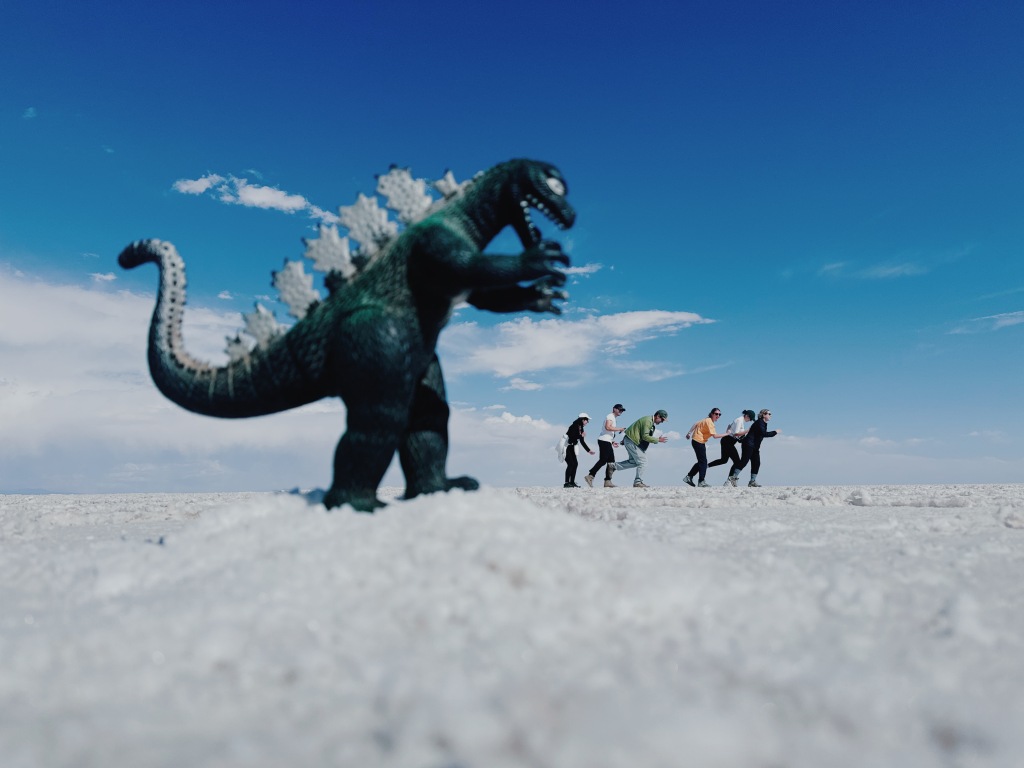
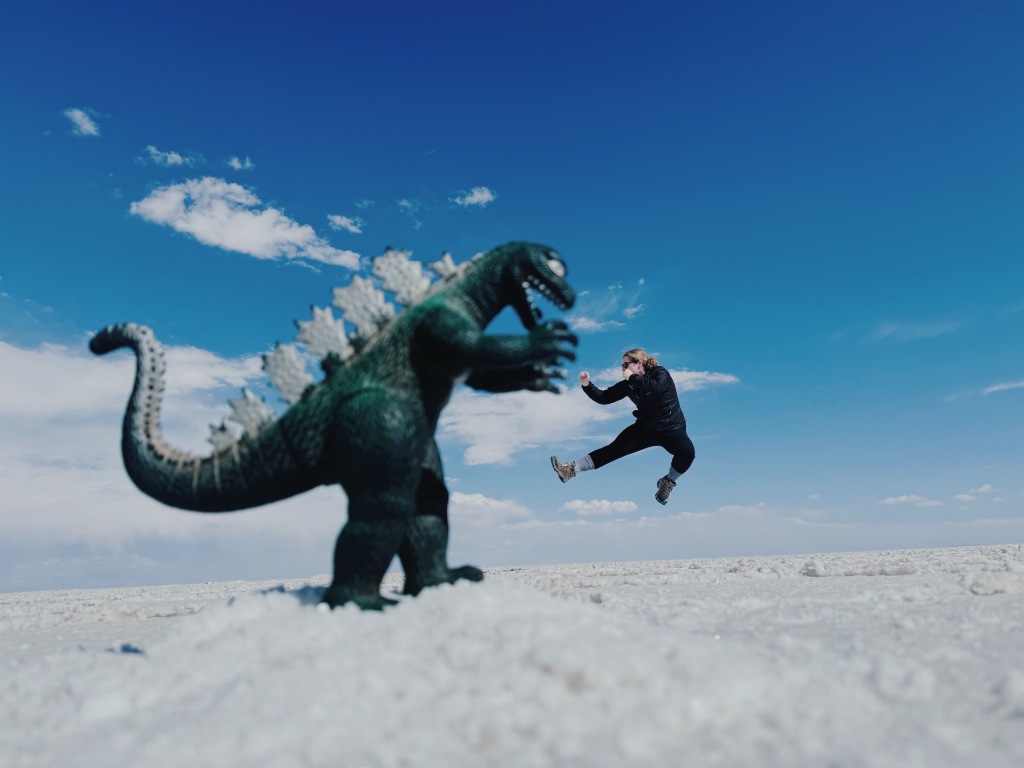
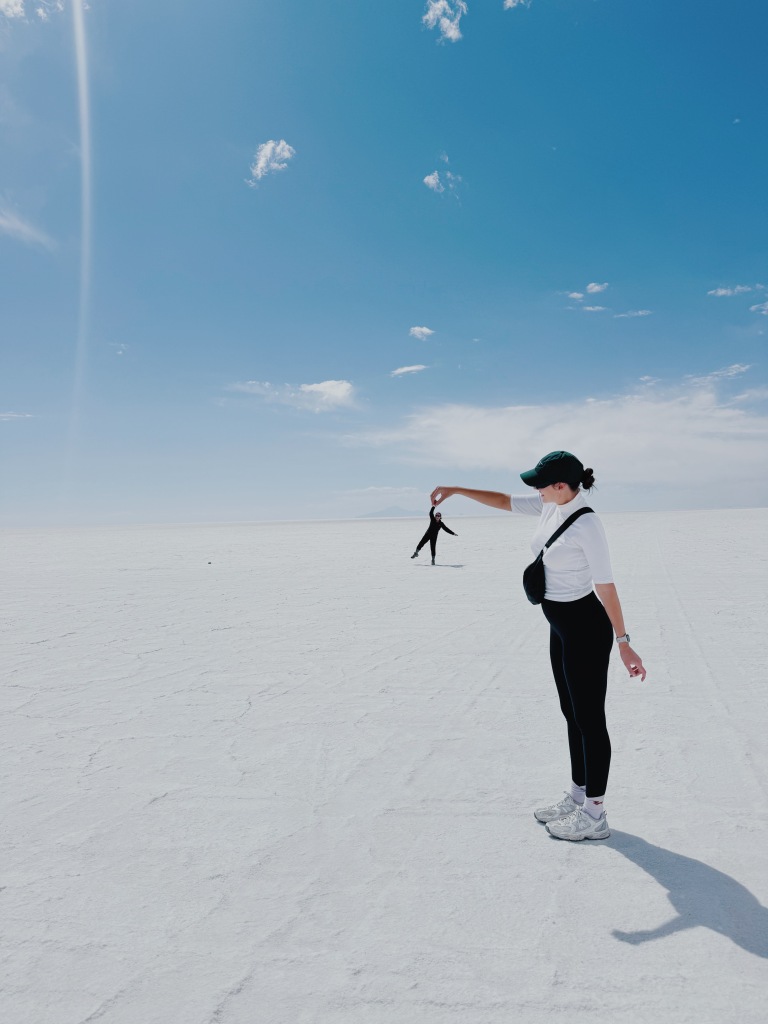
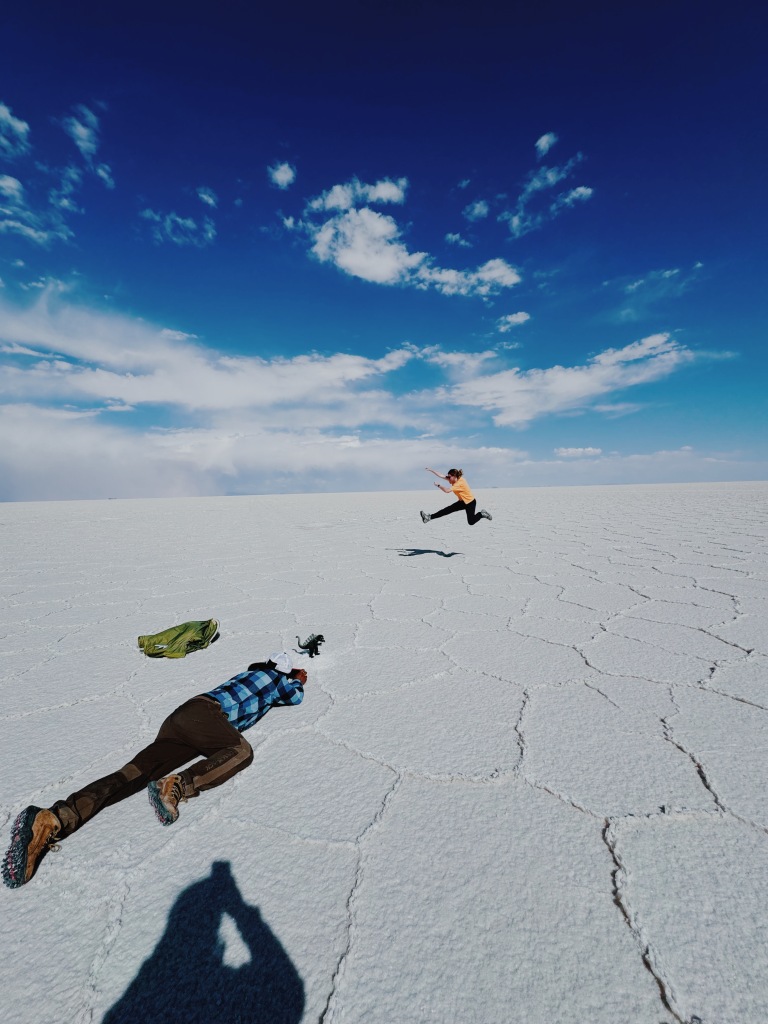
Day 1 is focused on the Salt Flats. You do start with the train graveyard where there are a lot of old trains. We also visited a town where they process a lot of the salt. Then we were off the to the Salt Flats itself. This was the highlight for me for sure! Such an incredible landscape that I’ve never experienced before. You could spin 360 degrees and all you could see was salt & the blue skies. Remarkable! We also visited the Isla Incahuasi – an island that used to be an underwater volcano. There’s volcanic rock and coral remaining and now a bunch of cacti live there. They are huge!
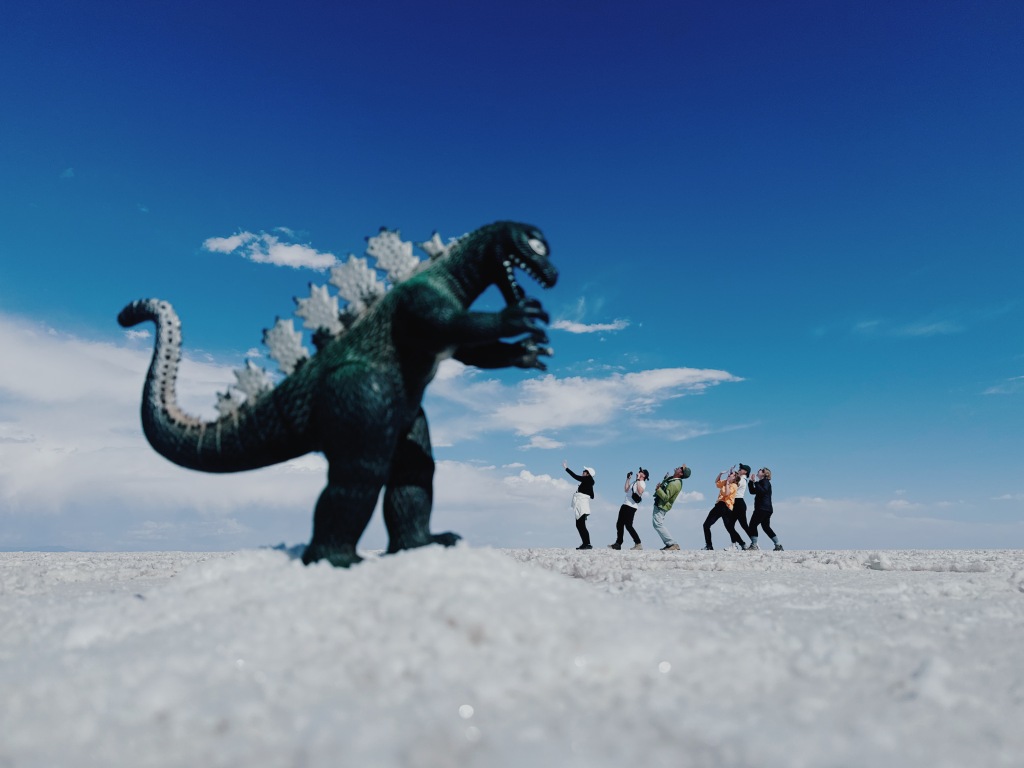
You get a chance to take lots of fun, silly photos that mess with perspective! The guides are usually pros at this (but ours was only alright, unfortunately).
Behind the scenes
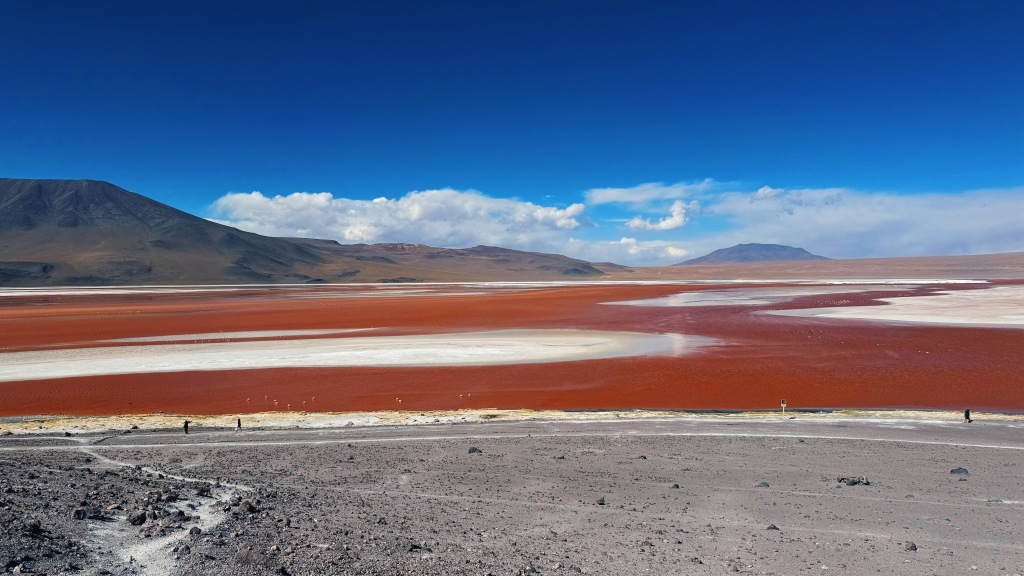
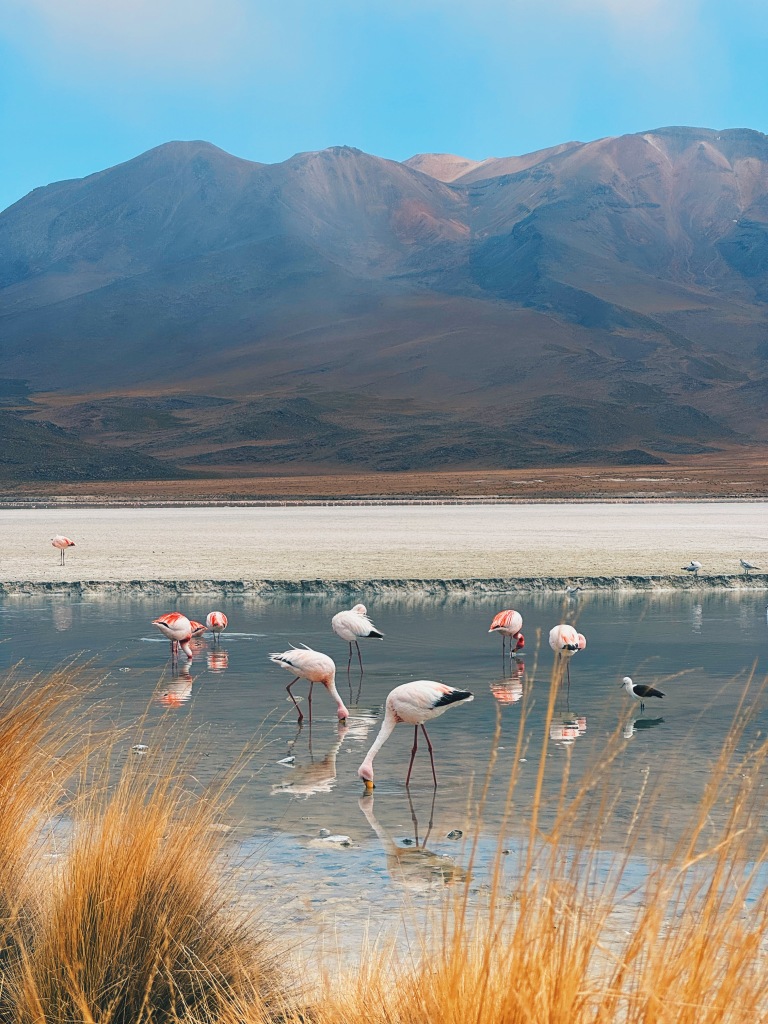
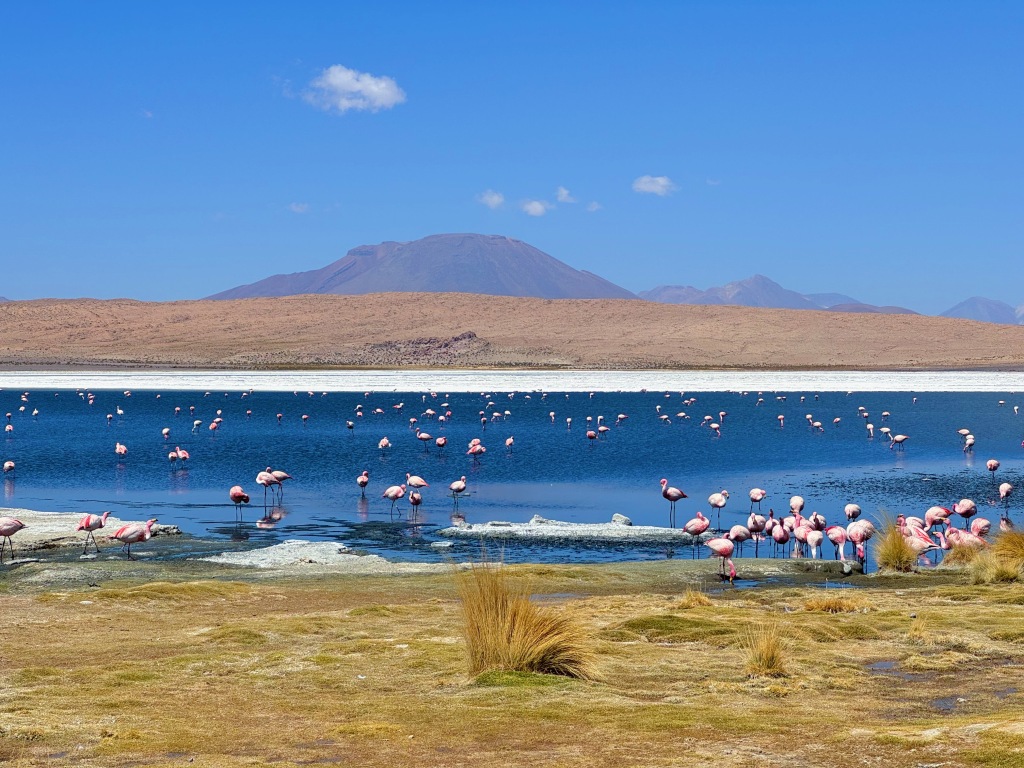
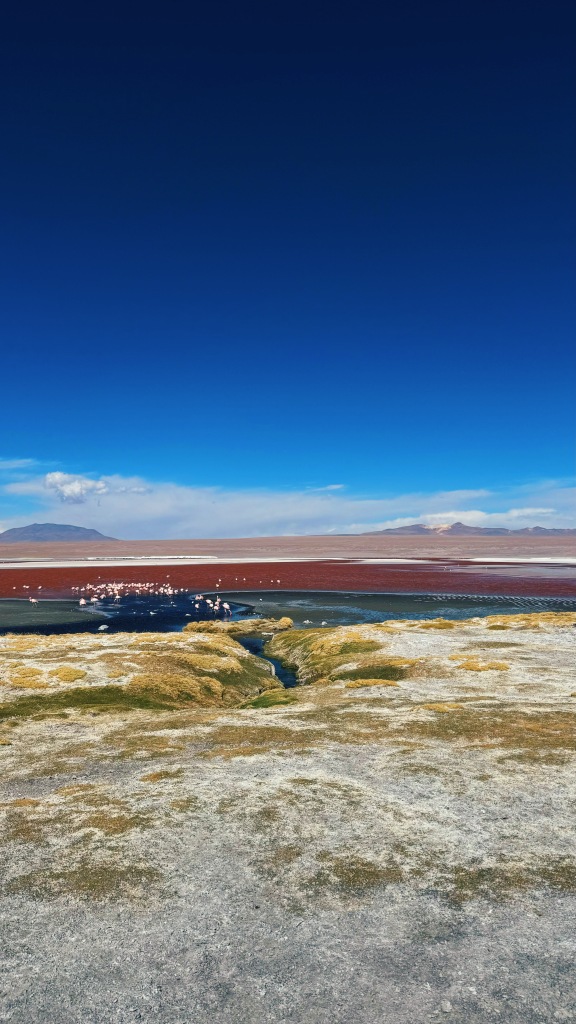
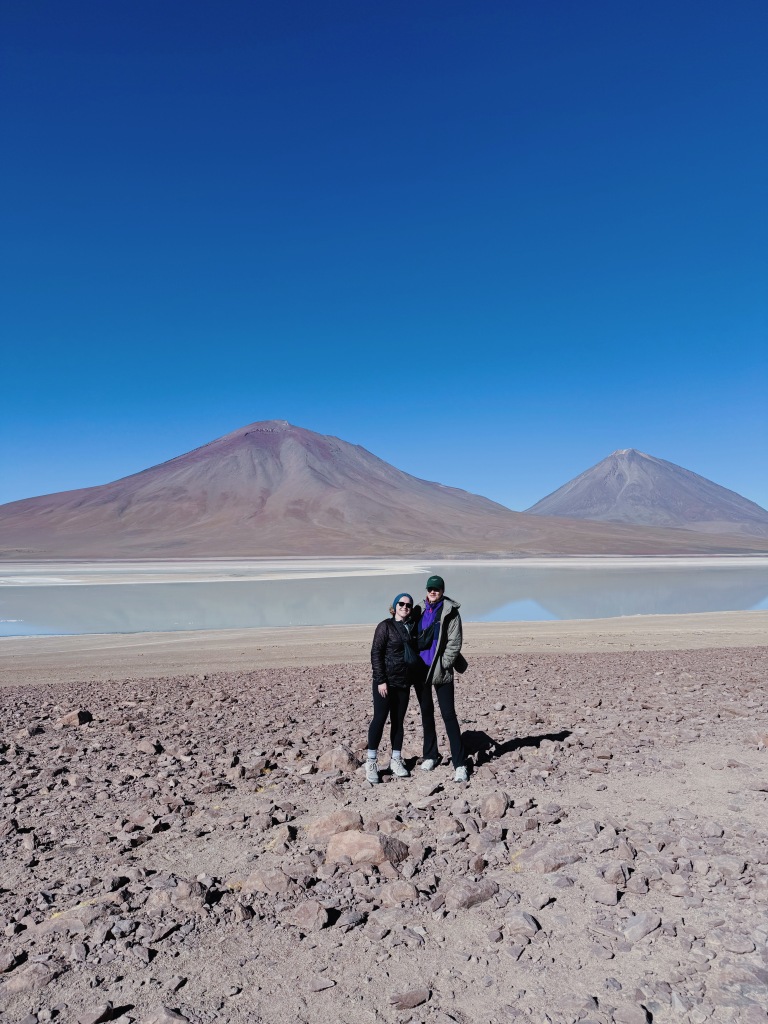
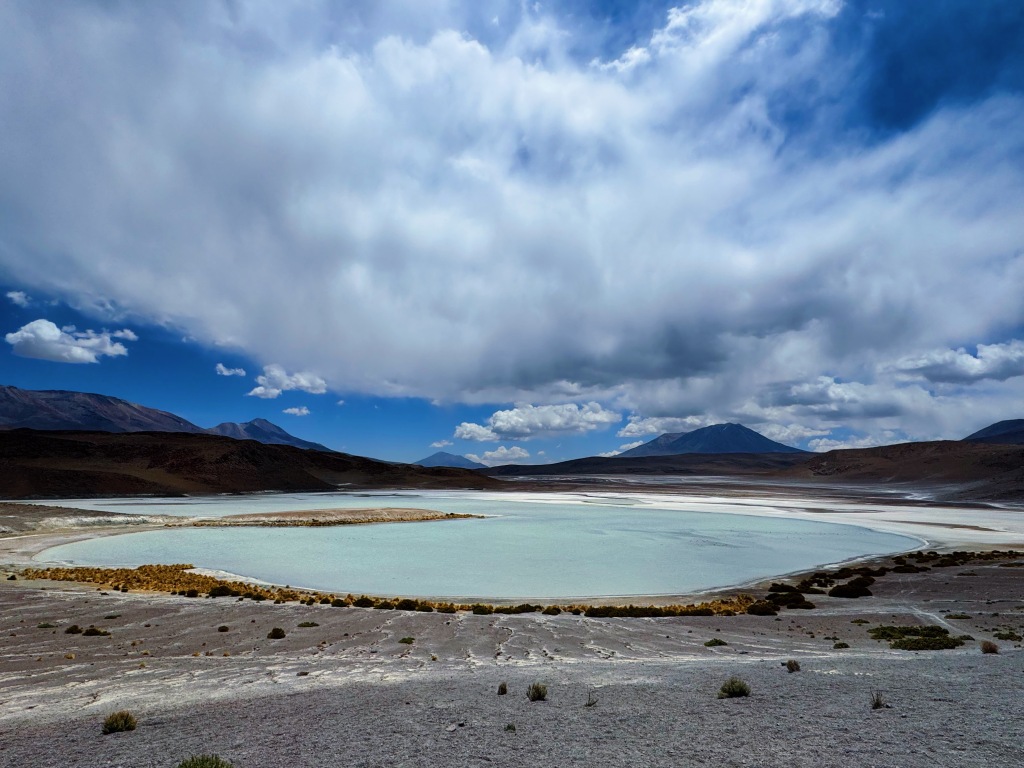
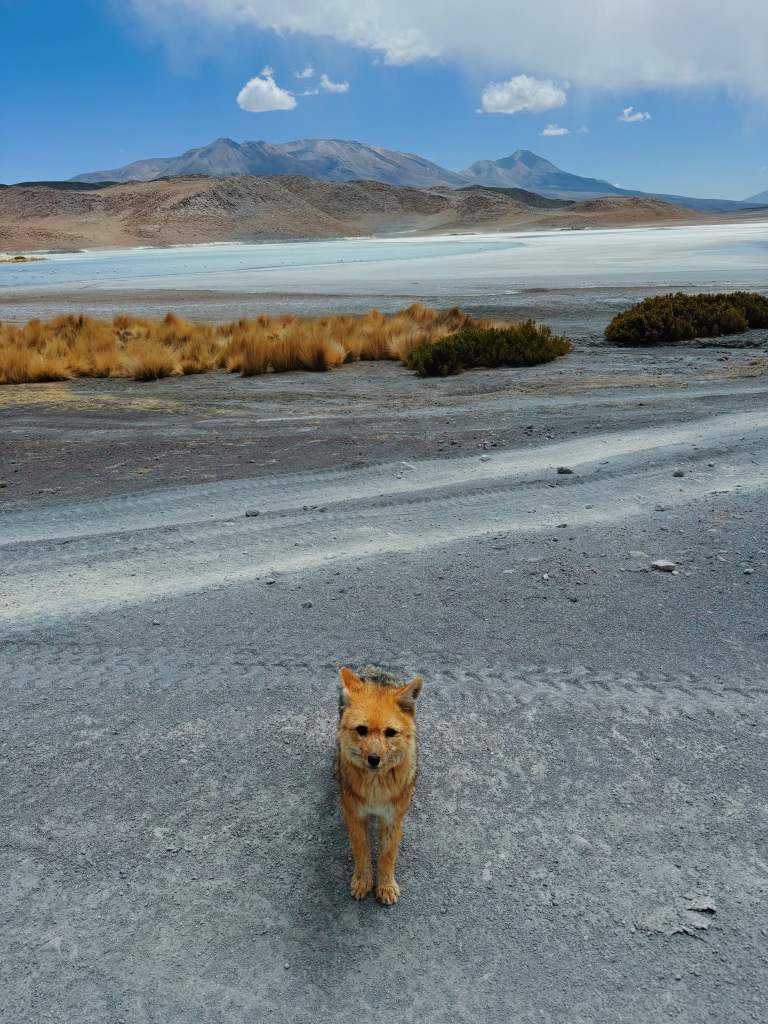
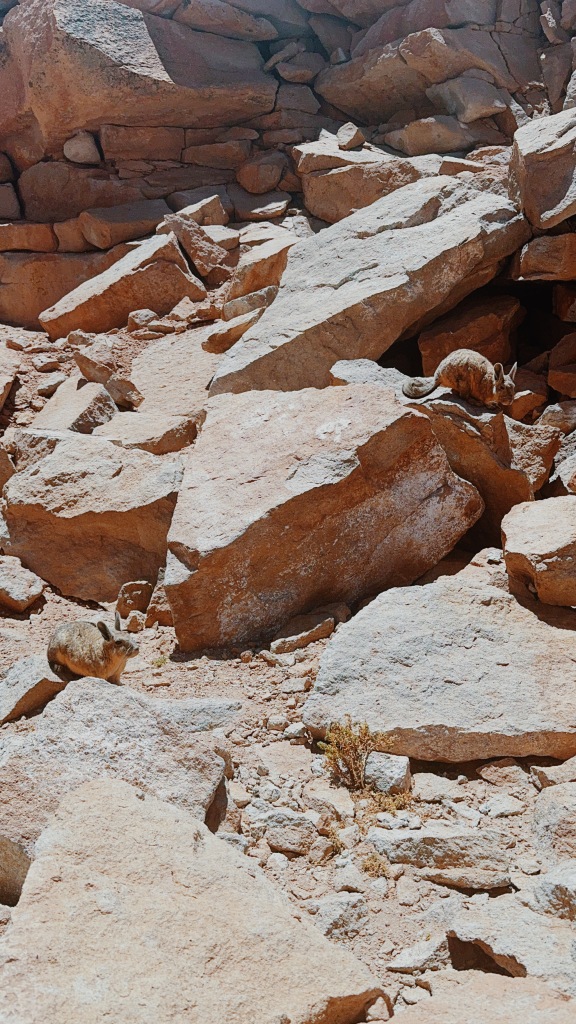
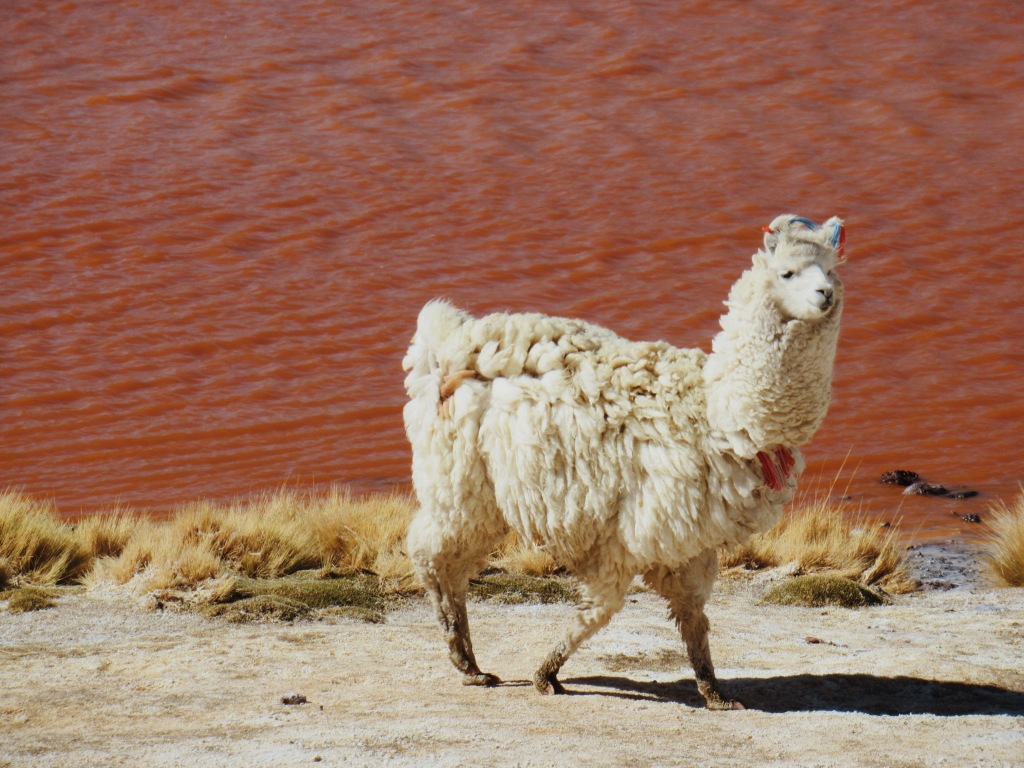
Day 2 is focused on lagoons and the desert. This was still pretty cool, but I definitely preferred day 1. We saw lots of flamingos, llamas and even a desert fox! We had a picnic lunch where all the Viscacha, while technically a part of the chinchilla family, they resemble rabbits, joined us. They were happy to take any of the carrots we dropped. We reached over 16,000 feet (which I think is the highest elevation I’ve ever been to!). We visited some geysers before arriving to our accommodation. The thermal hot springs were an option but I was honestly too cold to think about getting wet without access to a hot shower afterwards
Desert Fox!Viscacha
Day 3 was actually not a full day at all. The folks who were heading to Chile were dropped off at the border crossing around 9:30am after seeing some more lagoons. The rest had a very long drive back to Uyuni where the tour began. They then would hop onto another night bus back to La Paz. I was very grateful I only had an hour drive to Atacama ahead of me. The border crossing was very smooth and the tour guide got me settled onto the bus to Atacama. Now time to sleep 🙂
Overall Thoughts:
I always get so tired/burned out from these types of tours but they are incredibly efficient and you sorta just have to do it haha. Usually you meet some great people and see some cool sights. I didn’t love my group except one German girl. Also, it’s very hit or miss whether you get a good guide, so if you are lucky you’ll get one who takes awesome/creative photos/videos in the flats, or you’ll get one like mine who was just alright. Not much you can do about it. Overall, I’d highly recommend doing a tour of the Salt Flats. Also it was great because it got me to my next destination: the Atacama Desert in Chile.
BUDGET FOR 12 DAYS IN BOLIVIA:
WOW was Bolivia affordable 🙂
Accommodation: $80 ($8.90 per night) – This is slightly skewed because I had one overnight bus (aka $0 for accommodation) + my 2 nights on the Salt flat tour were accounted for in my activity cost.
Food: $105
Groceries: $9
Activities: $260 – includes Hike tour ($15), Death road ($45), & 3 days Uyuni Tour ($148)
Health: $60 – includes Massage ($20), doctor visit ($38), & hair wash ($15)
No visa needed from Americans (as of writing this). I wasn’t even asked for proof of onward travel. Also sadly no stamp
Bring US dollar bills as you will get a much better rate exchanging dollars (or euros/pounds) than taking money out of a ATM. This rate is known as the Blue Dollar rate & you can check what it’s currently at here. While I was here, I received around 15% more pesos for my USD while exchanging at a Western Union.
The public transit is super easy to use (google maps works great), but you need to buy a Sube card (which sometimes can be hard to find, so just ask the front desk of wherever you are staying to help you find a store or station that sells them).
In general I felt very safe, even walking home at night, but I was in the Palermo neighborhood which is particularly busy and full of tourists. Take care of your belongings and pay attention to your surroundings, but I never felt unsafe.
Consider adding a day trip or a few days to Uruguay since it’s just a ferry away!
CITY: BUENOS AIRES
HOW LONG: 15 NIGHTS
ACCOMMODATION:
I spent a total of 2 nights at a hostel when I first arrived to Buenos Aires (then I went to Uruguay for a week) and then spend 13 nights at an airbnb solo while I took Spanish language classes for 2 weeks 🙂 I stayed America del Sur Hostel which was in a cool neighborhood for walking around. The hostel had a nice common area + kitchen. The front desk was super helpful! Beds were comfy & had curtains/personal light/socket. The only complaint was that the sink in my room was outside the bathroom which meant when people arrived late or left earlier, you pretty were guaranteed to wake up since someone was using the sink 2 feet from your sleeping face Very odd design haha
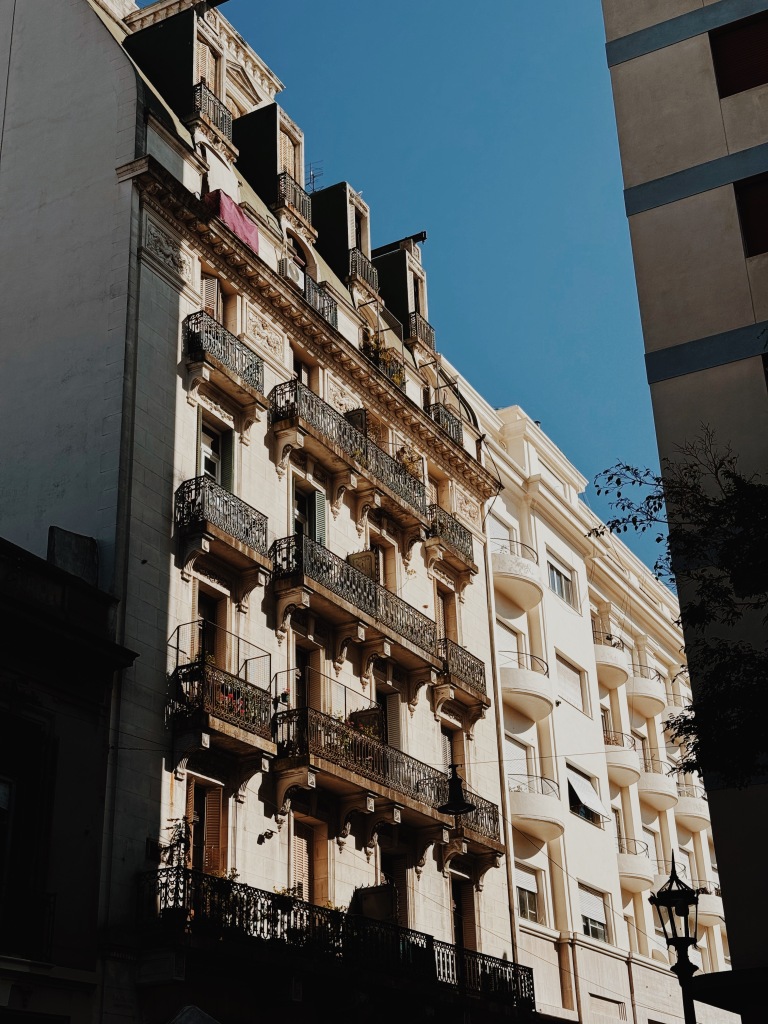
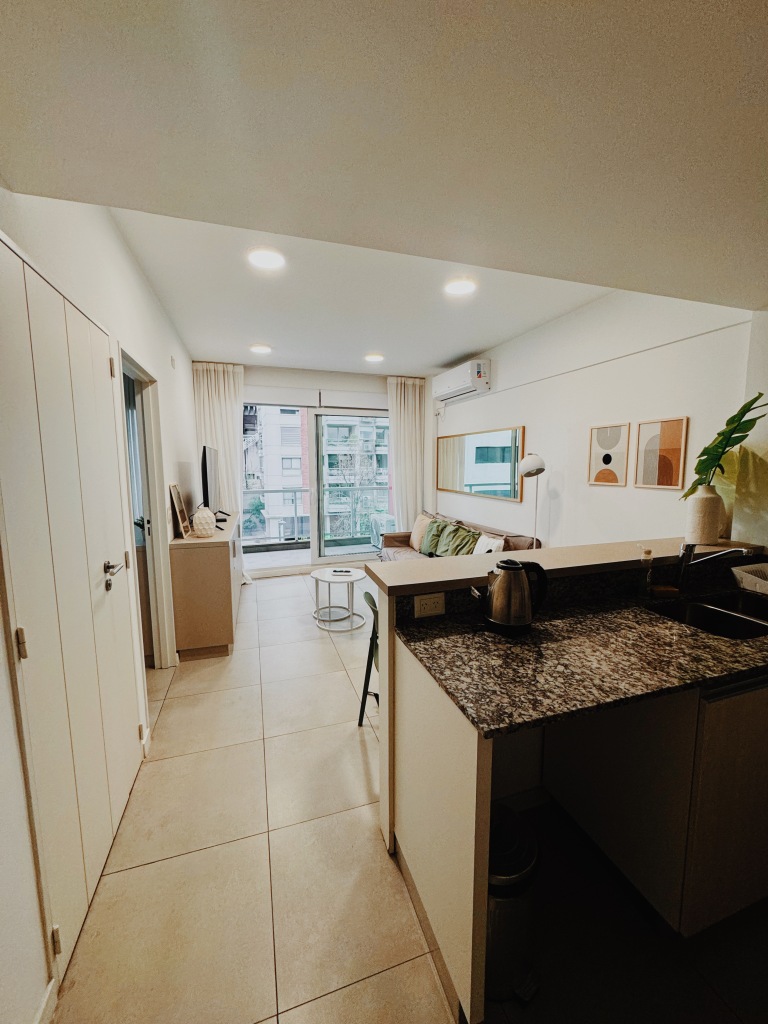
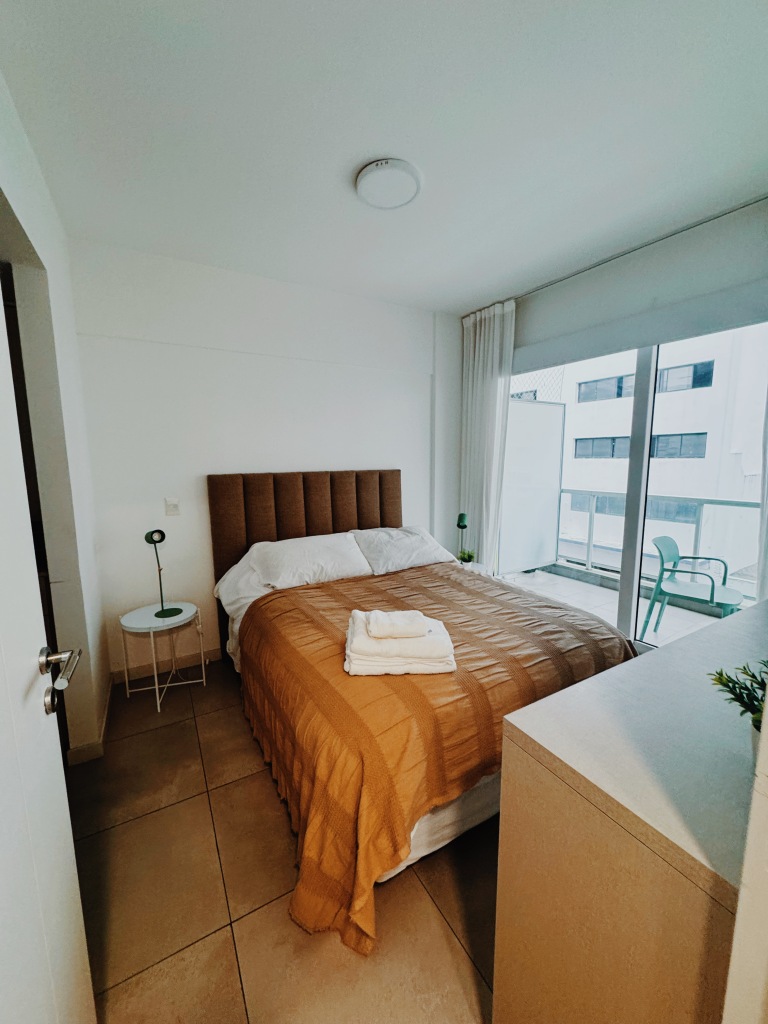
For my airbnb stay I chose an apartment within a 15 min walk from my school in the Palermo neighborhood. I loved this area! Highly recommend. The airbnb itself was cute, and was perfect for a two week stay. Kitchen was sufficient, laundry & gym in the building, and grocery stores nearby. I felt completely safe walking around solo day or night as well, which is such a treat while traveling! If I were to come back to Buenos Aires I would aim to stay as close to Plaza Immigrantes as possible as I loved eating it that area.
Las Petunias – Right on the main square in Palermo. Delicious (but slightly more expensive) Argentinian restaurant.
Ubu cafe – I ate here twice. Loved the Chicken Cesar wrap. It’s located right on the main square in Palermo.
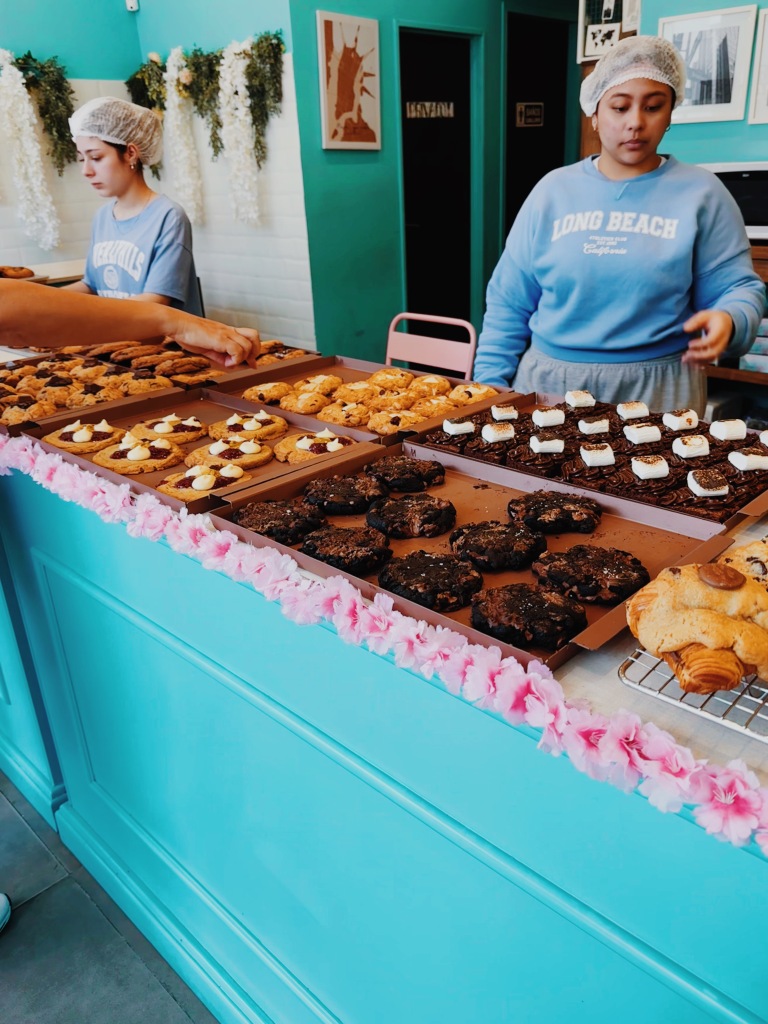
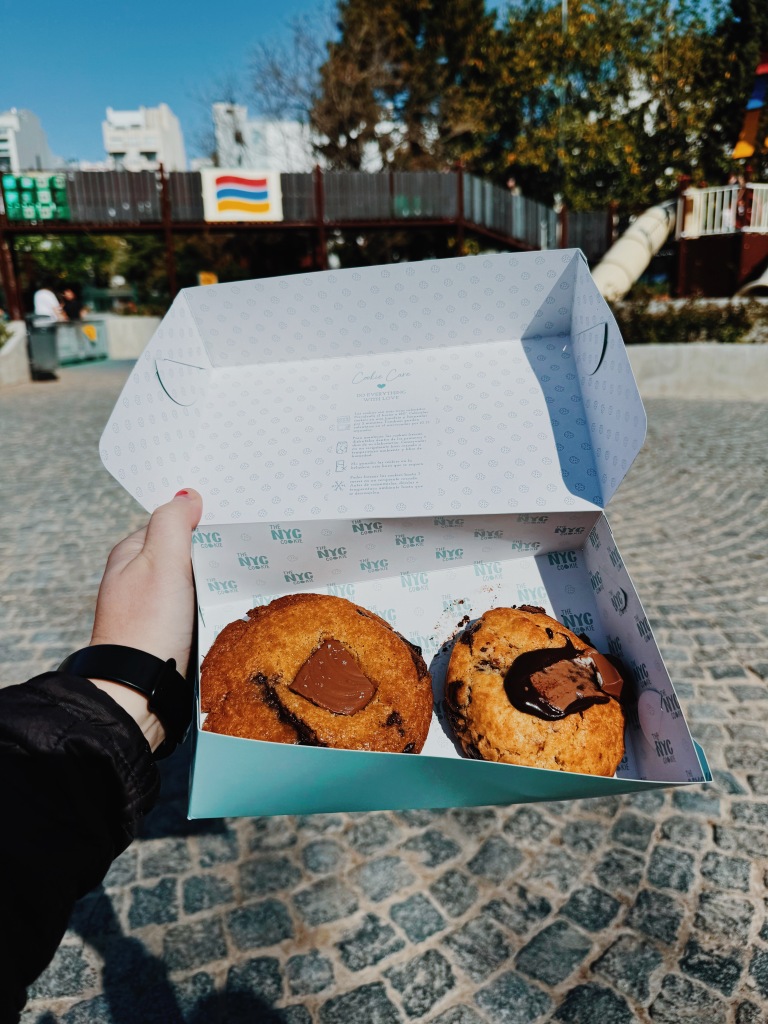
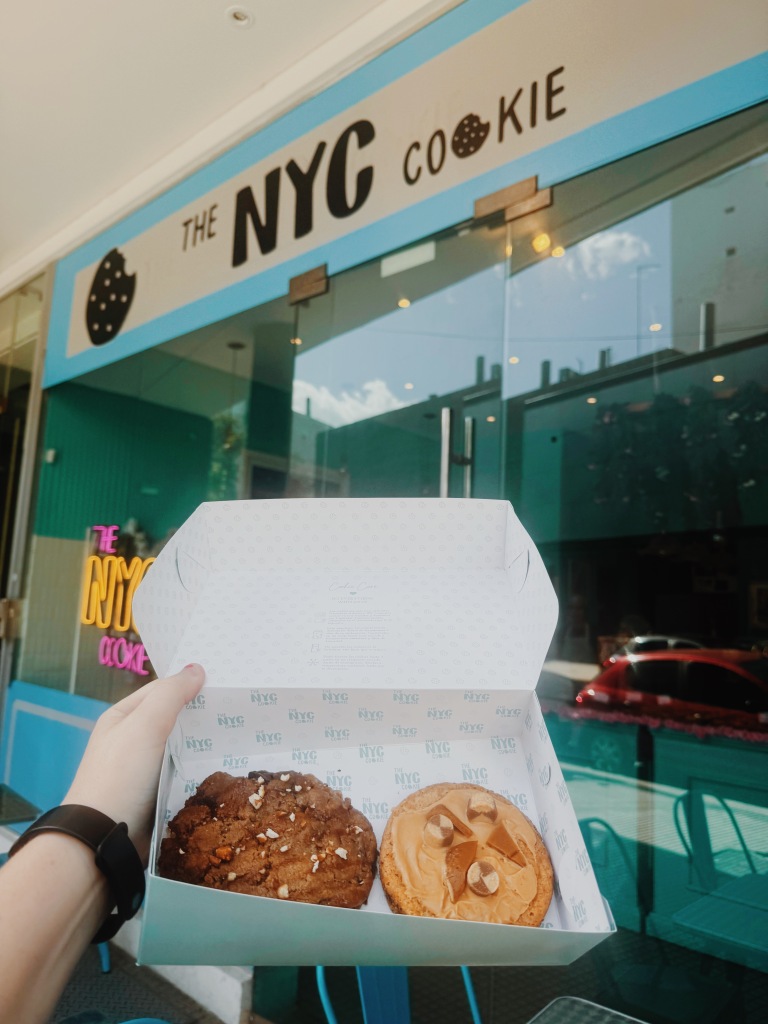
NYC cookies – Always happy to find a yummy cookie spot!
La paniglia – cute cafe with cozy vibes + hot chocolate
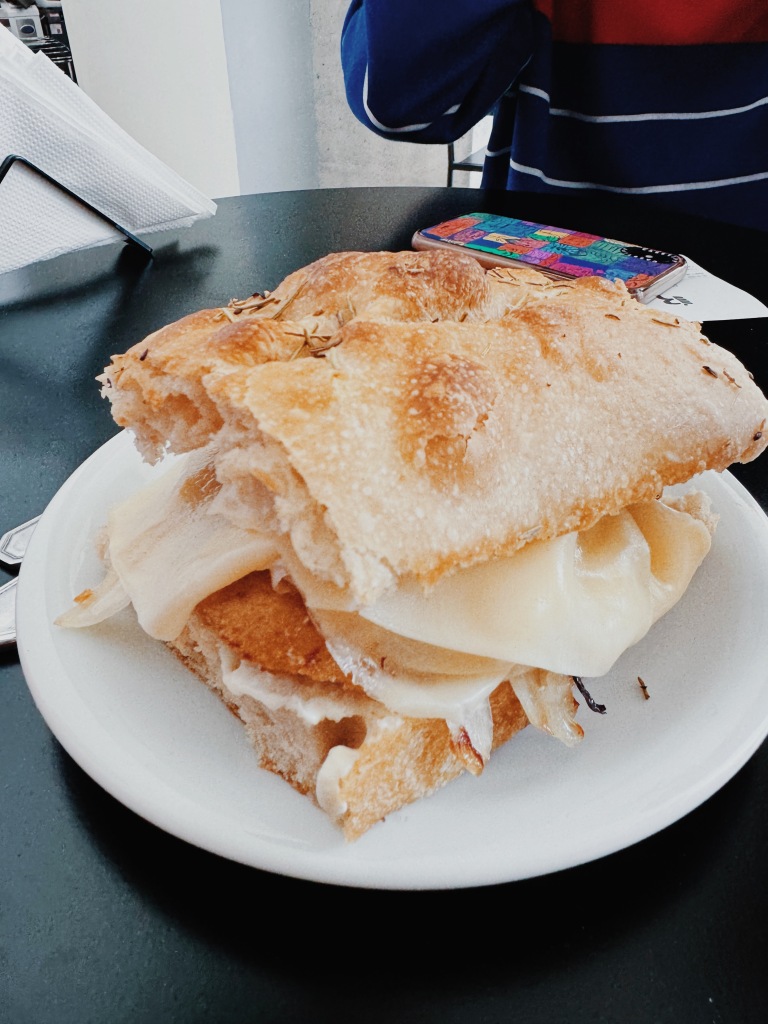
Arte focaccia – Delicious sandwiches! Felt like I was in Italy 🙂 We took the sandwiches and headed to the park to enjoy them
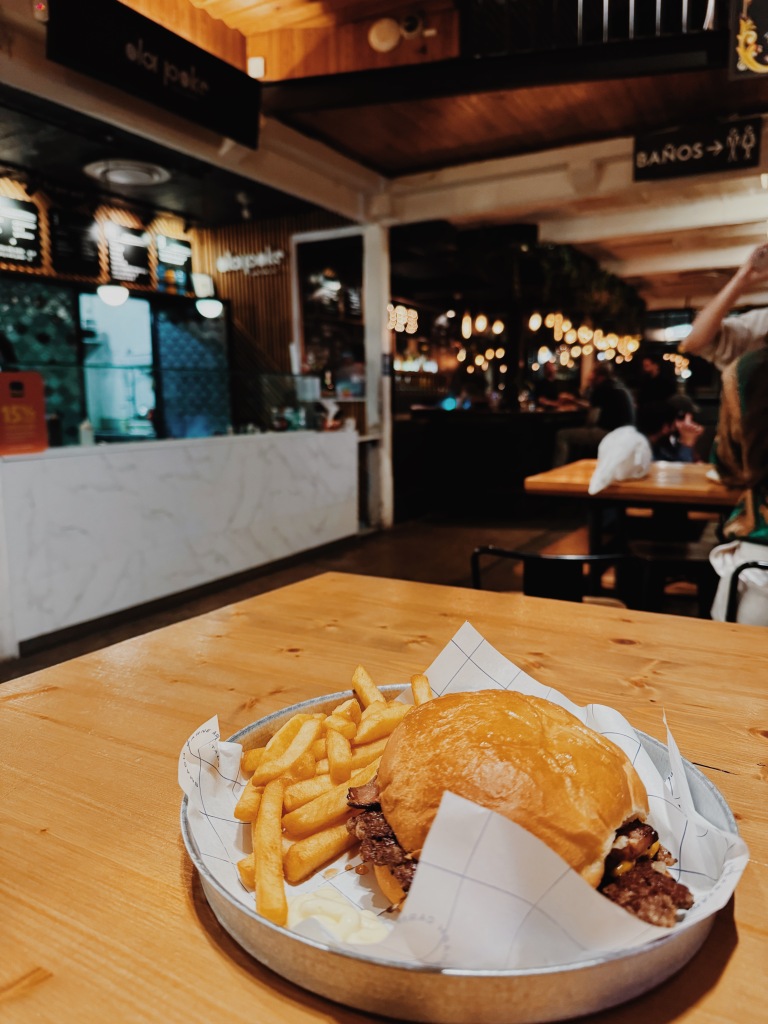
The Burger Company – Wow what a delicious burger. I expected a more fast-food level burger, but we all raved about the food. Great spot for lunch.
Casa Dingo – Aussie cafe right on the main square. Cute drinks & yummy lunch food.
Lardito – incredible, elevated club sandwich. Adorable vibes and every plate was delicious and interesting. Great for trying a bunch of different dishes. Highly recommend for dinner. You could go to the wine shop and pick out a bottle for the table. This was my favorite restaurant I ate at.
Submarino – hot milk with a bar of chocolate that melts into it to make hot chocolate!Focaccia in the park!NYC CookieNYC CookieNYC CookieArte Focaccia
WHAT TO DO:
Weirdly because I was using this two week as a break before heading into a bust two month stretch, I actually didn’t do much while here. Instead, I got into a routine where I worked out at the tiny gym in my airbnb, walked to Spanish class which was 4 hours long, and then headed to lunch with my classmates. In the late afternoons, I would catch up on admin work before cooking at home & watching some netflix. Honestly, I absolutely loved my chill time.
Given I have very little recommendations, here is a very comprehensive, well respected blog on a complete guide to Buenos Aires 🙂
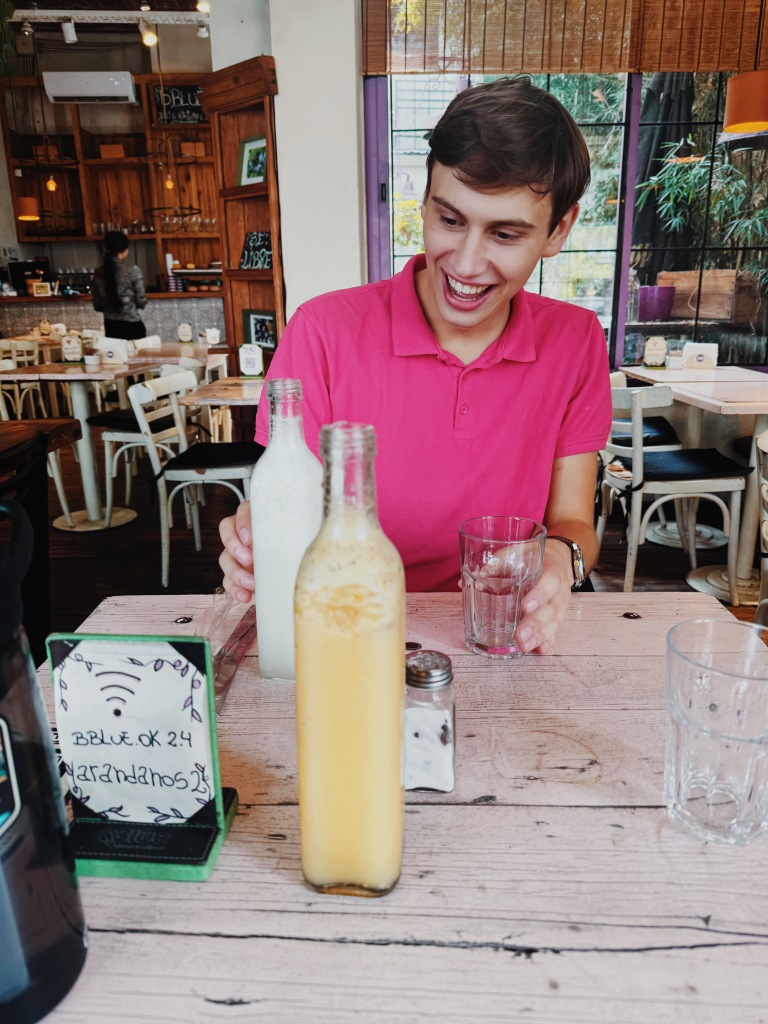
We did go to some language exchanges which were fun! They are a great way to meet people and also practice some Spanish 🙂
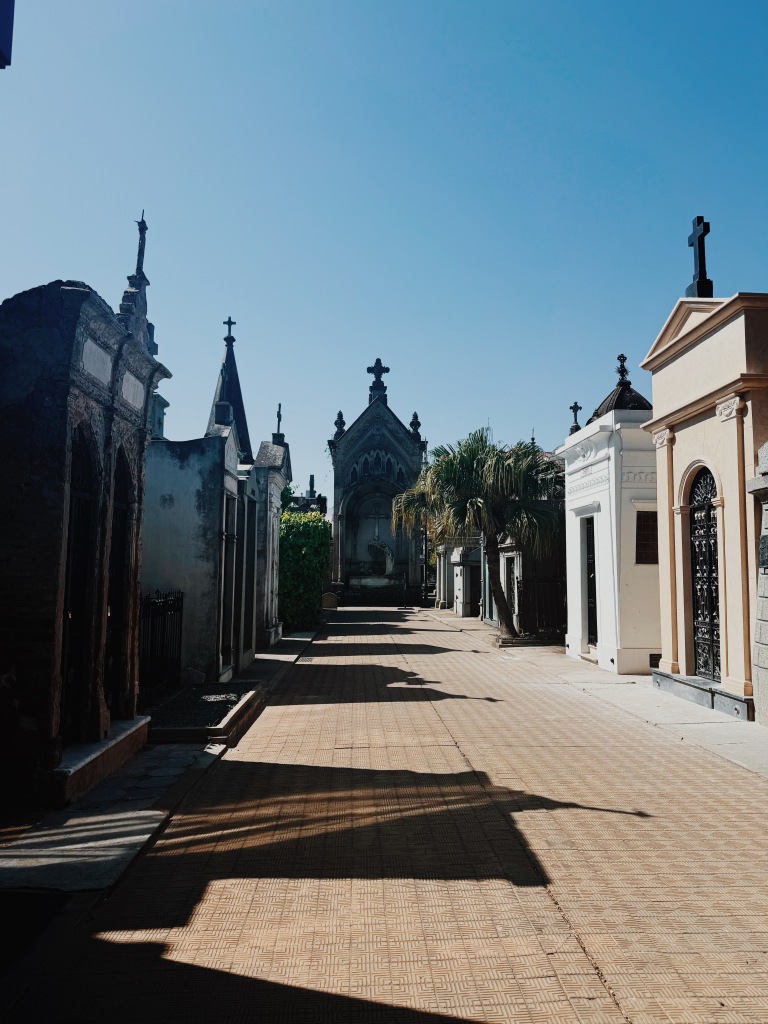
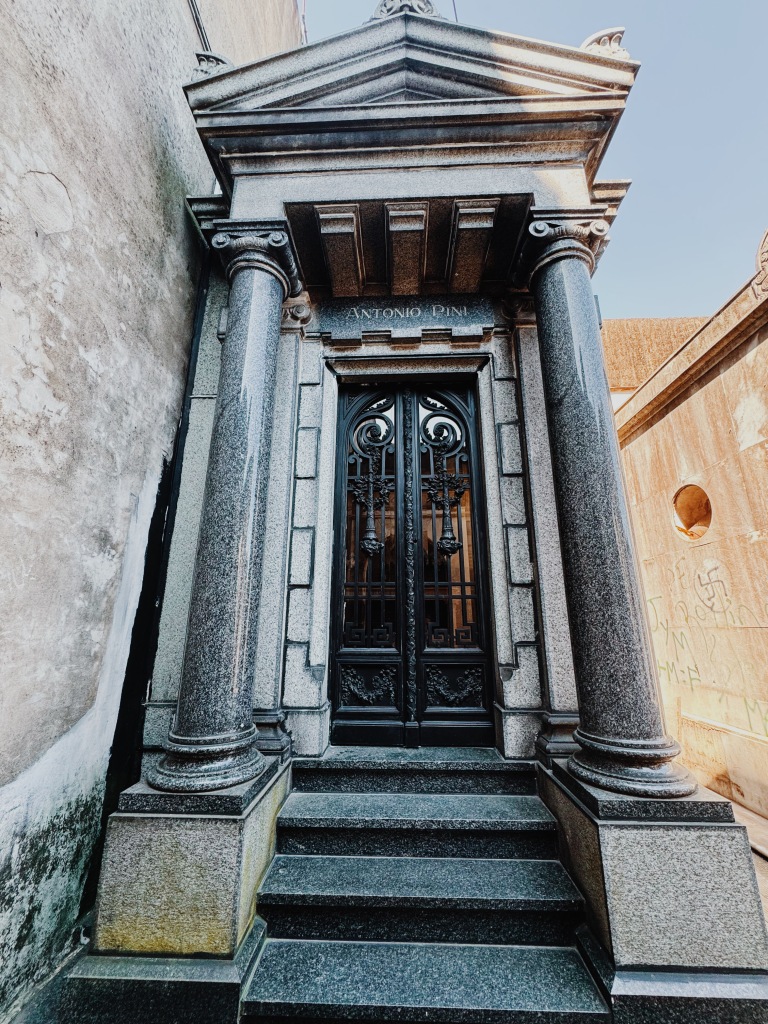
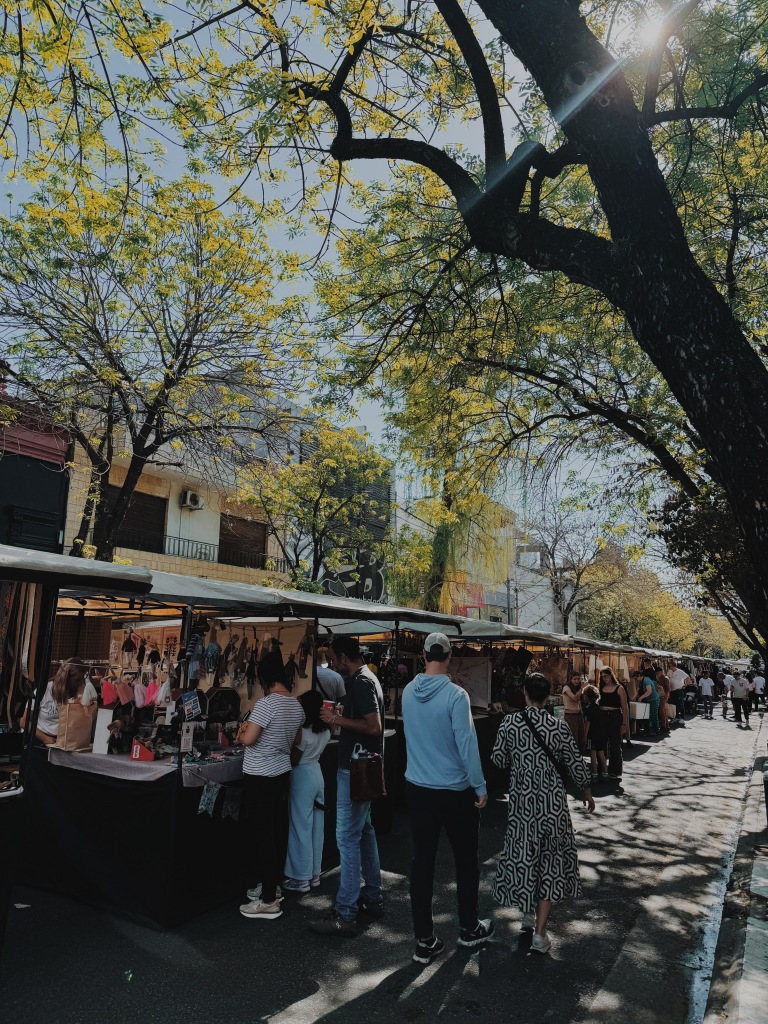
I also managed to get fairly sick my one weekend here However, I did go to the La Recoleta Cemetery and the Sunday market outside it. It was pretty cool to walk around the first public cemetery in Buenos Aires. Lots of old graves to check out.
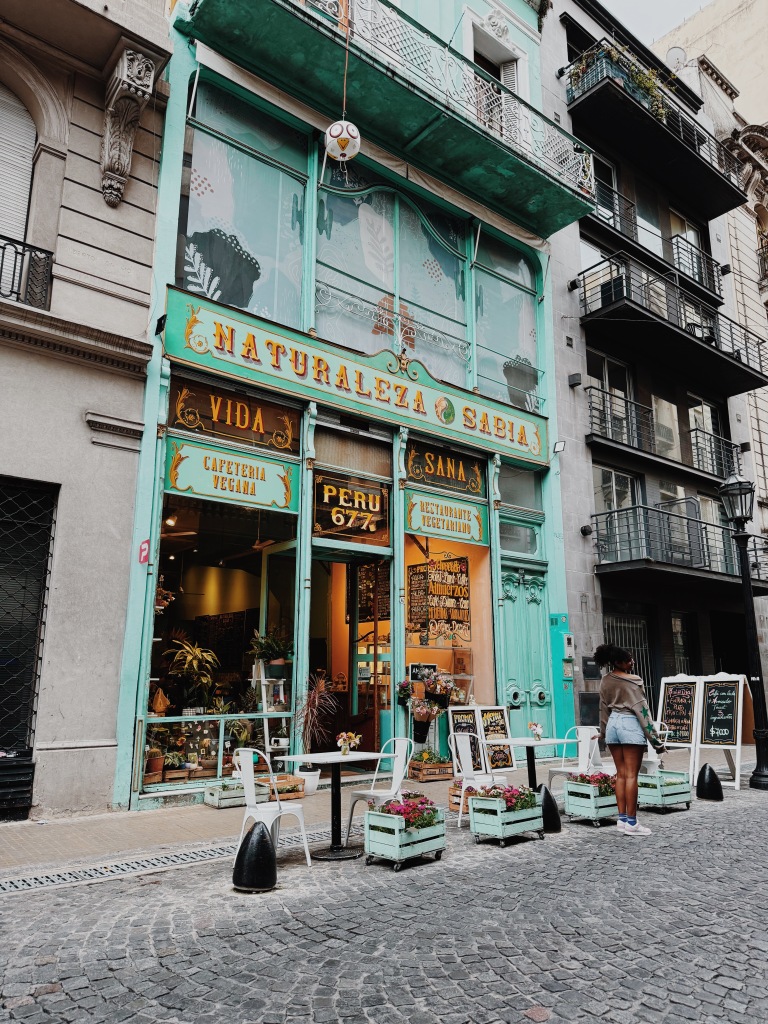
Other than that, I just loved eating my way through all the fun & cute restaurants in Palermo with my friends.
OVERALL THOUGHTS:
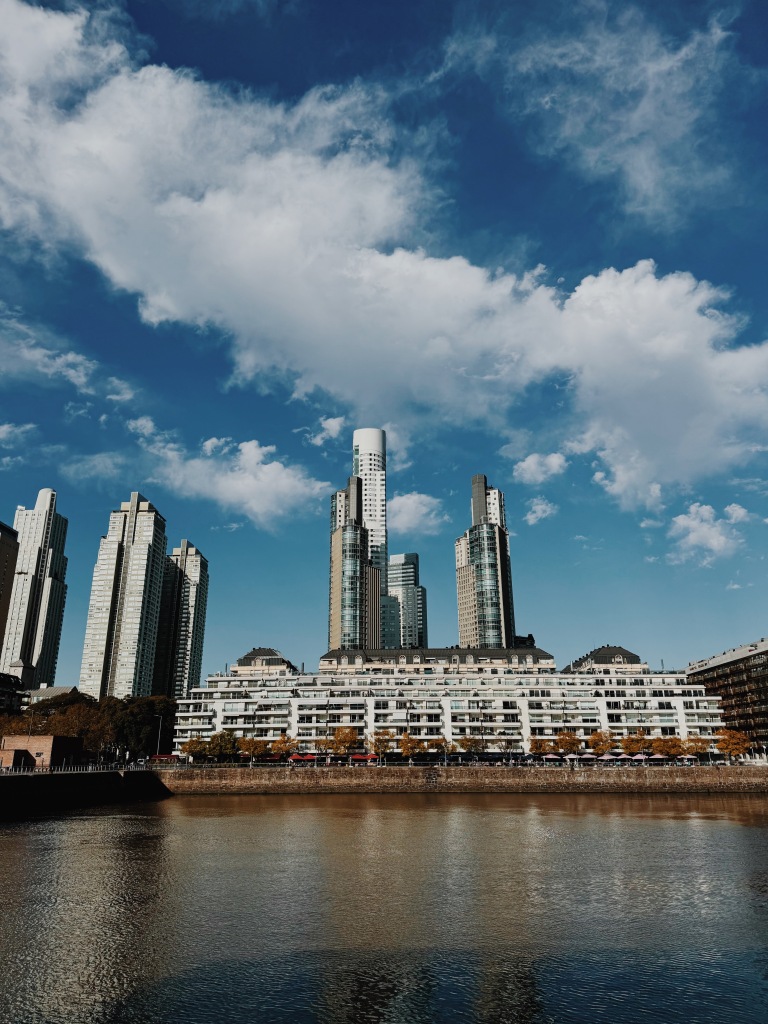
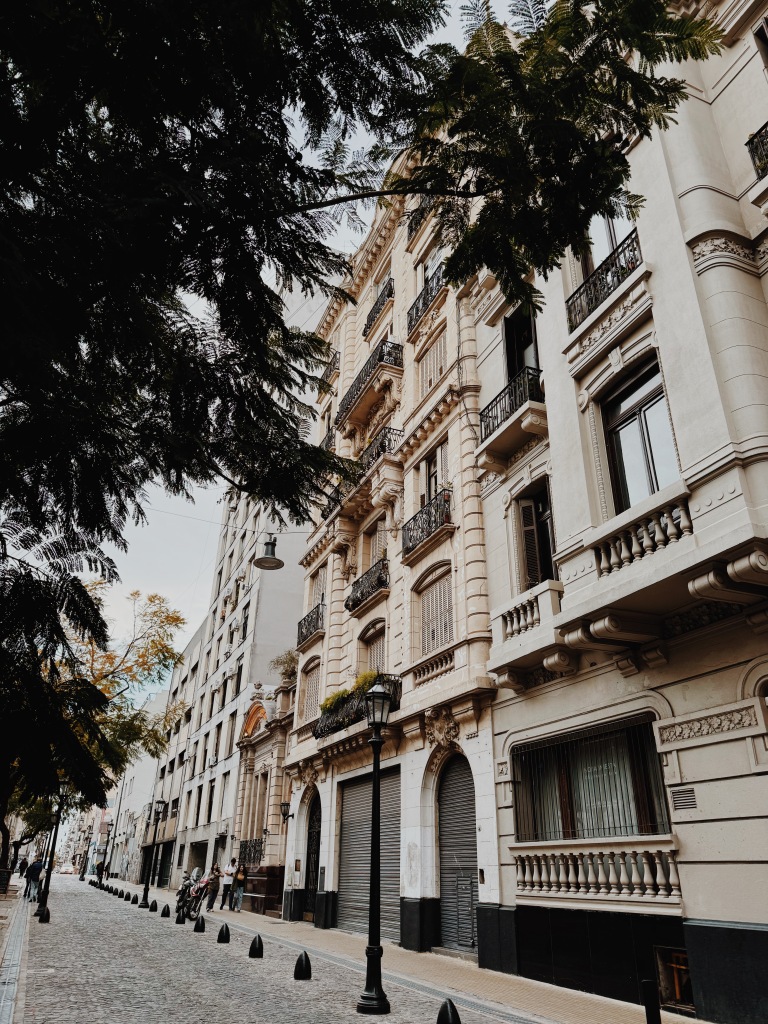
I always felt like I would love Buenos Aires and I was not wrong! It was such a beautiful city. It felt like a mixture of Paris, Barcelona & a hint of NYC, but overall a very European vibe. I was obsessed with the tree lined streets. I took a thousand photos but none did them justice. I was quite happy to be here for two weeks and would’ve loved to be here longer, but if you are just playing tourist, 3-5 days is probably plenty (but keep a minimum of one day for a day trip to Uruguay).
BUDGET FOR 17 DAYS IN BUENOS AIRES:
Accommodation: $440 ($30 per night)
Food: $155
Groceries: $78
Activities: $380 (This includes $370 for two weeks of Spanish classes; $9.25 per hour of class)
Local Transportation: $40
Total: $109 (Daily average: $72)
Transportation to next destination: $58 ferry to Uruguay + $226 flight to Bolivia
Cities visited: Montevideo, Punta del Este, & Colonia
Pro Tips:
Most commonly, Uruguay is visited in conjunction with traveling to Buenos Aires. It’s very easy to get between one another via flight, bus or usually by ferry (which is what I did).
No visa needed for US citizens (2024). I went through immigration in Buenos Aires as I boarded the ferry (out of Argentina & stamped into Uruguay) so once I arrived in Colonia there was no immigration to be done 🙂
You can even do just a day trip to Uruguay (to Colonia) from Buenos Aires, but I would recommend giving the country at least a few days. I was quite happy to spend a week here!
The best way to get cash is by exchanging dollars or euros (not by using an ATM). This will give you the best exchange rate.
Uruguay is known for its stunning beaches, but I went in the shoulder season (Spring) so I enjoyed fairly quiet version of the country. It also meant I could book my accommodation as I went (rather than booking ahead). It was nice to be able to get to a place and feel it out before committing to timeframe of how long I’d stay.
Uruguay is one of the safest & most stable countries in South America – I absolutely loved it and not a single concern of safety. What a treat!
However, it is definitely not the cheapest country, in fact it’s probably one of the most expensive. The good news is that I still found it fairly reasonable so don’t let the cost put you off it.
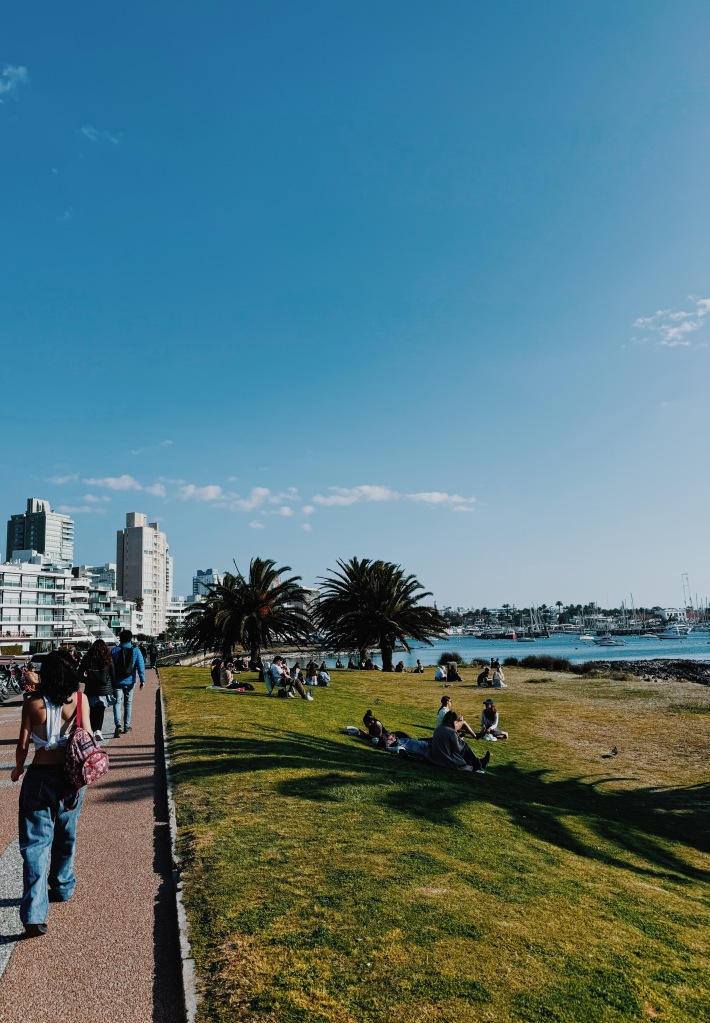
CITY: Montevideo
HOW LONG: 3 NIGHTS
ACCOMMODATION:
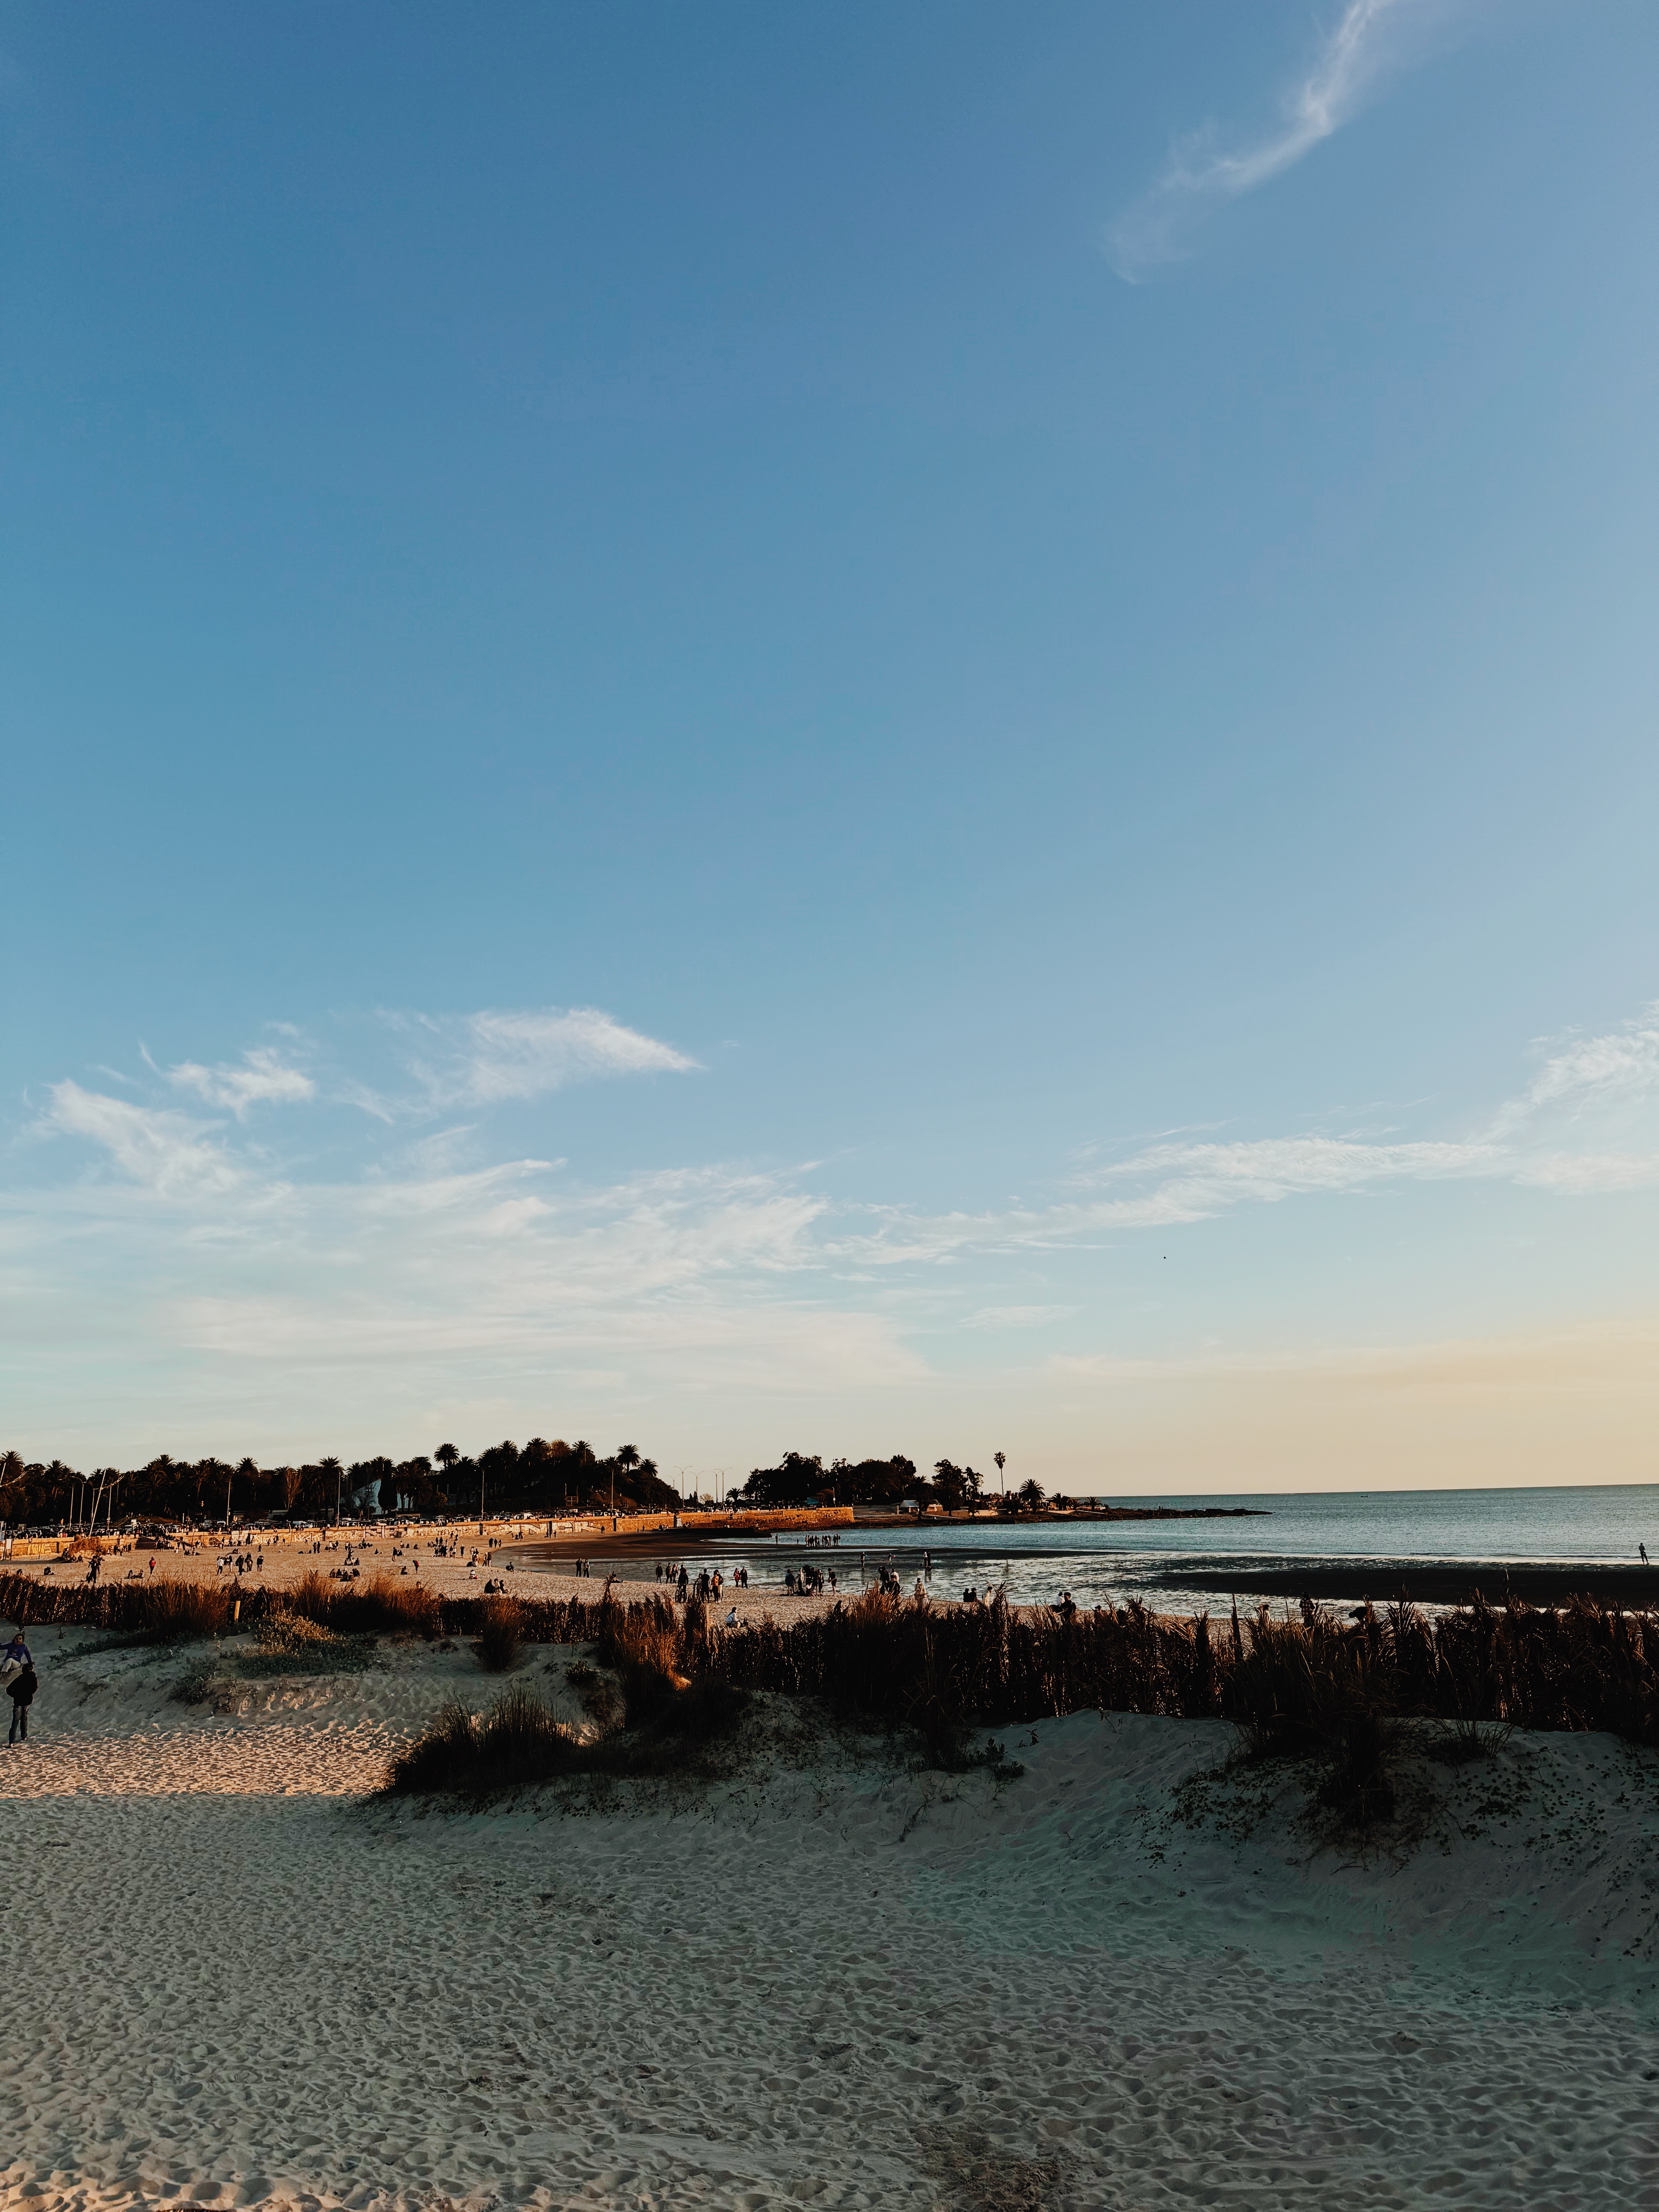
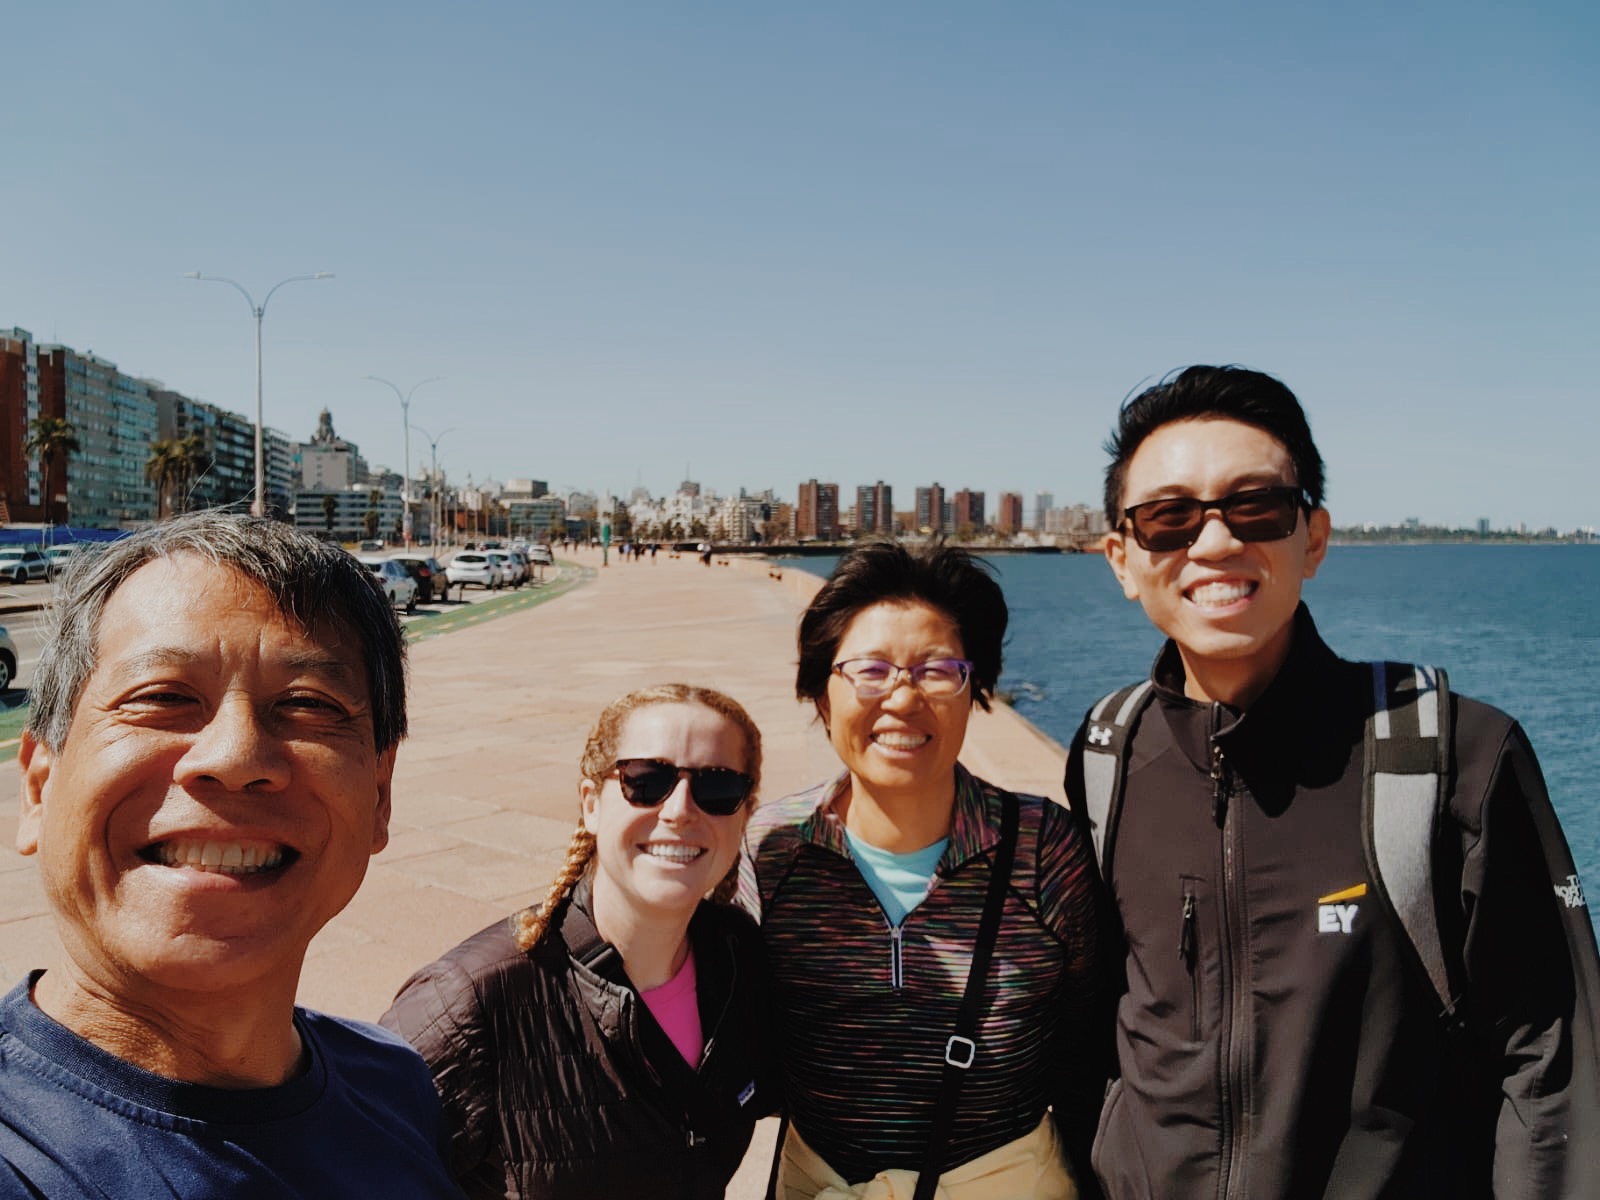
I stayed at a very cozy hostel a little out of the historic part of the capital called Mediomundo. I loved its location as it was safe, quiet, but there were tons of restaurants. Also it was 5 min away from the water front promenade that goes on for 20km+ so I went for a run each morning!! Such a dream. There were curtains on the beds + a personal light/socket. The breakfast offered was pretty cheap & included eggs. Overall I would highly recommend!
WHERE TO EAT:
I ate breakfast at the hostel of 2 days, but tried Americo Cafe for some delicious French Toast.
With the family I met on the walking tour, we also found a cafe so they could try Mate, a traditional South American caffeine-rich infused herbal drink. It is such an important drink for everyone here. Everyday when I went on my sunset walks, everyone was carrying around a little holder for their thermos of hot water + cup for their mate. It was very cool to see.
Mercado Ferrando was a fun food market spot with lots of great options for dinner! I had a delicious burger and some gelato for dessert. I just love a food hall 🙂
WHAT TO DO:
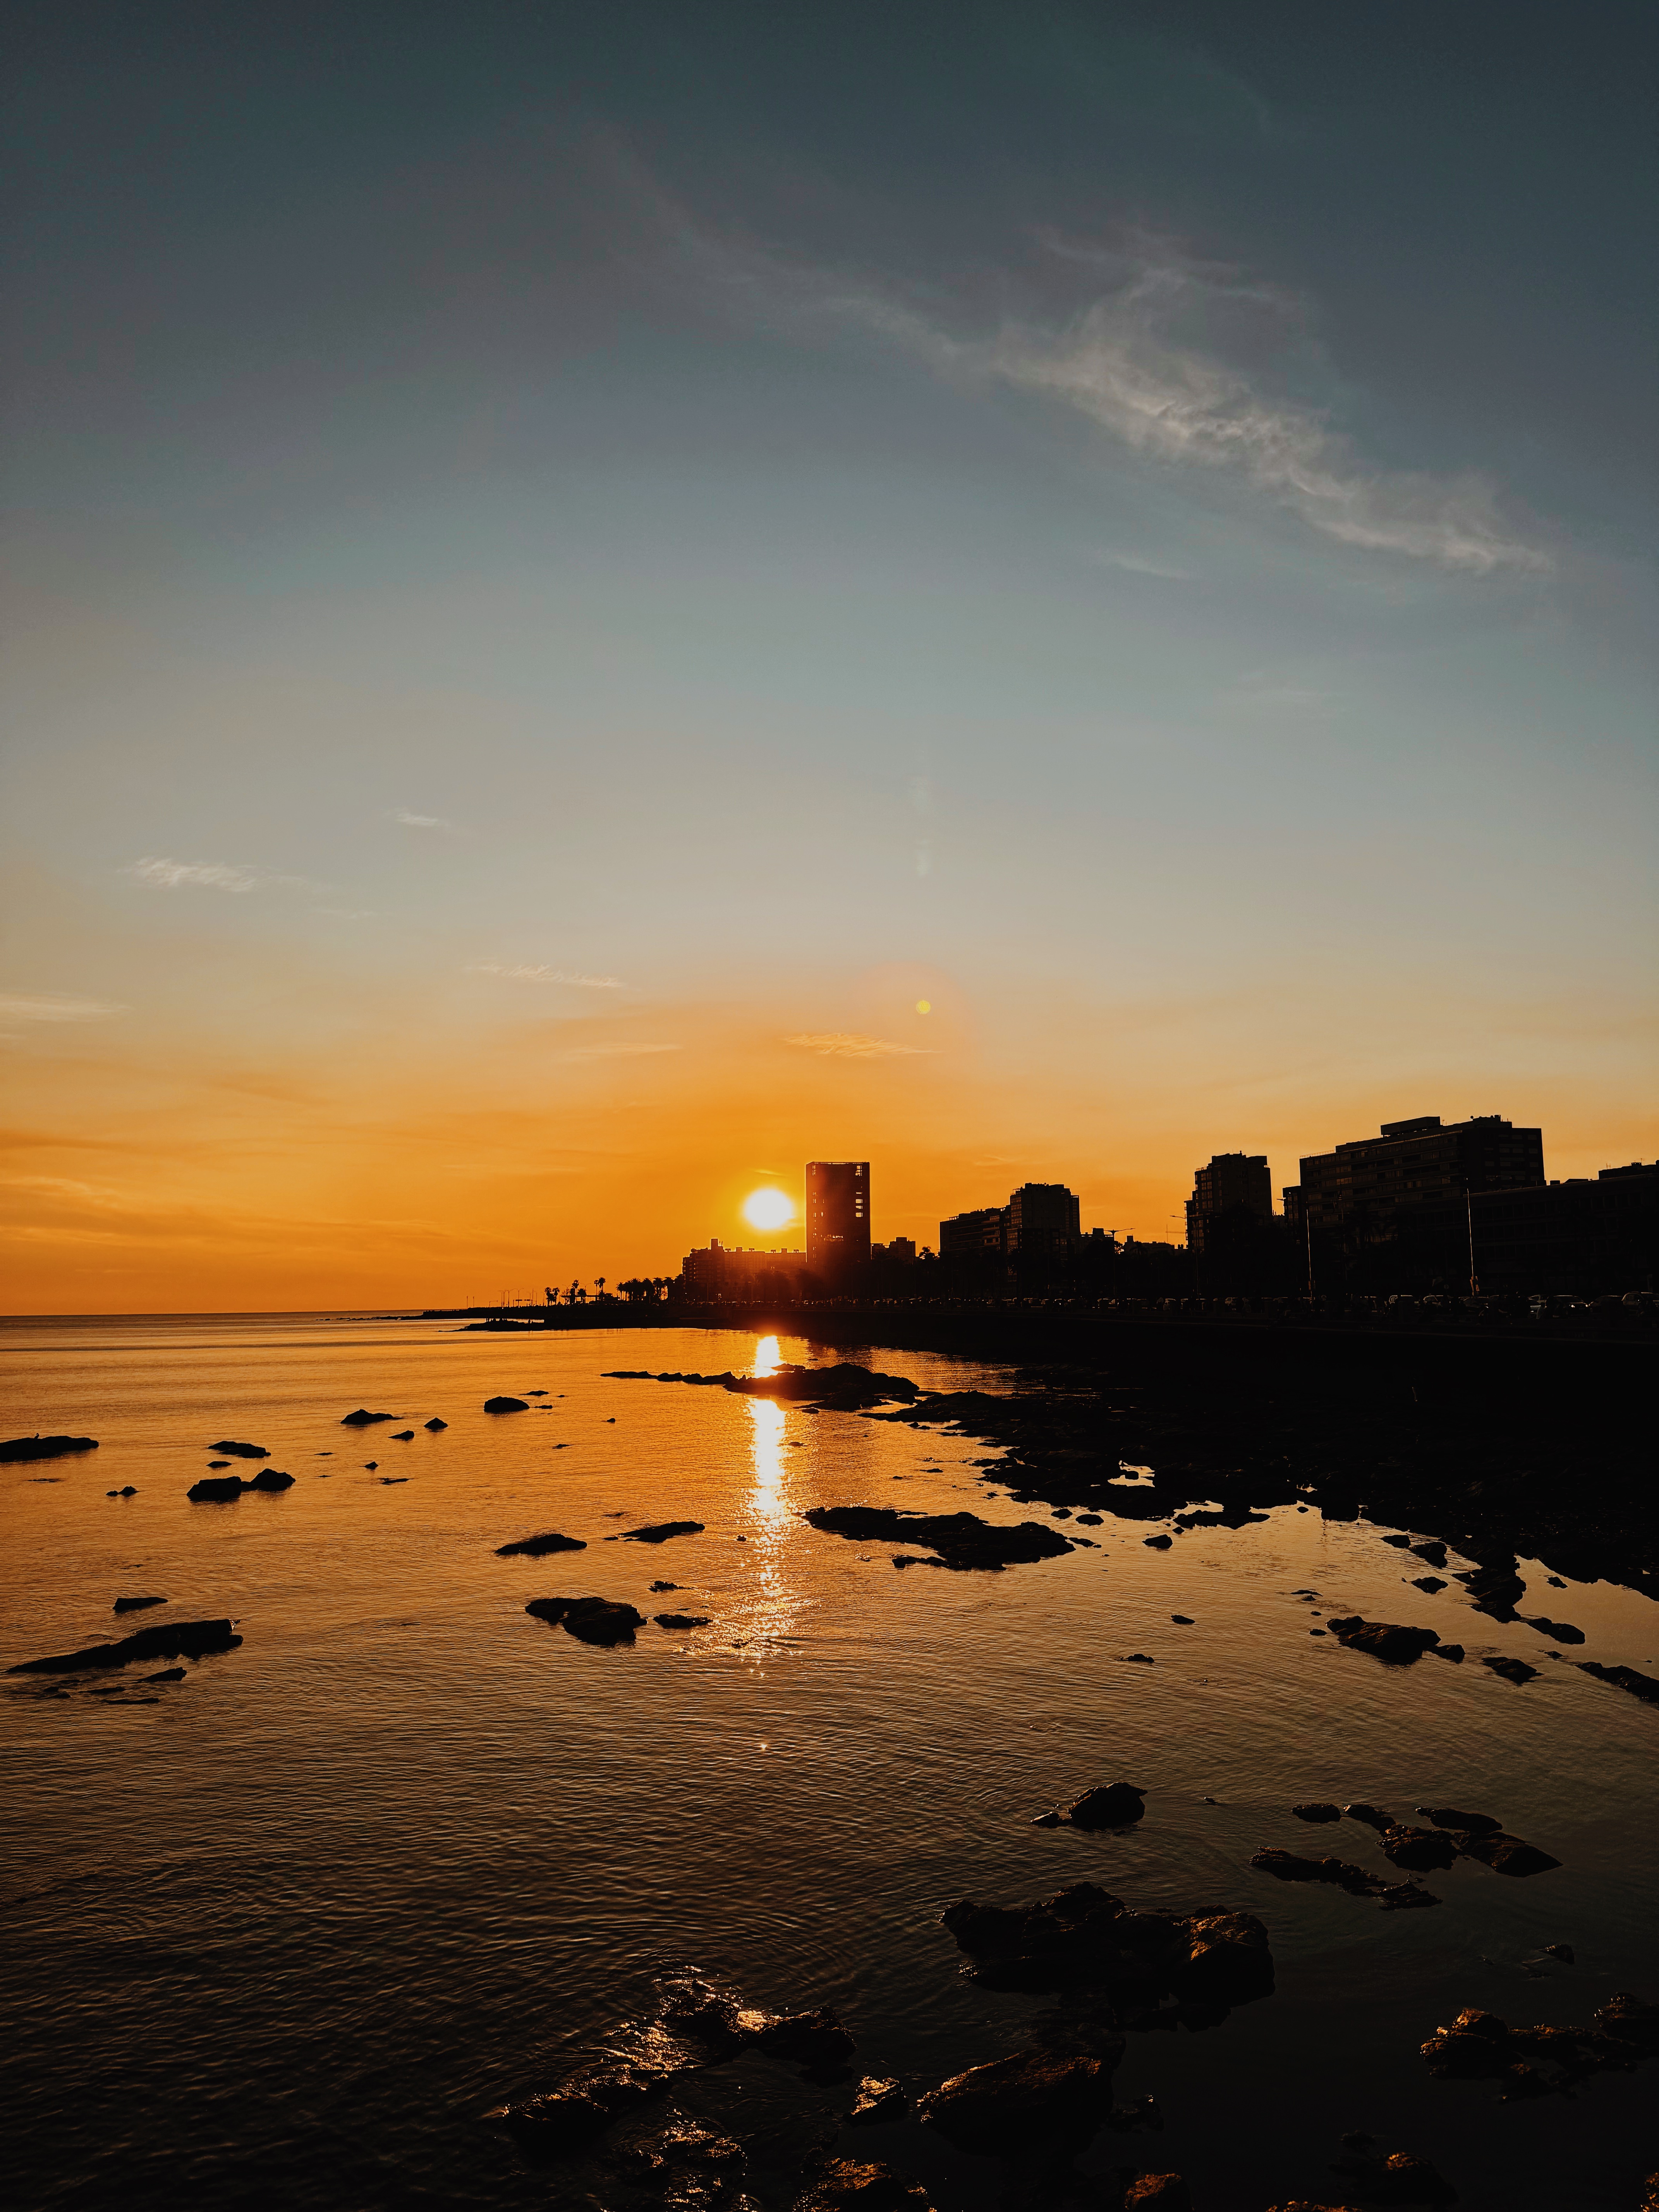
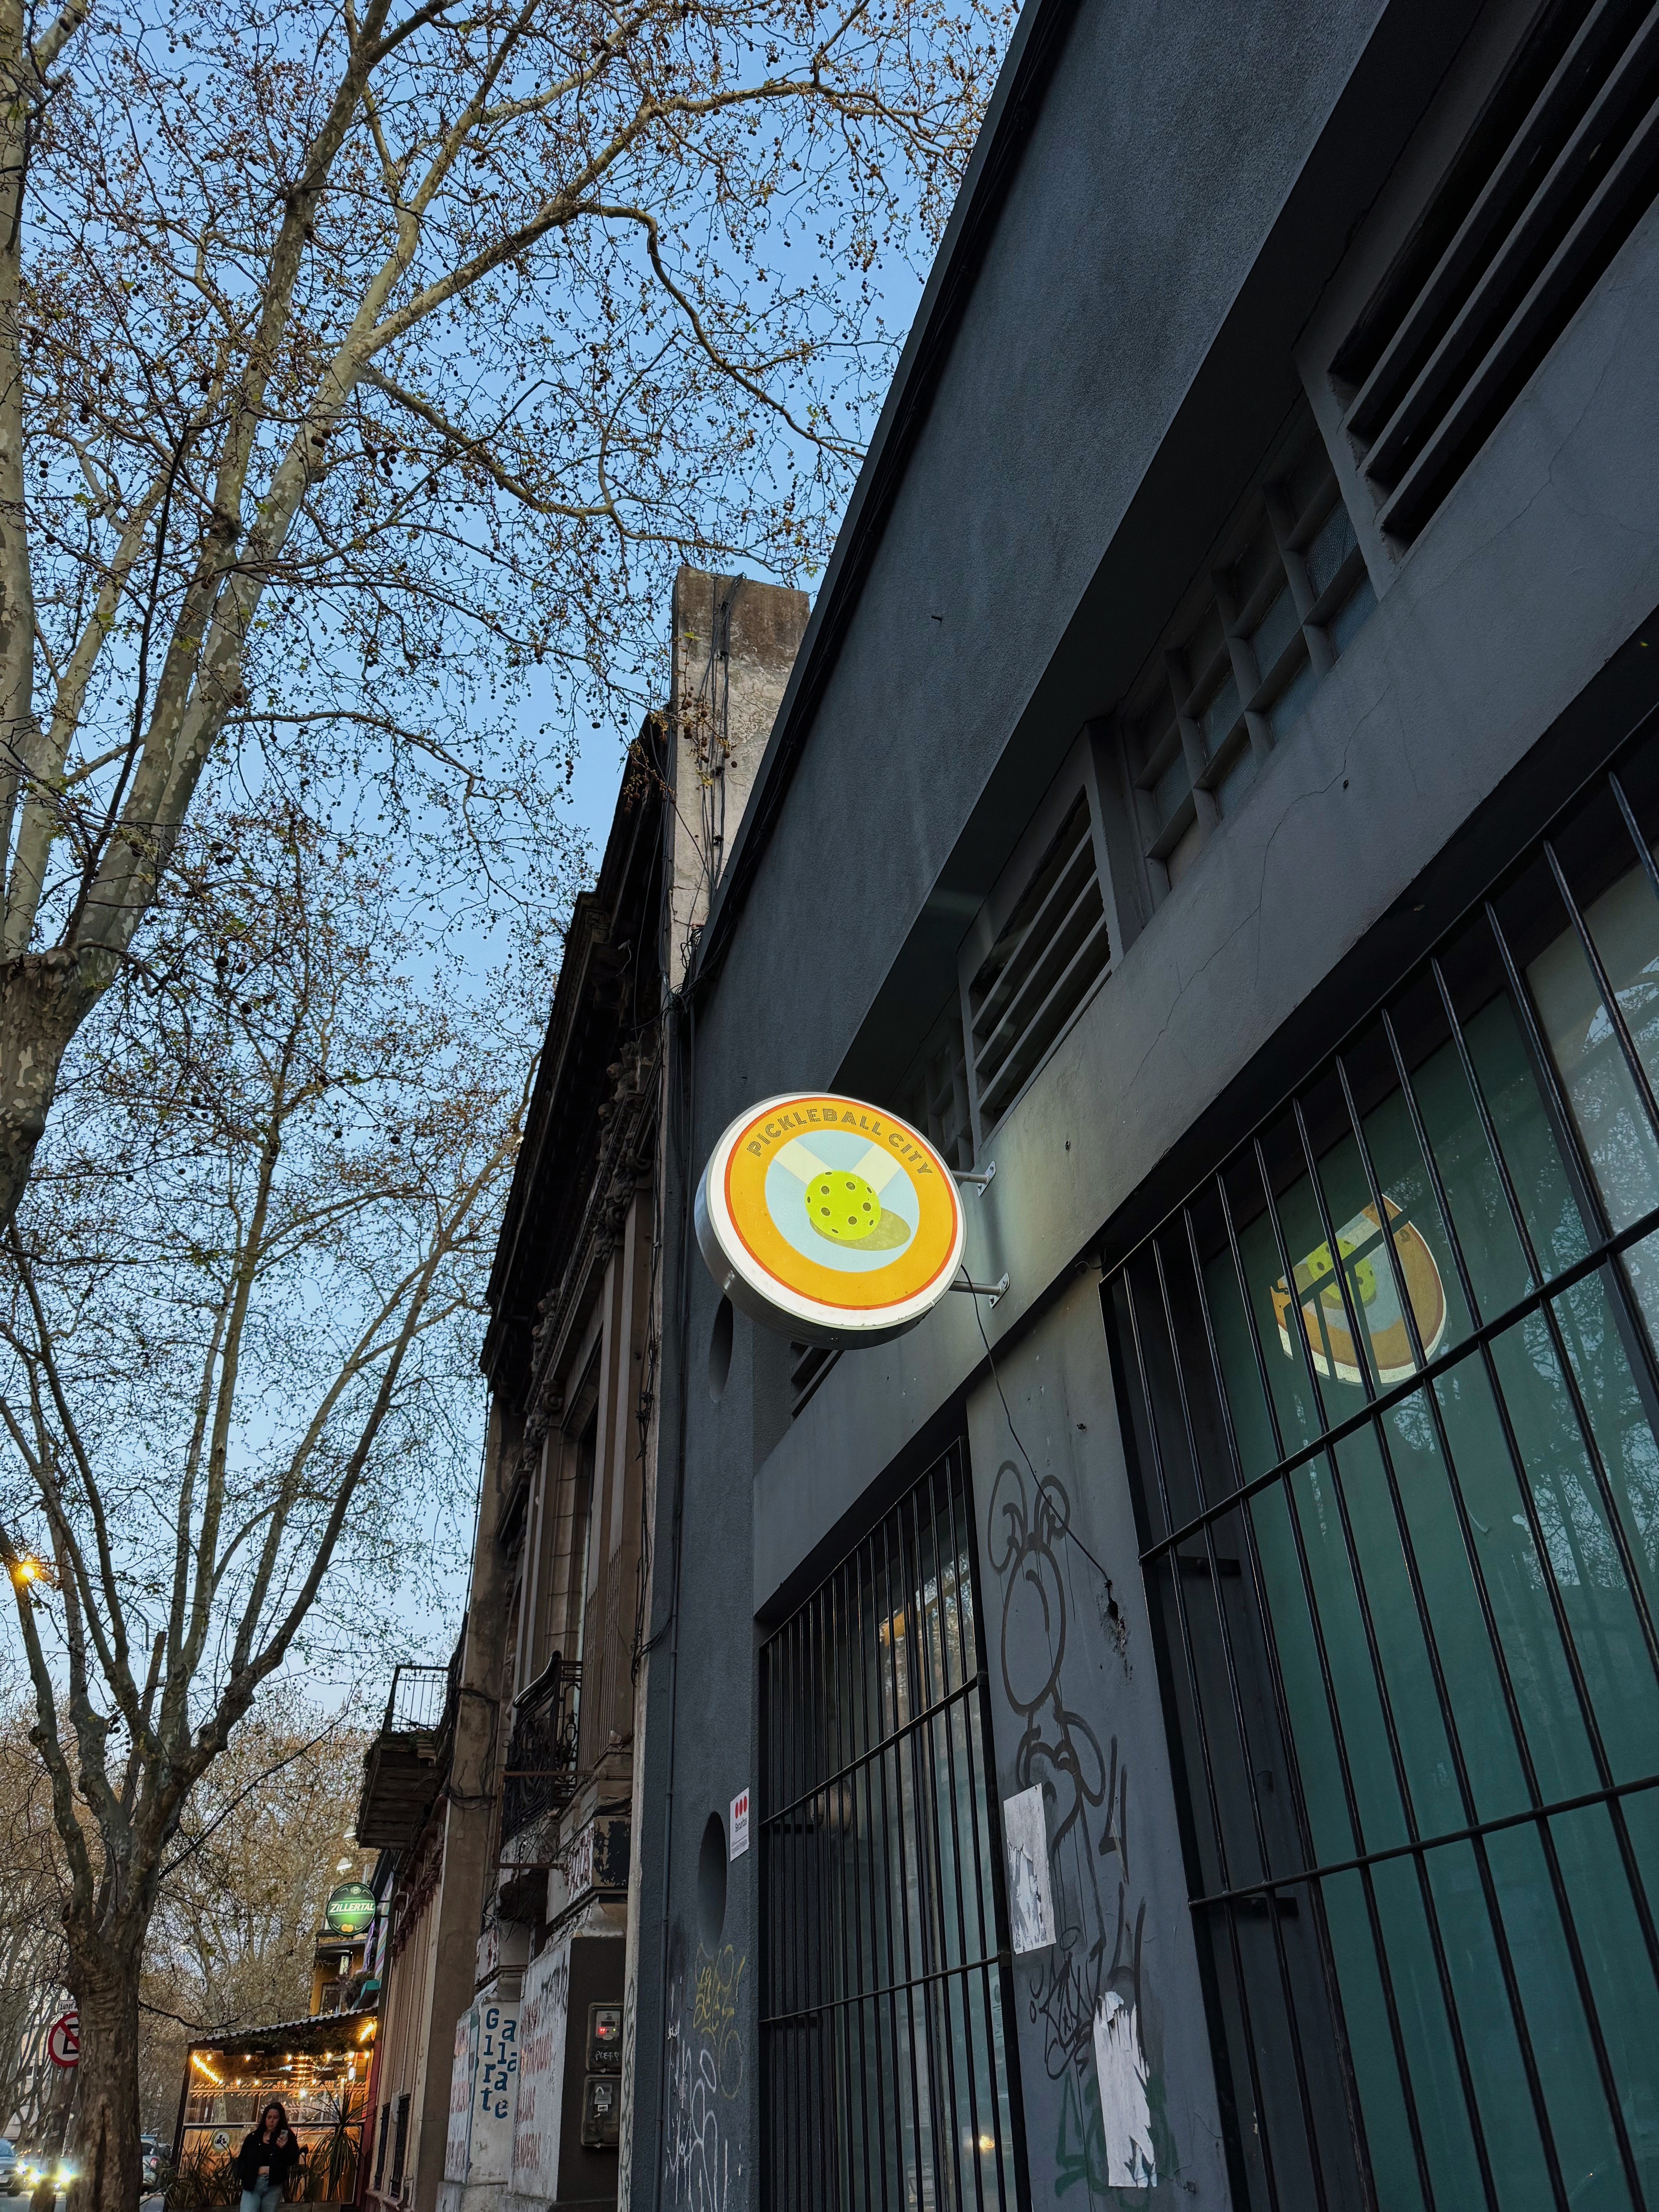
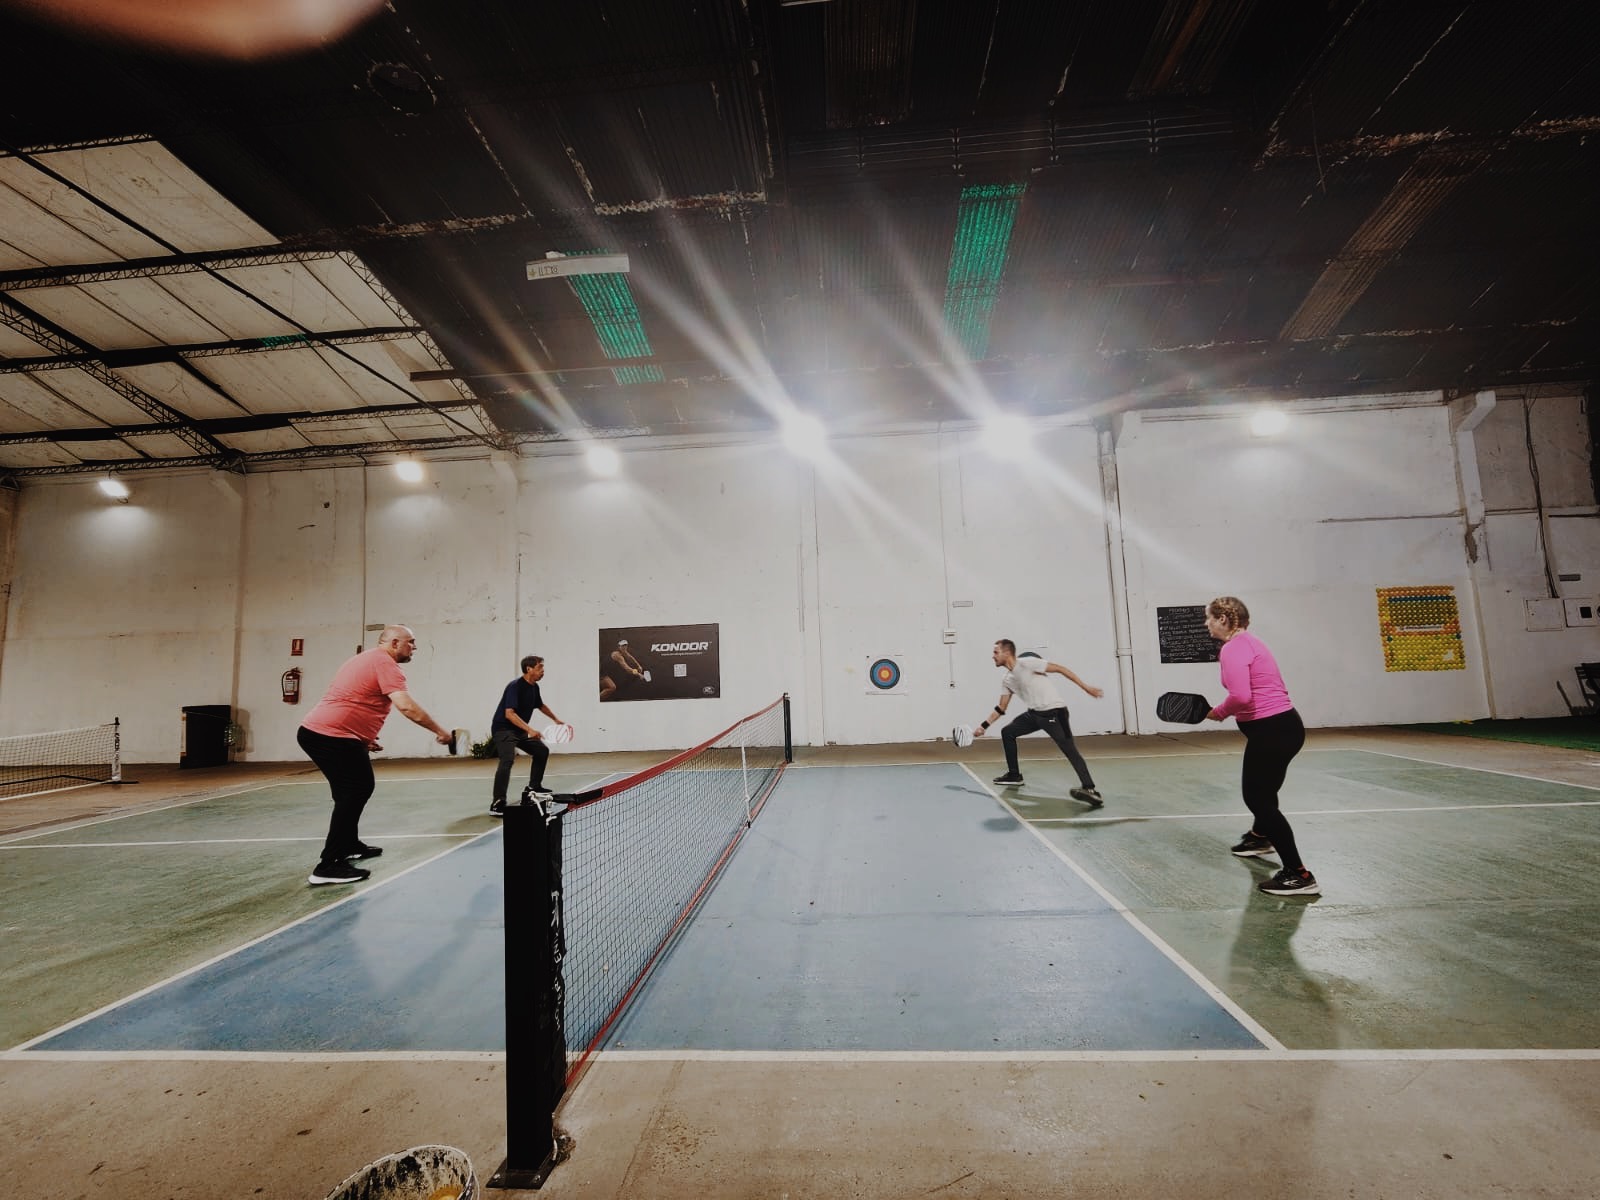
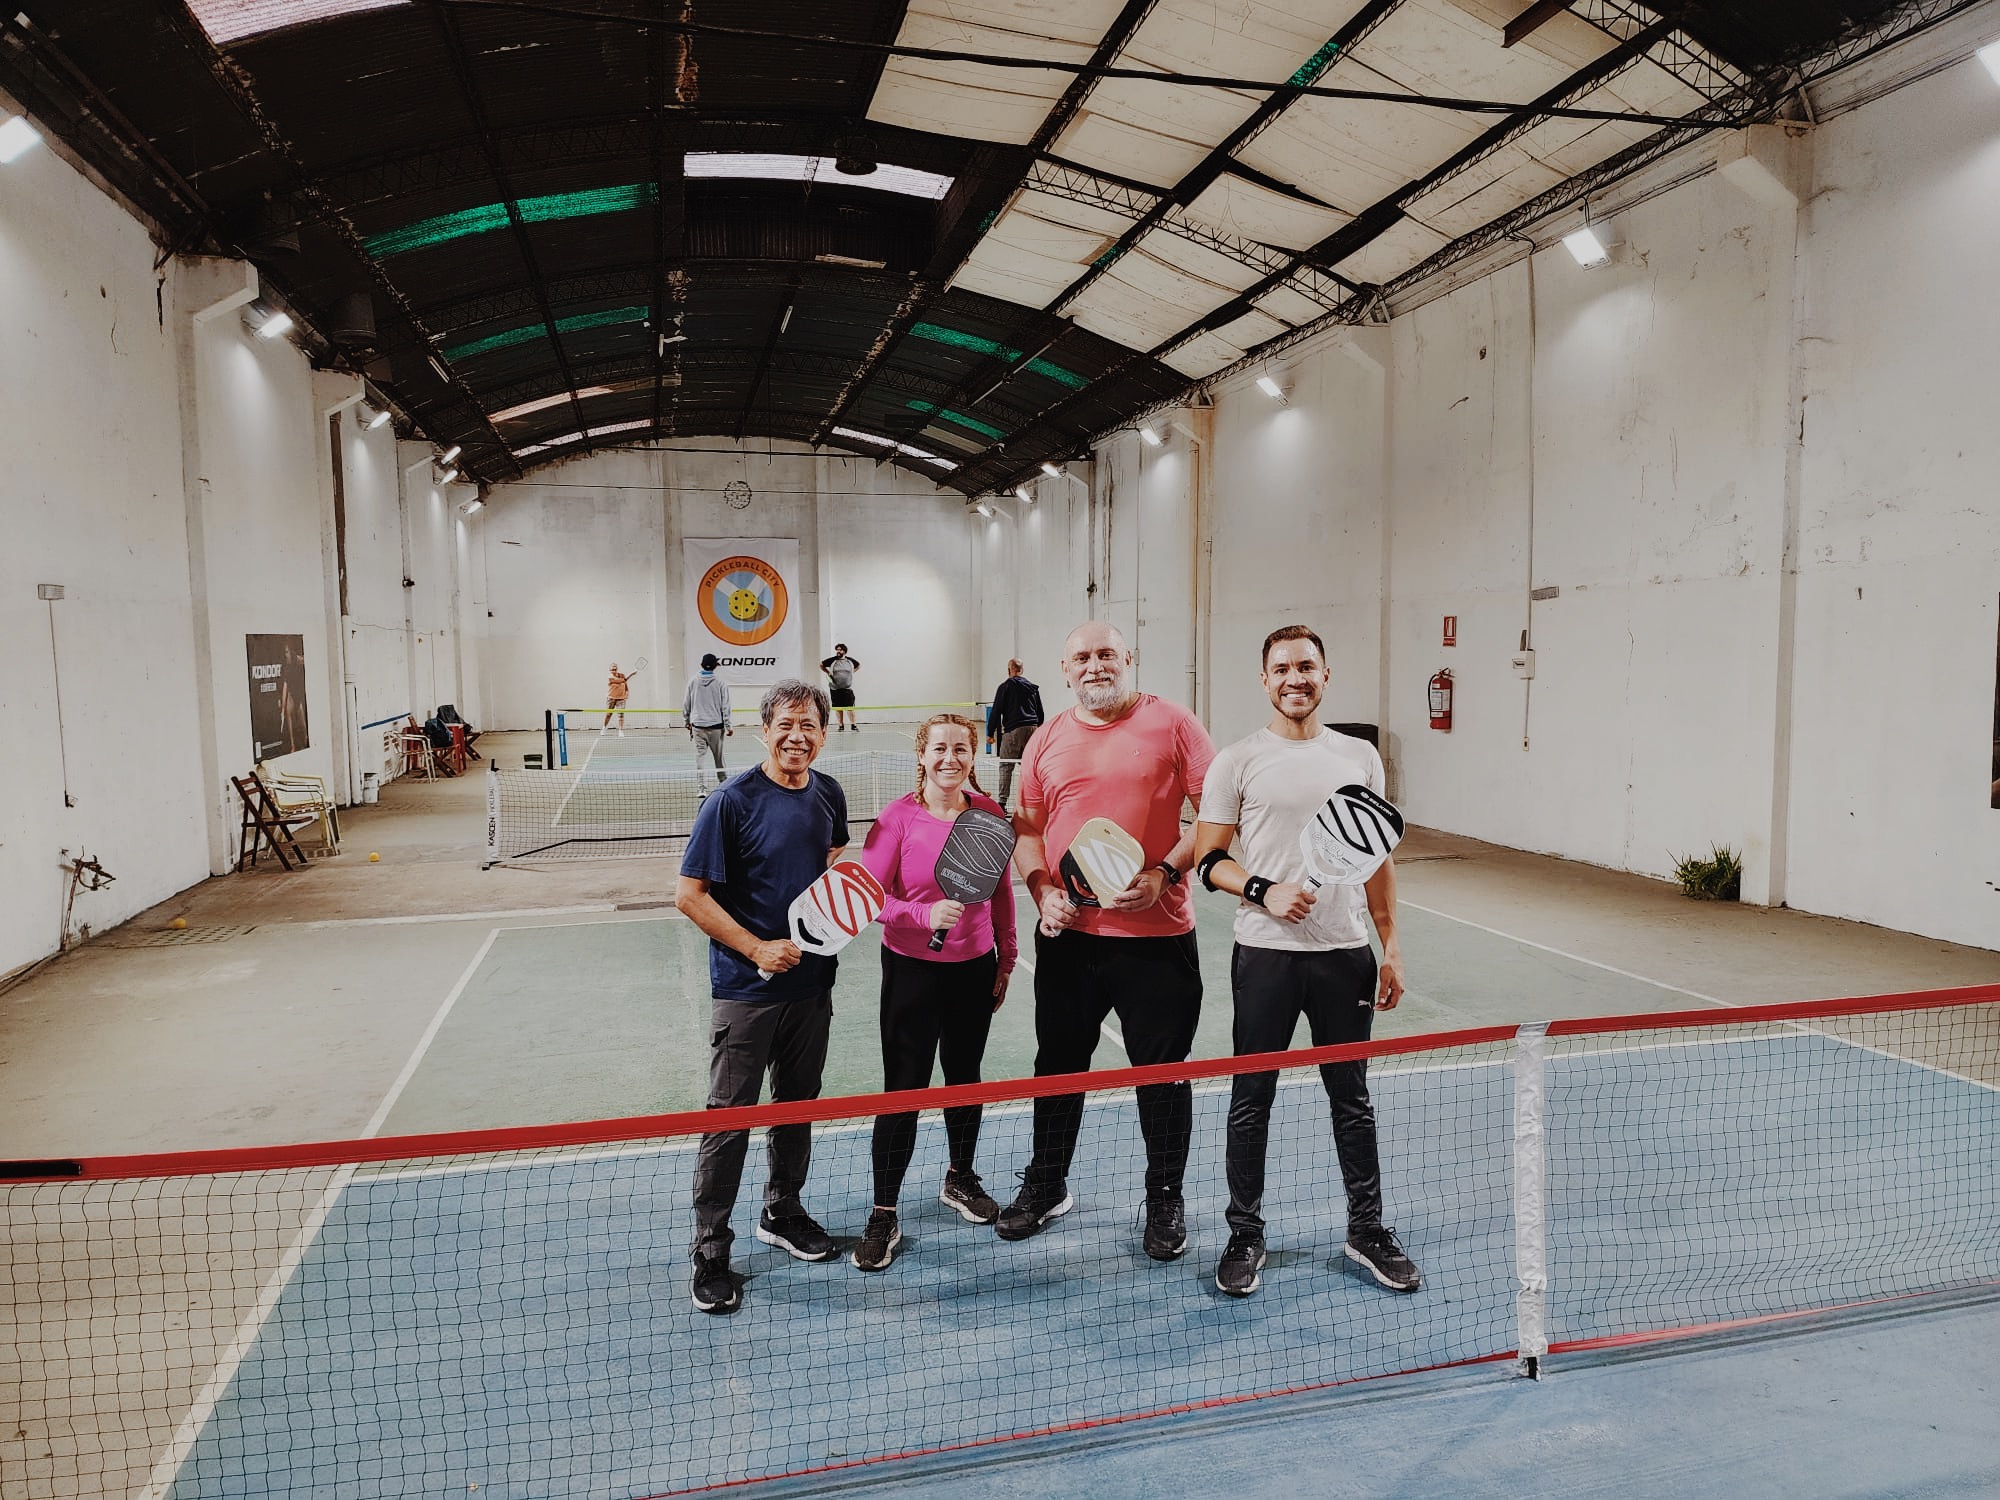
I loved just walking along the promenade and people watching. As per usual, I also went on a walking tour where I met a lovely family from California. We ended up spending the rest of the day together, including heading a pickleball spot I found as I walked around. The dad was thrilled to get out on the court on his vacation. It’s very difficult to find pickleball outside of the US so it was so much fun to play in Uruguay. In fact these courts (having been built 8 months prior) are the first in the capital city!
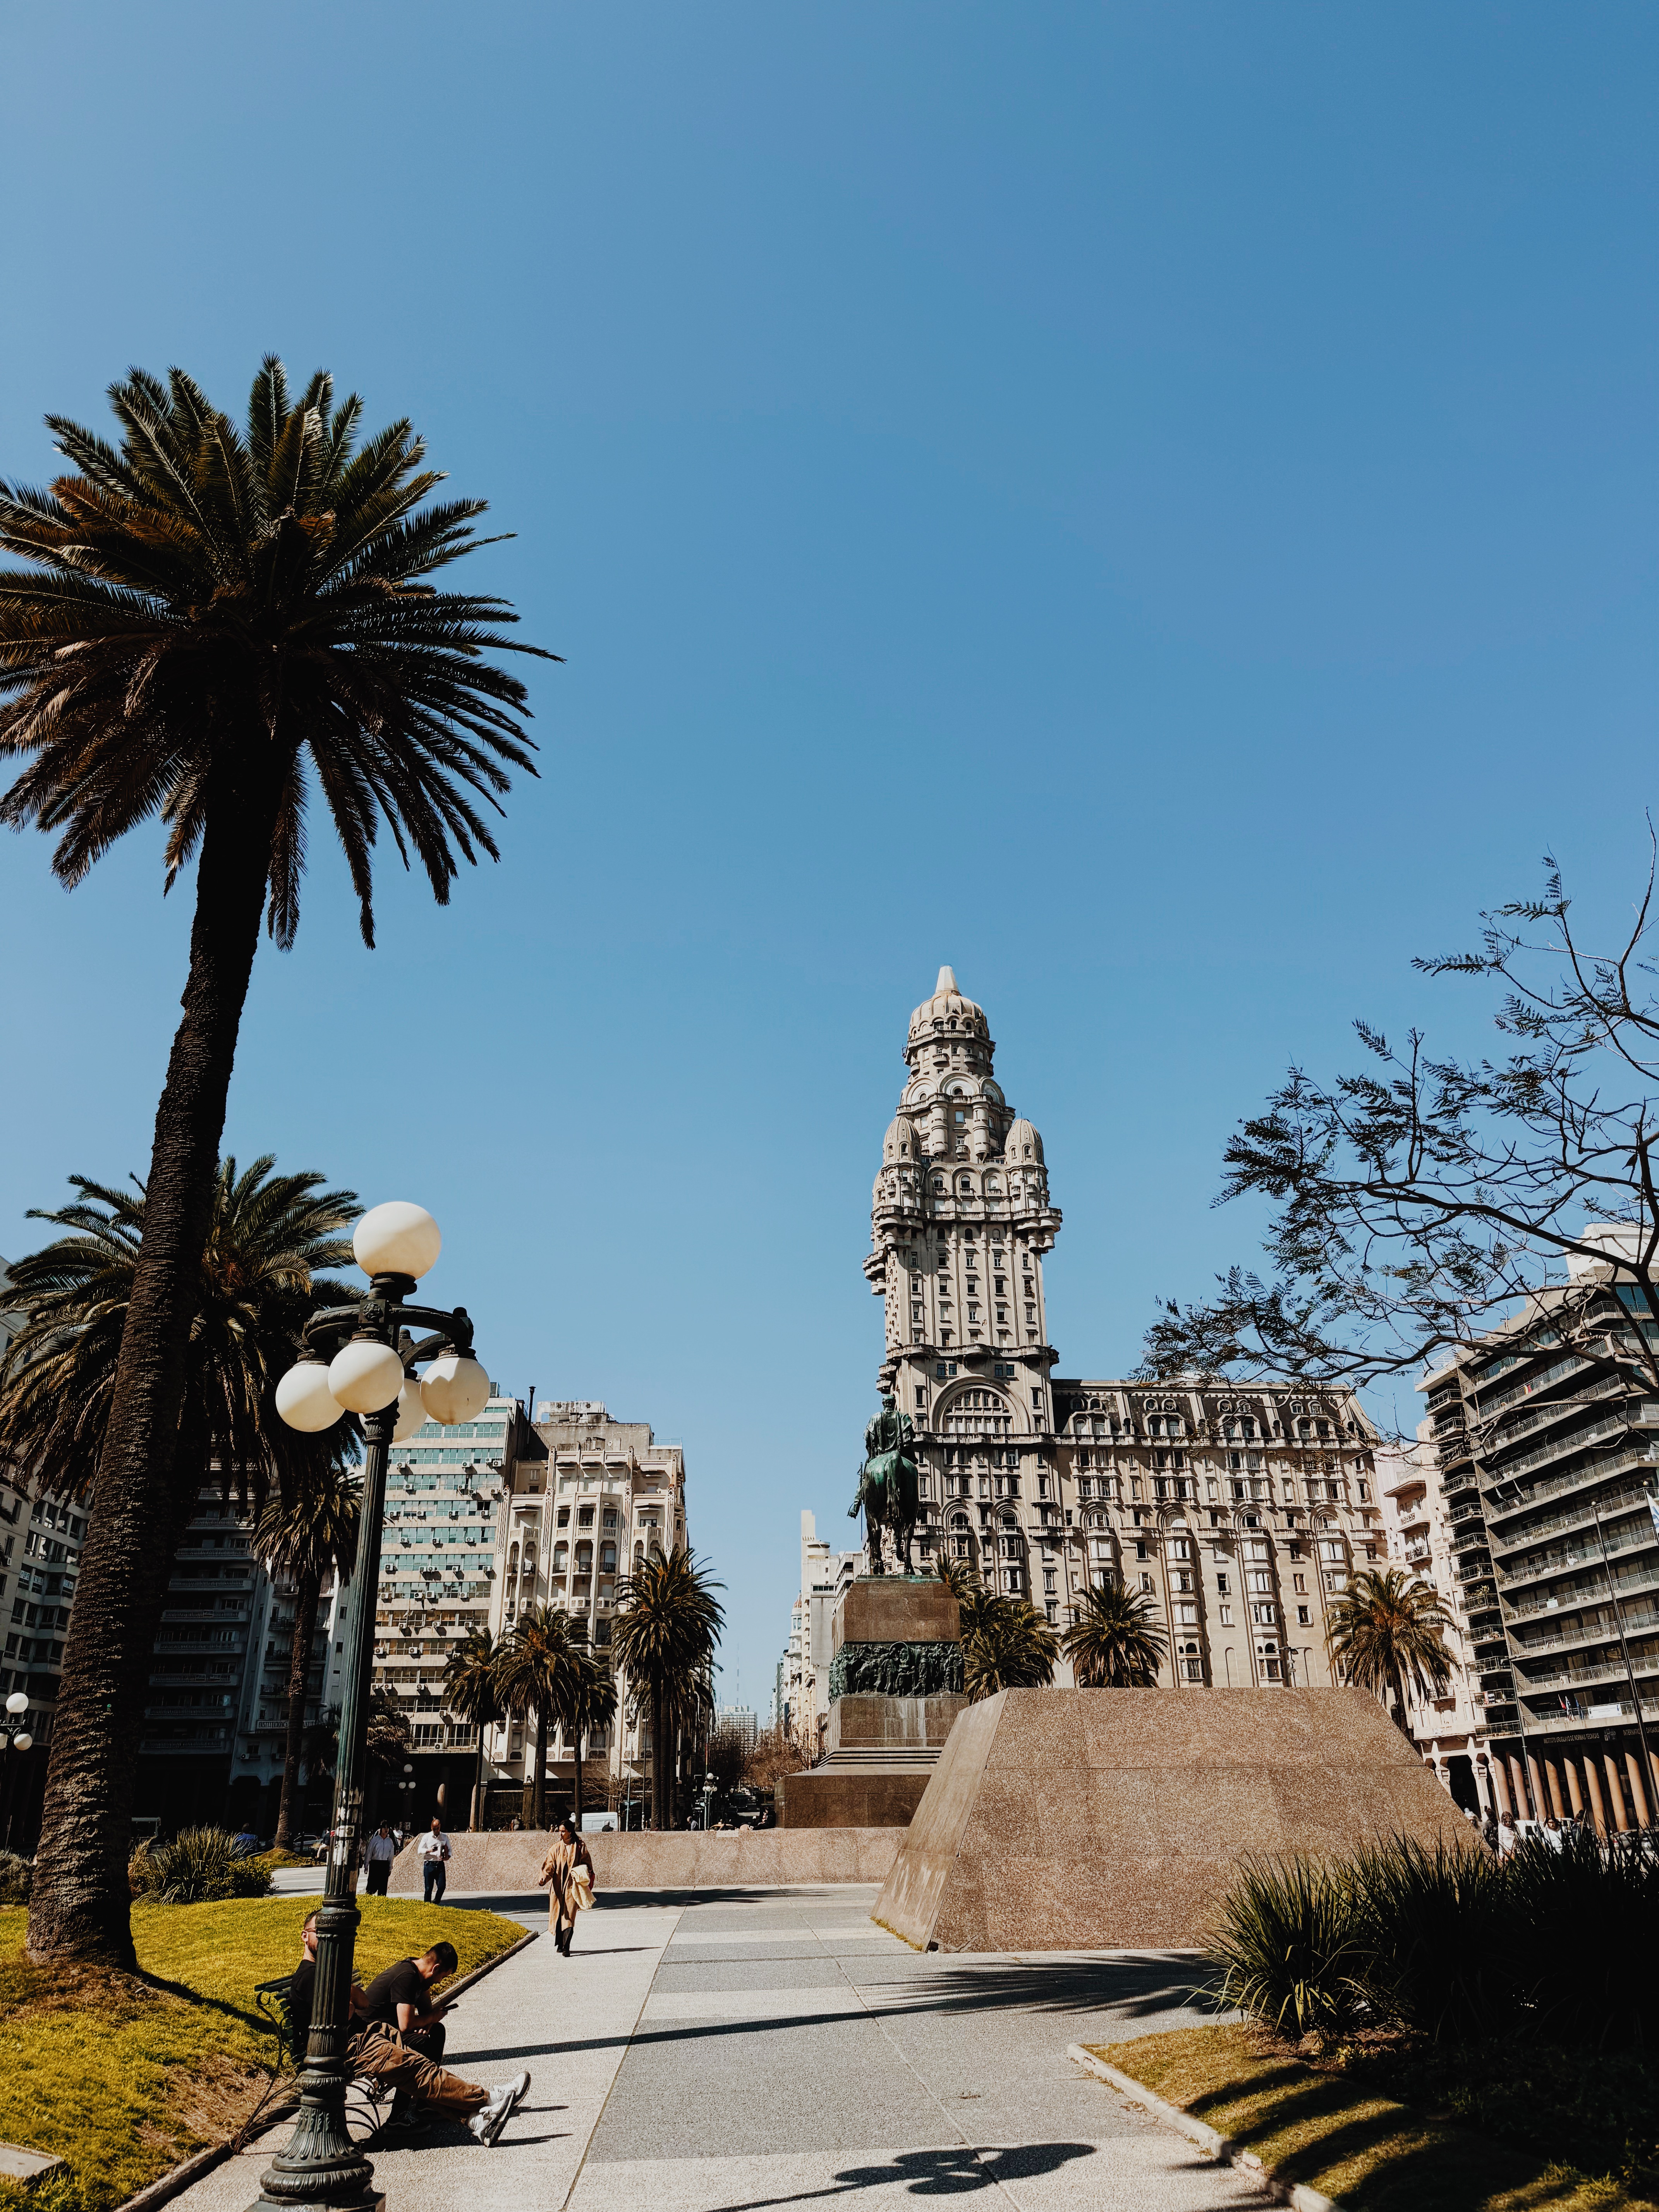
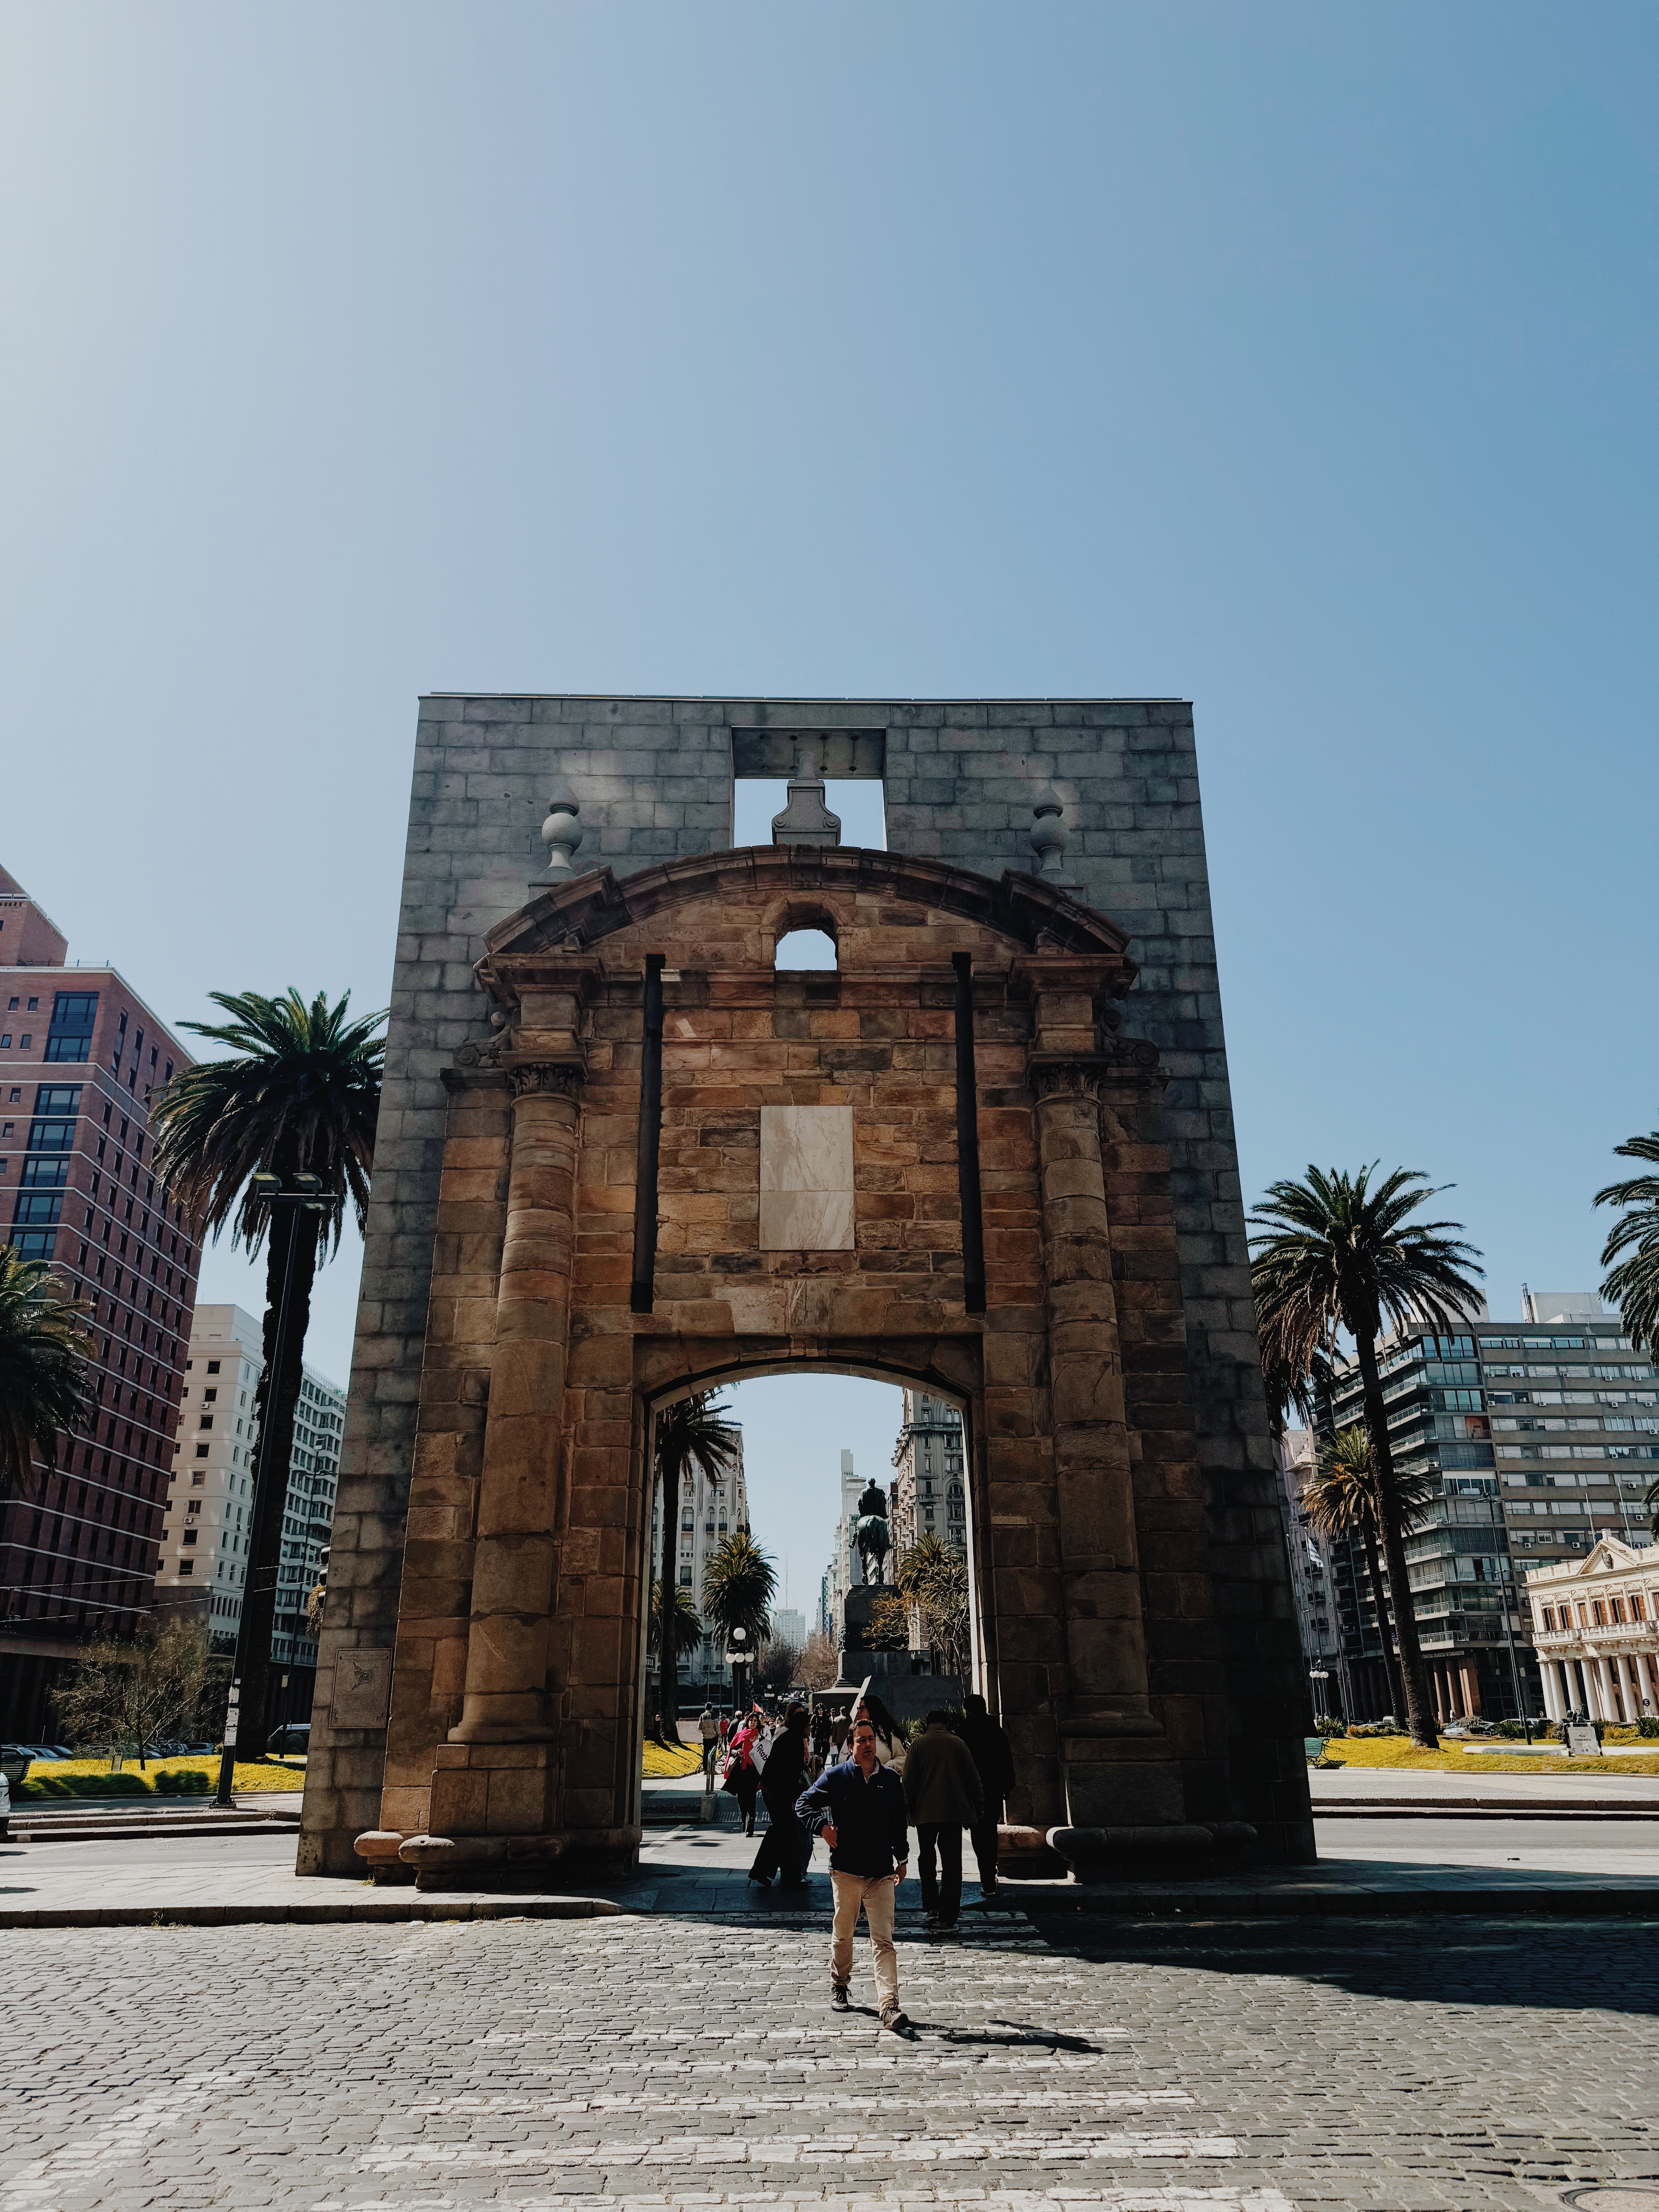
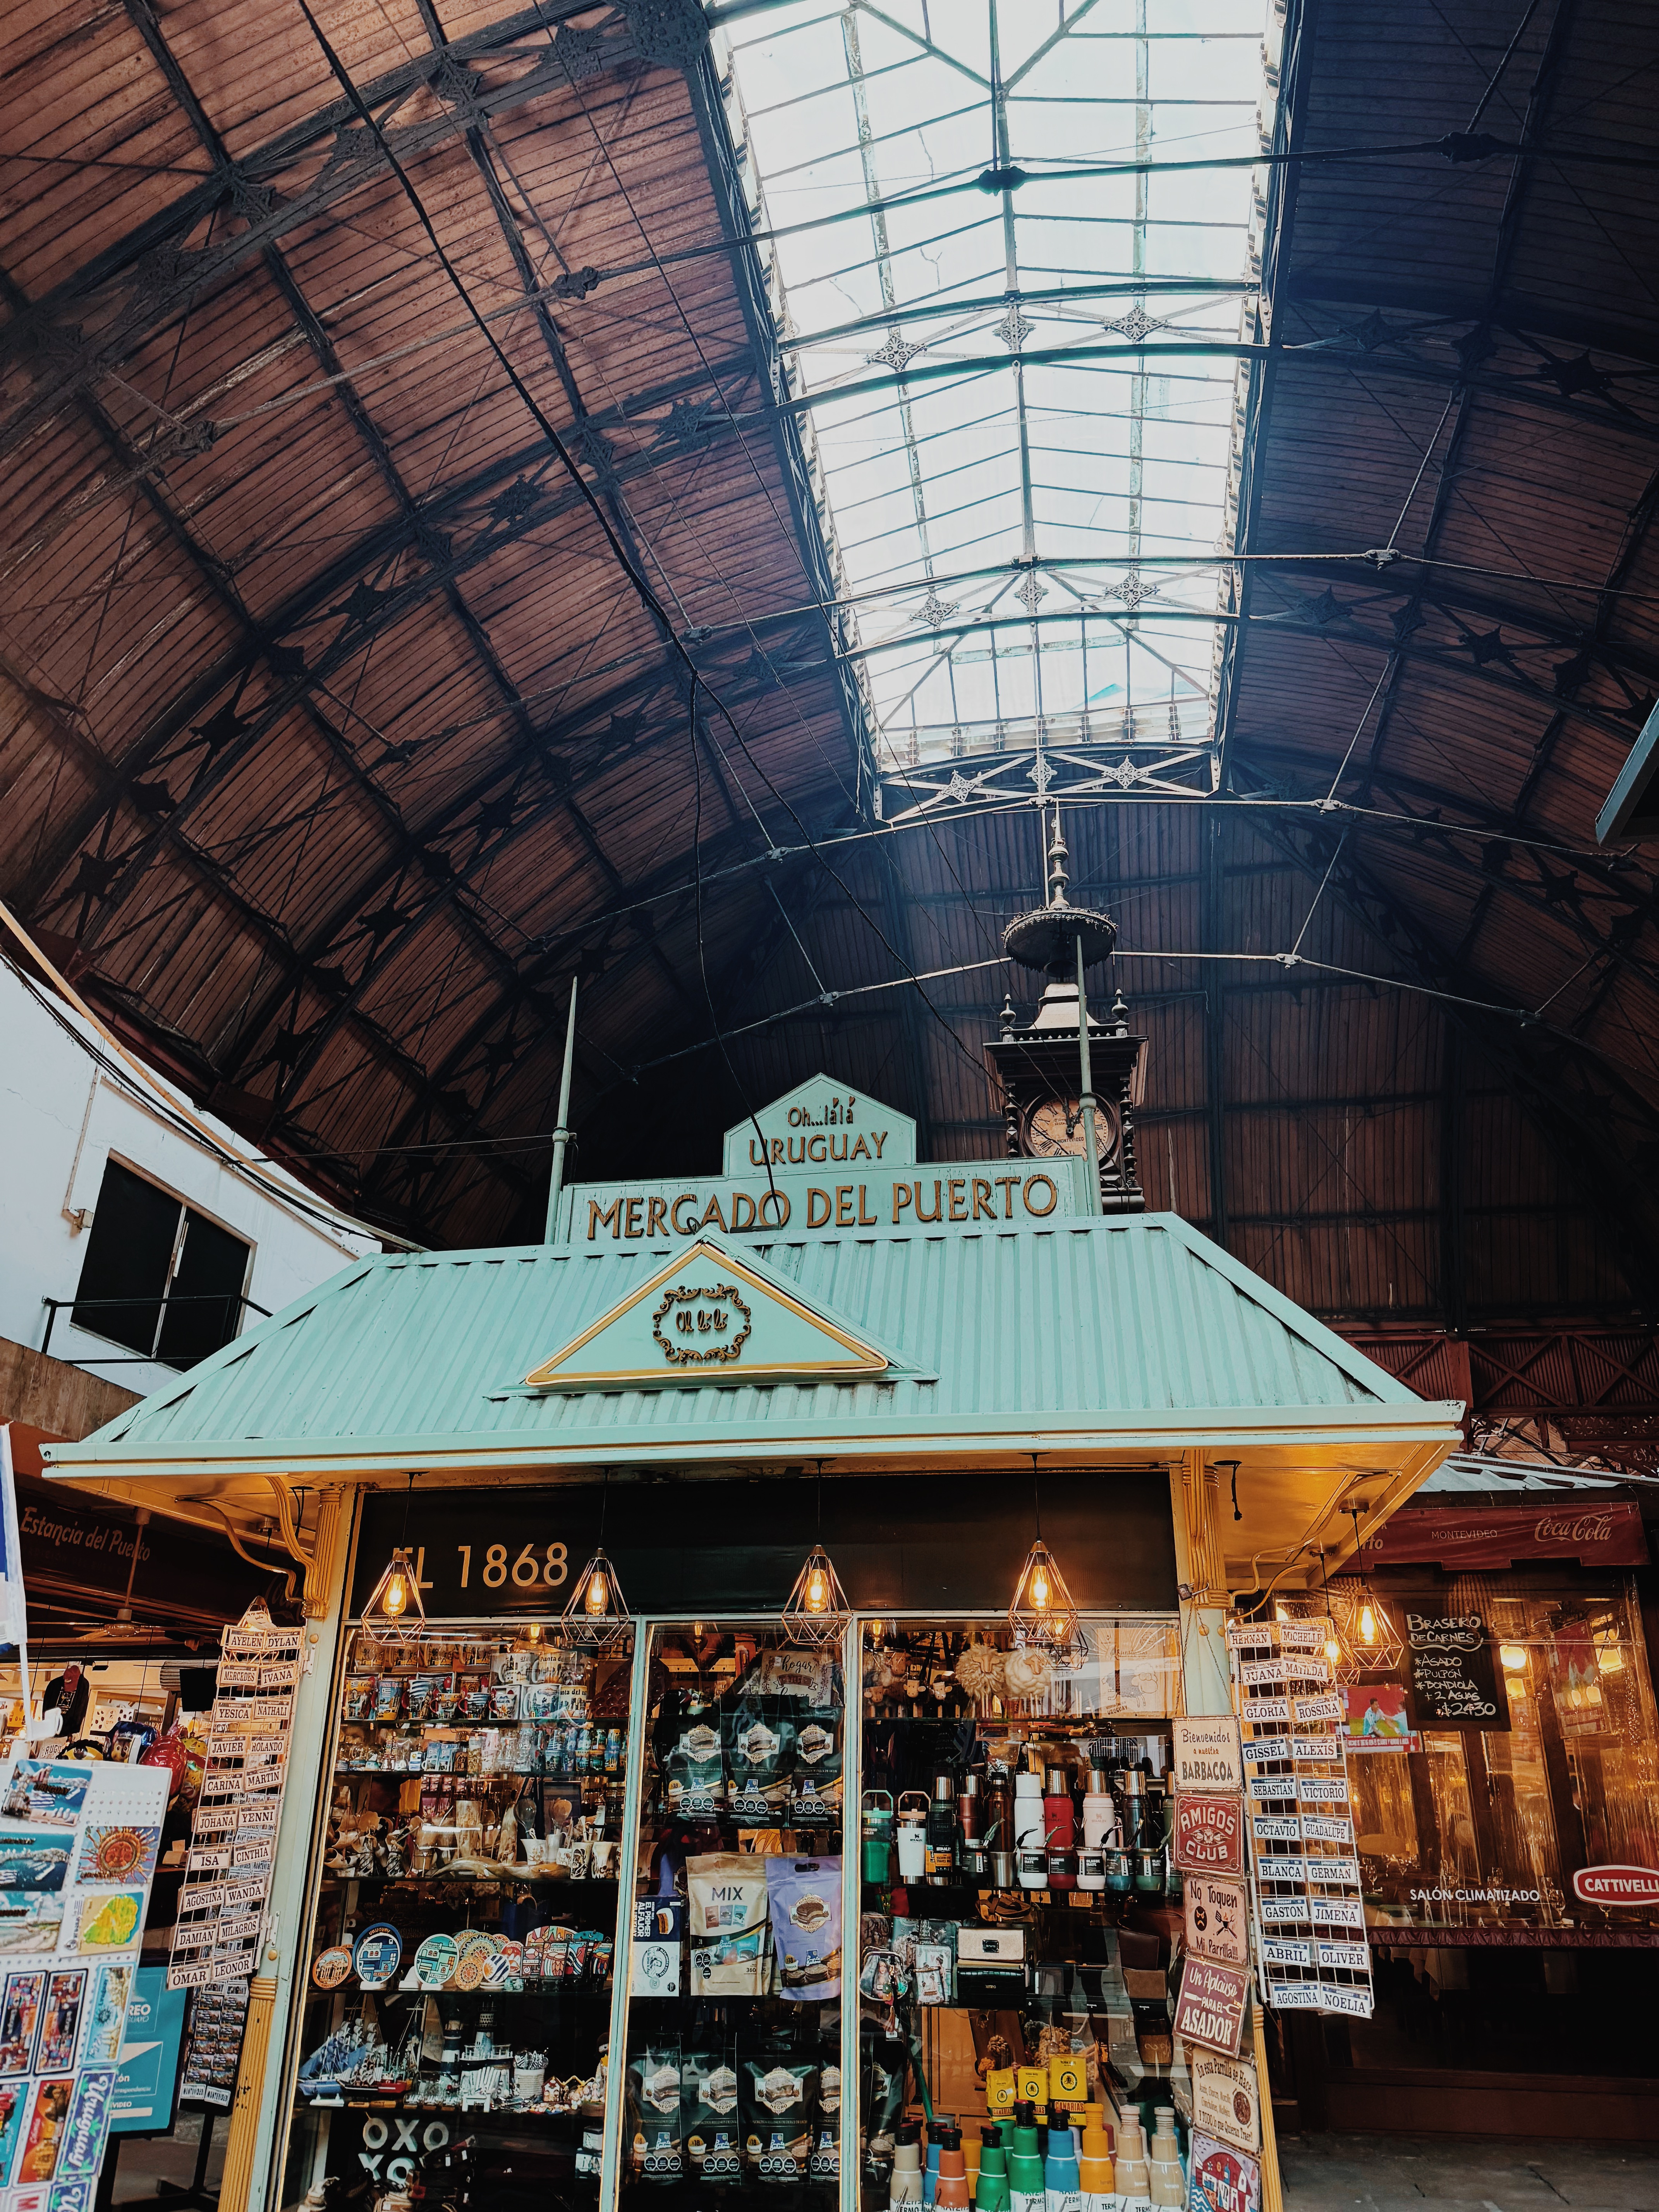
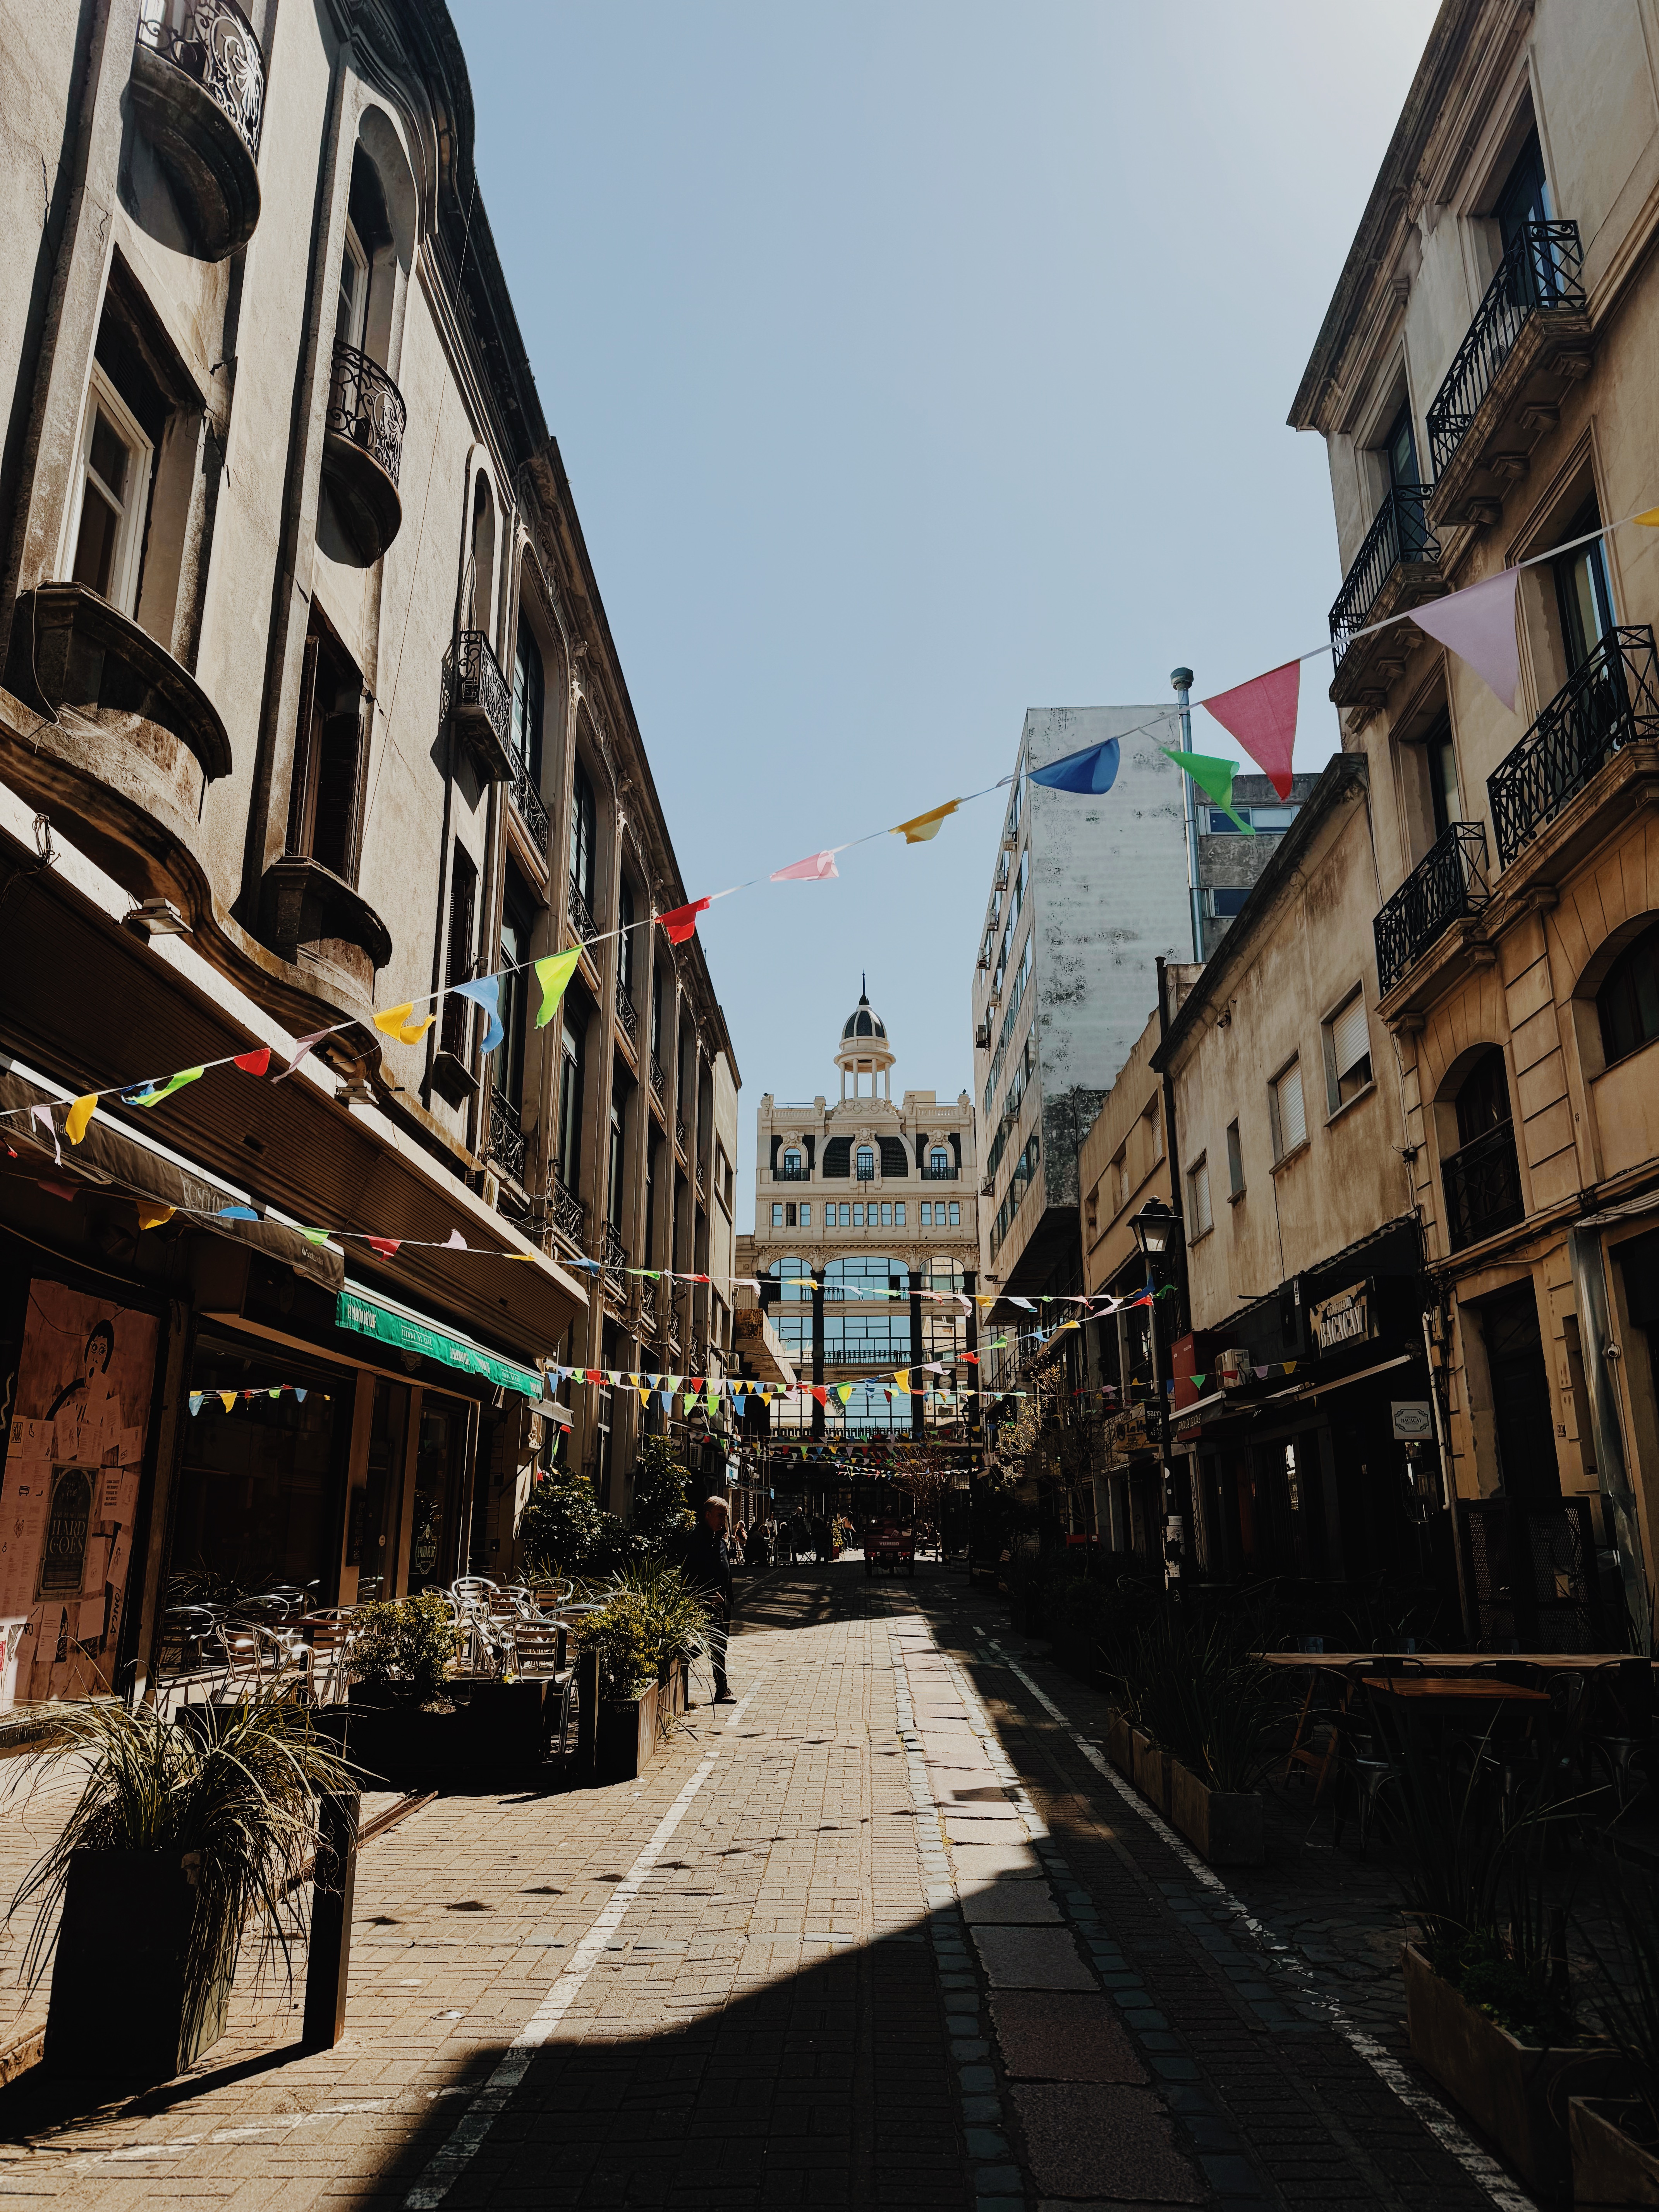
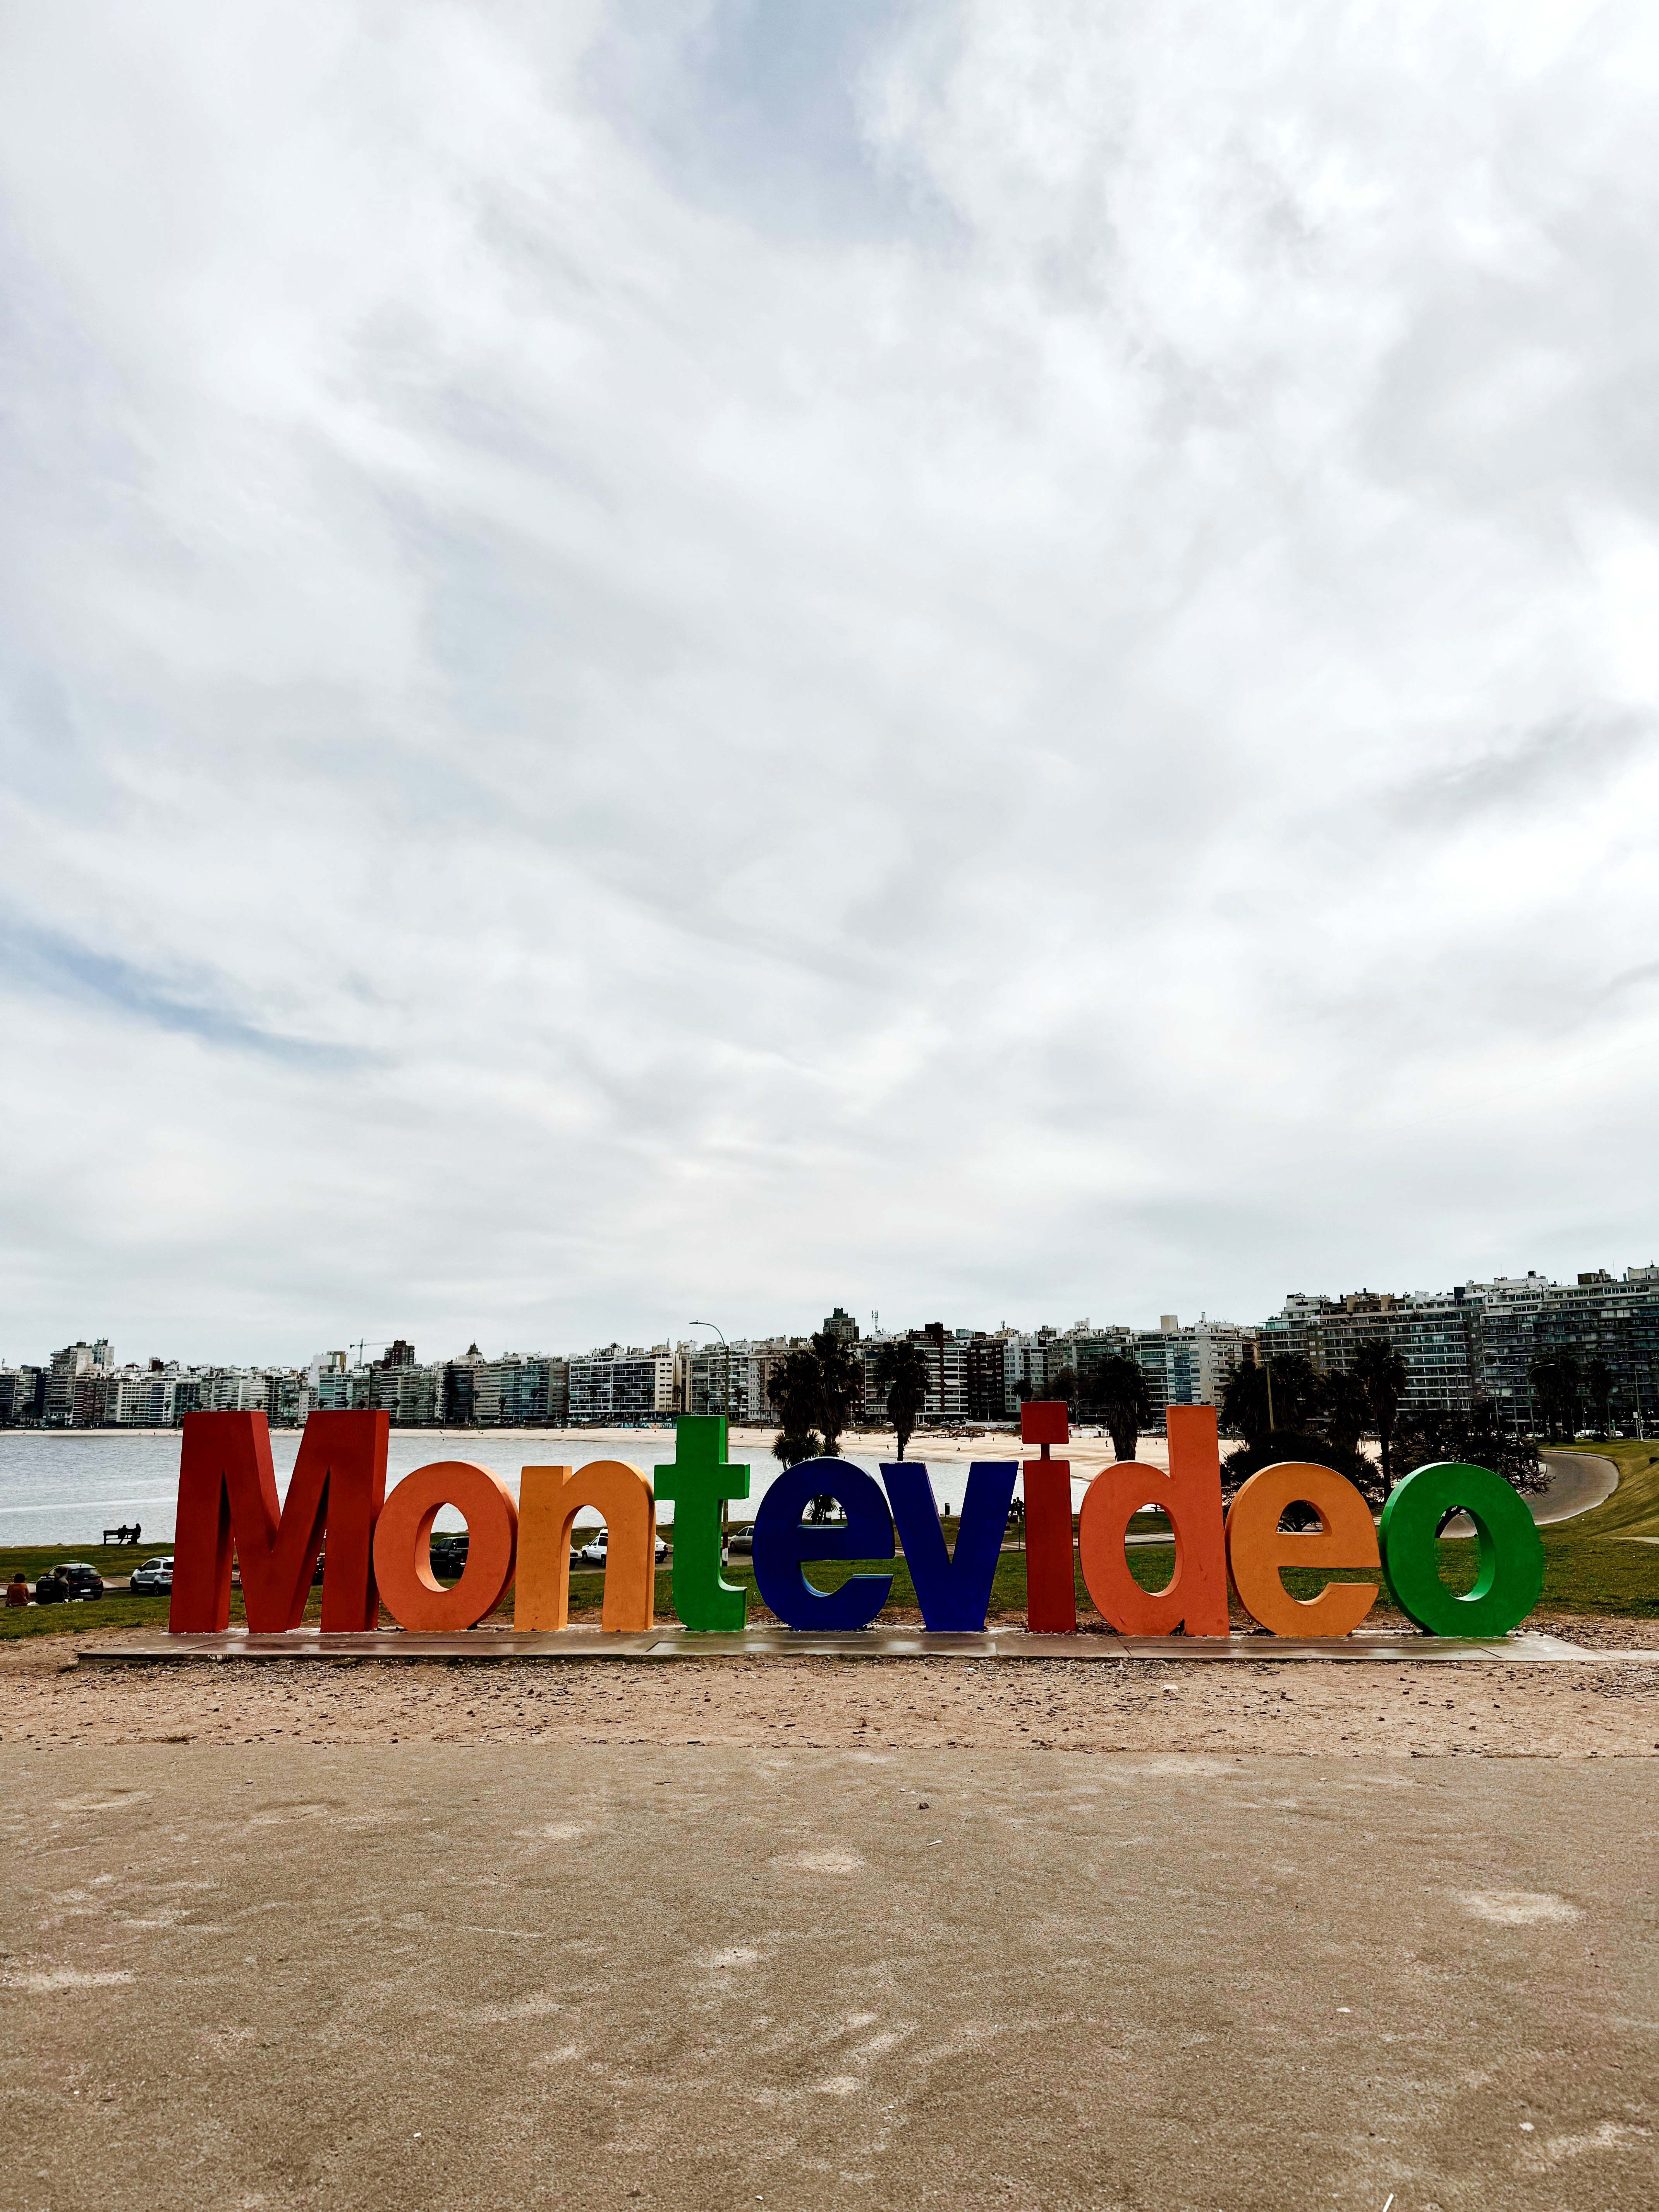
While walking around make sure to check out the Mercado del Puerto, Plaza Independencia, & the Montevideo sign (this is a little further away).
OVERALL THOUGHTS:
I totally fell in love with Montevideo. It felt safe, the architecture was charming, people were lovely, and it was so, so relaxed. I almost decided to do my 2 weeks of Spanish classes here instead of Buenos Aires. I hope to return to Montevideo/Uruguay again in my life!
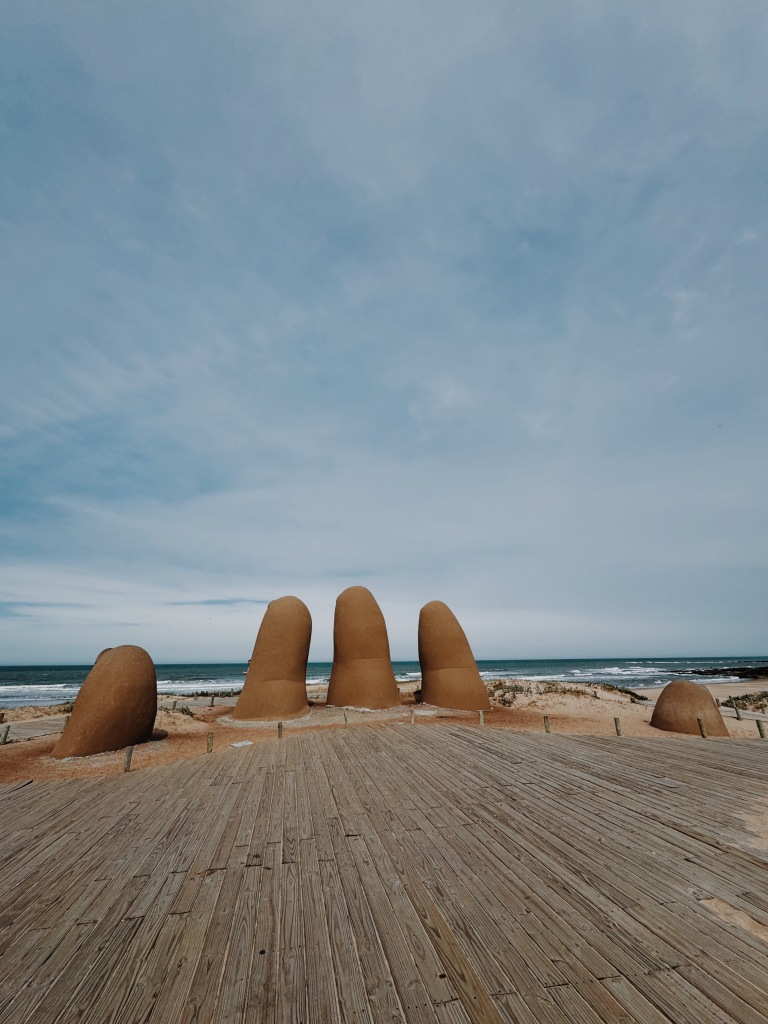
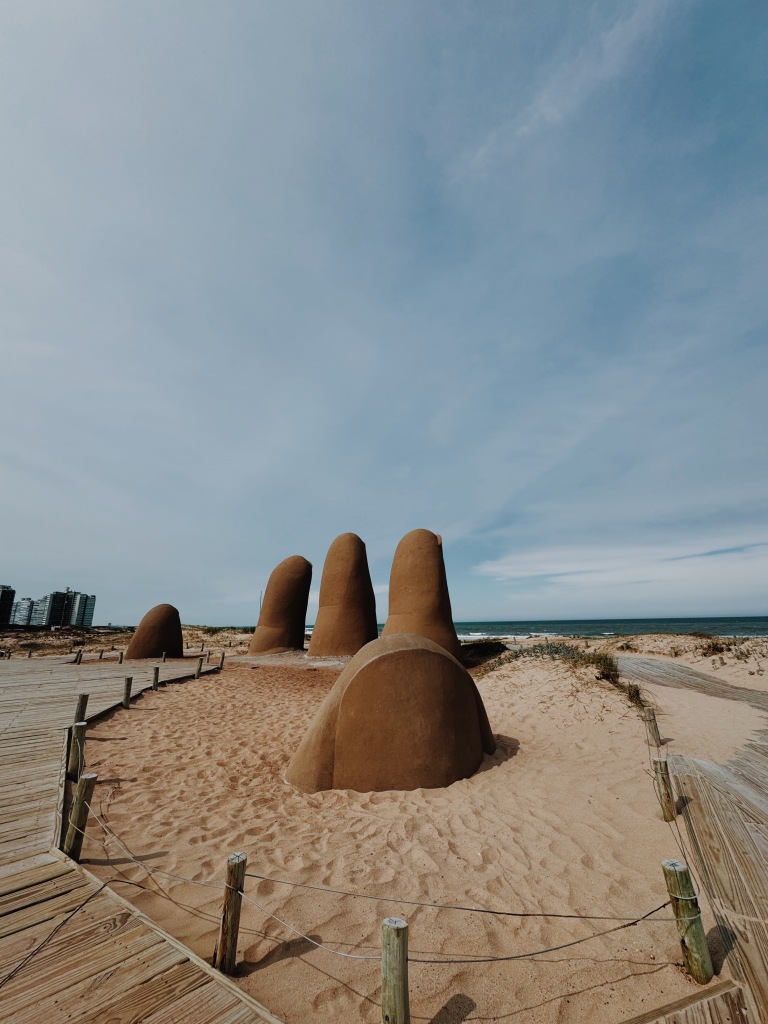
CITY: Punta del Este
HOW LONG: 2 NIGHTS
ACCOMMODATION:
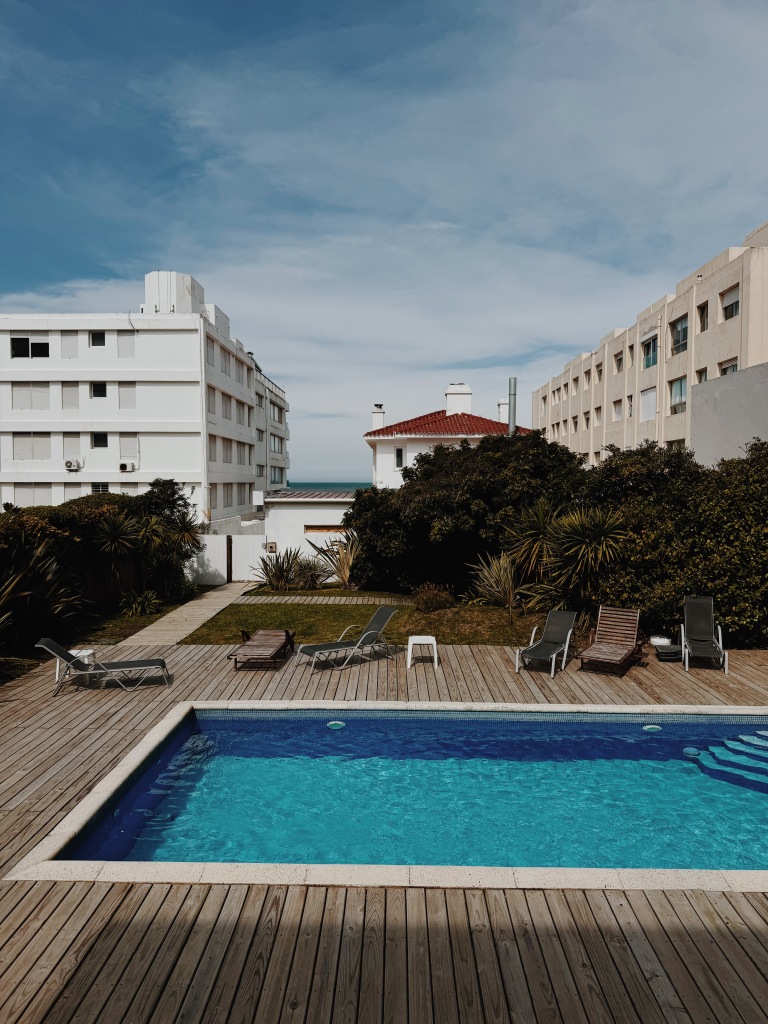
I treated myself to a hotel stay since it was only $40 per night (gotta love shoulder season)! It was in the center of town & included breakfast. There was a pool (but it was too cold to use it while I was there) & nice common area to sit in. Overall simple but nice.
so beachy & cuteHotel pool
WHERE TO EAT:
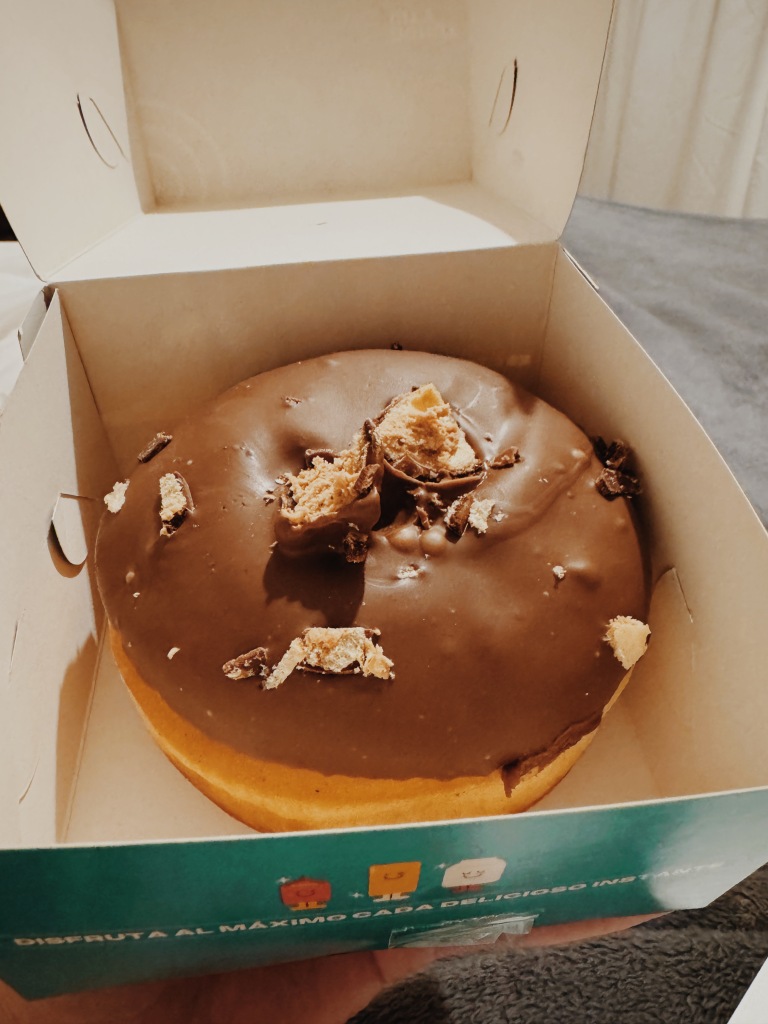
Because it was shoulder season, it definitely felt like a lot of restaurants were closed or doing renovations, but I enjoyed dinner at Capi Bar & Rey de La Pizza. I also tried a doughnut from Donut City that was decadent.
WHAT TO DO:
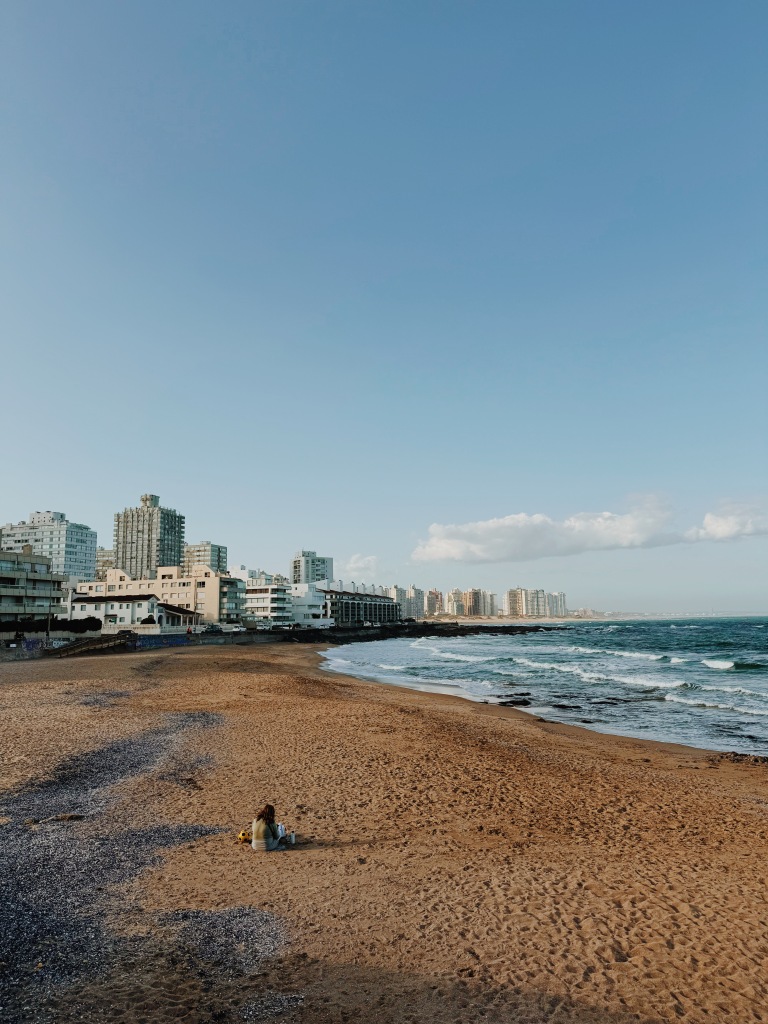
If you were visiting during the summer, the thing to do would be hang at the beach, but it was pretty windy & chilly while I was here. I still really enjoyed it though. Like Montevideo, there was a promenade along the water all around the city so I walked or ran along it each day! I also stopped to check out the cool sculpture of “La Mano.”
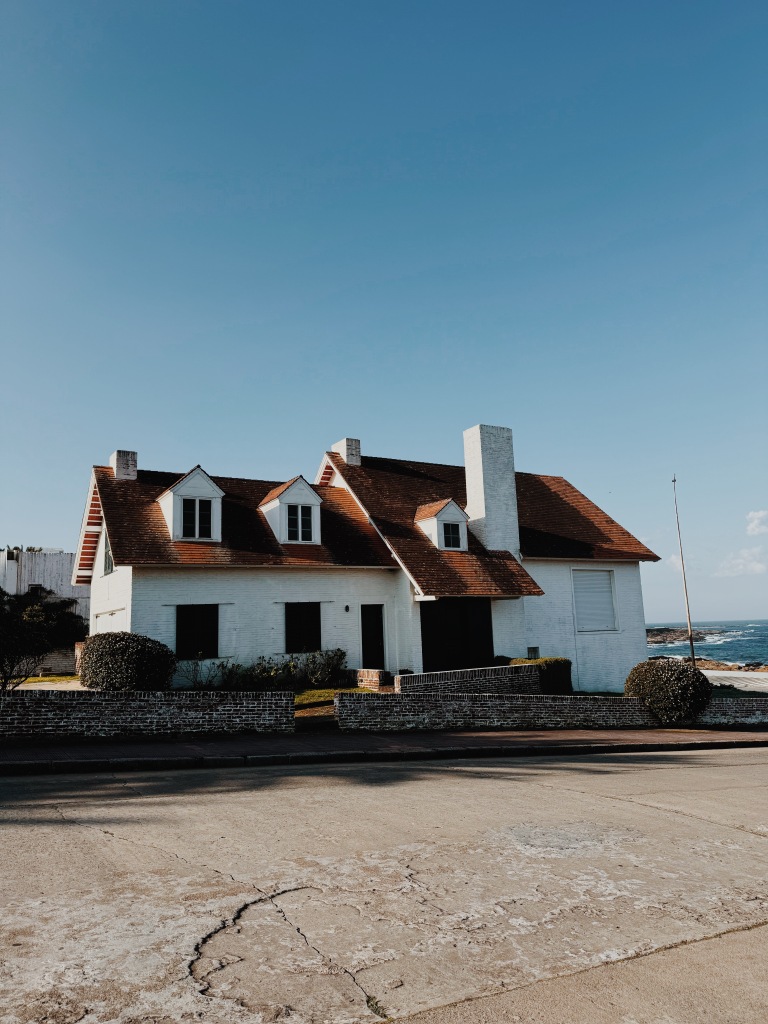
Punta del Este skylineCute housePunta del Este skylineA bustling Friday afternoonEl ManoEl Mano
OVERALL THOUGHTS:
This beach town is likely best enjoyed during the summer (rather than spring), but it was kinda nice to feel like I had the town all to myself. It was very peaceful, calm, & cozy. Definitely worth a visit!
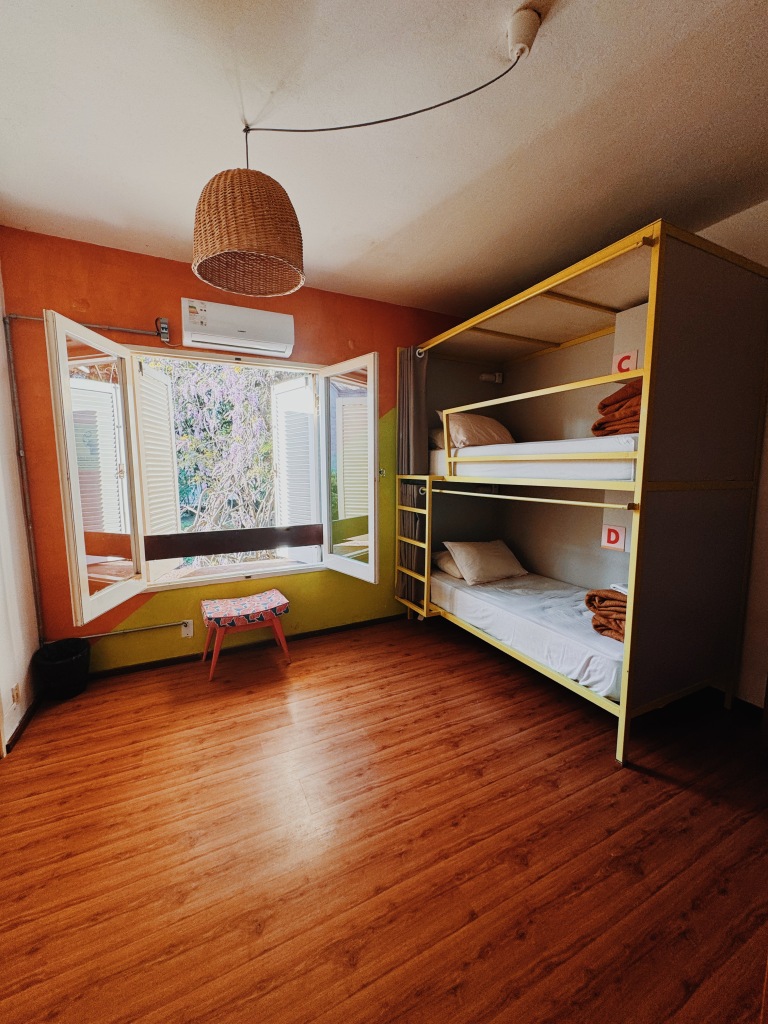
CITY: Colonia
HOW LONG: 2 NIGHTS
ACCOMMODATION:
I stayed at Viajero Colonia Hostel. This is a chain hostel (which I tend to try to avoid), but this one was actually great! The room was clean & quiet. There were curtains on the bed as well as a personal light, a lockable storage area for small valuables and a plug. Bathroom was attached to the room. Huge common area & the hostel was located in the center of town! I also did a free yoga class on the rooftop terrace. Definitely would stay here again.
Hostel roomView from the terrace
WHERE TO EAT:
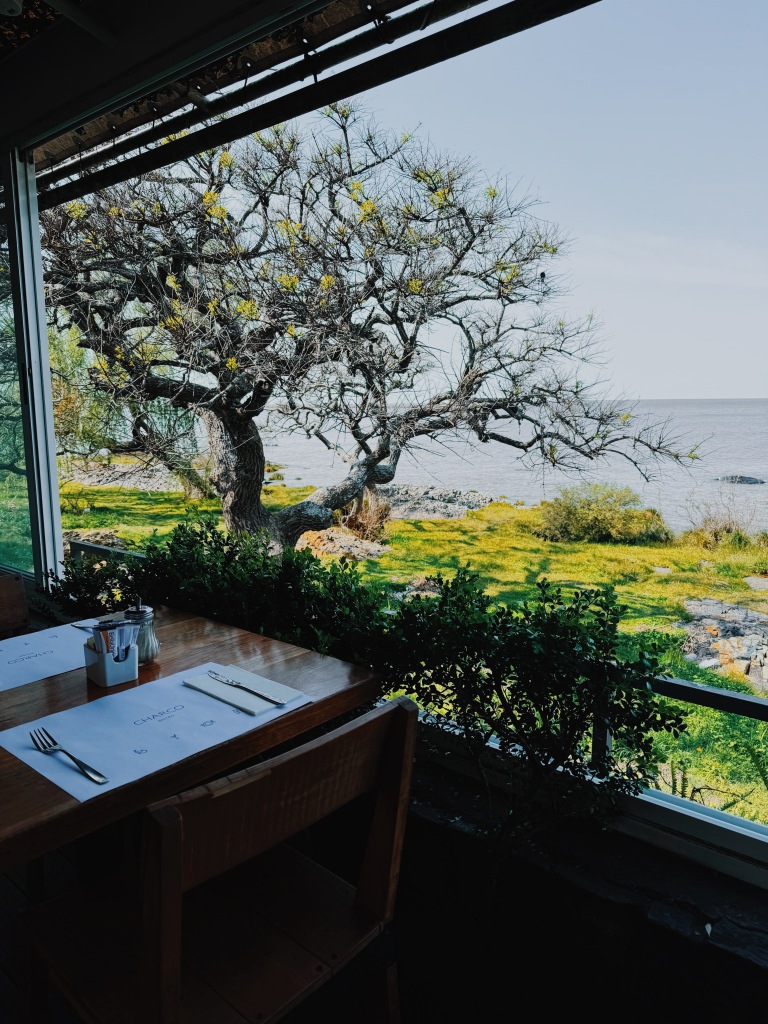
Breakfast at Charco Bistro was delightful. You sit with views right out on the water and restaurant is gorgeously decorated. Very light & area & green with plants. Food was yummy too!
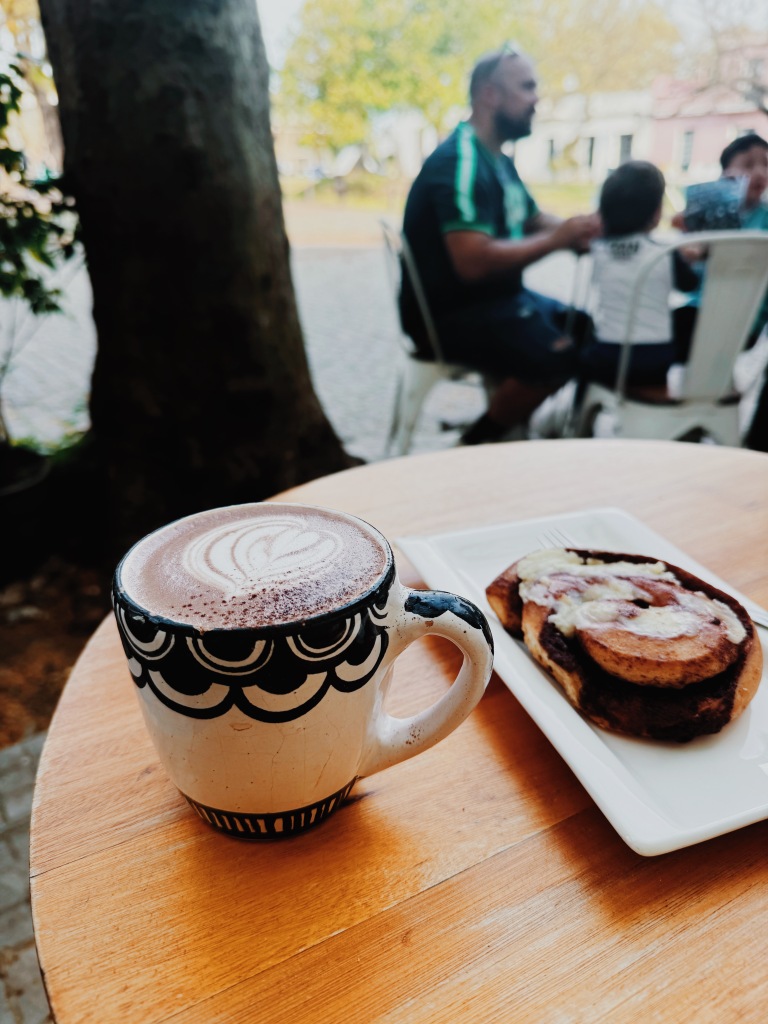
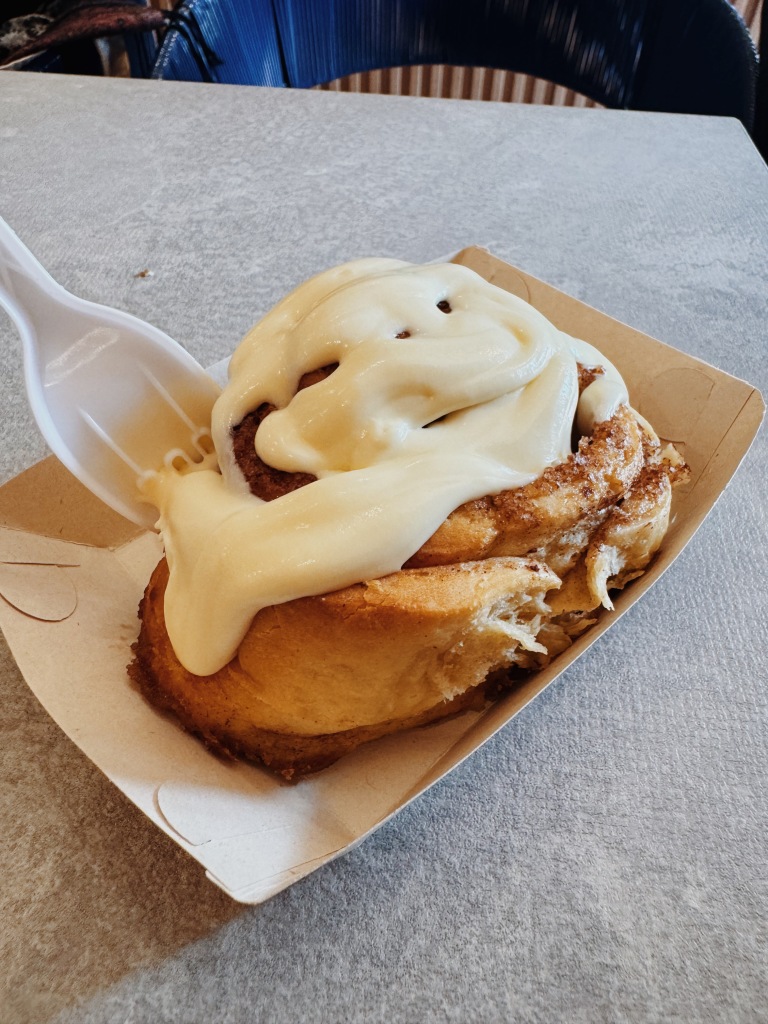
Colonia Sandwich Shop offered delicious sandwiches and they are also famous for their cinnamon rolls, so I obviously tried one! Lived up to its reputation. I paired it with a hot chocolate as well on a chilly, but sunny afternoon.
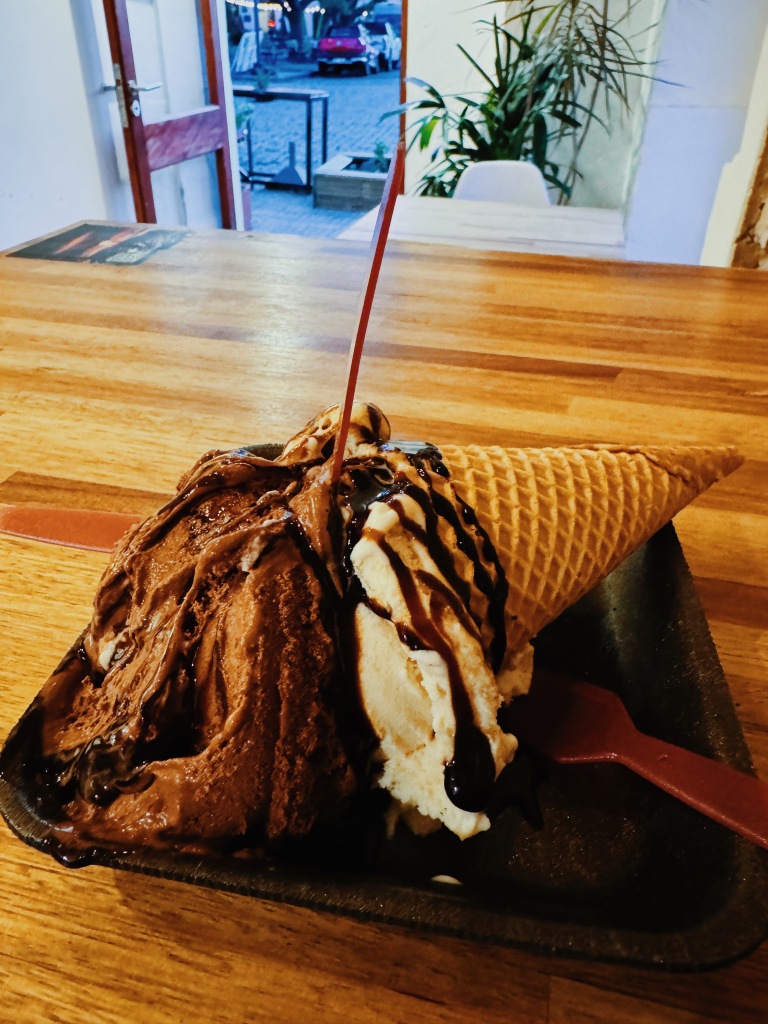
View from CharcoHelados DienzzoColonia Cinnamon Roll + Hot Chocolate
WHAT TO DO:
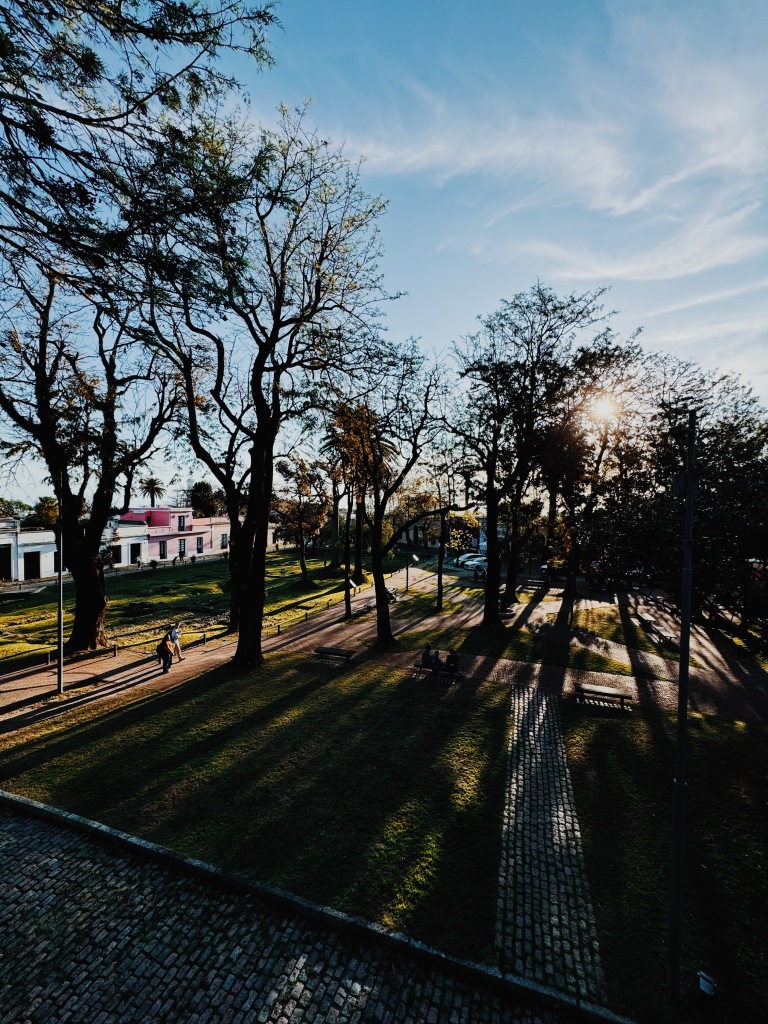
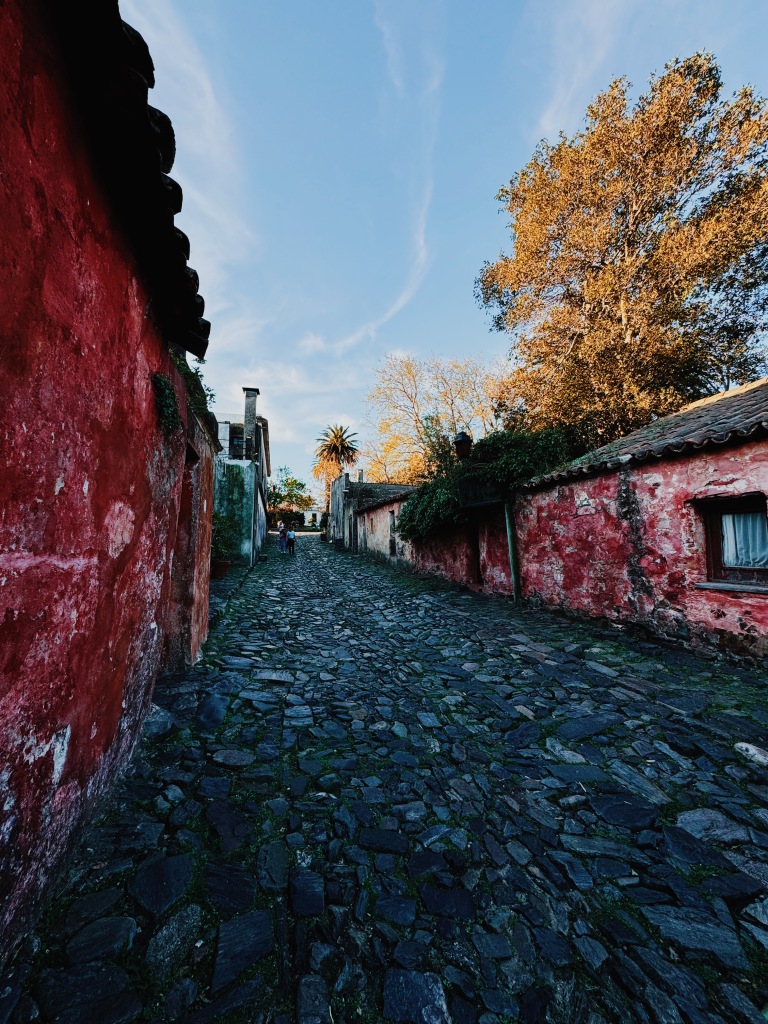
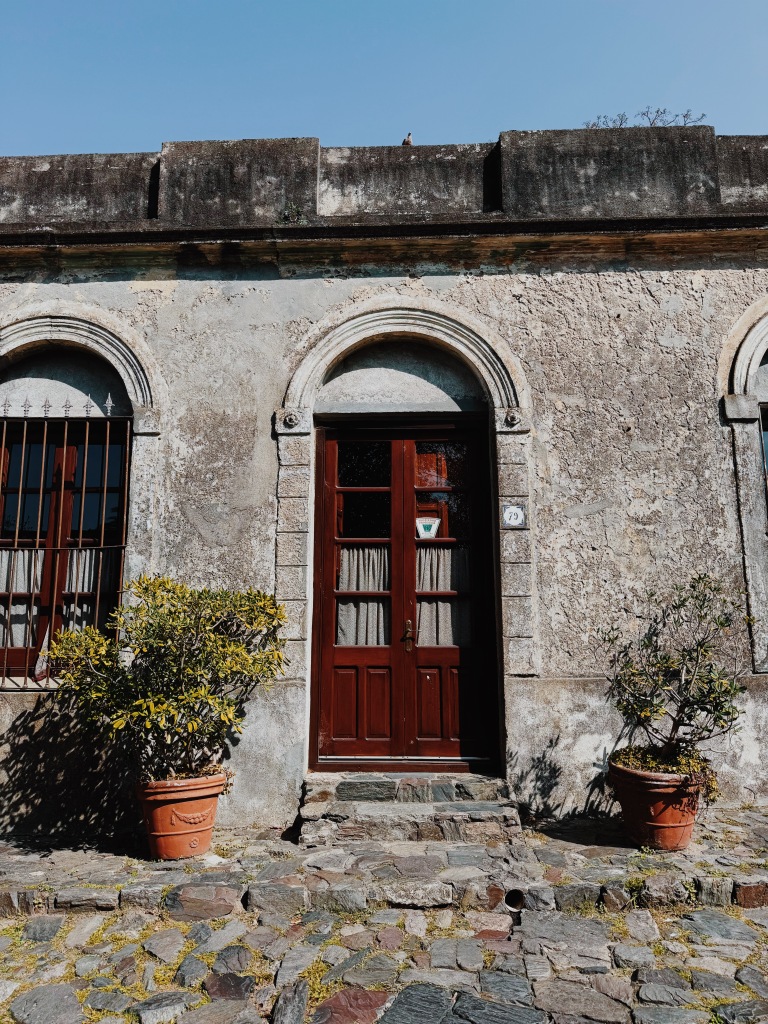
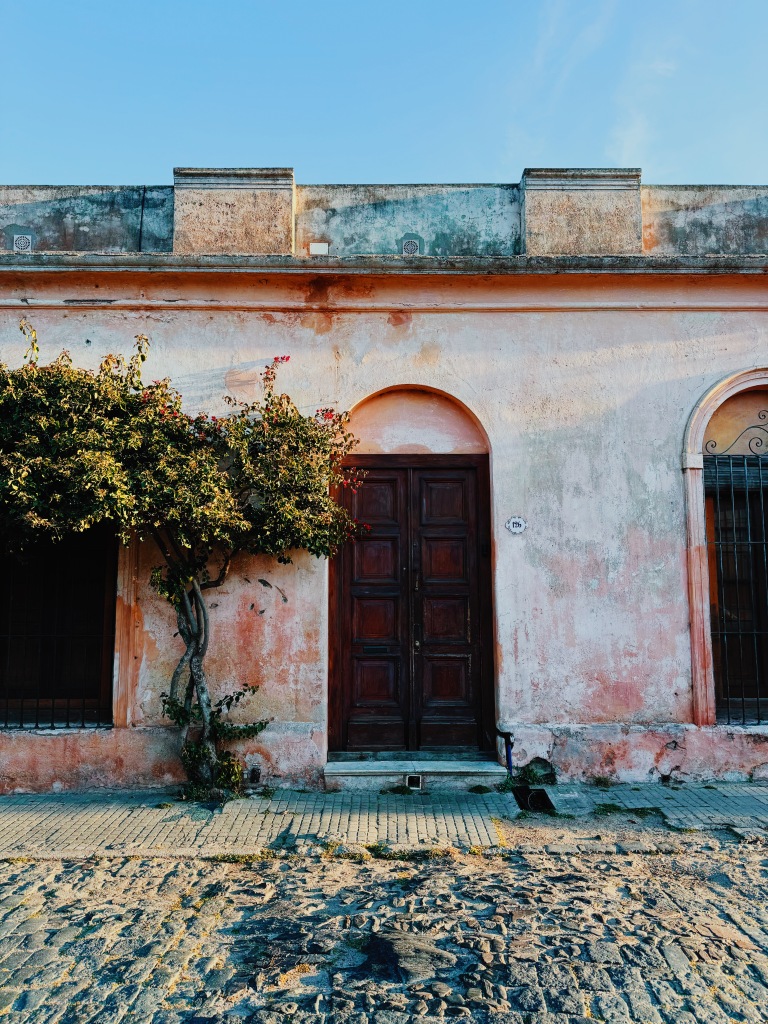
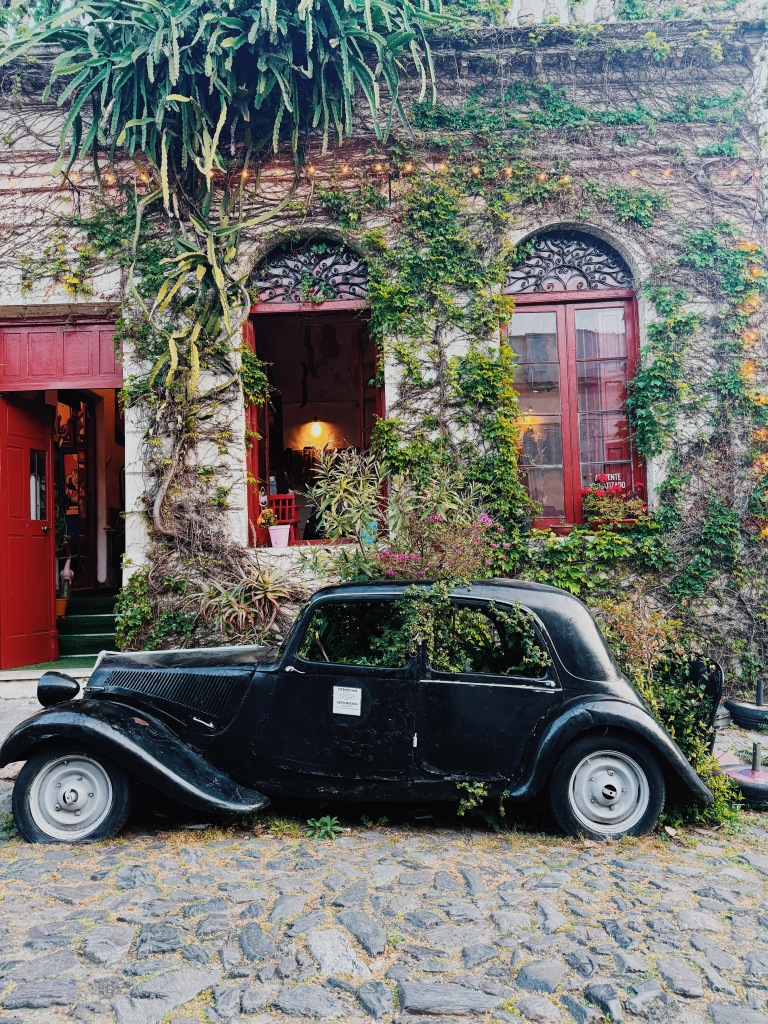
I honestly just enjoyed meandering around the small town center. Sunsets on the ocean were stunning and it was fun to see everyone gather on the waterfront. The architecture is charming & has a European feel. I took wayyyy too many photos haha.
OVERALL THOUGHTS:
Colonia is small so it really only needs a day, but I was happy enough to spend a full, lazy day walking around. I don’t like being rushed and constantly packing up so these days I try to spend a minimum of 2 nights in a place. So like I said, I didn’t find that there was much to do here, but just being here was a treat.
BUDGET FOR 7 DAYS IN URUGUAY:
Accommodation: $180 ($26 per night)
Food: $110
Groceries: $20
Activities: $33
Local Transportation: $50
Miscellaneous: $20
Total: $413 (Daily average: $59)
Transportation to next destination: $56 ferry back to Buenos Aires. I love an easy, cheap travel day to the next country 🙂
We stayed at the lovely Airbnb, right in the center of town. It had 4 bedrooms, 4 bathrooms & a washer! It was very modern and clean. It also felt very safe & had a clean water spout in the sink. It was perfect for a girls weekend in Oaxaca 🙂
WHERE TO EAT:
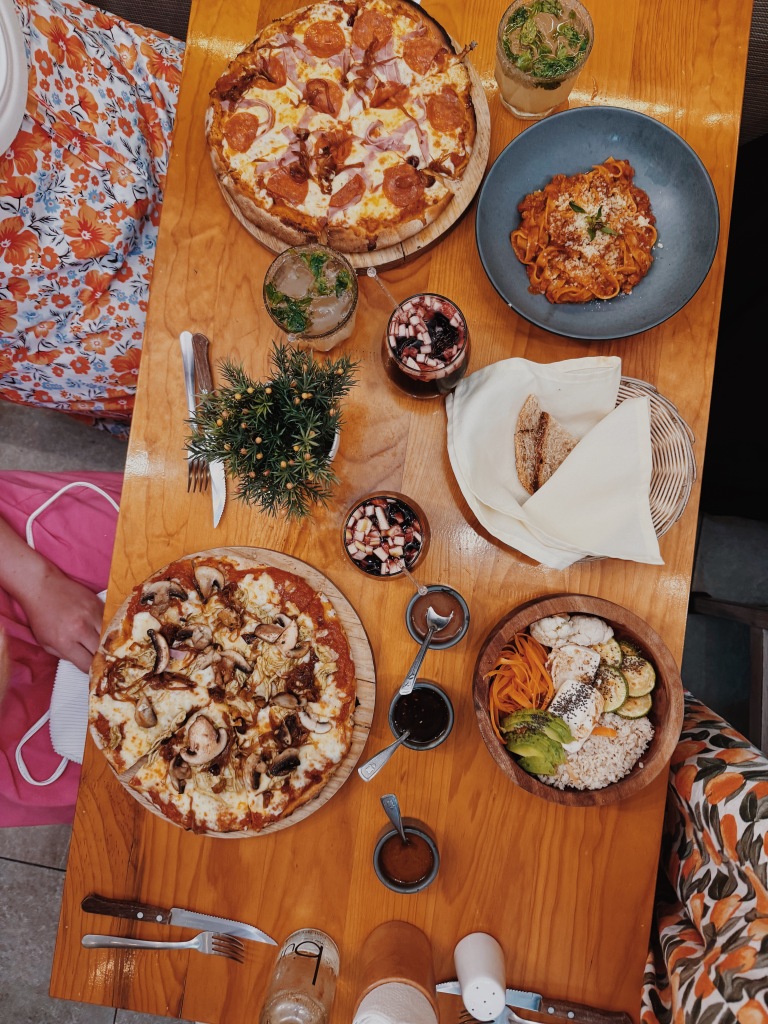
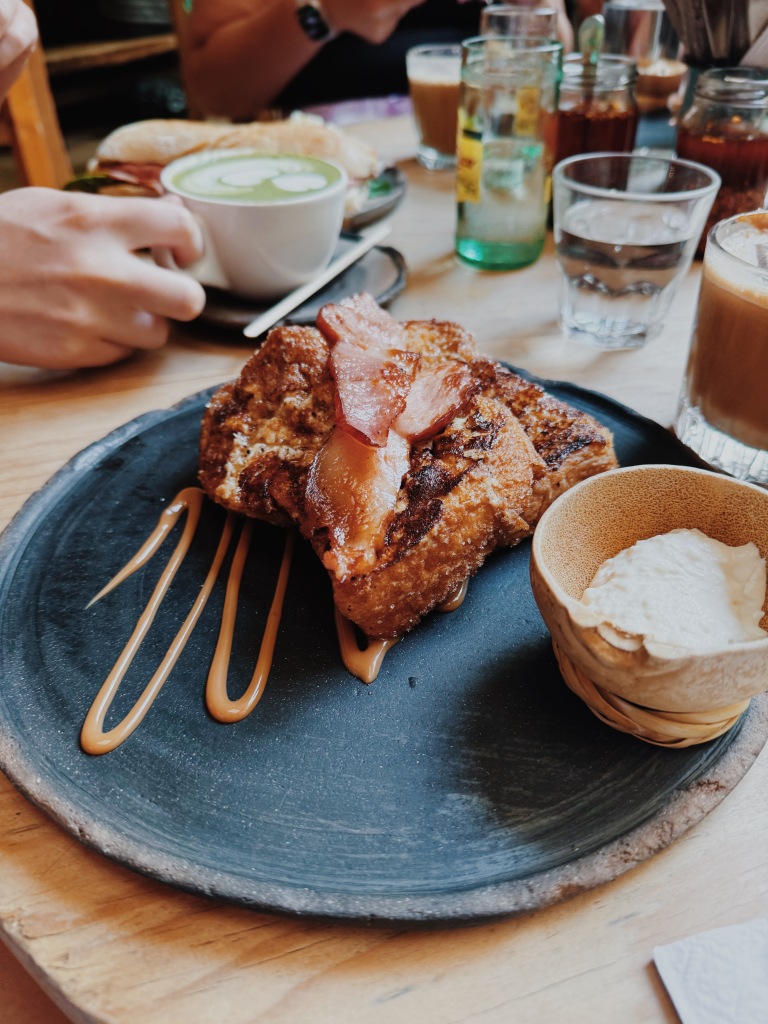
Boulenc – Fun, delicious brunch spot! I obviously got the french toast & added crispy bacon. Everyone’s meal looked great.
La Tribu – Fun pizza spot with a lovely outdoor terrace. I had a great, healthy rice & veggie bowl.
Tierra del Sol – Upscale, nice dinner. Our fanciest meal. Service was excellent & menu was very unique.
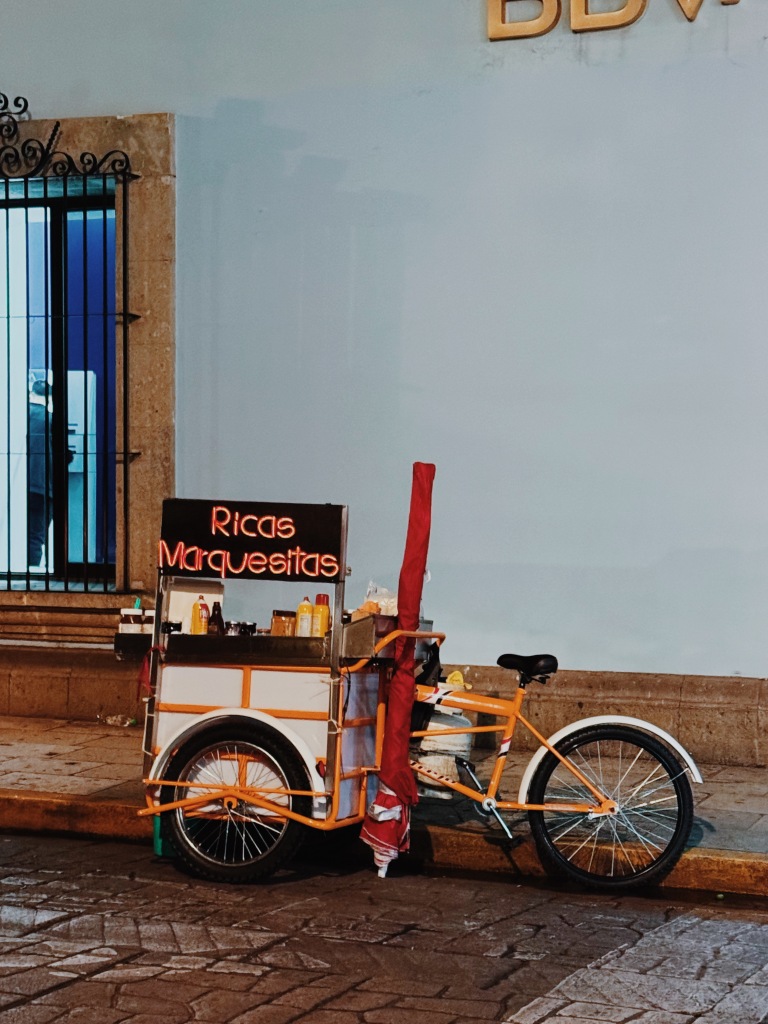
One night we stopped at a Marquisitas stand for a fun waffle/crepe-like dessert. I chose one with peanut butter and nutella – yum!!
La TribuBoulencBoulencDessert stand
WHAT TO DO:
Abbie is a master planner of events so she curated an incredible week for us all. I mean do you see this itinerary????? 🙂
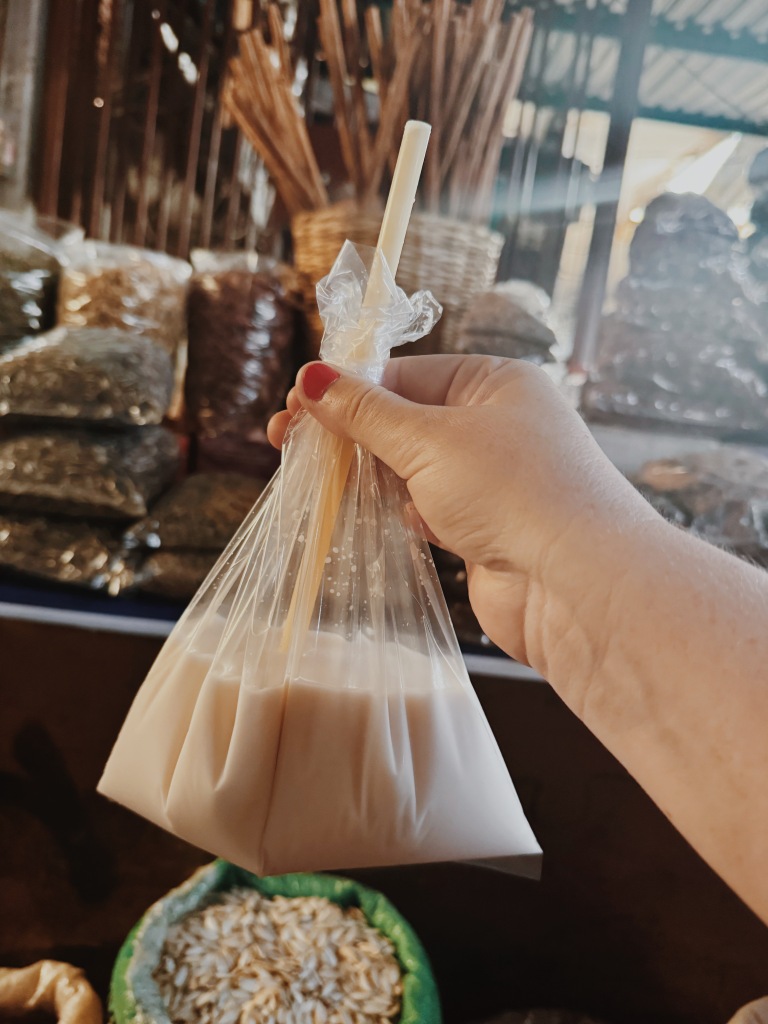
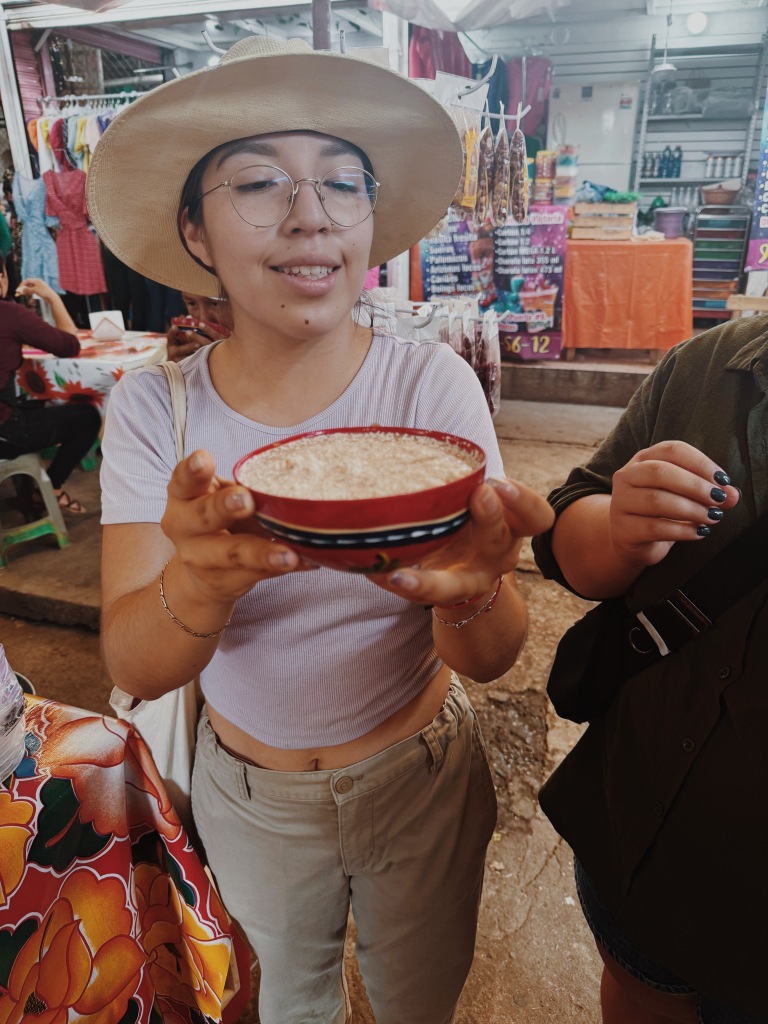
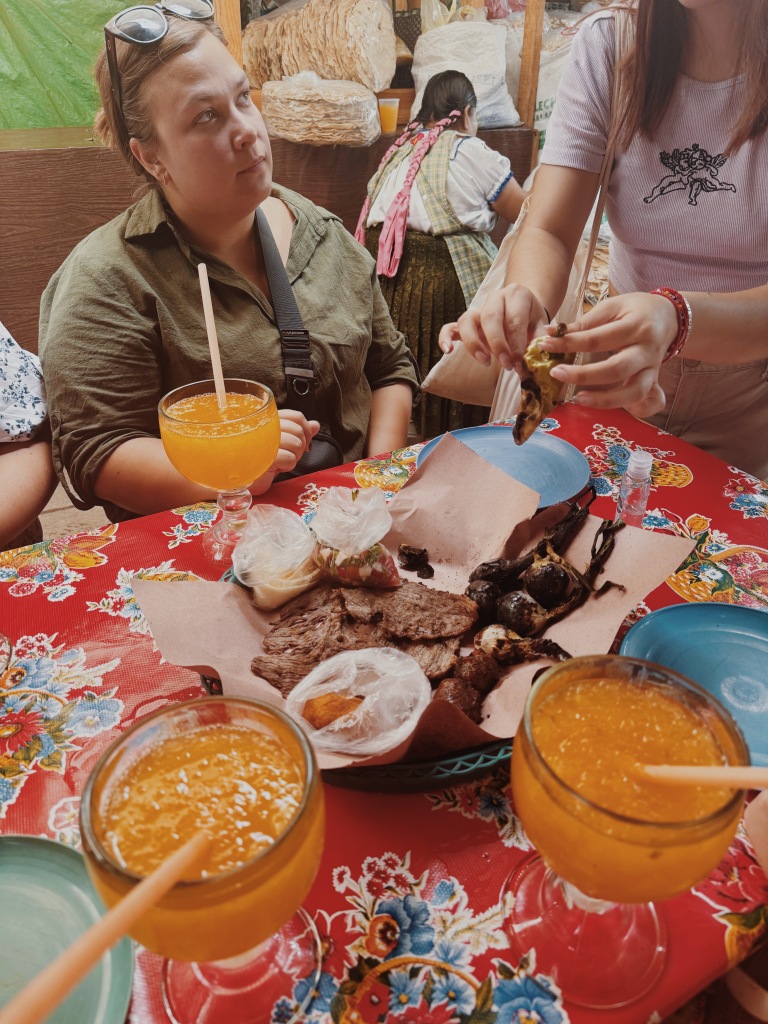
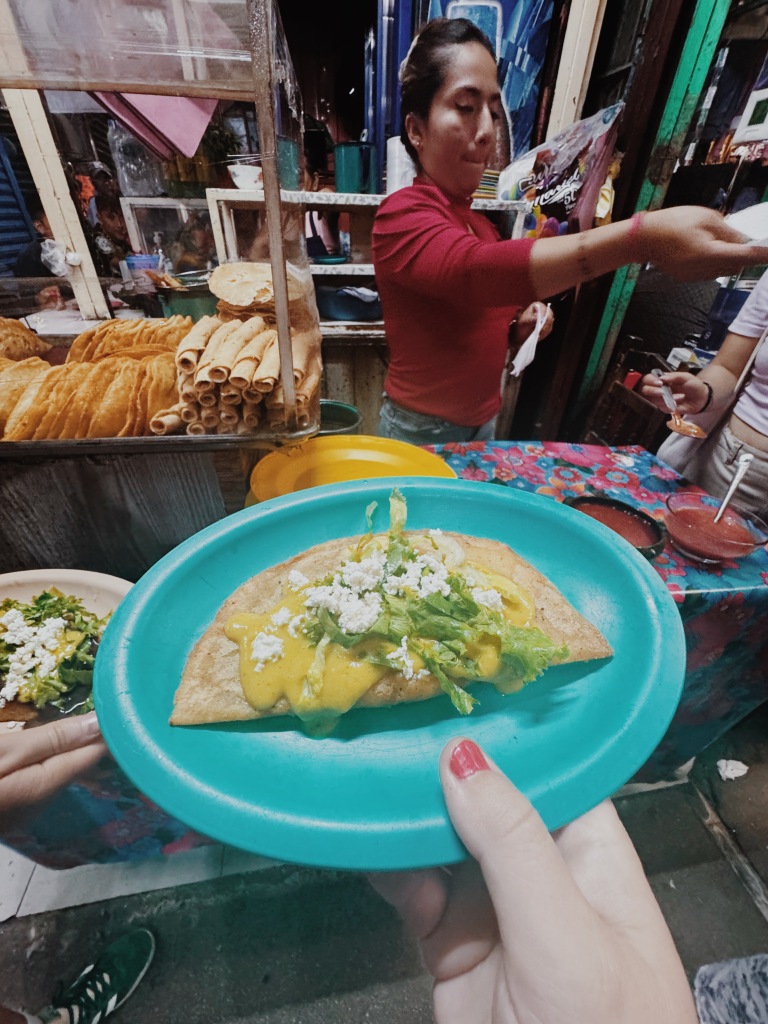
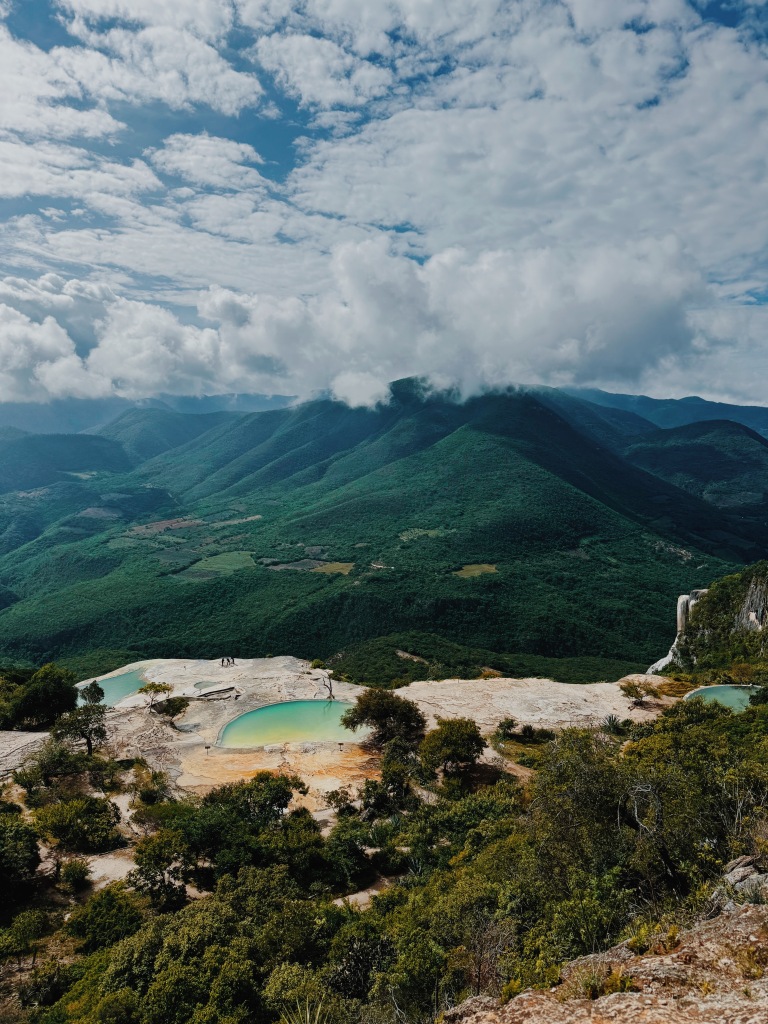
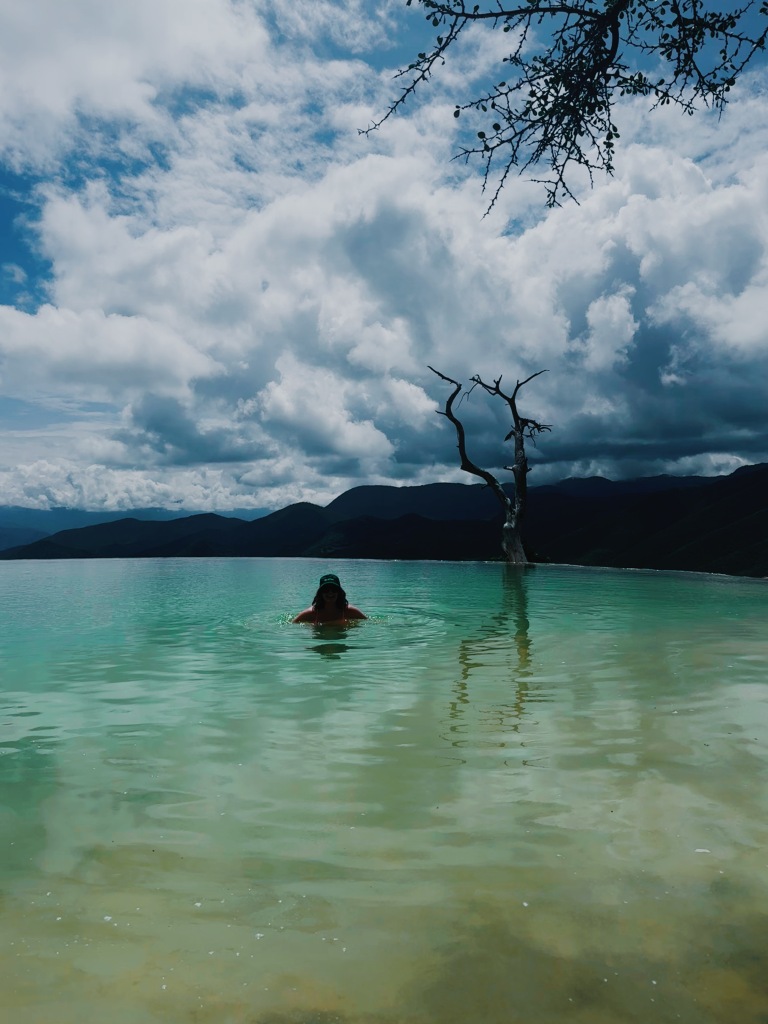
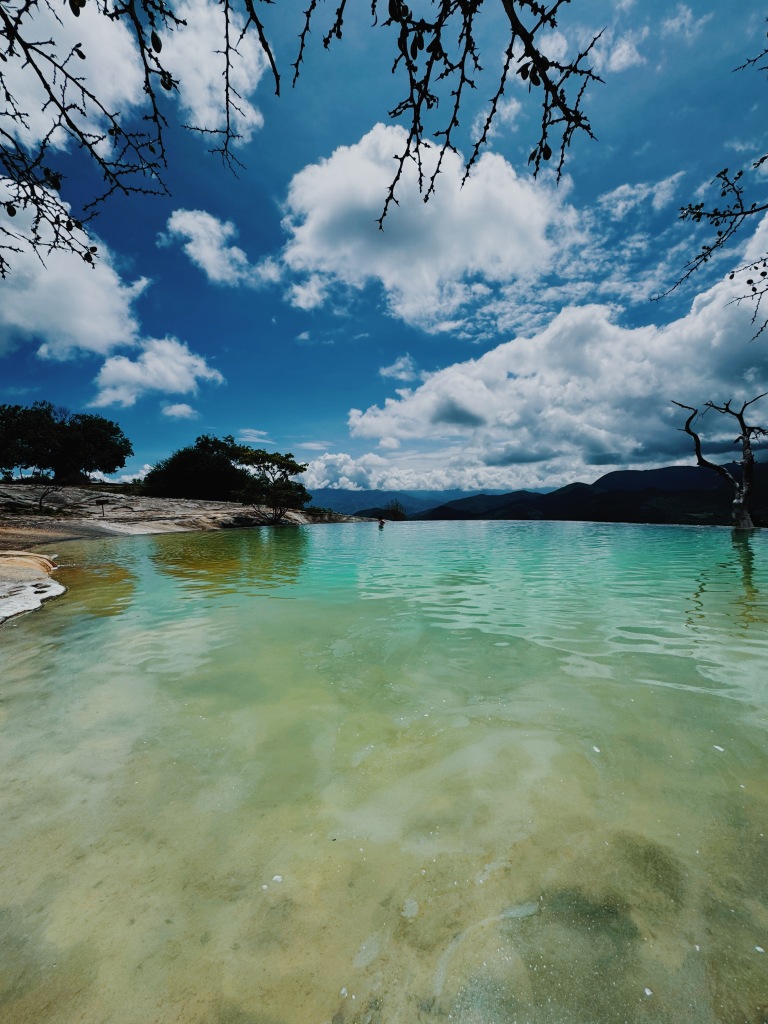
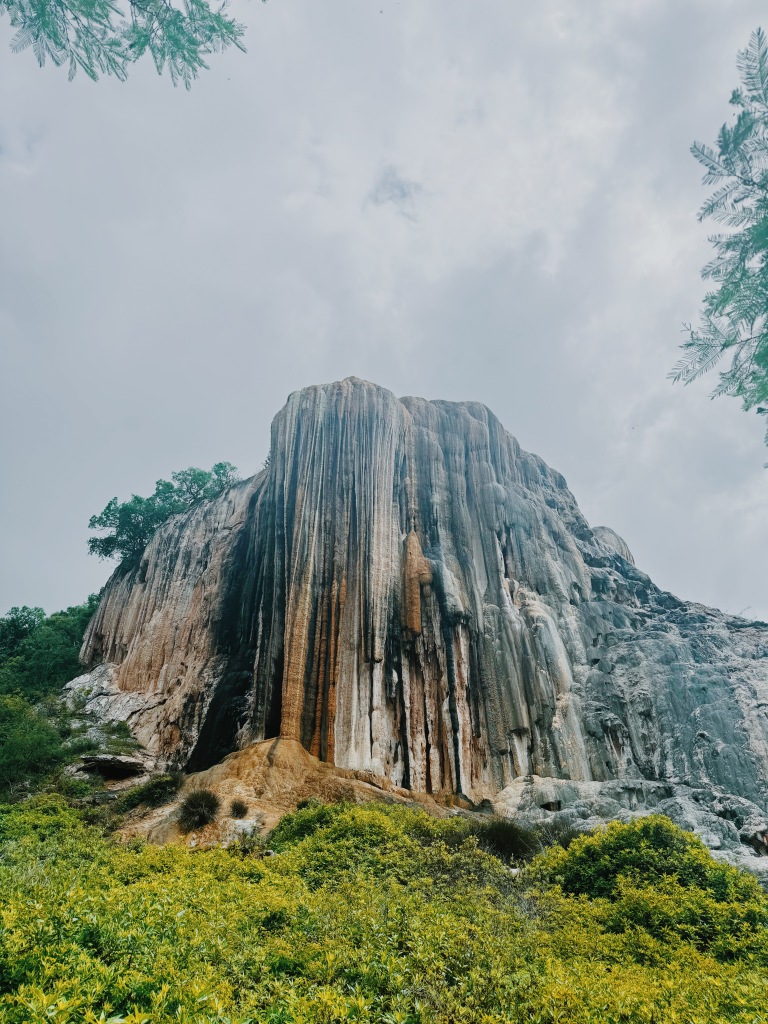
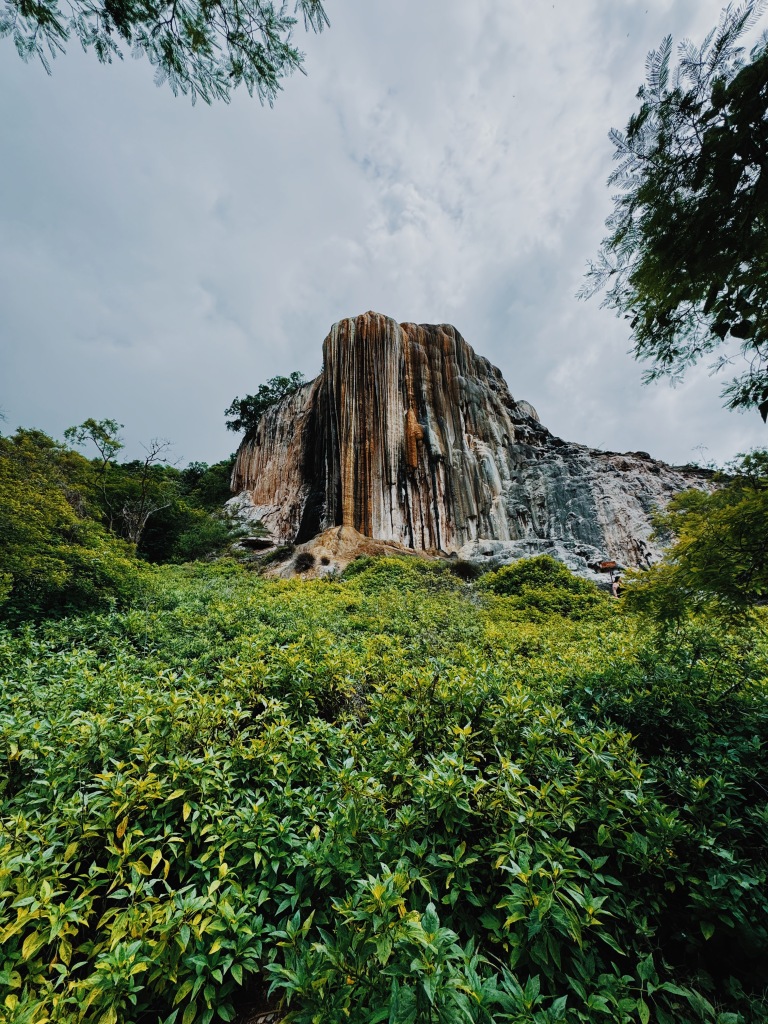
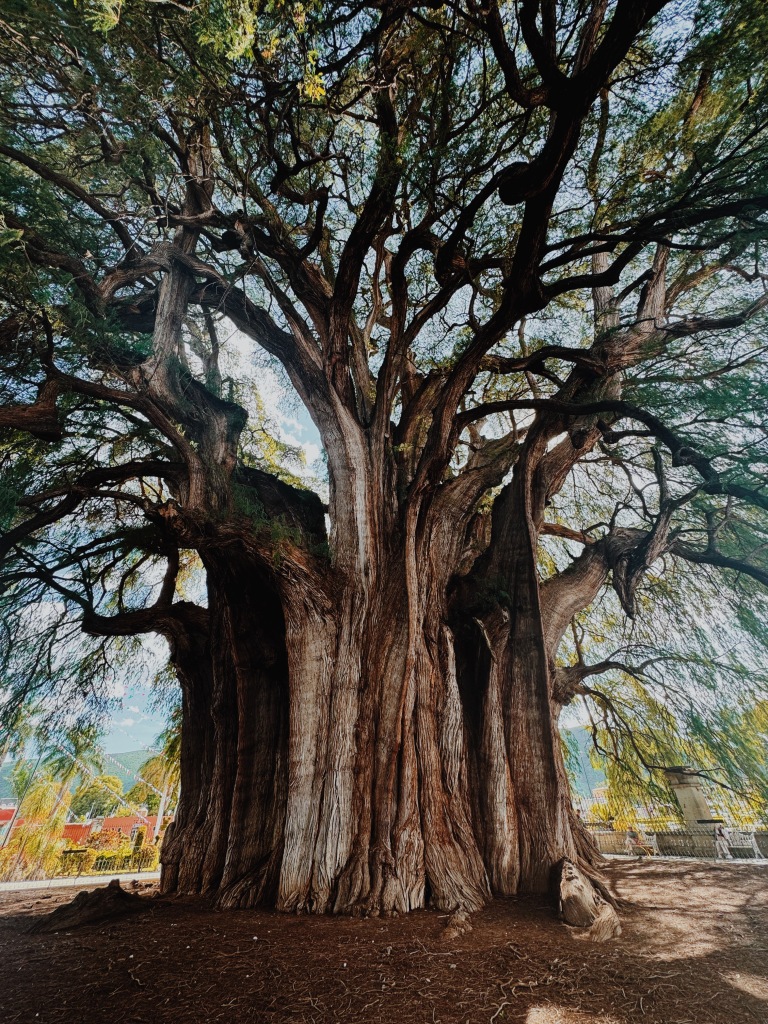
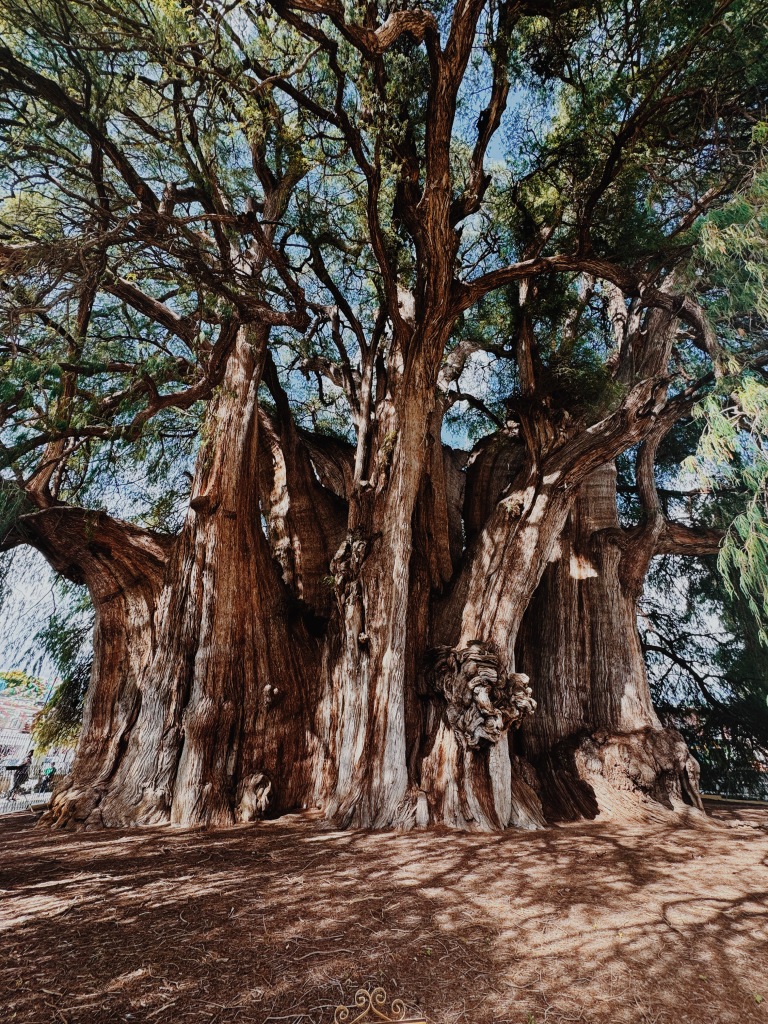
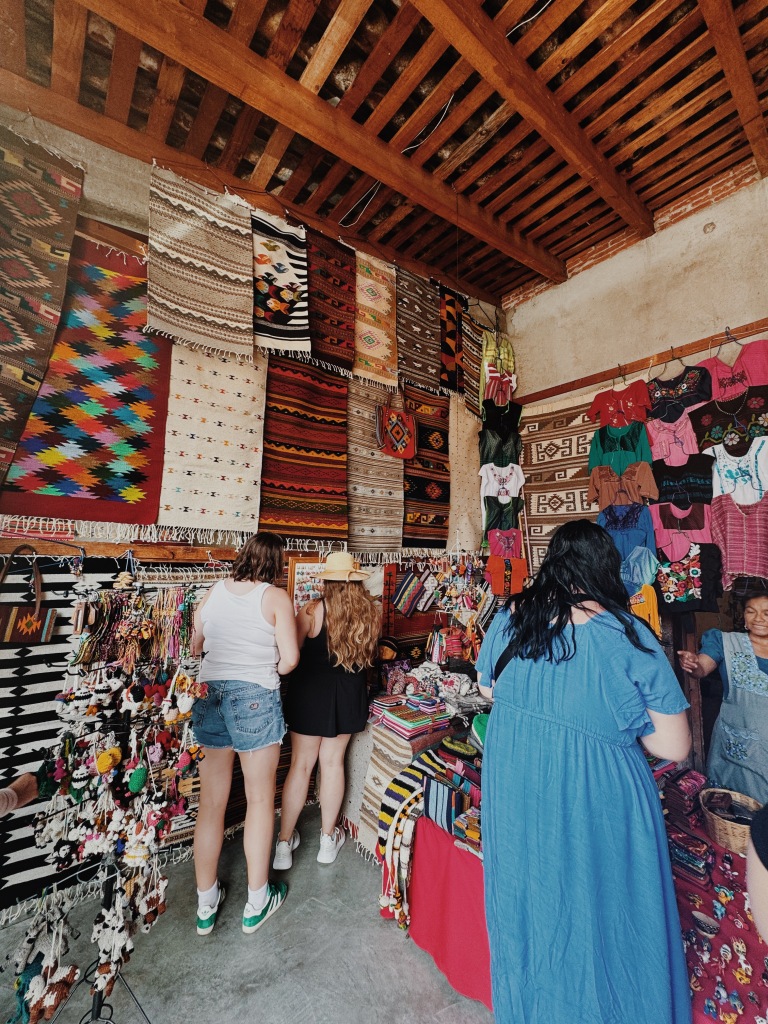
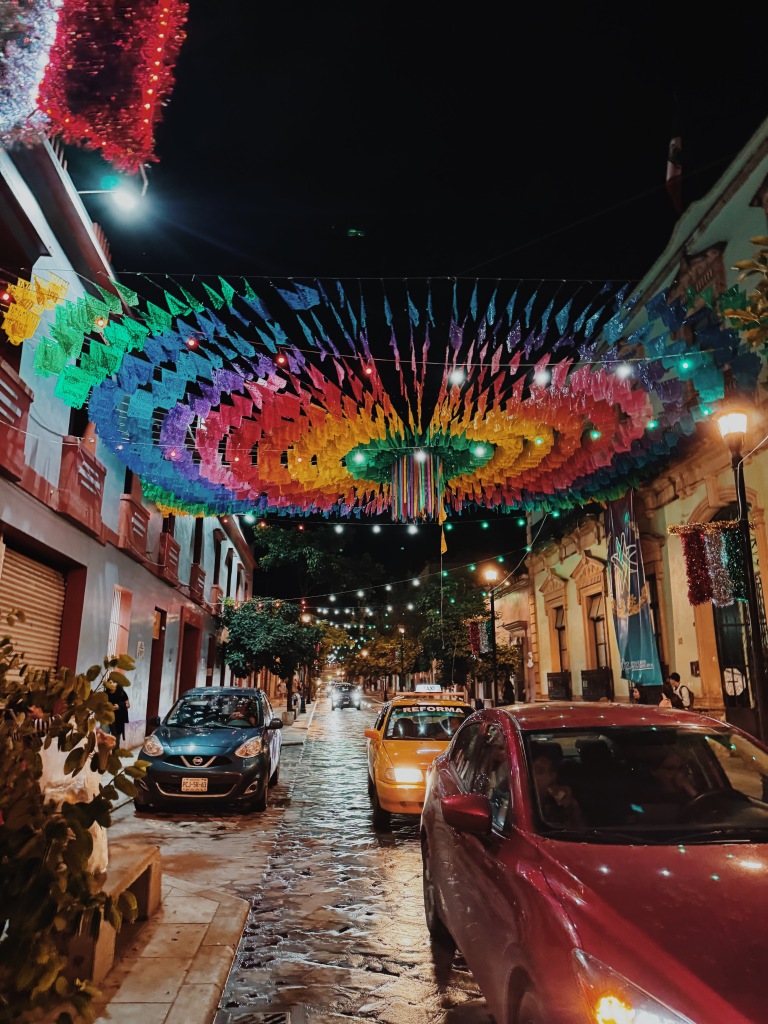
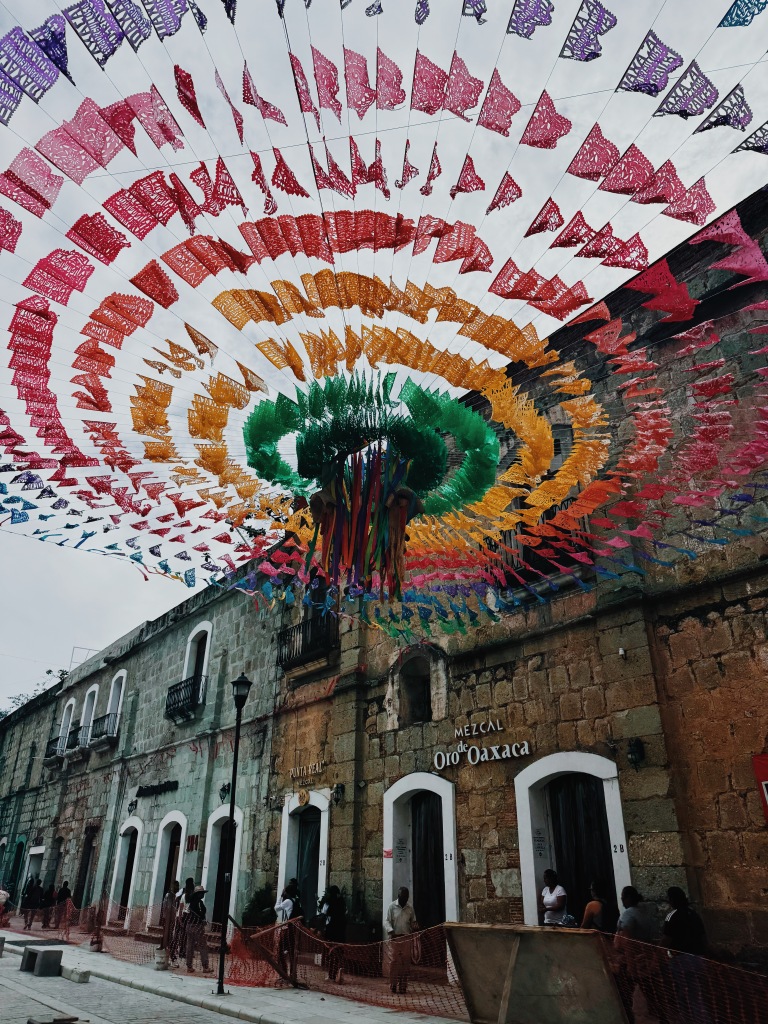
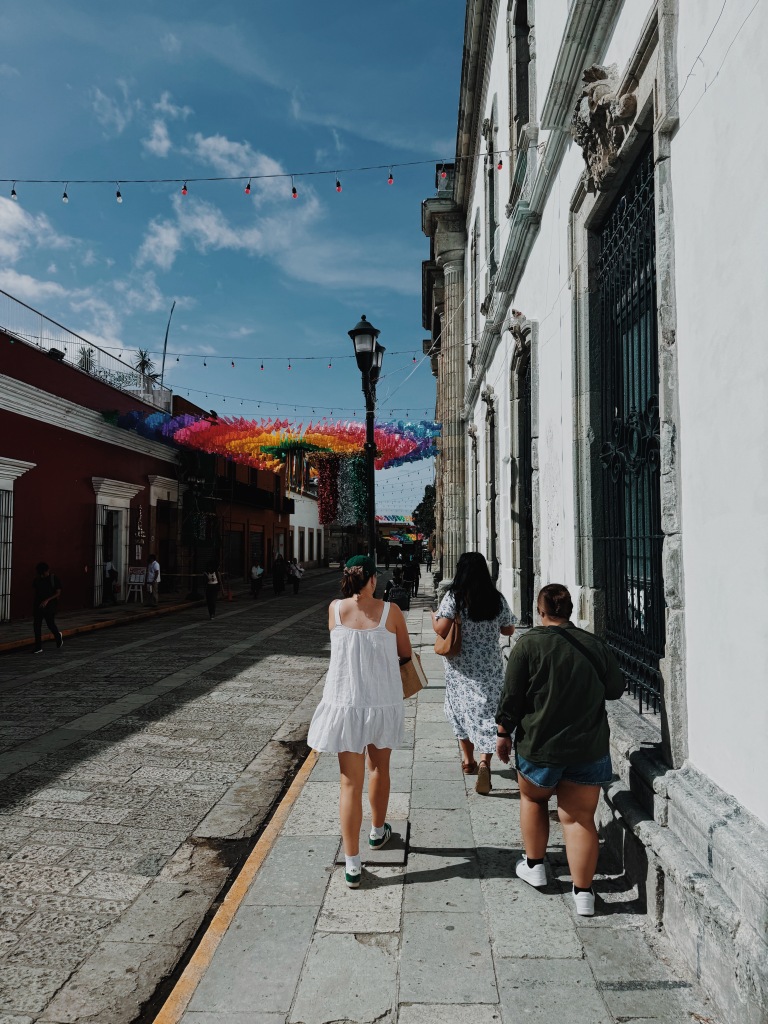
We did a food tour through a large market, had a pool day, ate our hearts out, and had a fabulous day trip to Hierve El Agua (hot springs + one of two certified waterfalls in the world), Teotitlan Del Valle (cute town with small market), & Arbole de Tule (widest tree in the world). We also just walked around Oaxaca, checking out small stores, trying snacks & fun drinks, and seeing the Cathedral.
Hot SpringsHot SpringsHot SpringsPetrified WaterfallPetrified Waterfall
Such a fabulous few days celebrating Abbie!
Birthday Girl + HaleyBirthday Girl + Haley
Overall Thoughts:
Oaxaca is a charming, small city that is worth a visit, but the highlight for me was the petrified waterfalls, hot springs, & the widest tree. There is just nothing that beats cool nature things for me haha.
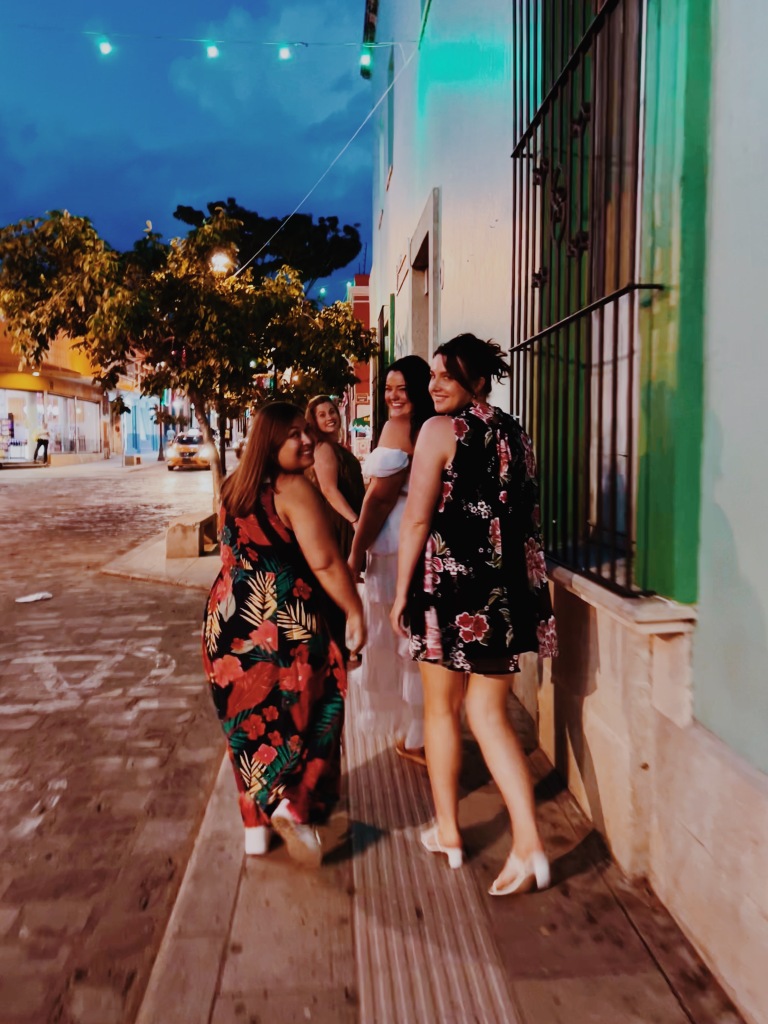
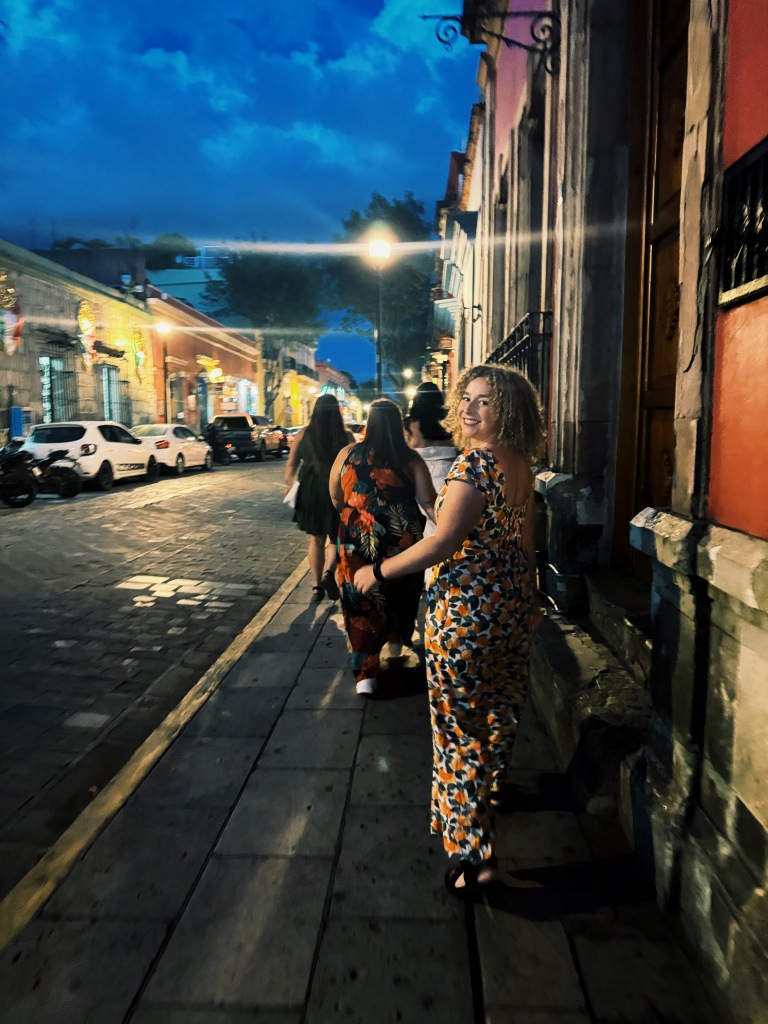
It was so fun to have a girls trip be a part of my larger grand adventure. Very grateful Abbie included me and I had a blast going abroad with Haley for the first time!!
Our first international adventure together30th birthday parties look very different than early 20’s haha
Budget for 3 days in Mexico:
This was not my typical backpacking trip so costs are a bit more than usual. There were plenty of things that could’ve been done to make this cheaper, but I was not in charge & it was a 30th birthday so all in all not too bad!
Accommodation: $315 ($105 per night)
Food: $117
Groceries: $0
Activities: $175 (some transport & other miscellaneous expenses were rolled into here but my friend just charged us one venmo for all pre-paid activities so I just lumped it in this category)
Local Transportation: $5
Total: $612 (Daily average: $204)
Transportation to next destination: $365 for the flight to Oaxaca from SFO & $525 for the three flights it took me to get to Buenos Aires (lol)
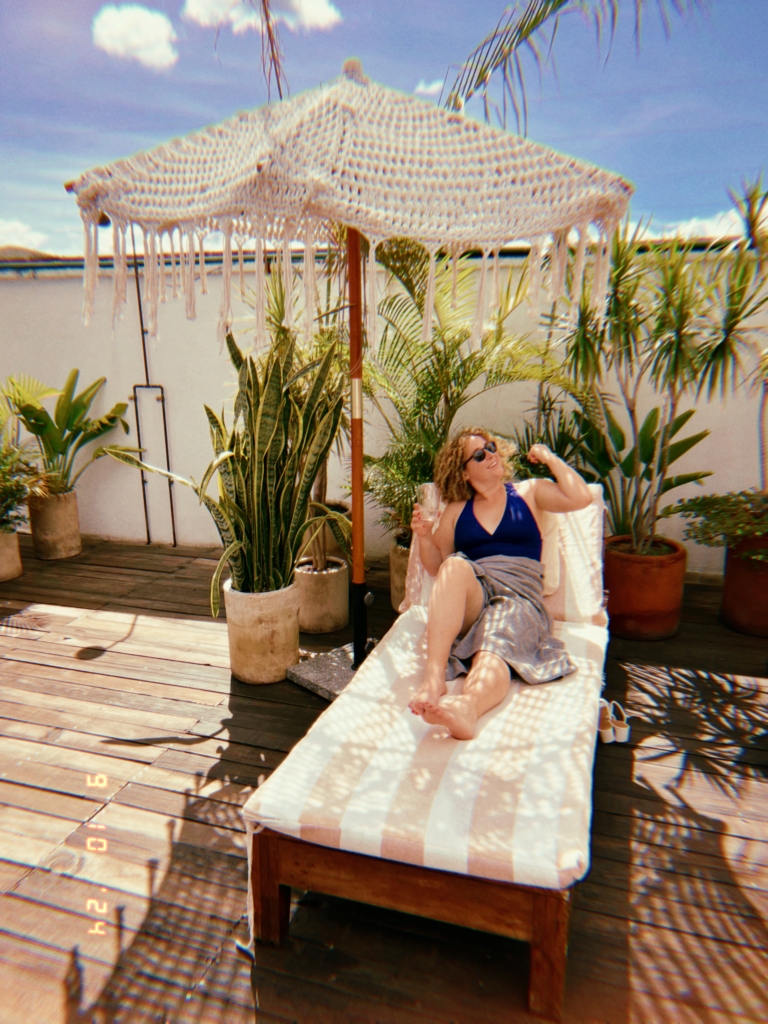
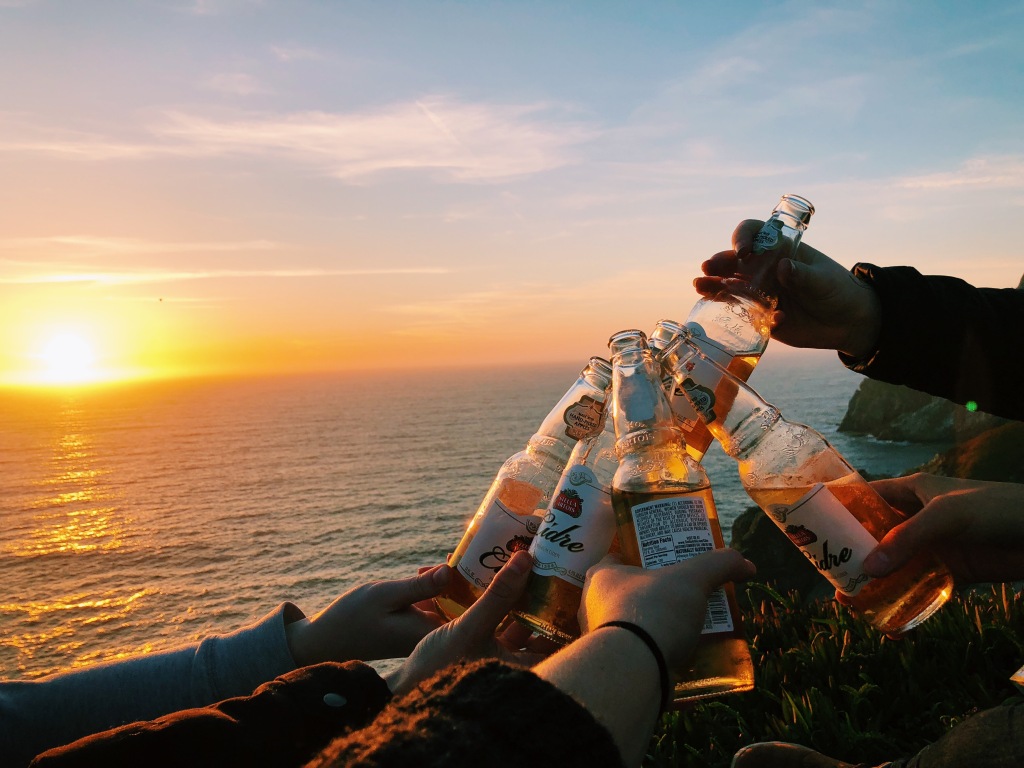
Bonus photos of me having alcohol for the first time in 6 months hahah
After a wonderful 2.5 months soaking up the summer sun in California, I am back on the road again. This time I am headed to South America to backpack all around this large continent! I am planning to go to Argentina, Uruguay, Bolivia, Chile, Brazil, & Paraguay… but also ANTARCTICA!! Pretty exciting stuff. I’ll finally check off all 7 continents 🙂
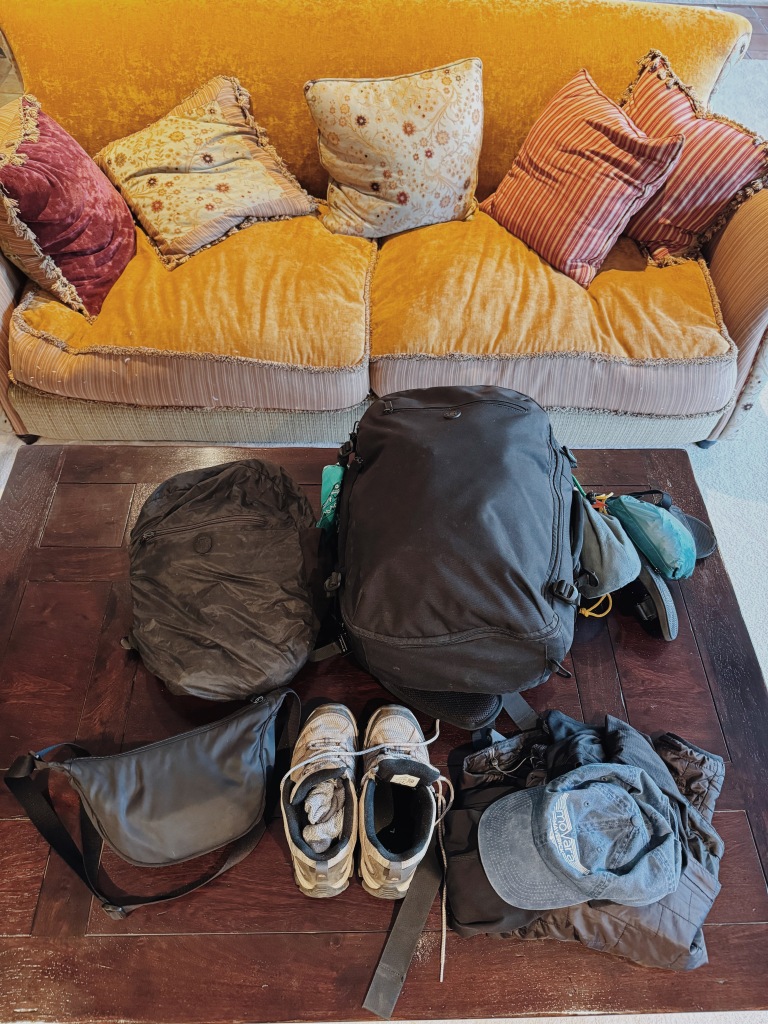
That being said, this was one of the more challenging trips to pack for because I’ll be doing lots of hiking & in some colder climates, which means more layers and bulkier items like my hiking shoes. I made the decision to really focus my clothes on practicality, which means I sacrificed bringing lots of “cute” clothes that I inevitably wouldn’t be wearing much since the focal point of this trip is hiking, often at higher (read: colder) altitudes. If you know me then you know I’d wayyyy rather be warm than dressed cutely haha.
Overall tips:
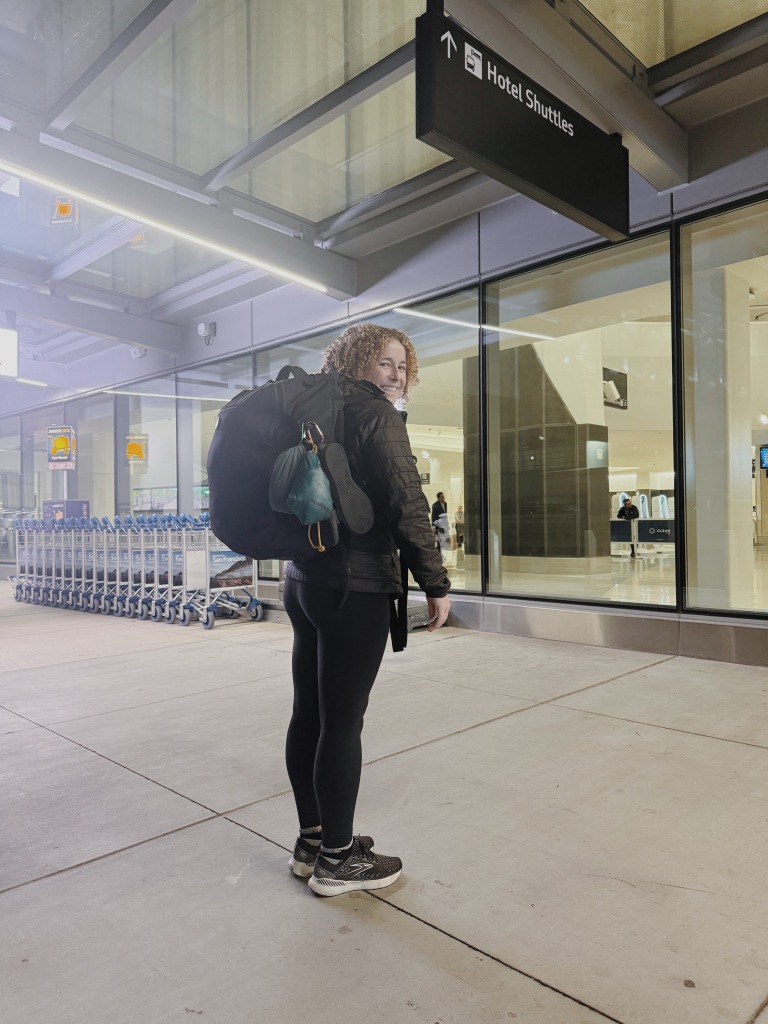
Start with the right bag! I love every bag I have ever had from Tortuga. They are designed for this type of travel and include features like opening like a suitcase (avoid top loading backpacks), fit carry on size restrictions, & organize your stuff beautifully. I currently use an old bag of theirs that is 35L. Try to take MAX 45L (but the smaller the better).
Consider the weather, destination, & time of year you are heading to South America as this will greatly vary what types of clothes you will need. Bolivia in the winter – COLD, Colombia in the summer- HOT, Buenos Aires – generally fairly mild year round
Think through how the clothes will layer together.
Make sure that every top works with every bottom and works with every shoes. Use a capsule wardrobe as inspiration. This is less important since my clothes are mostly athletic items, but still good to think through.
Less is more! I can’t emphasize this enough. You CAN do laundry. You CAN buy anything you feel like you ended up needing on the road. I promise!
If you are planning a longterm trip, don’t forget to check out all the things I wish I had known before setting off on my first big trip!
Also, here’s a great Antarctica specific packing list.
1 pair of Lululemon Align pants – can be used for working out/walking around town (even hiking in a pinch) or I can dress it up.
1 pair of Lululemon joggers- after a long day of hiking, I want a more casual, comfy pair of pants to throw on in the evenings.
One pair of warmer leggings from Patagonia – For Antarctica
Waterproof pants – for Antarctica
1 jumpsuit I had made in Hoi An (inspired by my Madewell Jumpsuit) – this will be my one cute outfit when needed
2 Cute shirts – these are pretty casual (in a pinch I could hike in them)
4 sports bras
4 athletic shirts (for running + sleeping in). One is from Vuori & a few from Lululemon. Need lots of these for all the hiking!
3 long sleeve shirt (I recommend Merino Wool but I can’t use it because I’m allergic to wool sadly so mine is from Lululemon – I have 3 colors!)
1 long sleeve jacket from Lululemon – good for warmth & layering, but also super cute!
Booty shorts (to sleep in)
5 pairs of underwear
9 pairs of socks (some regular, some hiking, some warm for Antarctica)
Waterproof gloves (for Antarctica)
1 black bralette
Light Patagonia puffer – good for chilly planes/busses & for layering on hikes. It also smushes down fairly small so it’s a great backpacker jacket. I’ve also used it as a pillow in a pinch.
1 Swimsuit – I don’t foresee doing much swimming on this trip, but it’s always smart to bring one
Hiking boots – I normally don’t bring these traveling since they are heavy & bulky (aka they never go in my pack, I just wear them on travel days), but for the amount of hiking I am doing, it’s a must to bring them.
Waterproof sandals (will act as my water shoe as well as my cute shoes- I never said the backpacker lifestyle was glamorous haha)
Sunglasses (Warby Parker)
Baseball hat
Bandana- for hiking
Warm hat – for hiking & for Antarctica
Scarf or gator – for Antarctica
Rain coat (Patagonia; you can pack it up into its pocket so I can easily attach it to the outside of my bag via a carabiner)
Running belt – I don’t use it often since my Lululemon Fast & Free’s have a pocket for my phone, but every once in a while it comes in handy.
Crossbody bag (I put it into my daypack on travel days). I use this out and about on a daily basis. It fits my iPad mini, passport, keys, credit cards, cash, AirPods, chapstick, sunscreen, etc.
ELECTRONICS
Computer + Charger
iPad
iPhone + Charger (I get a 6 ft cord so I can always reach the plug from my hostel dorm bed!)
AirPod Pro’s
Headphones (Bose; noise-cancelling for travel days)
AirTag (This is a no brainer these days; provides peace of mind incase I am forced to check my bag or when it’s below me in a bus. Always nice to confirm it’s still with me!)
Headlamp – for hiking + Antartica
TOILETRIES (I USE A BUNCH OF LITTLE TOILETRY BAGS TO KEEP THESE ALL ORGANIZED)
Toothbrush
Toothpaste
Floss
Any medication you take
Retainer
Deodorant
Tiny roller perfume
Makeup
Makeup Remover (I’ve become obsessed with cleansing balm for this because it isn’t a liquid, & it’s highly effective at getting makeup off at the end of the day!)
Razor
Conditioner + Shampoo (Get containers to put your products into & refill on the road!!)
Face wash
Moisturizer
Hair Brush
Pocket Hand Sanitizer– I keep one in my backpack and one in my sling/purse. Great in general, but also for when inevitably there is no soap at a random bus stop bathroom 🙂
Tiger balm (I picked this up in Southeast Asia and it’s now a staple in my bag. Great for mosquito bites and just feeling a little sick. It’s kinda like Vick’s vapor rub).
Ibuprofen
Hair ties and bobby pins
Moleskin
Bandaids
Cough drops
Topical steroid cream for bed bug bites or regular bug bites to help with itchiness
MISCELLANEOUS
Passport – no explanation necessary 🙂
ID (I bring my driver’s license)
Travel Credit Card- I bring 2-3 cards with me in case I lose one it gets stolen or it gets hacked. Important to get ones with no foreign transaction fee; I have the Chase Sapphire Reserve (hello lounge access!) + Capital One Venture Card.
Debit Card (Charles Schwab has the best one because it reimburses ATM fees from any ATM in the world 🙂)
US Dollars – I always bring 1-2 Hundred dollar bills as an emergency source of cash (luckily most places in the world would take USD if it was truly an emergency & you needed some cash to get you out of a situation), however, in the case of South America, I’ve taken more! Between Bolivia’s visa requiring payment in USD & the best exchange rate being USD to local currencies in a lot of countries, I’ve taken closer to 10 Hundred dollar bills
Record of your plans (I make folders within my email inbox to keep track of everything or you could print out a copy of your itinerary)
Eye Mask (you can either go the classic eye mask route or get one like this that almost acts like your eye mask + ear plug since you can play white noise through the built in bluetooth speaker- pretty cool!)
Lock (for staying in hostels or locking my bag.) Get the combo lock so you don’t have to worry about tiny keys. I take two to be able to lock two different compartments in my bag AND so I can keep my computer/passport/iPad compartment still locked when I use the other one to lock a locker within a hostel.
3 carabiners – I just attach them to my backpack and over the course of the trip they will hold everything from my water bottle, shoes, rain jacket and more. You will not regret having a few on hand.
Hand warmers for Antarctica
Pack of playing cards (My sister got my a custom deck with some of my favorite photos from my travels – such a thoughtful gift)
Monopoly Deal – a fabulous compact game for the backpacking trail!
Face mask (I’ve used this while feeling sick as well as on a dusty motorcycle ride)
2 pens for writing postcards
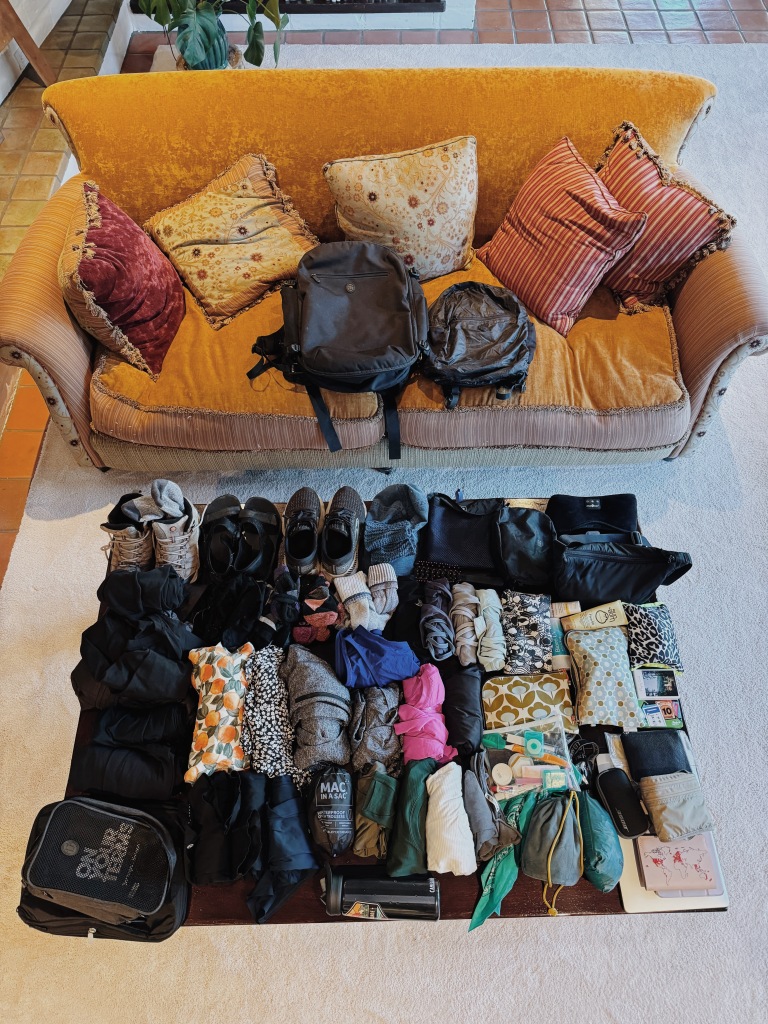
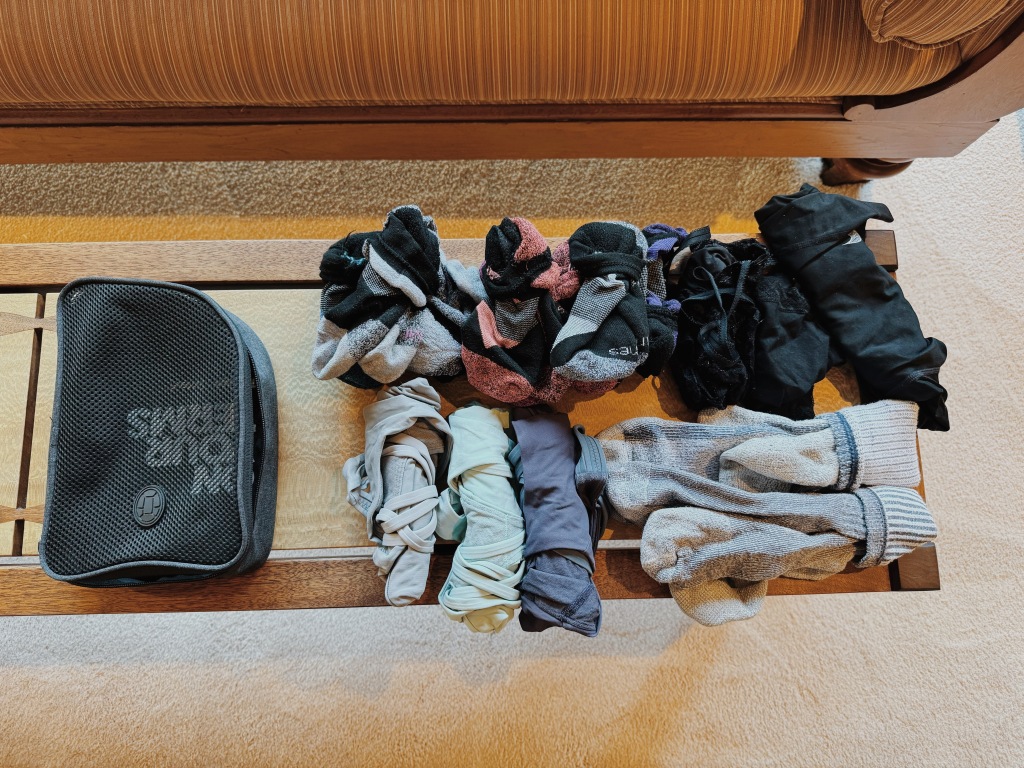
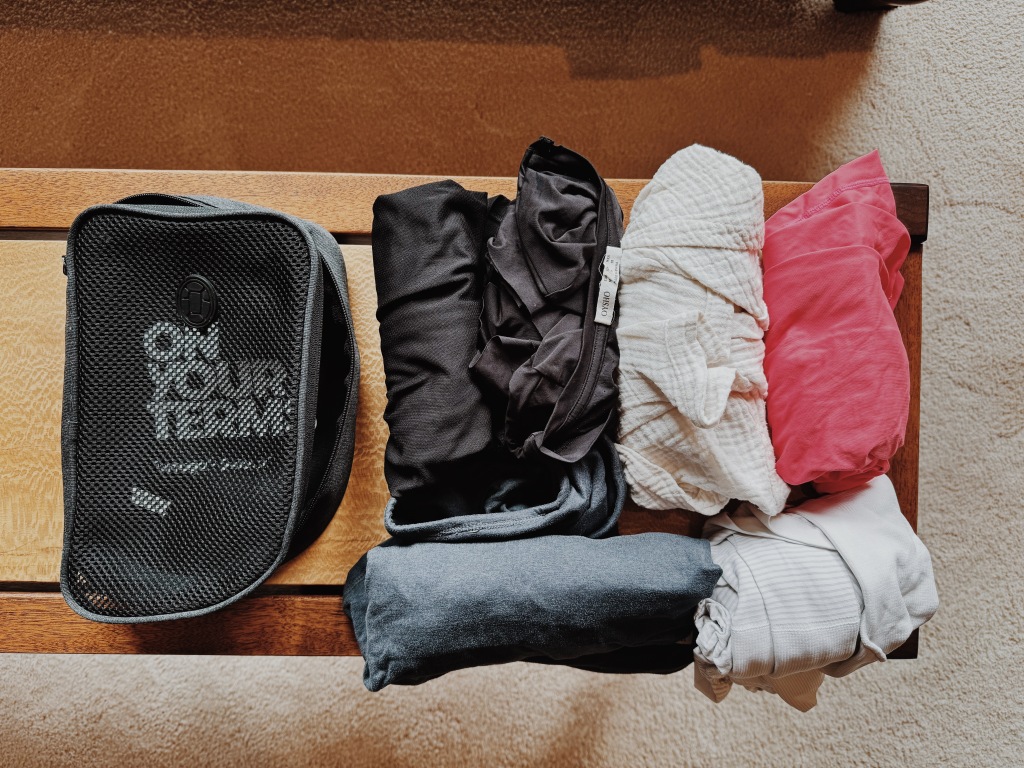
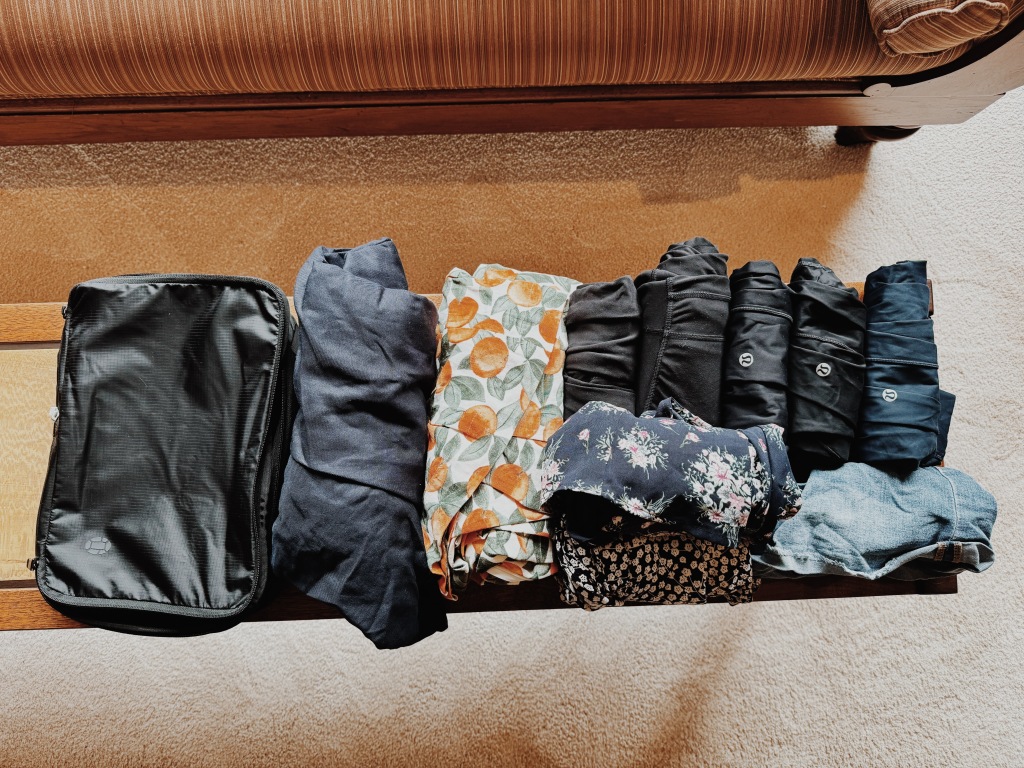
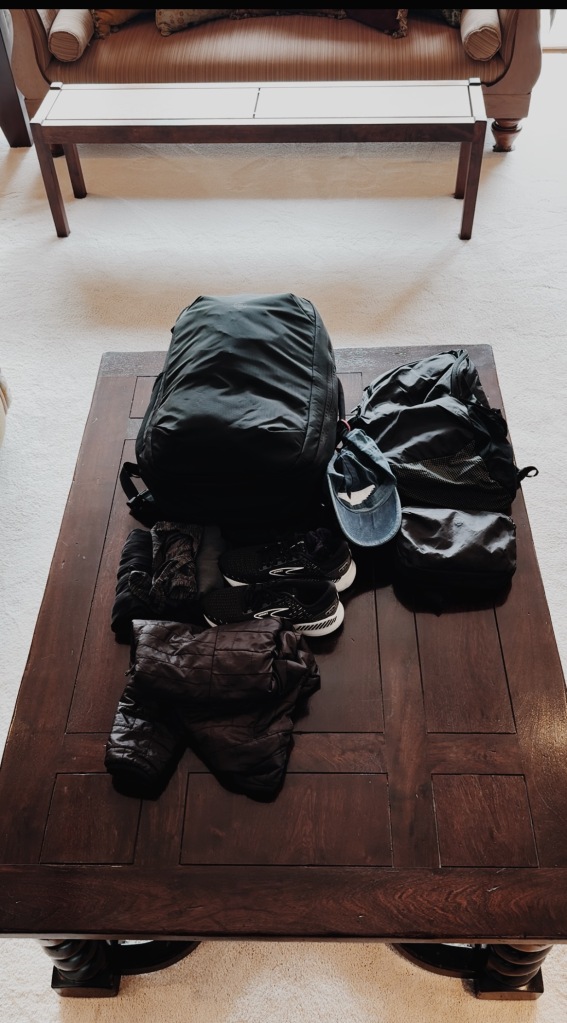
HERE IS EVERYTHING SPREAD OUT ON A TABLE!
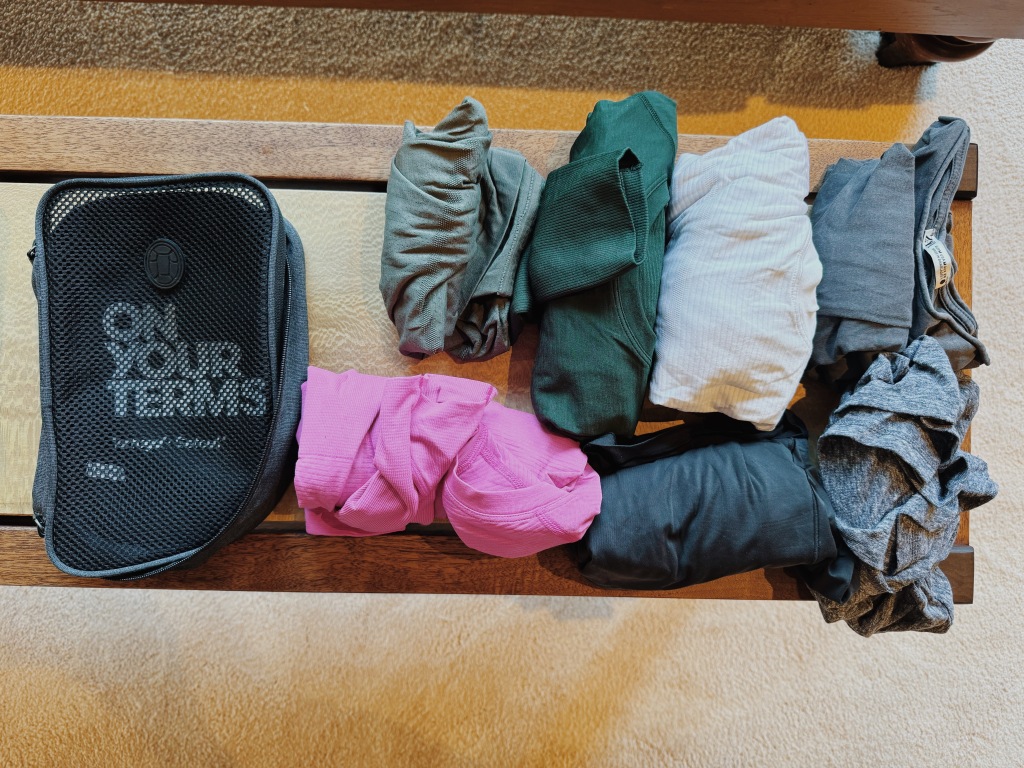
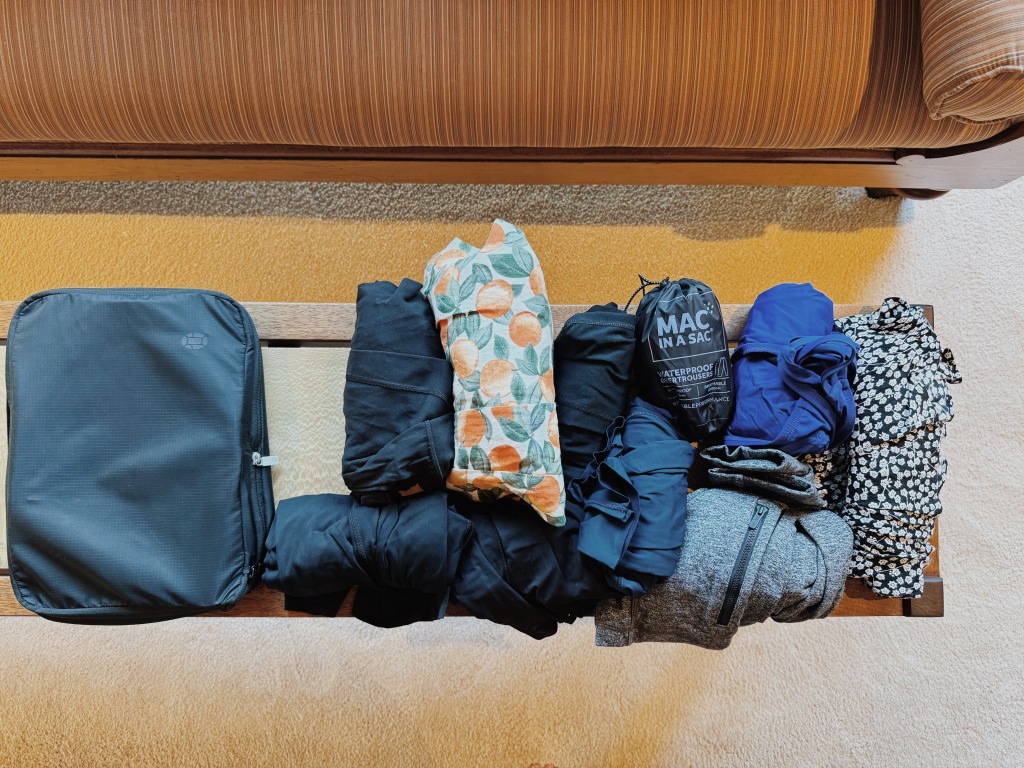
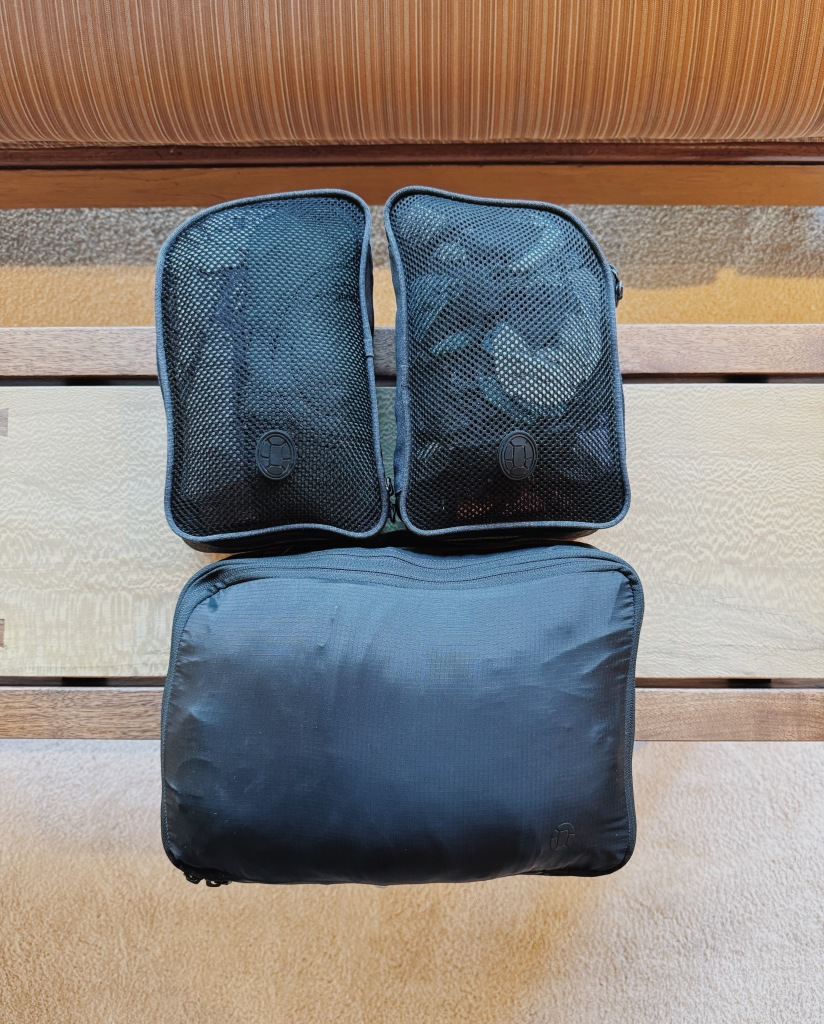
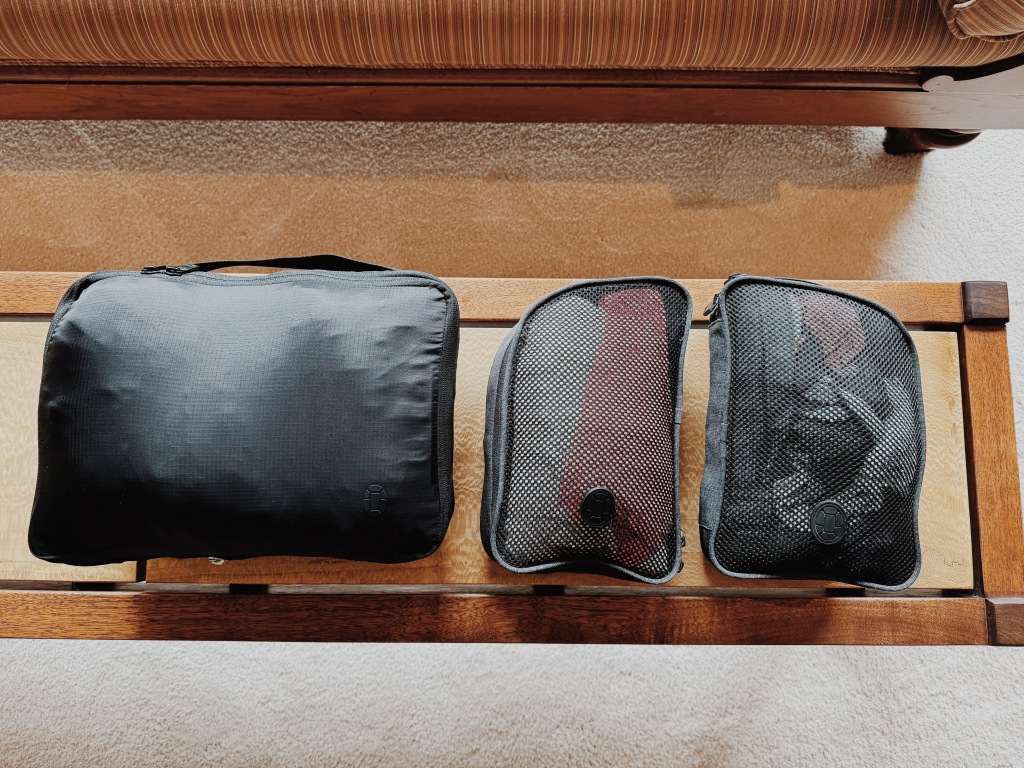
Here is what is packed in each packing cube:
Three sports bras, 9 pairs of socks, booty shorts & underwear3 long sleeve shirts, 2 short sleeve shirts, & 2 cute shirtsLululemon jacket, 6 pairs of pants, swimsuit & jumpsuitAll packed up
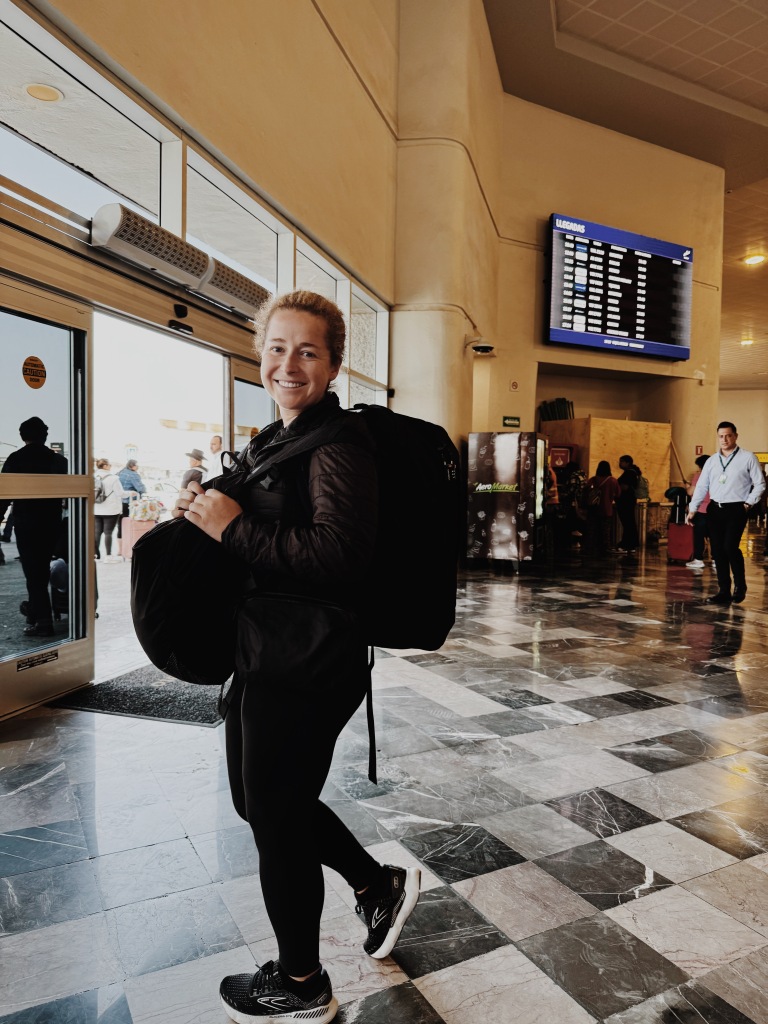
All packed up and ready to go on another adventure!
Well I’ve officially been on the road for over a year!! I can’t believe how fast time flies when you are having fun… & jet setting around the world! If you know me at all in real life, you know there are two topics that get me more excited than anything else: Travel & Personal Finance. So I thought it would be fun (for me anyway haha) to put together a post on what one year of international travel can look like from a financial perspective.
Some considerations:
This is only for one person (me)
I travel fairly cheaply (mostly staying in hostels) & in general don’t have expensive taste in food or transportation, but I also am saying yes to any experiences that I want to say yes to
I am traveling fairly quickly so taking lots of flights + moving locations every 3-5 days usually. It’s much cheaper to travel slower
I am not traveling in a super logical route. For example, while in Europe I went to England, then Northern Ireland, then France, then England, then Switzerland, then England, then Ireland… I was meeting up with different friends at different points so while it wasn’t logical, it made sense for what I was doing. However, again this is an area that one can make cheaper if they don’t travel in circles like I did haha
I am flying home to California quite often for Christmas, my 30th birthday, and for some weddings. Again this is driving up some inefficiencies.
Here’s the trip summary leaving in June 2023, covering 30 countries across 6 continents:
6 months in Europe + Egypt – 19 countries
.5 month CA visit for Christmas
1 month Fiji & New Zealand with my family – 2 countries
3 months Southeast Asia + Japan – 6 countries
.5 month CA visit for my birthday
2 months Mexico + Colombia – 2 countries
In full transparency, my parents kindly paid for Fiji, NZ & Japan since I was with them for those three countries (very, very lucky!!) so this analysis will cover roughly 10 months (FJ, NZ, Japan + CA visits were roughly free). Also on this trip, I have tried to add what I spent in each country to its dedicated blog post so hopefully that’s helpful (for example: scroll to the bottom of this blog post to see how much I spent for 3 weeks in the Philippines).
Here we go…
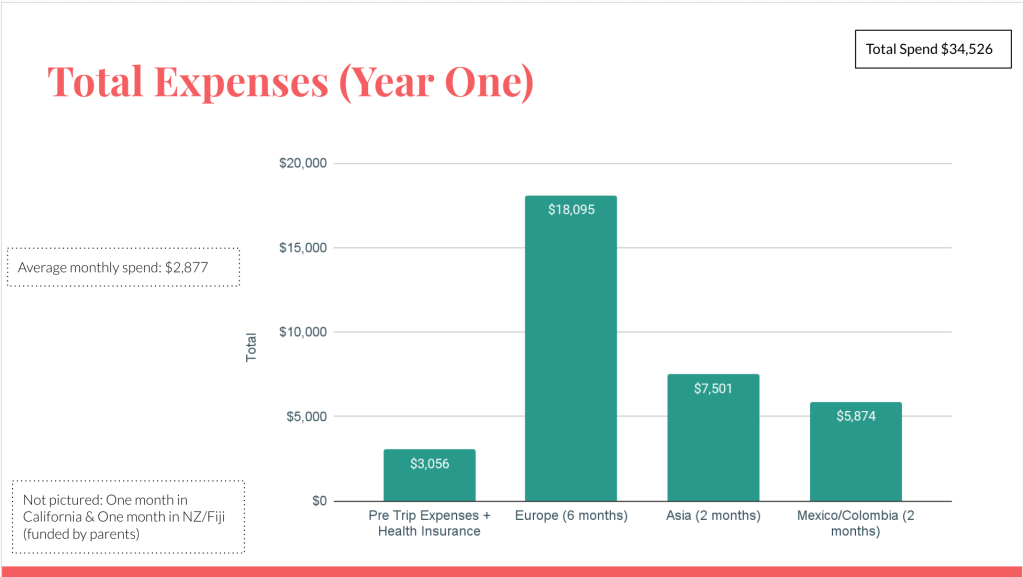
Total Spend: $34.5k USD
Spend by Segment
This shows a breakdown of the total spend by trip segment. Obviously Europe will be the highest since that was the longest segment of the trip so far. Pre-trip expenses include: clothes, Workaway membership, initial flights, & electronics. Health insurance for the duration of the trip was $170 per month ($2,040 for the year).
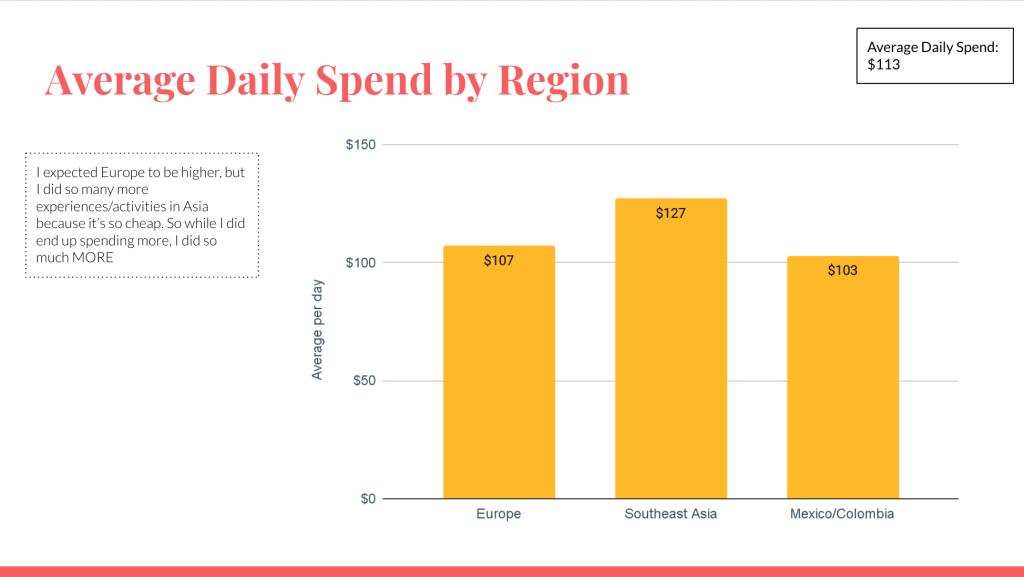
Average Daily Spend by Region
This shows the daily cost by region, which makes it far easier to compare the costs agnostic of time spent in each spot. I was a little shocked to see that Southeast Asia was the highest since it obviously has a reputation for being one of the cheapest places to backpack, but I was living my best life while there. I spent $351 on 22 hours of massage (average of $16 per hour). I spent $577 on 13 dives (average of $44 per dive). I did a 3 day sailing trip around the Philippines. I did a 3 day cruise of Ha Long Bay. I did a 4 day motorcycle ride through Northern Vietnam. I spent $450 on tailor made clothes in Hoi An. This is opposed to Europe where the only “experience” I spent money on was the hot air ballon ride in Turkey. Put another way: in Europe, the activities category made up 15% of total spend. In SEA, the activities category made up 35% of total spend. So while the average daily spend was higher for SEA, I was living like a queen.
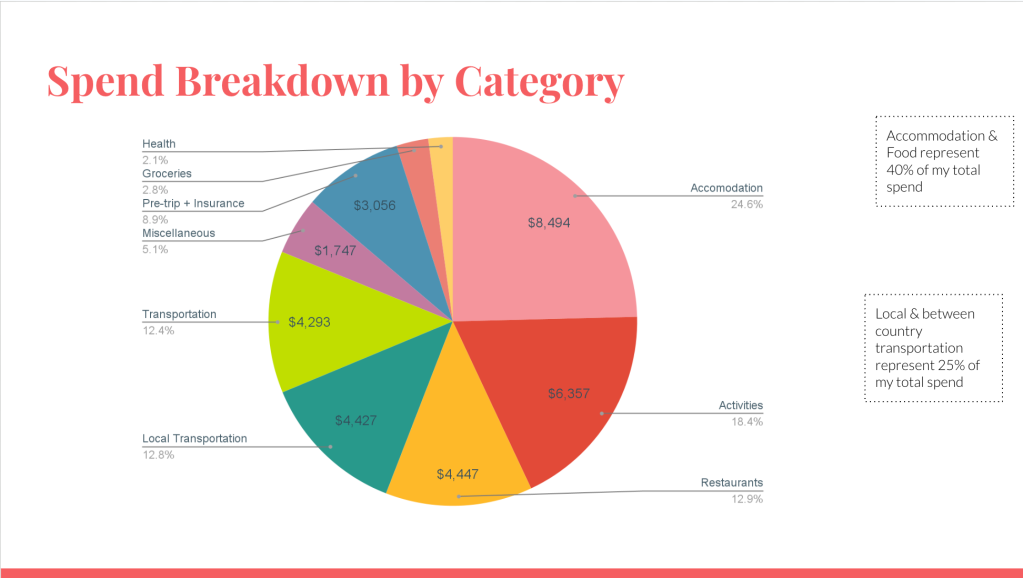
Spend by Category
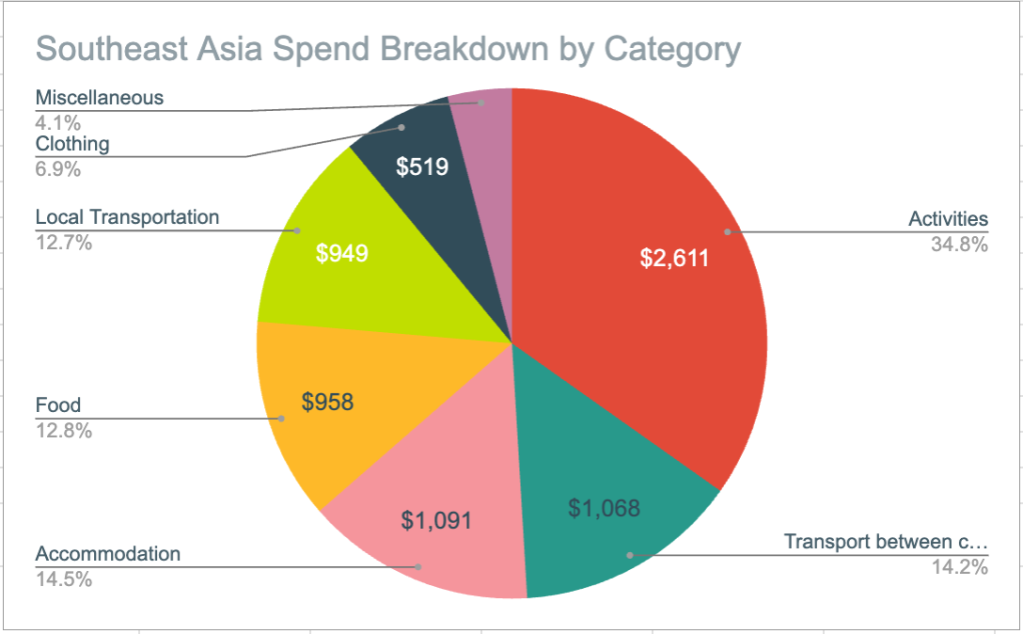
This is a breakdown of how much I spent by category. As expected, accommodation is my largest spend, but I am actually proud of myself for spending so much on activities! I can be pretty stingy with spend so I love that I have said yes to so many experiences on this trip. A lot of them ended up in my top 5 memories of the trip 🙂 You’ll find the breakdown for the trip overall as well as by region.
Europe (6 months): $18.1k
Southeast Asia (2 months): $7.5k
Colombia & Mexico (2 months):
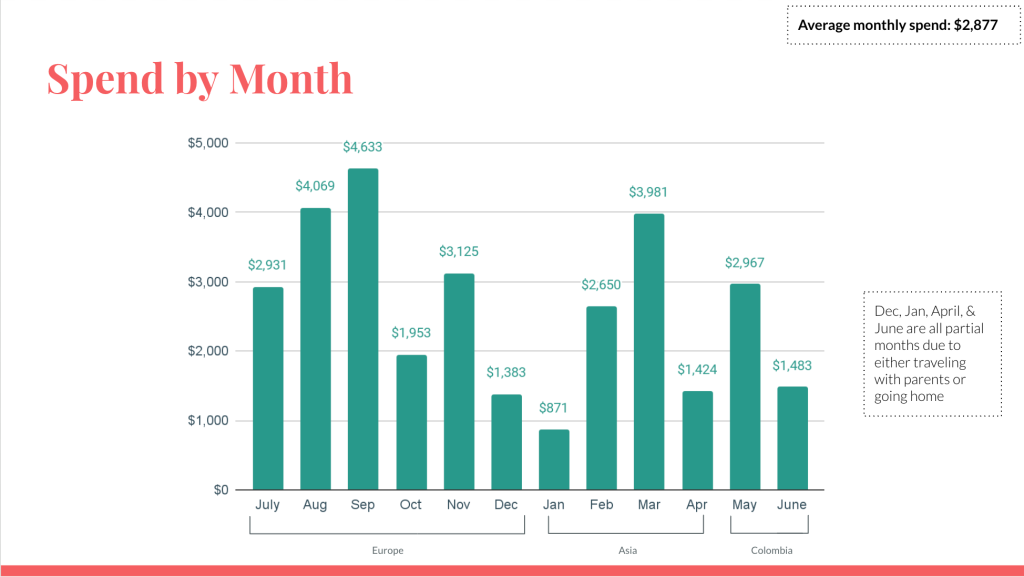
Spend by Month
This breaks down my spend by month! Sept was particularly high because I managed to spend $1400 in 3 days in Switzerland (thank you last minute rental car & expensive destination). October was lower because 3 weeks of that I was au pairing in Spain with living expenses covered. As noted on the graph, Dec, Jan, April & June are all low spend months because either I spent 2 weeks at home or my parents were with me. I averaged $2,877 per month over the course of this year, which when you compare it to what I spent just living in San Francisco, this is actually cheaper!
Top 5 experiences of the trip so far:
Hiking Milford Track in New Zealand ($2045, but my parents paid for this)
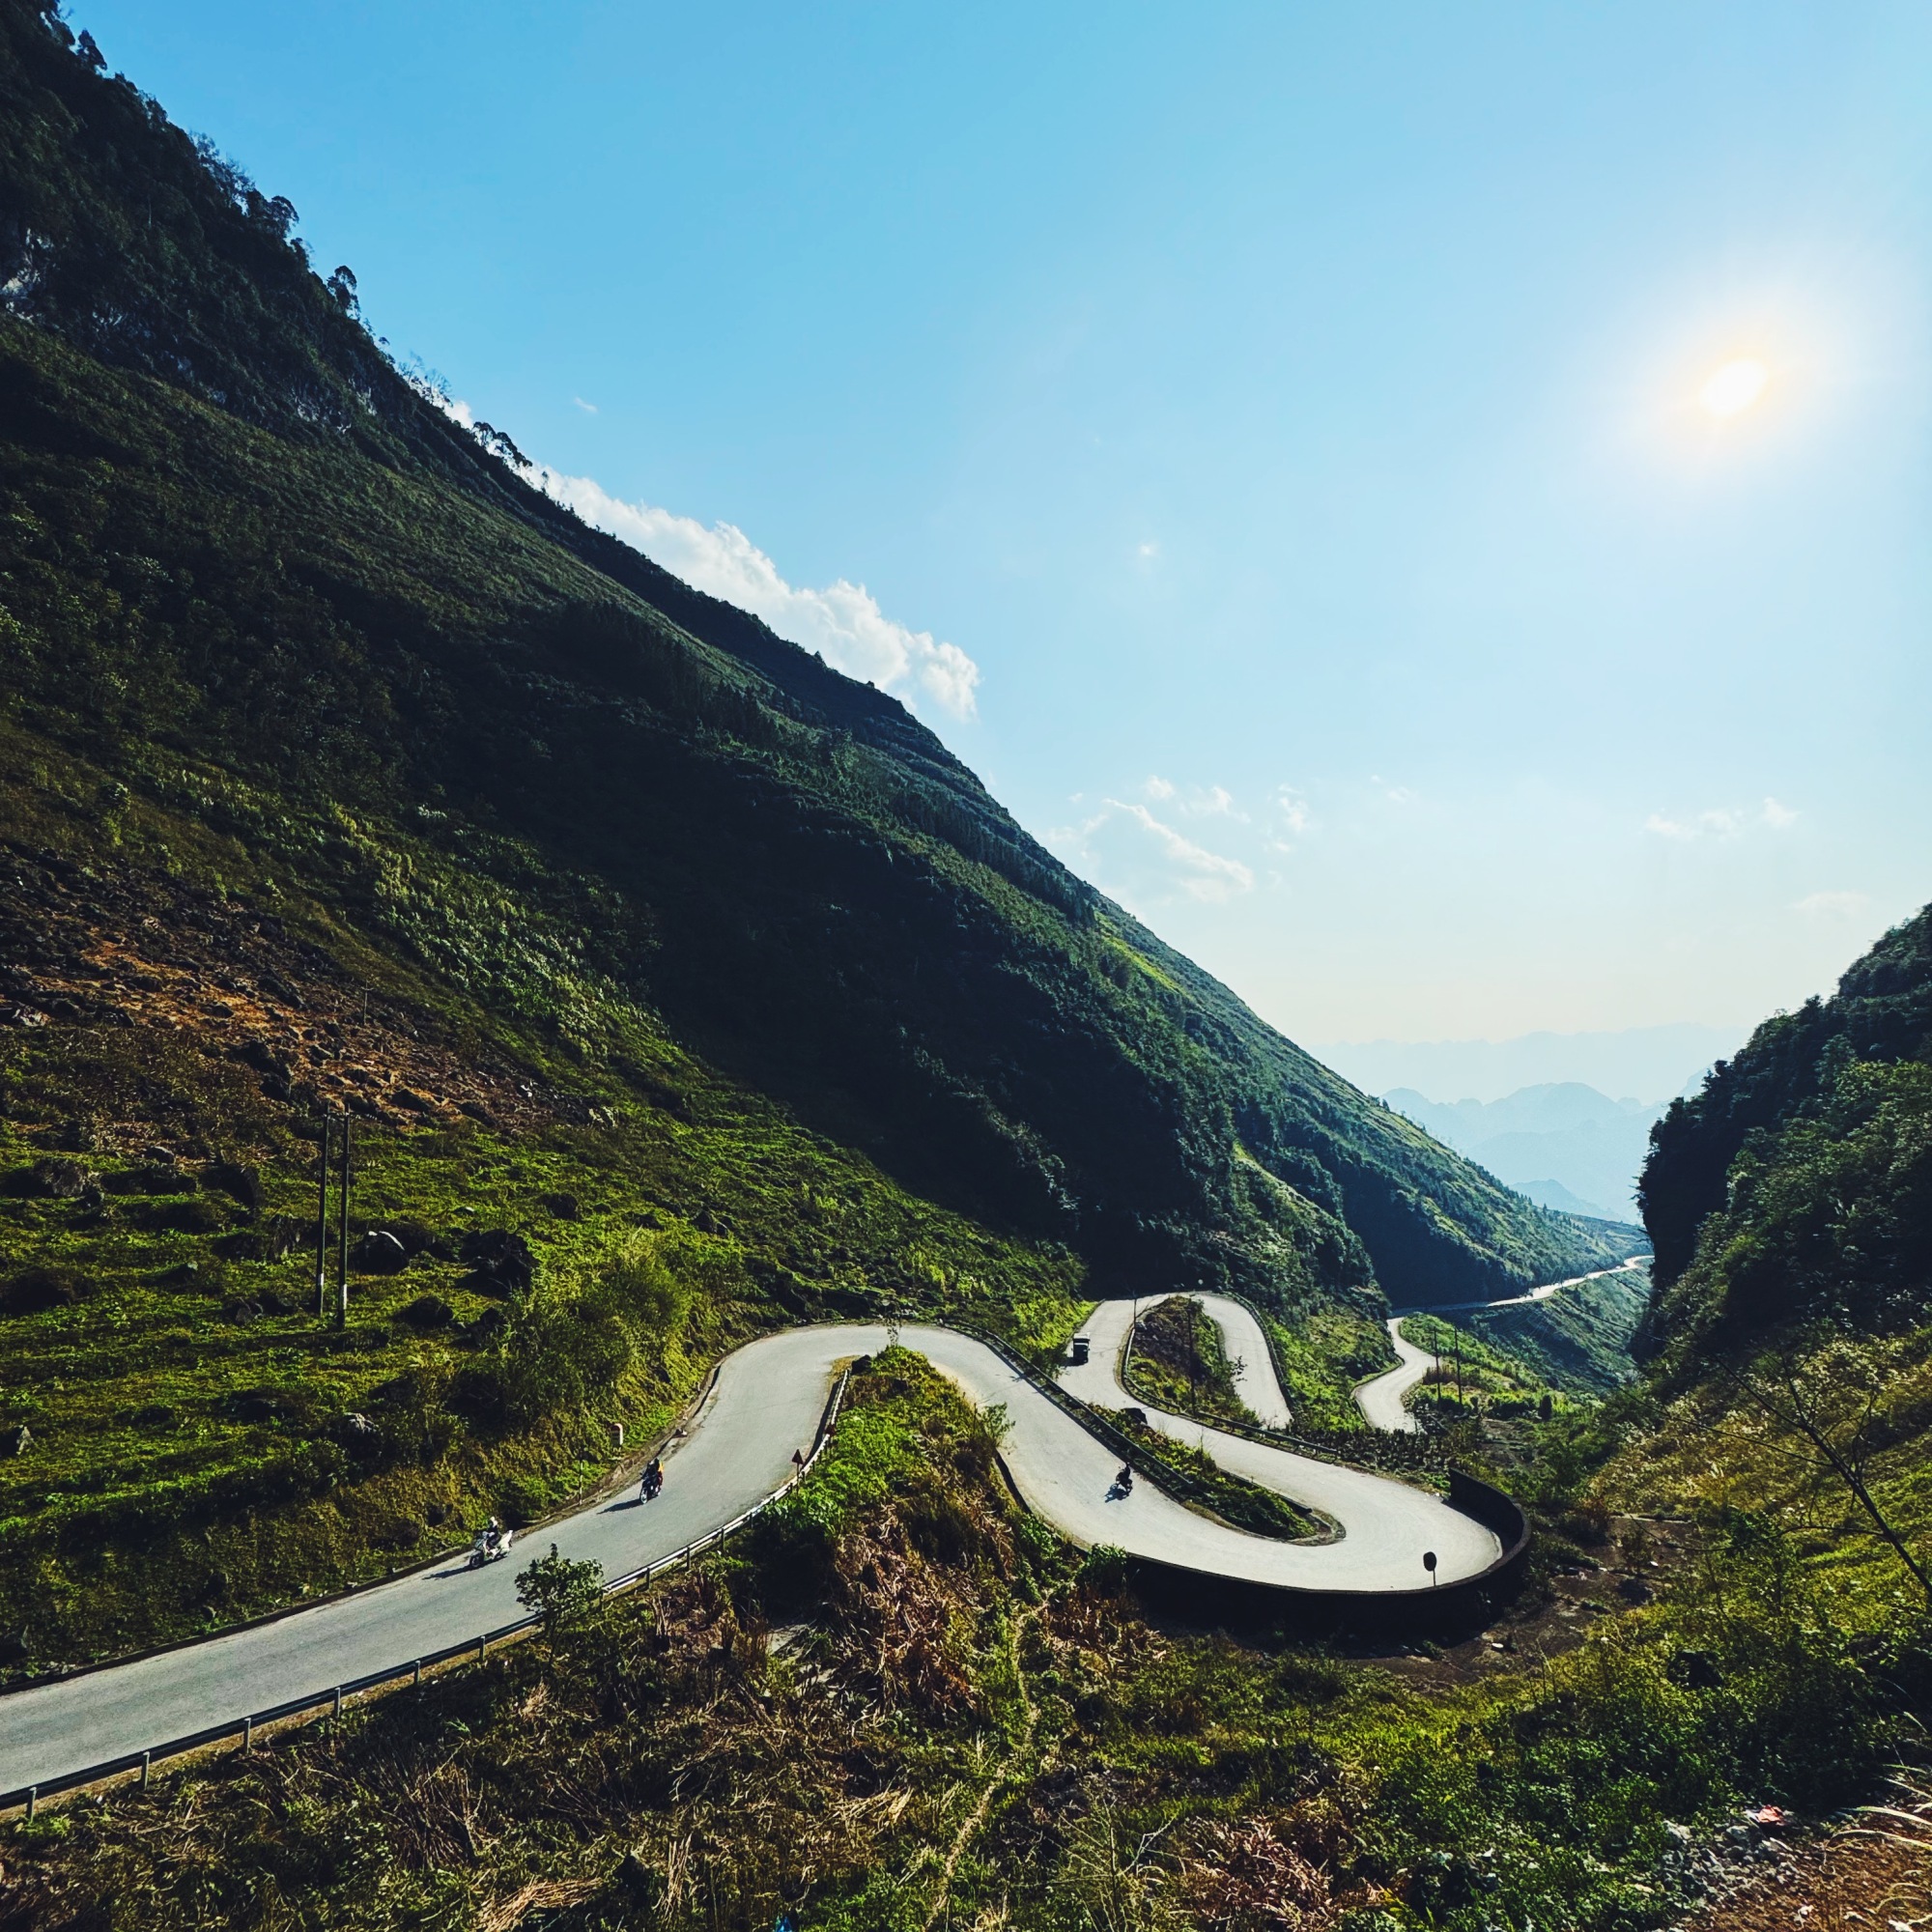
Riding Motorbikes through the Ha Giang Loop in Vietnam (300 USD)
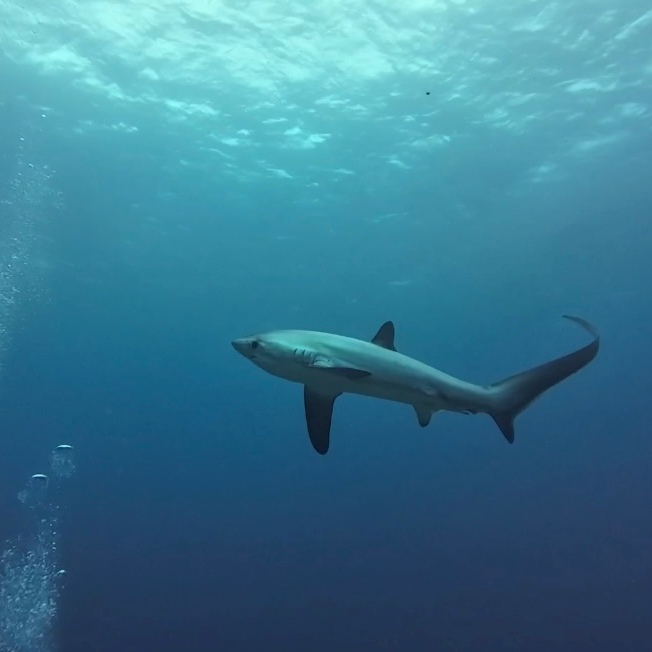
Scuba Diving with Thresher Sharks in the Philippines ($88 USD)
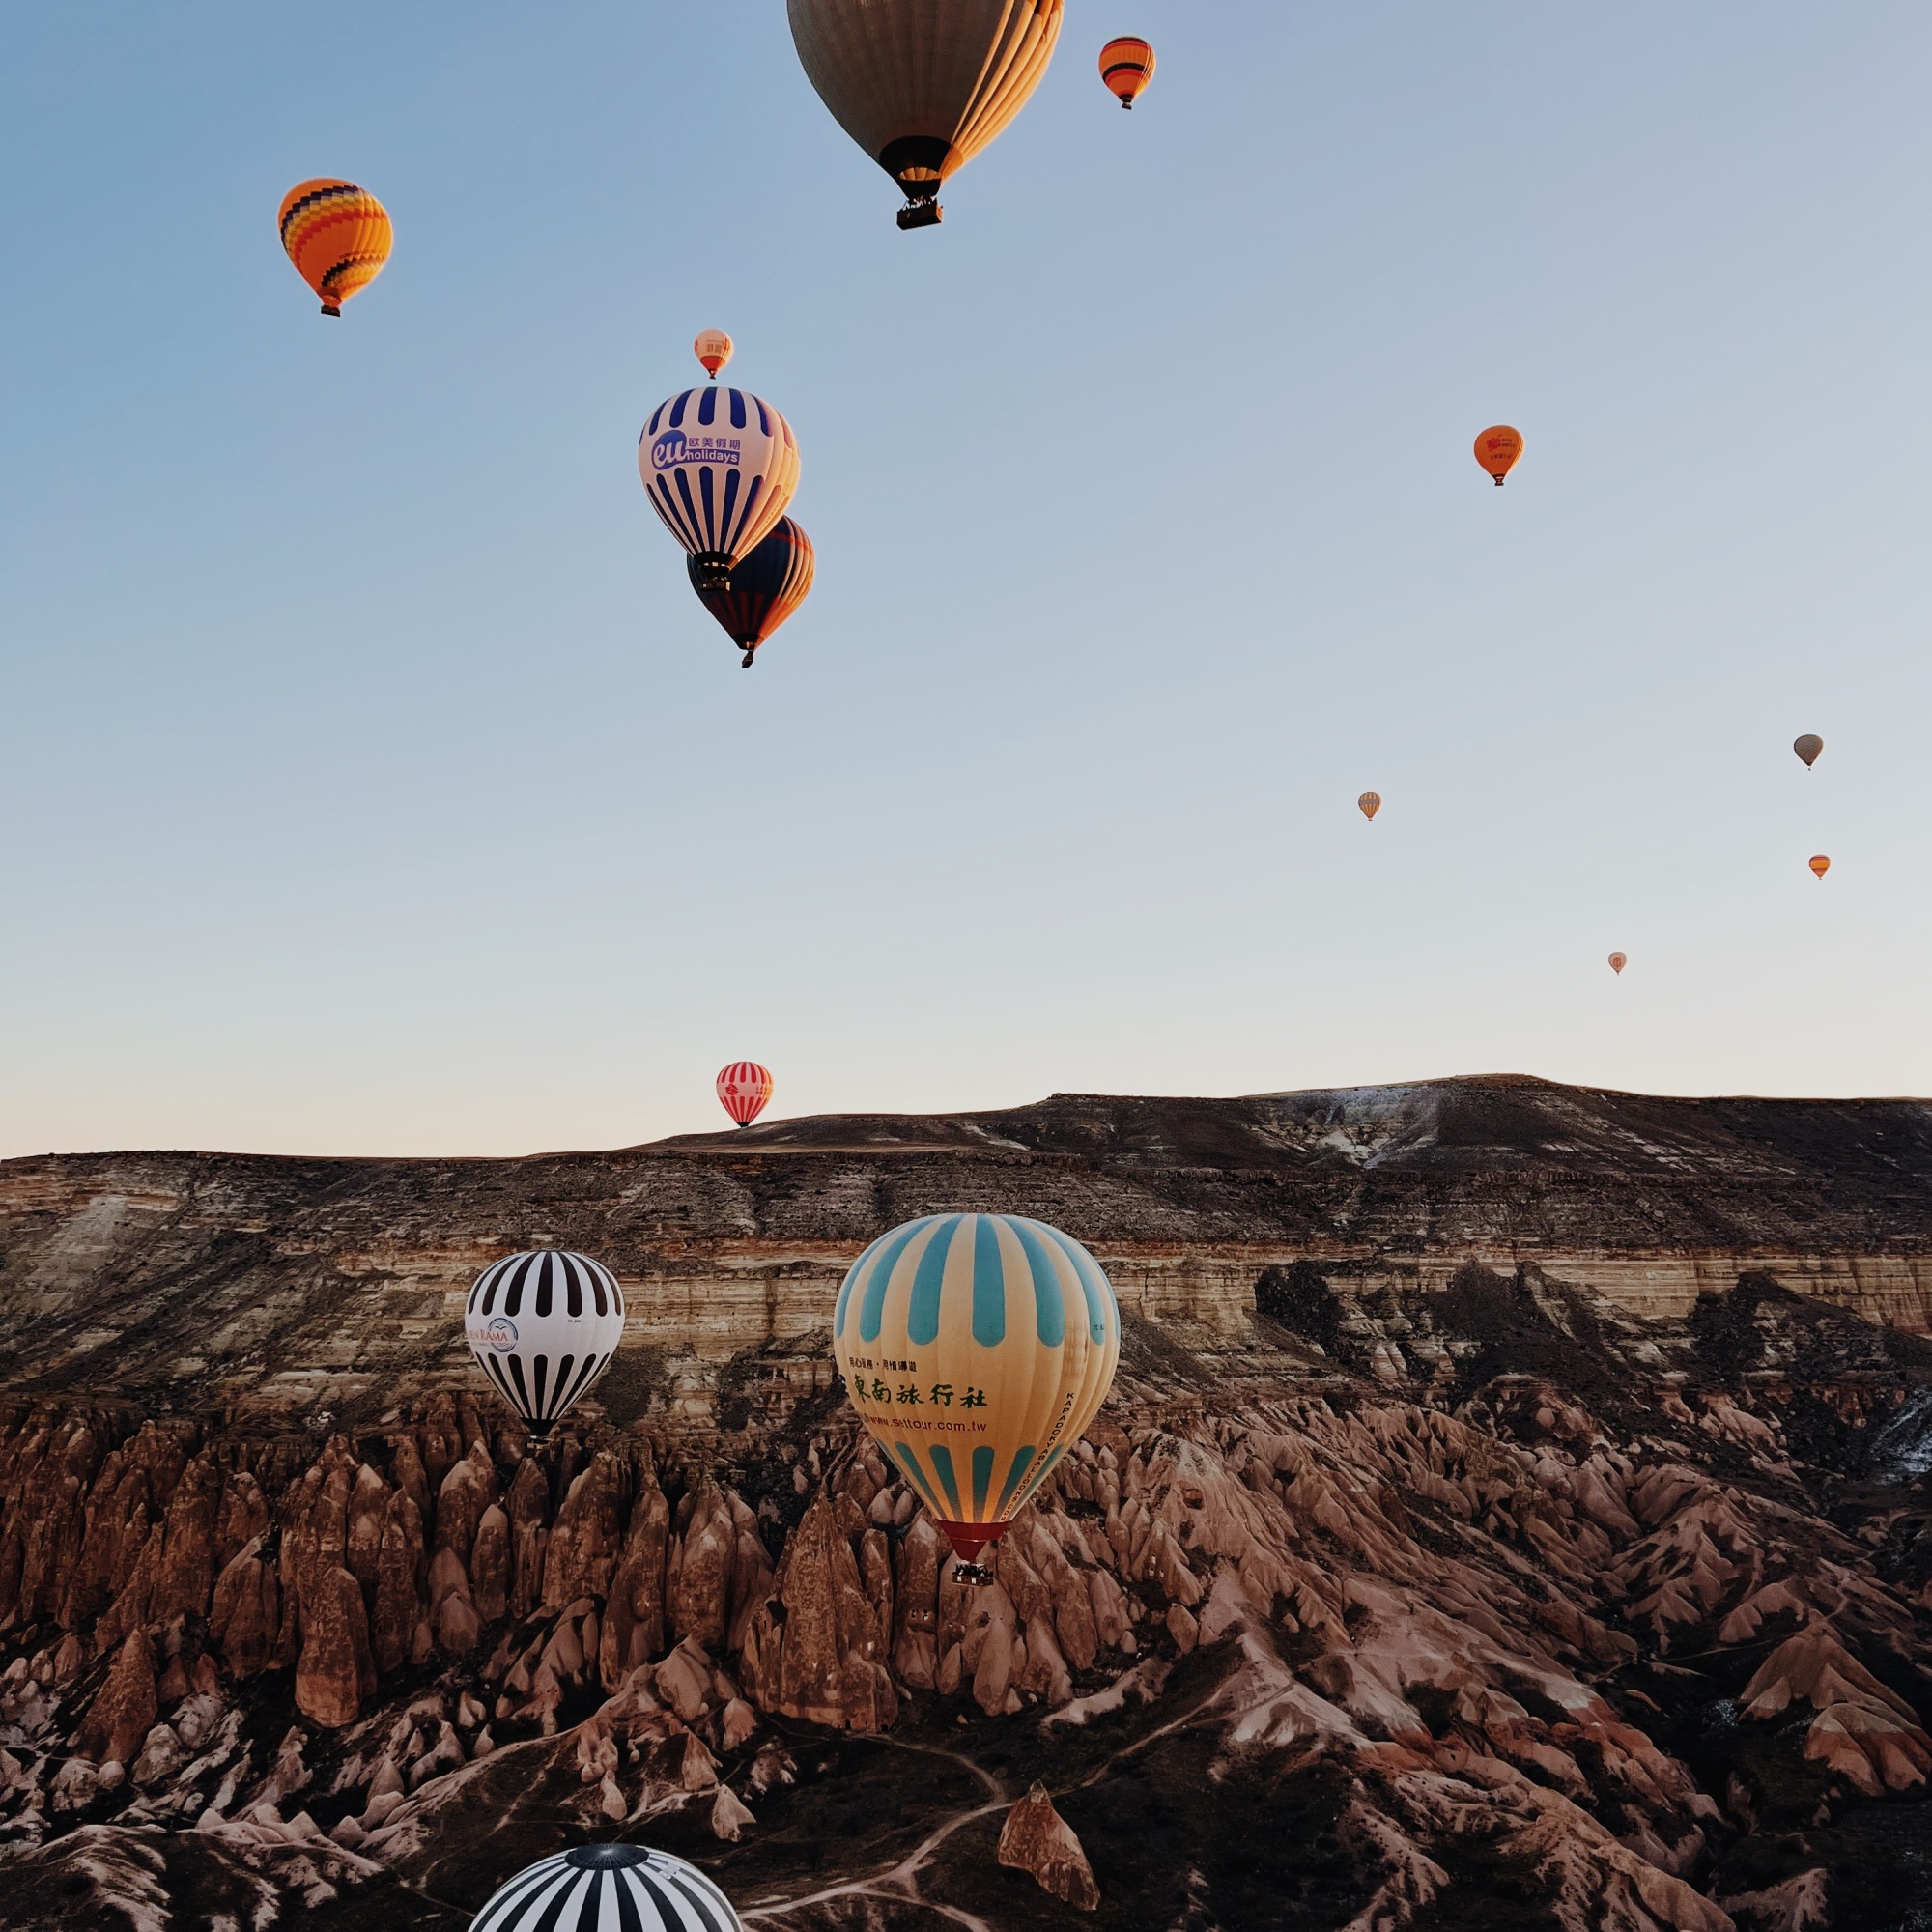
Hot Air Balloon Ride in Turkey (~$200 USD per person)
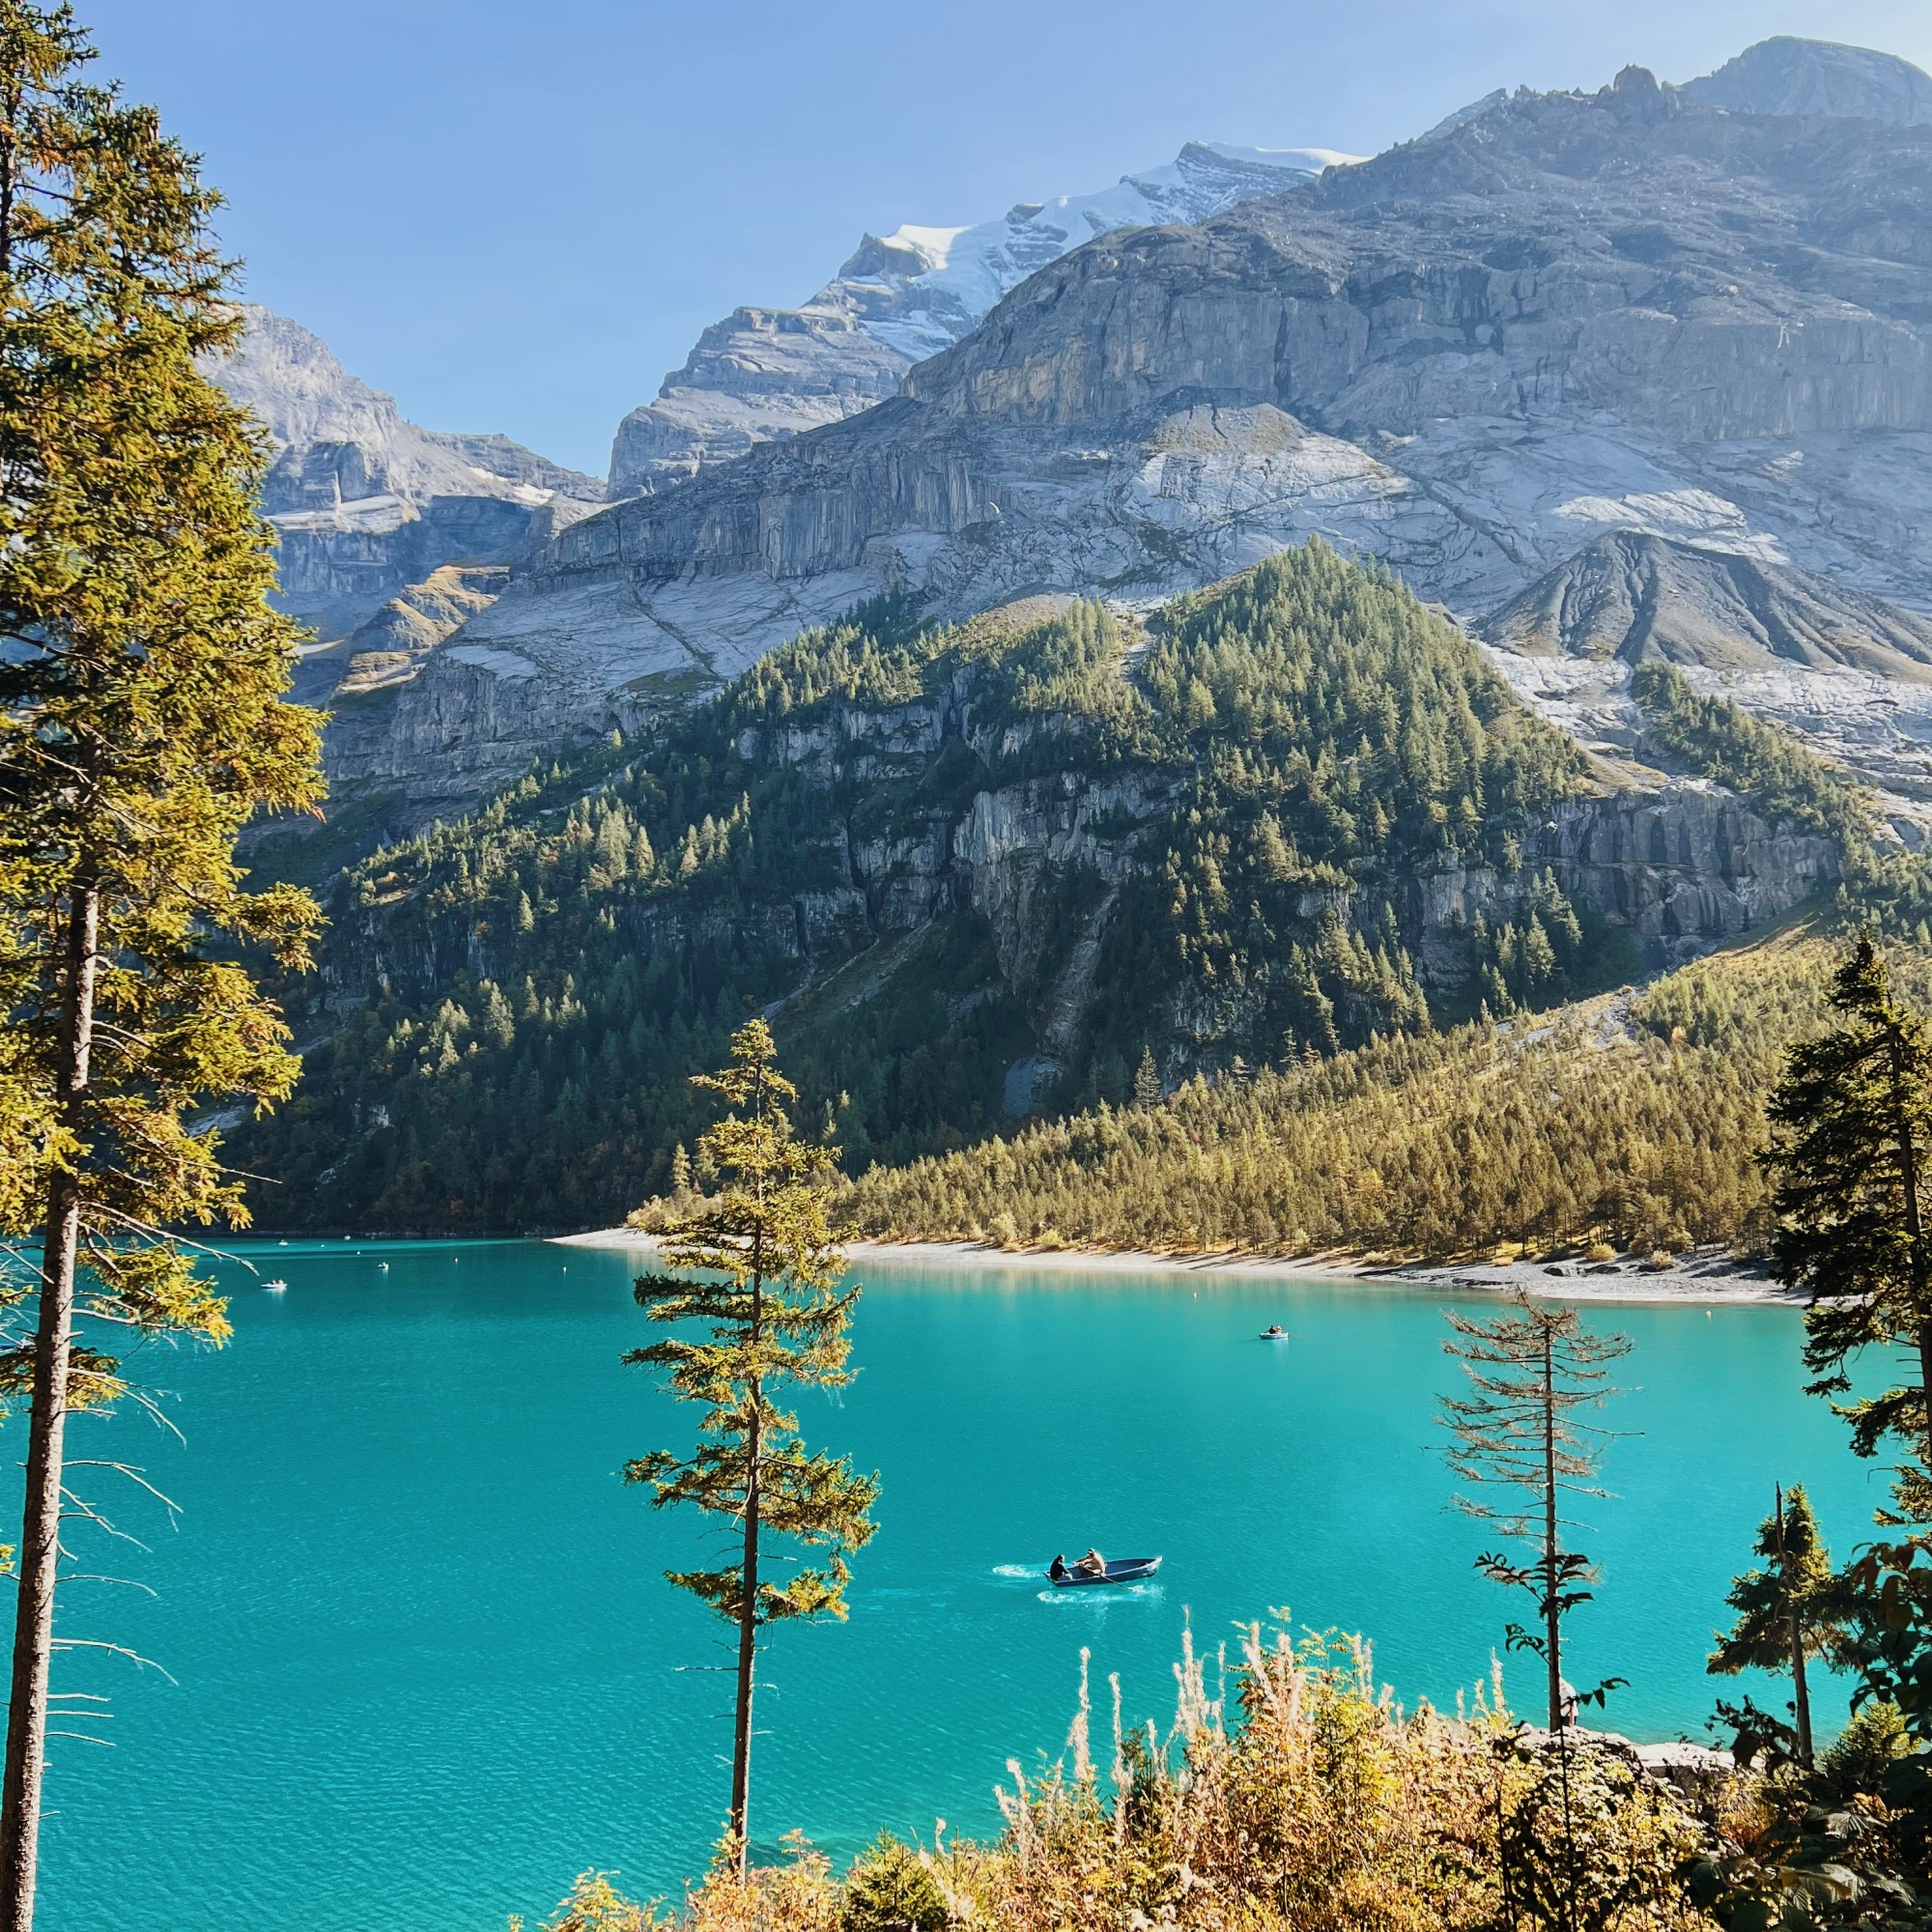
Hiking in Switzerland (~35 USD)
Top tips for traveling cheaper:
Stay in dorms in hostels – you might sacrifice a bit on quality of sleep but in general the cost savings + meeting so many cool people makes this a great resource for traveling on the cheap
You’ll notice I spent almost $4500 on eating out. If you are staying in airbnbs or hostels with kitchens (more common in Europe, NZ & Australia), buy groceries!
Travel slower. As I mentioned, you’ll save a lot on accommodation costs if you can book a month long airbnb than hotels/hostels for a few nights at a time. This also will bring down your transportation costs.
Fly less! Unfortunately I am doing a lot of flying. I’d be saving a ton of money if I was doing bus/train travel and if I was going slower, thus visiting less places.
Only take a carryon backpack. You’ll save on baggage fees every time you do have to fly.
Use credit card points to book flights.
Consider doing WOOFING or Workaway to save money in exchange for working a few hours a week (usually ~20)
Hope this was helpful!!! Wish my luck on my next year of adventures, starting with more time in South America 🙂
Well I’ve never really “traveled” here but since I’ve spent most of my adult years living in San Francisco (when I’m not galavanting around the world), I thought I might write out a few of my favorite things to recommend to people when they visit my favorite US city.
It’s not comprehensive but it’s a list of some of MY favorite things to do 🙂
Pro tips:
Don’t call San Francisco “San Fran” or “Frisco”. Do call it SF, San Francisco, or The City.
Don’t leave anything in your car when you park it. Notice I didn’t see leave anything valuable, I said don’t leave ANYTHING in your car. It will get broken into.
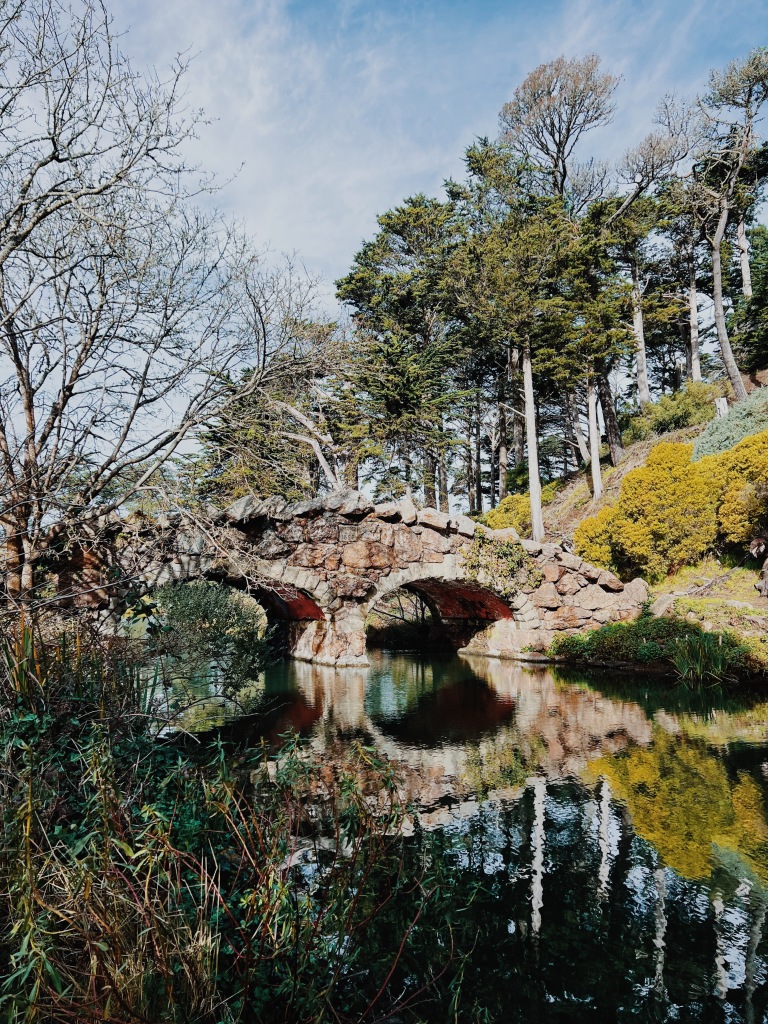
While SF can be expensive, lot’s of my favorite things to do are free/cheap. Play pickleball in the most beautiful location in the Presidio, walk along Chrissy Fields, explore Haight Ashbury, picnic in any of the incredible parks, etc.
From a weather perspective, I think September & October are the best times of year to visit. This is our summer when we get the most sun & it’s fairly warm (although SF has a microclimate and it’s always much cooler than any of the surrounding areas so DO NOT FORGET A JACKET). Runner up would be April/May when spring is doing its thing.
Public transport & Uber are pretty widely available in SF, so if you can avoid renting a car, I’d recommend it. But if you are leaving SF, then just wait to rent a car once you are leaving.
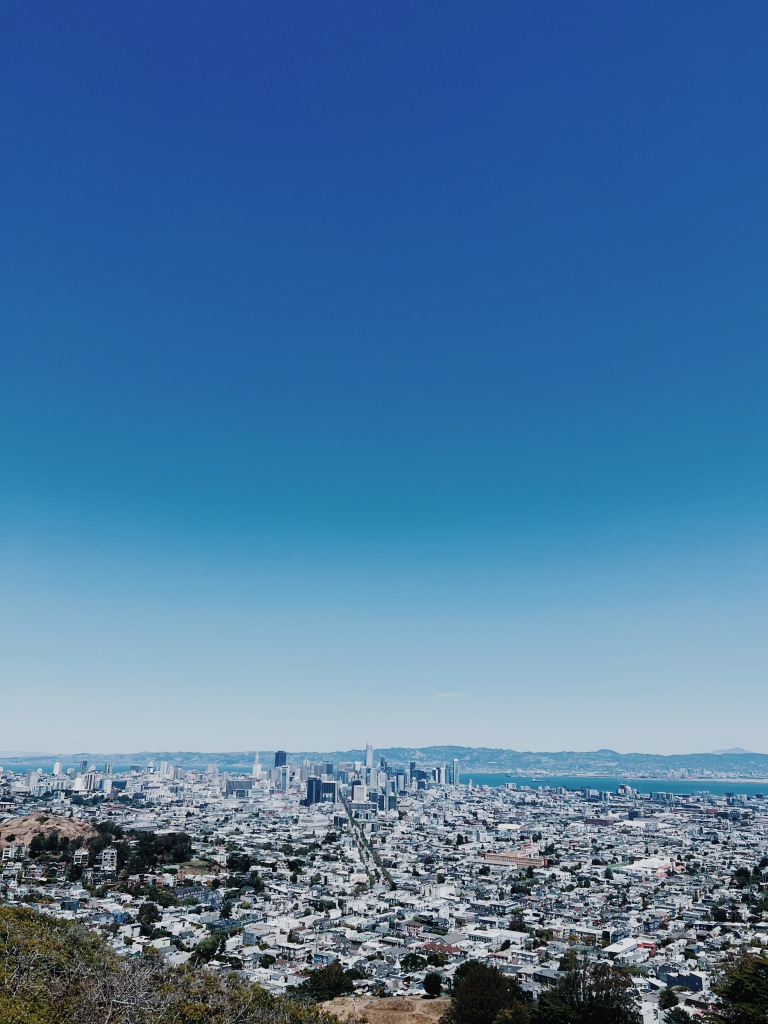
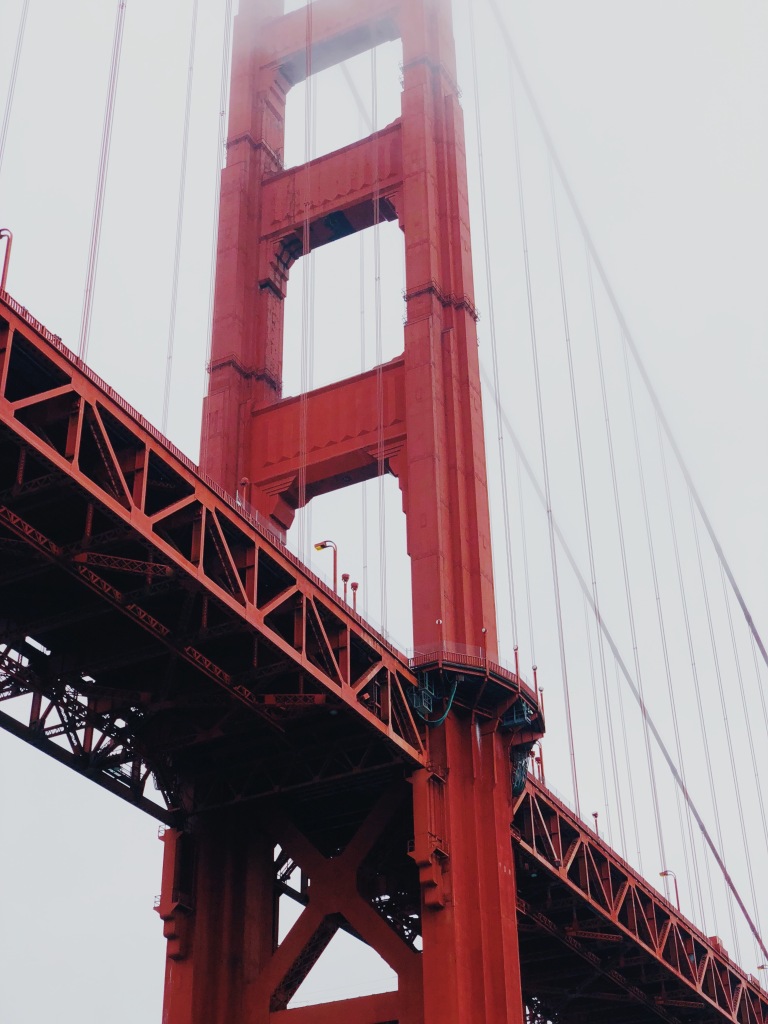
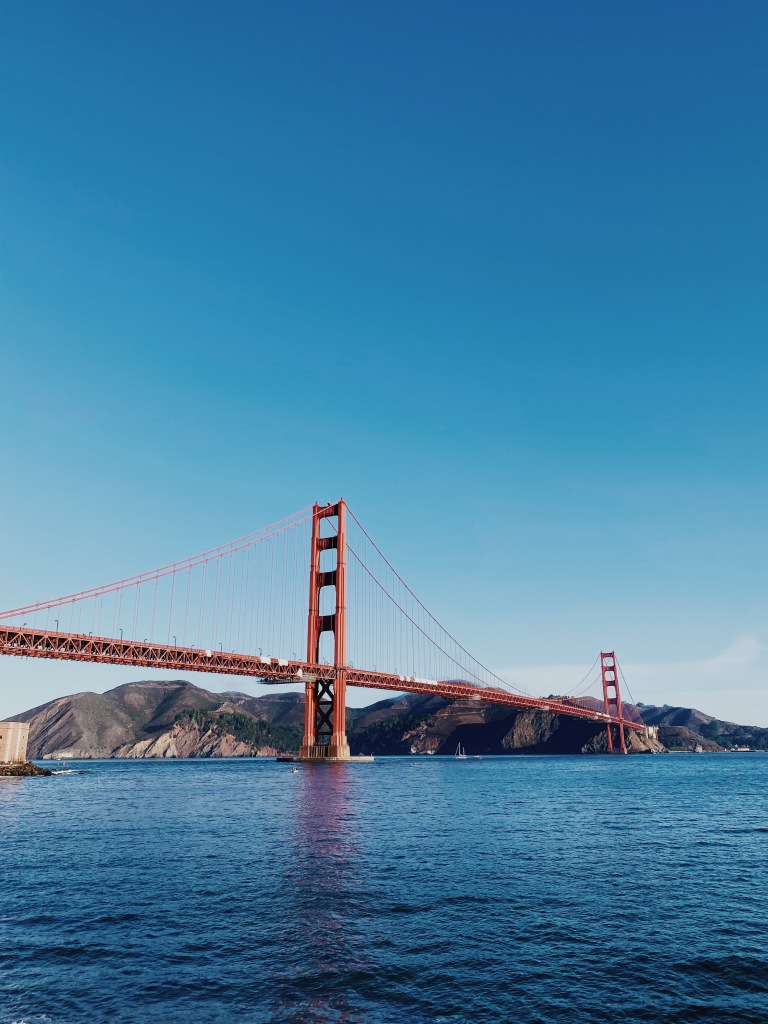
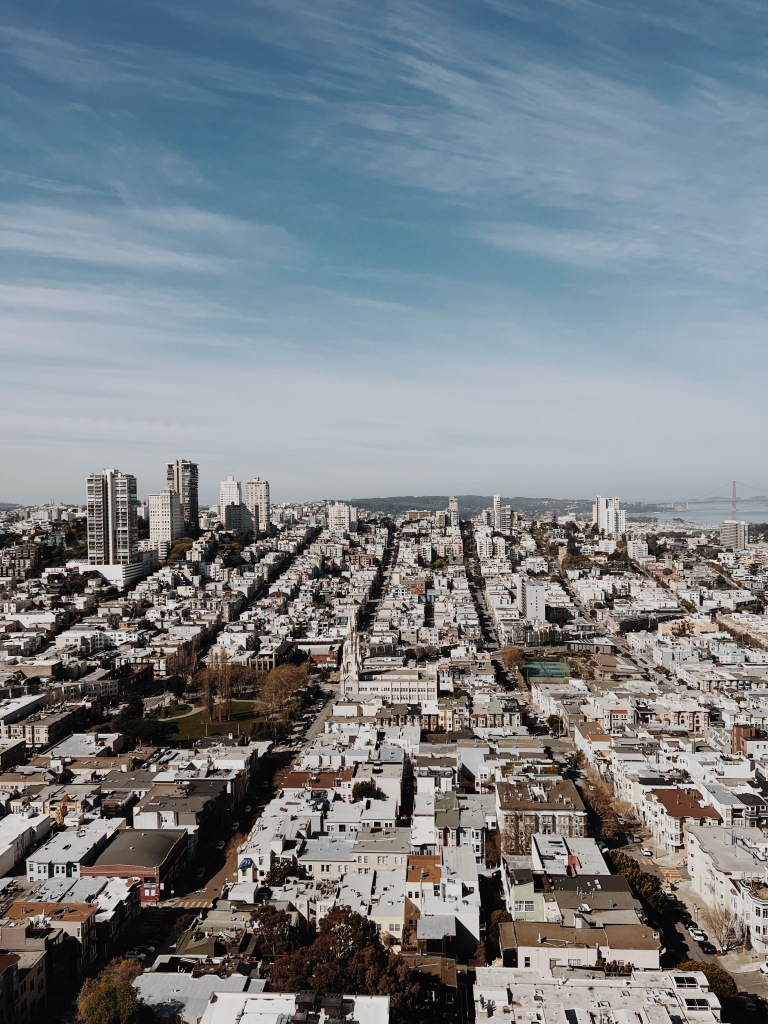
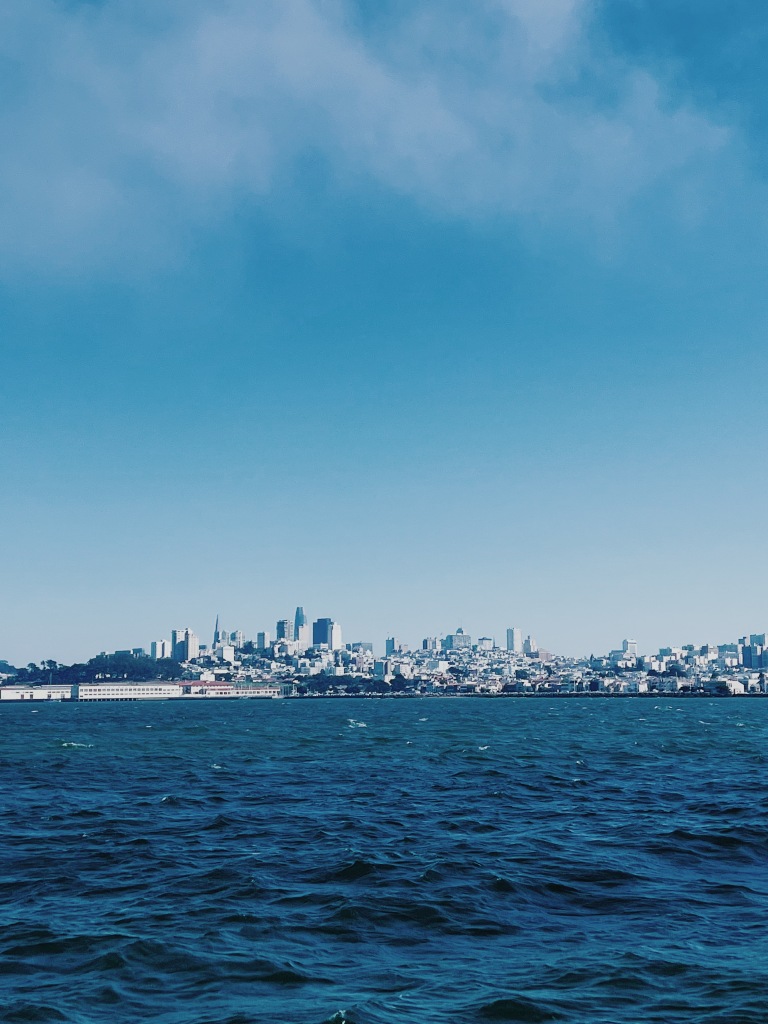
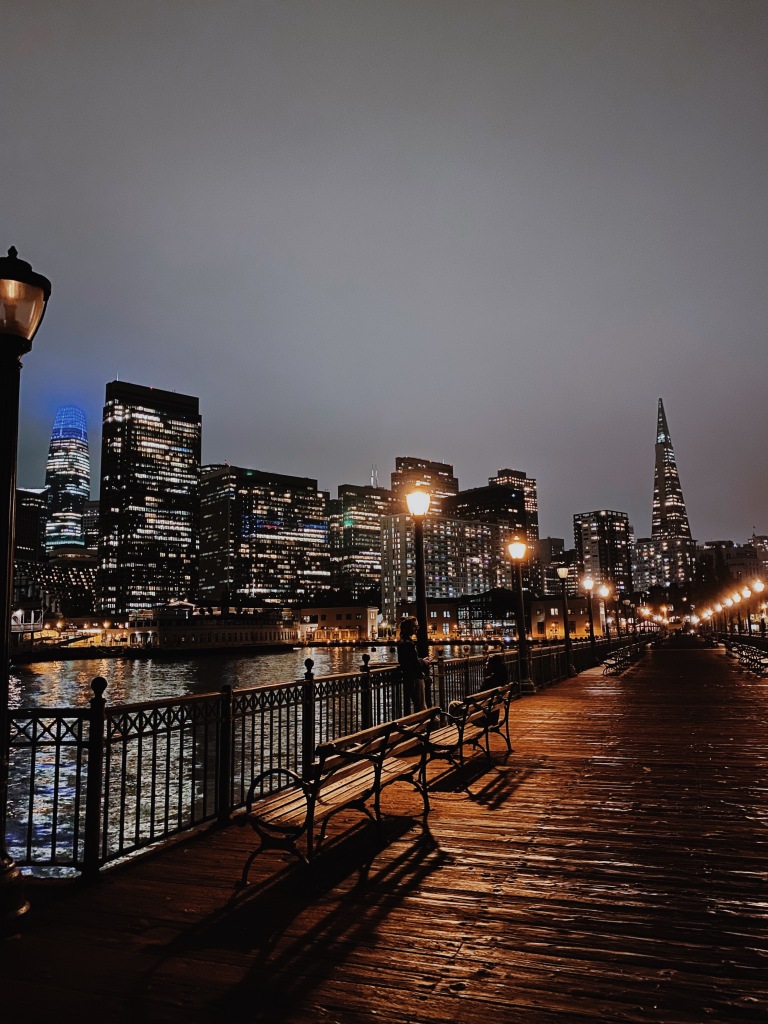
San Francisco SkylineGolden Gate Bridge from below (on a boat cruise)
Where to Stay:
I don’t have actual recommendations since I’ve never stayed in a hotel, and weirdly most of the hotels in San Francisco are in downtown or near Pier 39, which can be touristy or in the less cute parts of SF. My favorite neighborhoods are Hayes Valley/Alamo Square, North Beach, & Cow Hollow. There aren’t many hotels in these areas, but if you are staying in an Airbnb these would be good places to start. That being said, Downtown or Pier 39 are still good/central places to be since you’ll be running around the city anyway. If you want a guide on all the districts, check them out here. Here’s a comprehensive list of hotel options to check out.
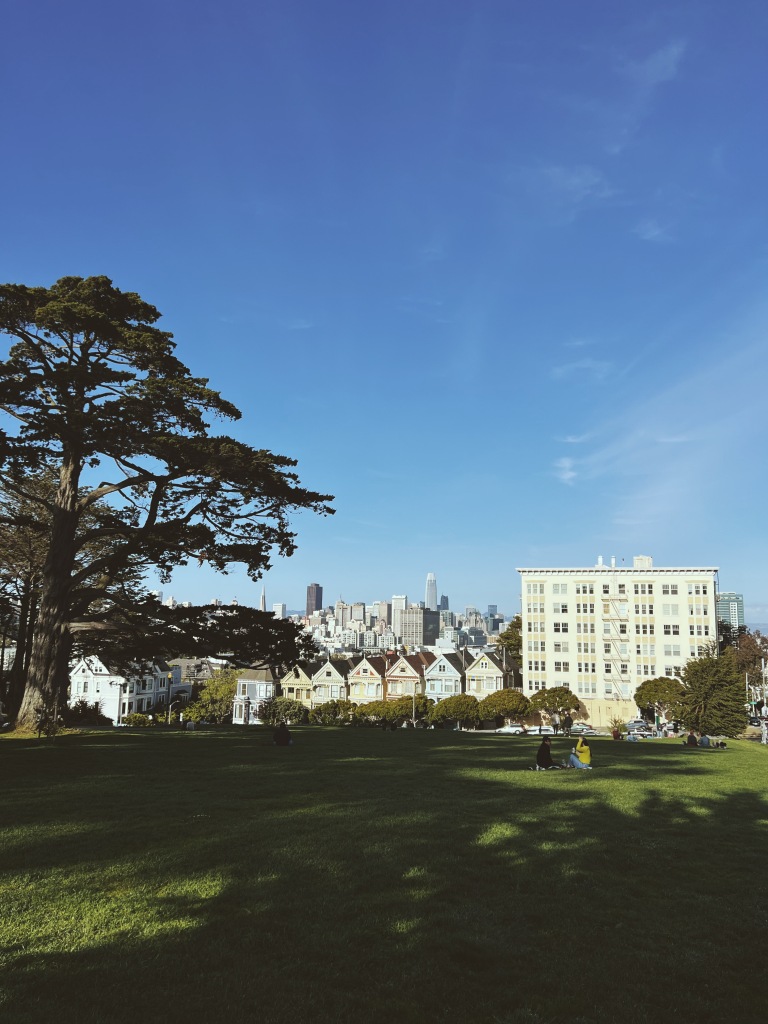
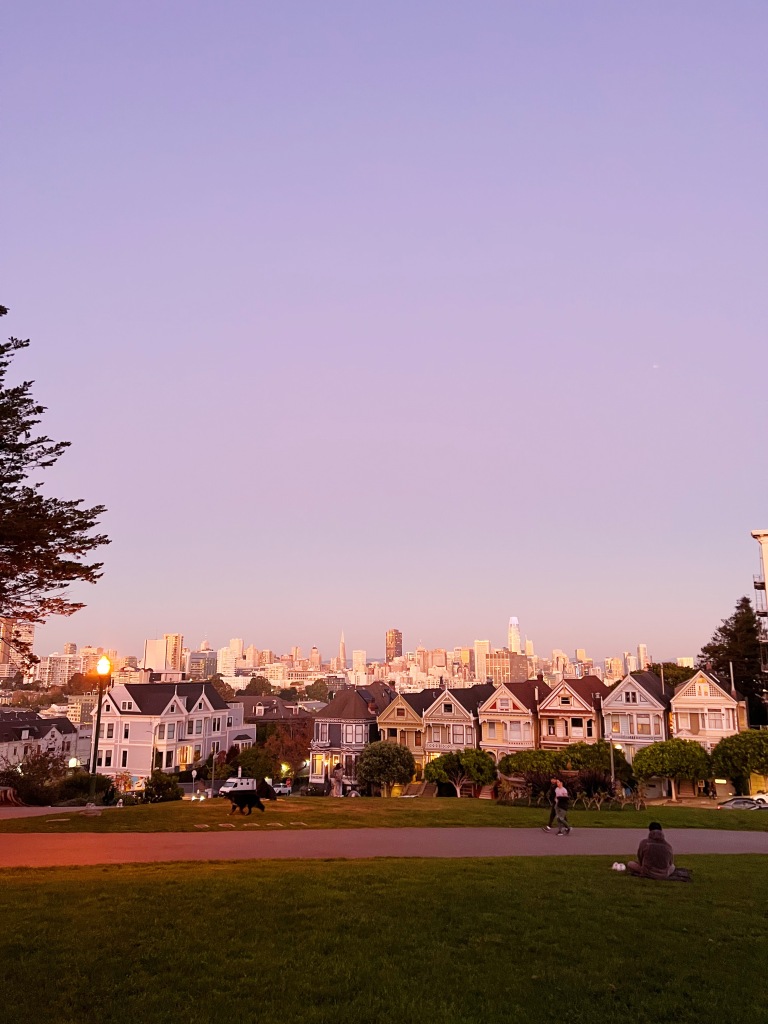
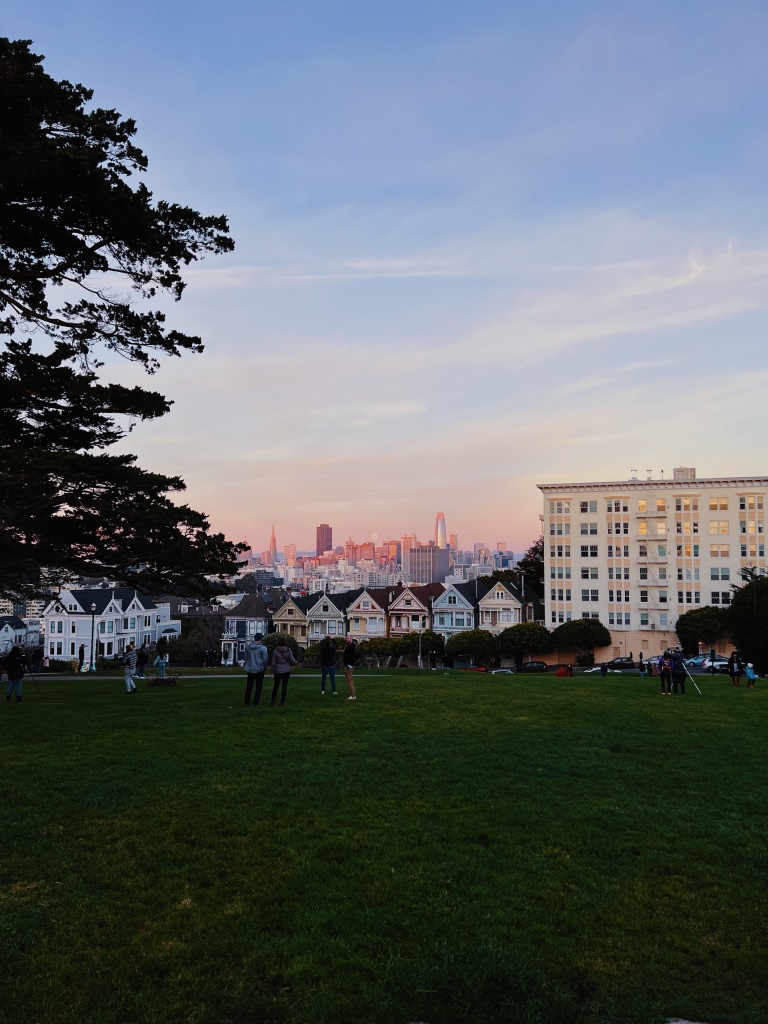
Alamo Square (I lived right around the corner from the Painted Ladies)My favorite plant in SF: Spiral Aloe (located at 1124 Page St)
Where to eat:
Here are some of my favorite restaurants. Caveat- I am not a foodie nor am I known for being in the know for the best restaurants so I humbly just offer where I like to go as an average eater living in San Francisco 🙂
Coffee/Bakery Spots
The Mill – Cute coffee shop with spots to work on your computer in Nopa.
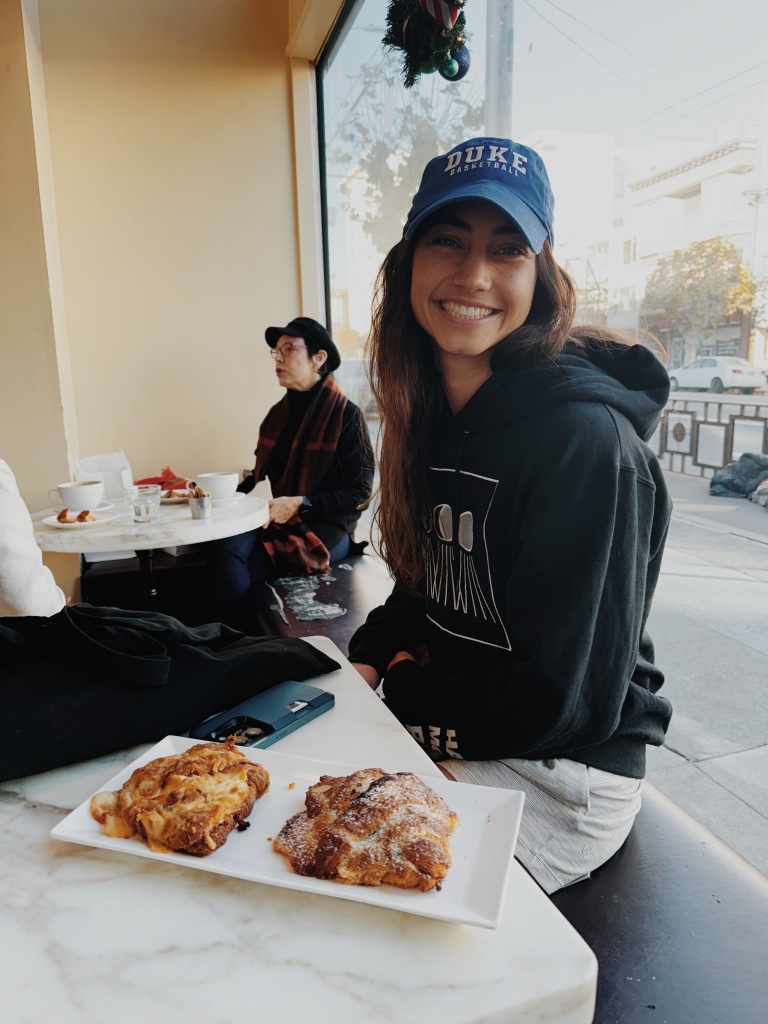
Arsicault Bakery – very well known bakery in SF. Plan ahead and go early, but expect long lines no matter what 🙂 Their croissants (especially their almond croissant) are out of this world. Two locations (Inner Richmond & Civic Center).
b. Patisserie Famous for their chocolate almond croissant! Line can be long, but moves efficiently. Located in Lower Pac Heights.
b. PatisserrieJane the Bakery
Brunch spots (all are popular so factor in wait times)
Zazie – Delicious brunch in Cole Valley! They pay livable wages so tipping isn’t required.
Plow – in Portrero Hill, known for their crispy potatoes!
Kitchen Story – known for Millionaire’s bacon & has an Asian influence. Located in the Mission.
Brenda’s – soul food brunch (think French, Creole, and Southern cuisine, including beignets and po’ boys), but in a more dicey area of the city (Tenderloin) to be aware as you walk around or park (wouldn’t advise parking here).
Devil’s Teeth Baking Company – less brunch and more of a breakfast sandwich to go type of place in Outer Sunset. Grab one (there will be a line) and then head to Ocean Beach to eat it.
Le Cafe du Soleil – cute cafe with all day breakfast in Lower Haight.
Devil’s Teeth feat Ocean BeachBrenda’s
Lunch spots
Lucinda’s – Great sandwich to grab and then eat in Alamo Square.
Gott’s burgers – Local Bay Area chain with yummy fries, burgers (including Impossible of course), and shakes. Located at the Ferry building so fun to walk through there.
Radhaus – German pub vibe located right next to Fort Mason. Great beer options.
Cheese plus – Great deli spot for a sandwich on Polk Street.
Mayflower Market – Another favorite with my friends. We like grabbing a sandwich here and eating it in Alta Plaza in Pac Heights.
Dinner spots
Beretta – reasonable Italian food (one location in NOPA & one in the Mission).
Souvla – cheap, casual, yummy greek food (there are a few locations around SF).
Flores – in the heart of the fun going out young part of town (Marina/Cow Hollow neighborhood). Known for delicious margaritas and good Mexican food.
Walk along Chrissy Fields for the best views of Golden Gate Bridge
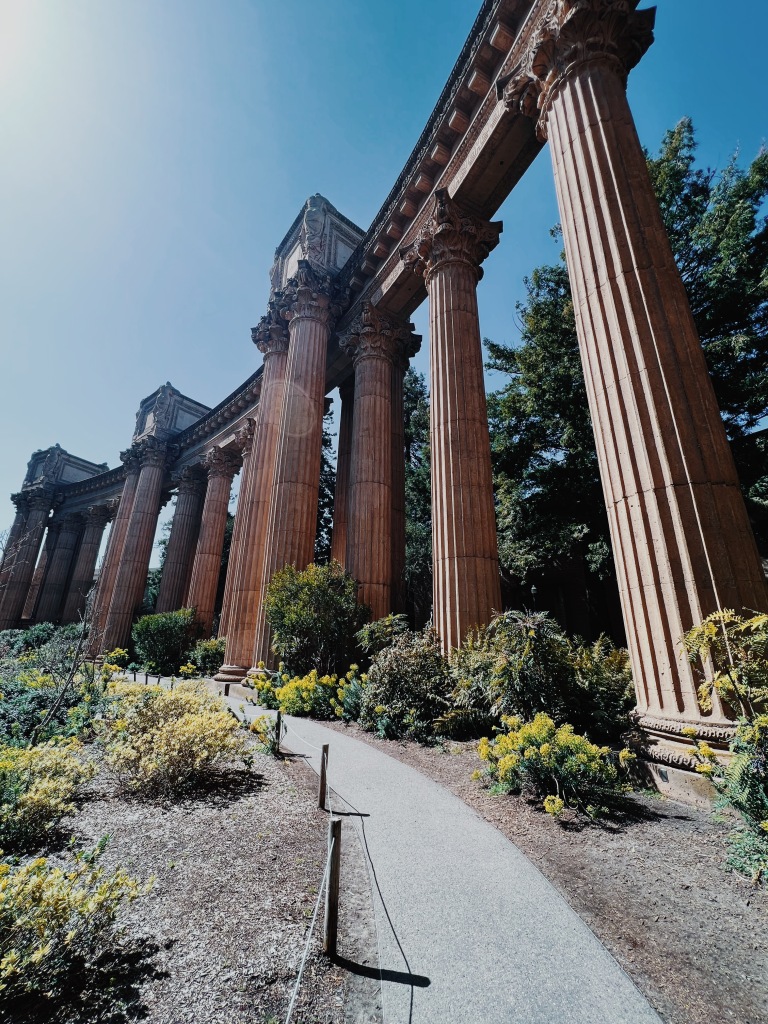
For a European moment, walk around the Palace of Fine Arts (near Chrissy Field so easy to couple these together)
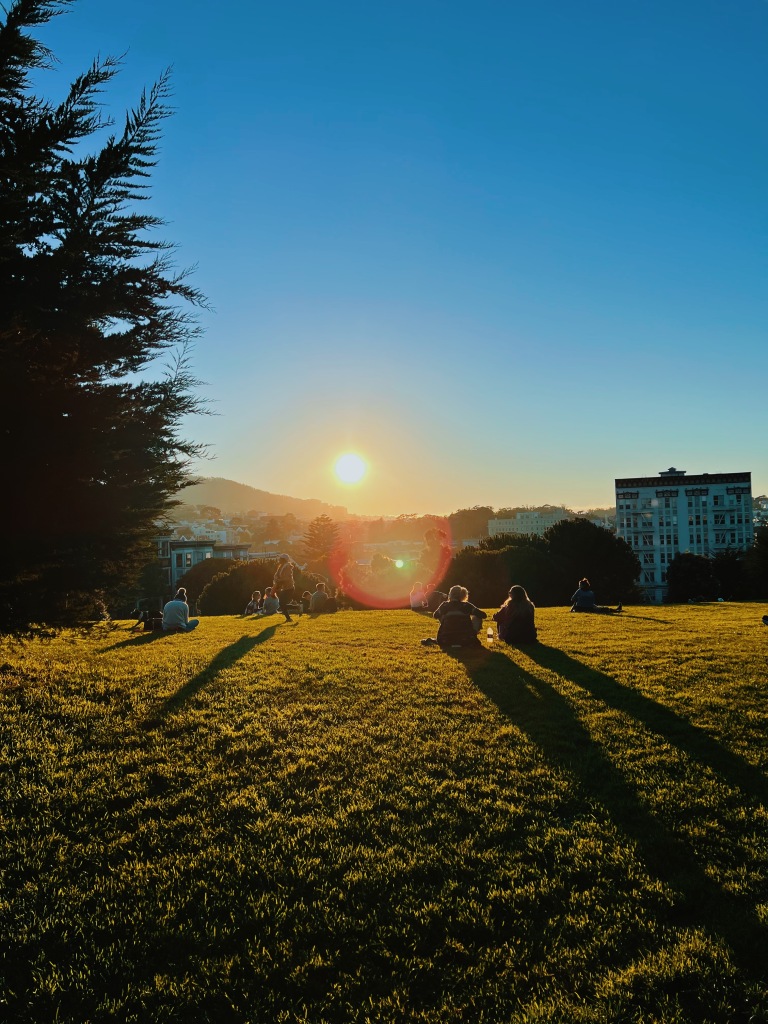
Visit Alamo Square for the Painted Ladies & views of the SF skyline (great during the day or sunset). Pro tip: as mentioned above, get a sandwich from Lucinda’s and sit in Alamo Square for some fabulous people watching
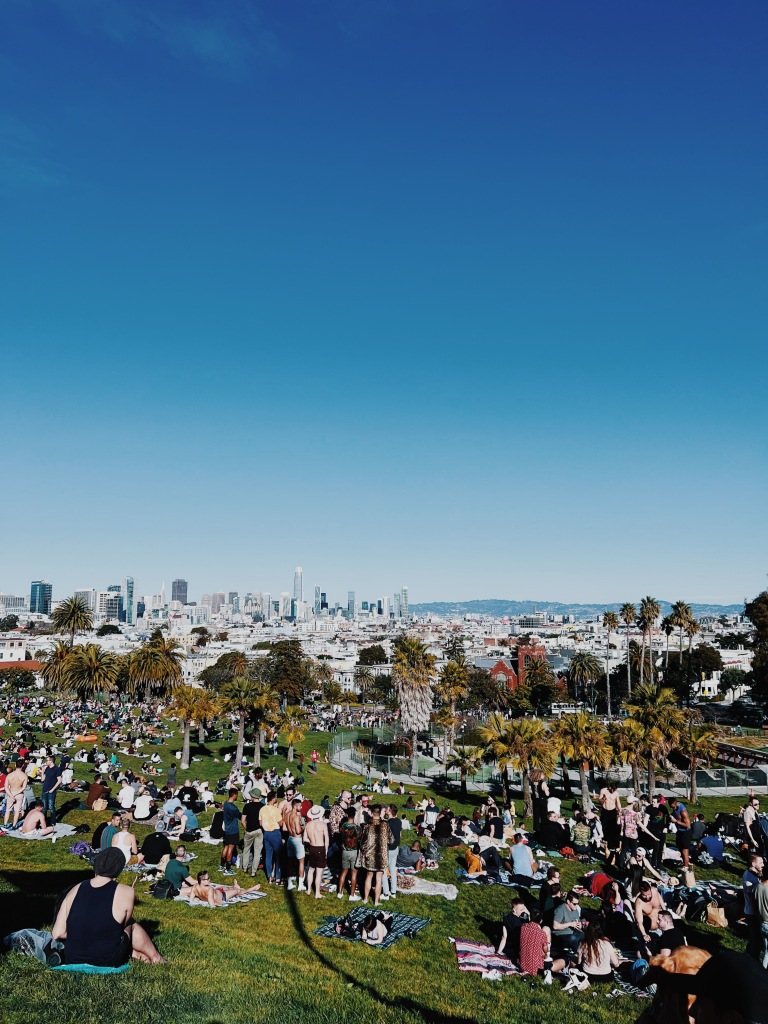
Picnic in Dolores Park for some even better (read: weirder) people watching, but also great SF skyline views
Visit Coit Tower for panoramic views of SF on a clear day! Pro tip: if it’s foggy, don’t both coming here
Drive or walk town Lombard Street, the most crooked street in the world!
Take a cable car
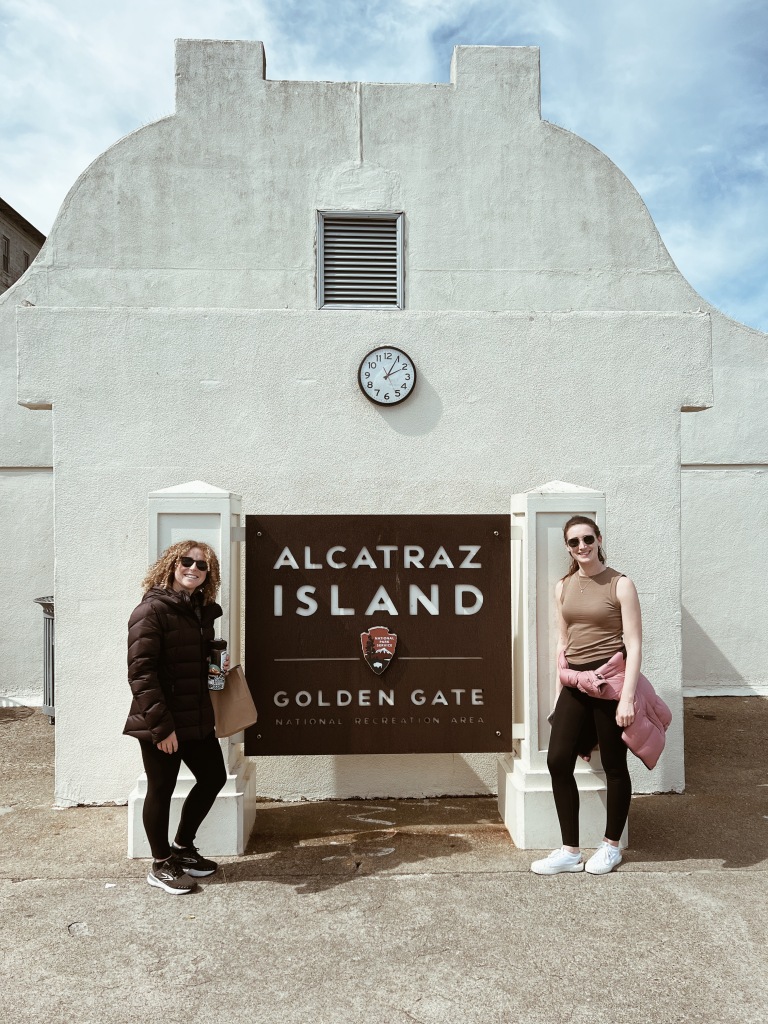
Visit Alcatraz! Pro tip: tickets CAN sell out so it’s worth booking tickets ahead of time if you don’t have lots of flexibility
Explore the hippy neighborhood of Haight Ashbury for great thrifts shops
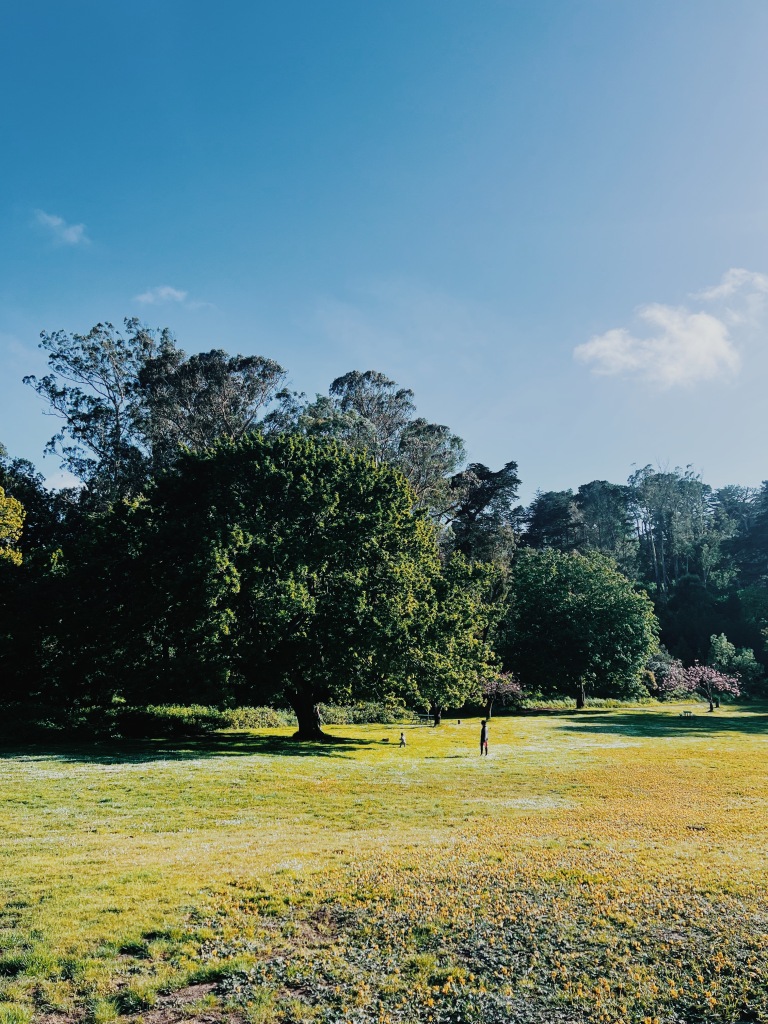
Walk around Golden Gate Park & discover lakes, Bison, art, & windmills. Pro tip: rent a lyft e-bike & cycle your way all the way to Ocean Beach. Grab a Devil Teeth’s breakfast sandwich and enjoy it while sitting on the beach, listening to the waves
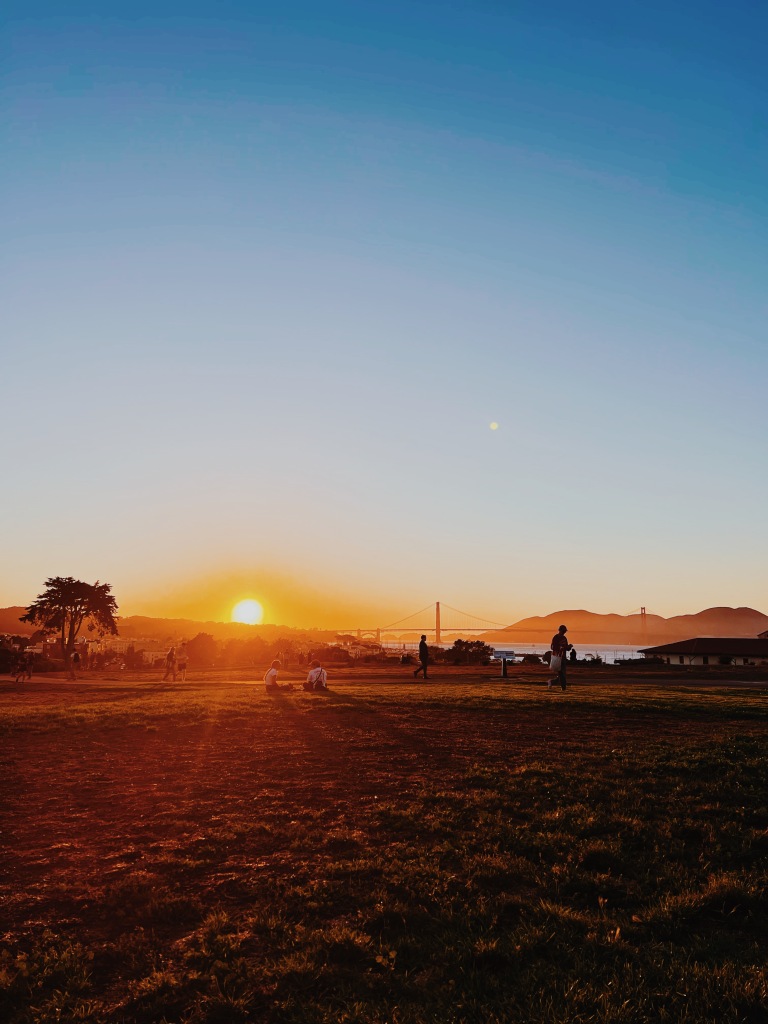
Head to Fort Mason for sunset, especially on a warm Friday afternoon. There’s always tons of people enjoying the green space, with plenty of dogs to say hello to!
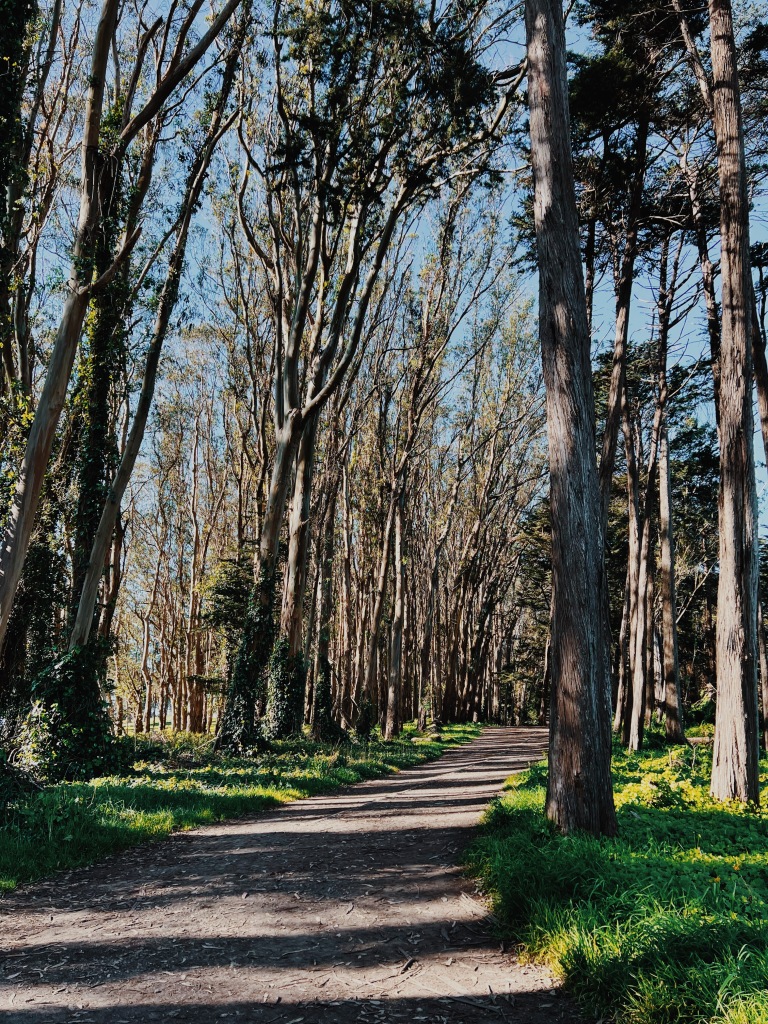
Walk around the Presidio – tons of lovely walks to do
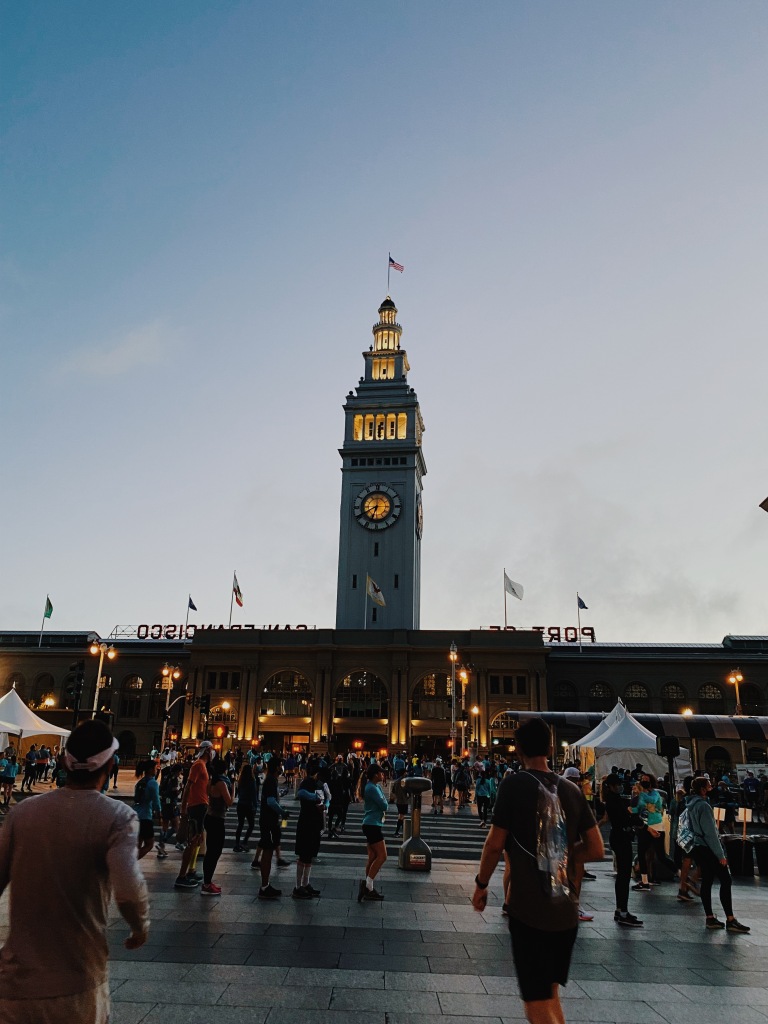
Peruse all the fun shops & food stands at the Ferry Building. Great spot for picking up some artisan gifts. Pro Tip: There’s a great farmer’s market on Saturdays!
Visit any of the fabulous museums like the De Young or Museum of Modern Art. Check out this guide to some of the best museums. Pro Tip: if you are visiting on a Thursday, go to the Exploratorium after dark. It’s a very cool interactive science museum & on Thursdays it’s open for 18+ with alcoholic beverages available
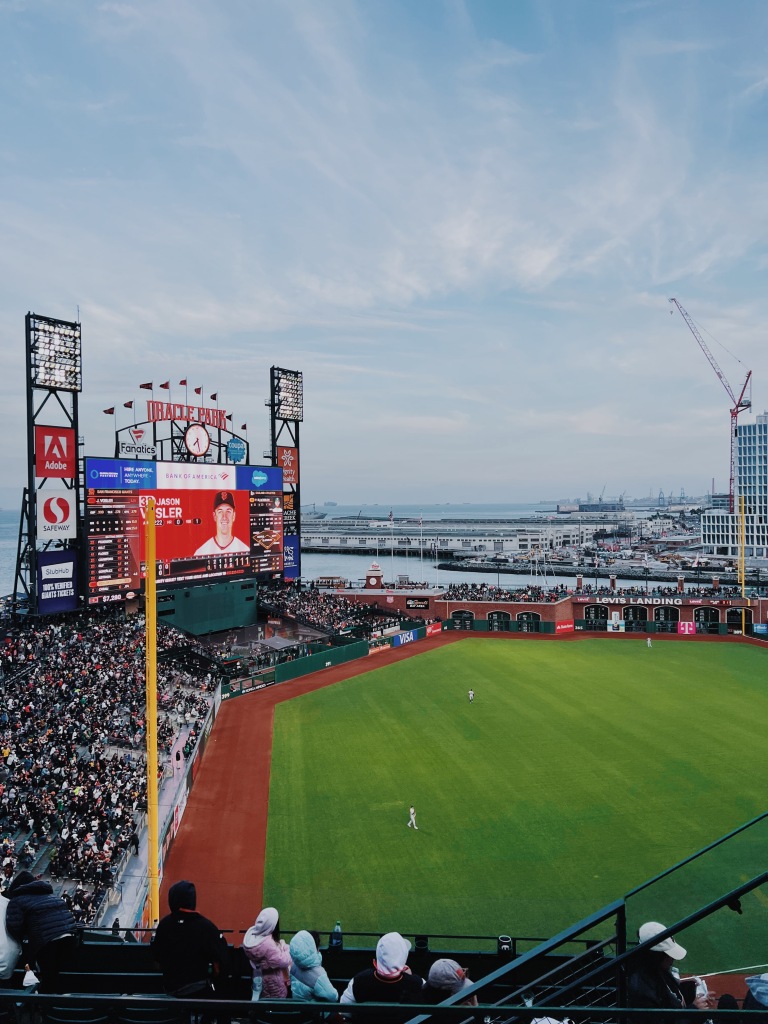
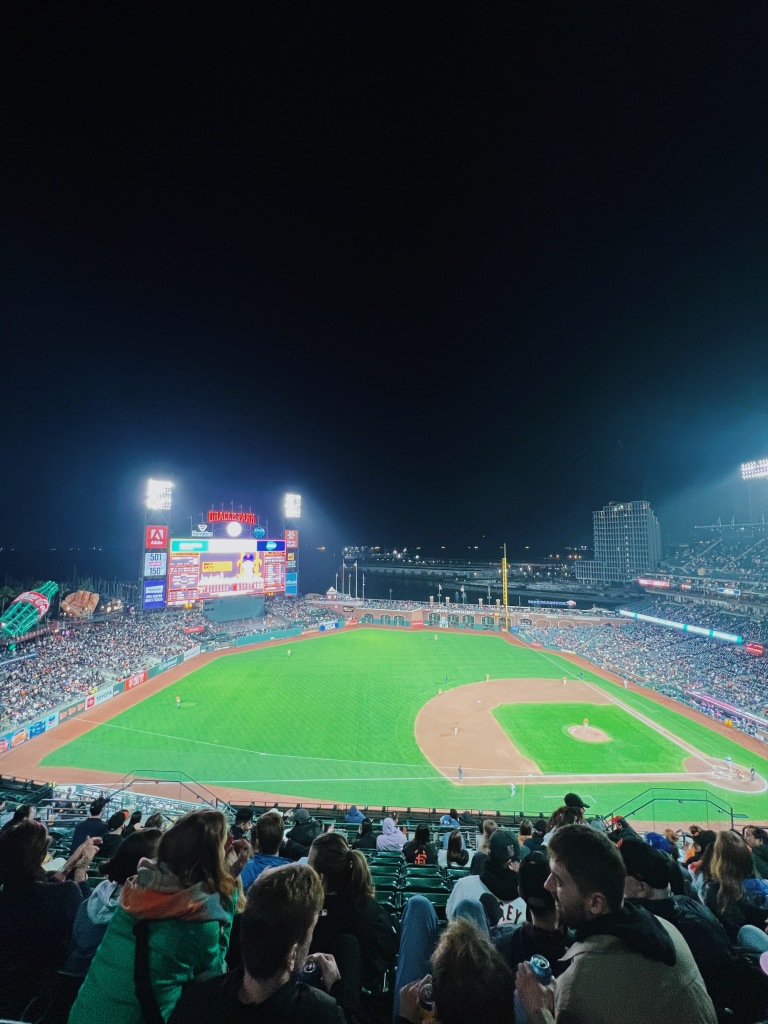
Check out a Bay Area sports game. Between the Giants, Warriors, 49ers, the A’s and the Sharks you have plenty to choose from!
Golden Gate Bridge from Chrissy Fields Palace of Fine ArtsPalace of Fine ArtsAlamo SquareAlamo SquareAlamo SquareAlamo Square facing West for sunsetDolores ParkViews from Coit TowerAlcatrazGolden Gate ParkGolden Gate ParkGolden Gate ParkOcean BeachFort Mason for sunsetFort Mason for sunsetThe PresidioFerry BuildingWarriors GameGiants GameGiants Night Game
What to do outside of SF (Day Trip):
North of SF
Muir Woods – Get lost in some big beautiful old growth coast redwood trees. Pro tip: you need to reserve parking permits ahead of time & there is little service in the park so plan ahead.
Sausalito – Drive over from the city or take the ferry over & enjoy the gorgeous views of SF. Tons of cute restaurants & a yummy ice cream shop.
Hike Mt Tam – a lovely, big hike with great views on a clear day.
Napa Valley – some fabulous wine tasting. Pro tip: Sonoma, St Helena, Calistoga, & Livermore all also offer great wine tasting (and can be less busy & often less expensive).
View of SF from SausalitoMarin side of the Golden Gate BridgeMuir WoodsWine TastingSt Helena
South of SF
Santa Cruz – have yourself a beach boardwalk day, complete with some roller coaster rides.
Pacifica – it can often be foggy, but it’s a classic Northern California beach town. You can often spot whales in the ocean on their migration.
PacificaDevil’s Bunker in PacificaDevil’s Bunker in Pacifica
East of SF
Berkeley – fun, hippie city across the bay. Easy to take the metro over for a few hours to walk around.
What to do outside of SF (overnight/weekend Trip):
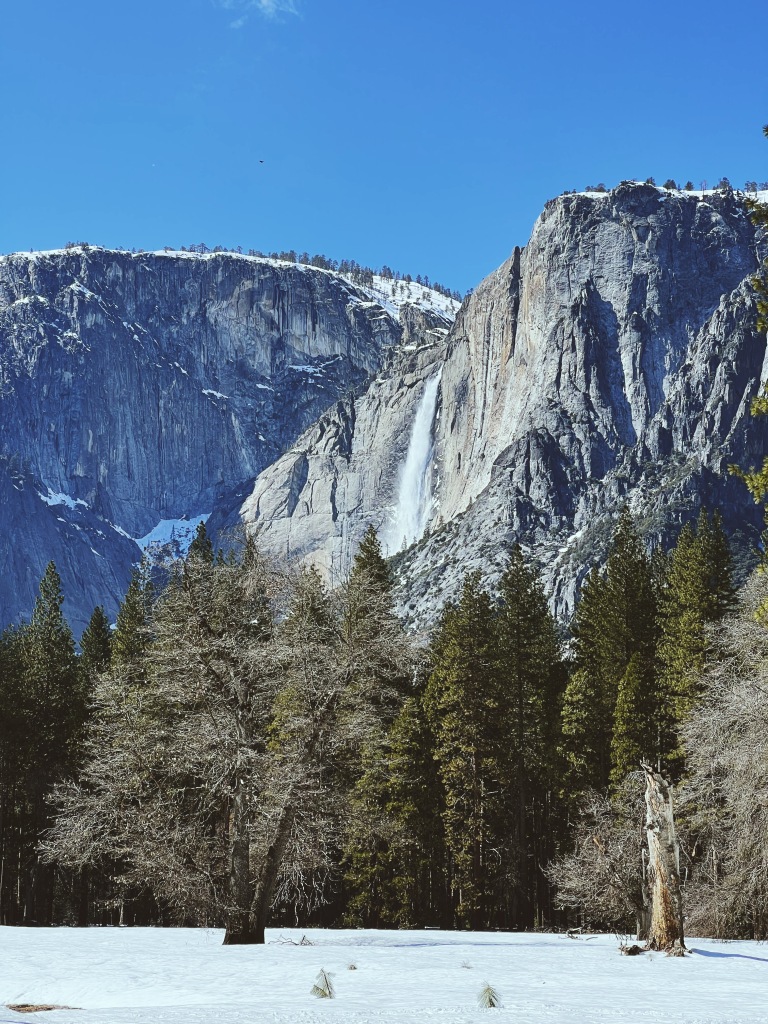
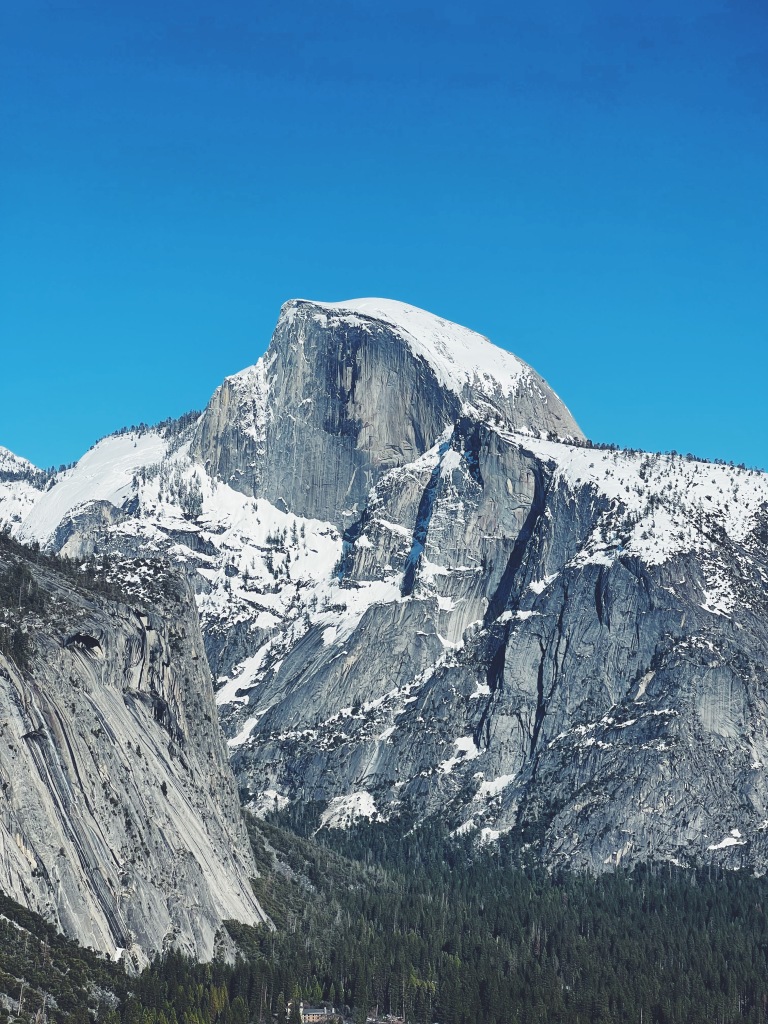
Yosemite – my favorite national park in the US
Lake Tahoe – my favorite place in the US (but I grew up coming here so there’s nostalgia mixed in) & it’s great year round, but summer & winter are the most popular times. Pro tip: of course spend some time at Lake Tahoe itself, but don’t be afraid to spend time hiking to one of the many other lakes in the region during the summer. Desolation Wilderness is beautiful!!
Mendocino – moody, green, & quiet is how I would describe this area. Check out the fun airbnbs up there for a cozy weekend.
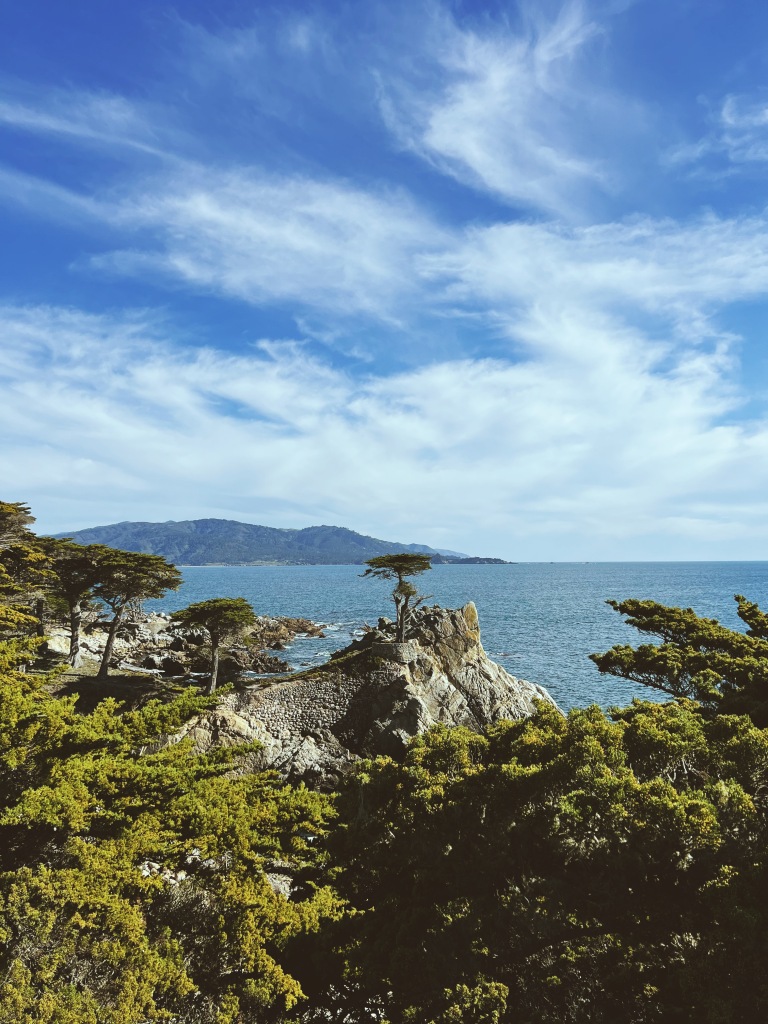
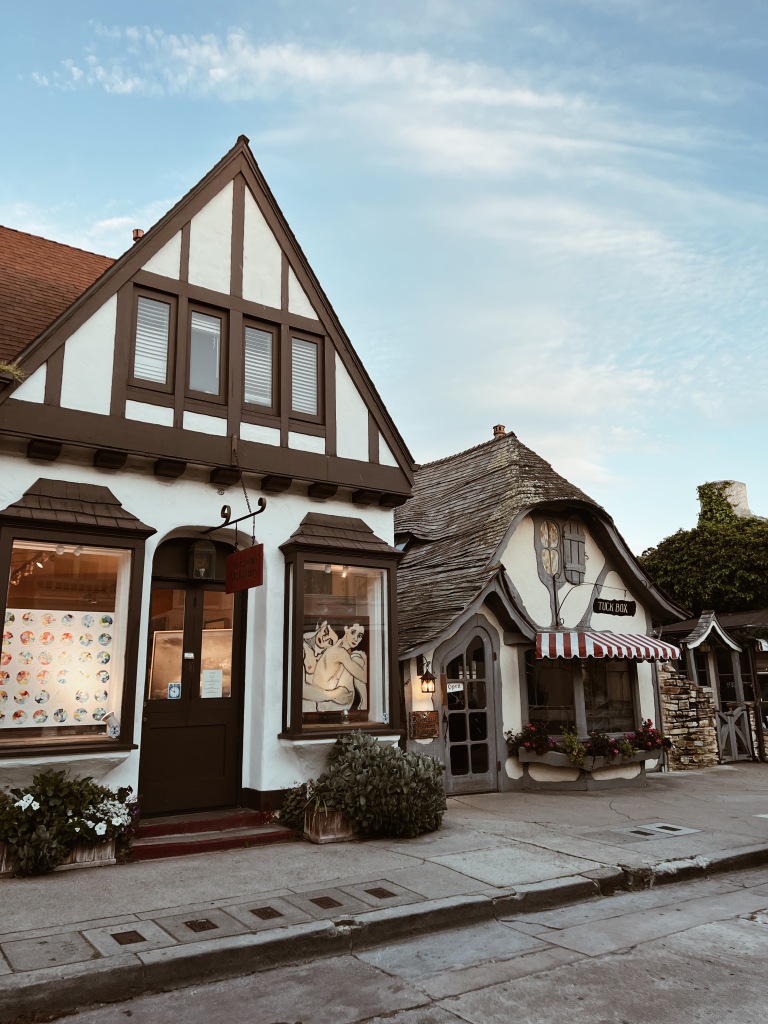
Carmel & Monterey – charming seaside towns along the central coast
Big Sur – where Big Little Lies is filmed. Gorgeous ocean views, but check out road closures as access here often is tough with Highway 1 collapsing at times.
There are tons of events throughout the year in SF (see a more comprehensive list here), but these are some of the most popular:
Bay to Breakers – Usually in May. This is a classic SF event. It’s a 12k race from the SF Bay (east side of SF) all the way to Ocean Beach (West side of SF). Essentially you run from one side of the city to the other. The aim of the game is to dress as silly as possible. In classic SF fashion, you will see plenty of boobs & dicks – any excuse to get naked. Pro tip: You can still participate even if you don’t sign up for the race. Most people just get dressed up with friends and drink along the course 🙂
Bottle Rock – Usually in May. A music festival held in Napa Valley, so there’s a heavy wine influence on the festival. Past artists include: Red Hot Chili Peppers, Imagine Dragons, Bruno Mars, Tom Petty, Eric Church, Kygo, Post Malone, Ed Sheeran, & Stevie Nicks.
SF Pride Parade – Usually at the end of June. It’s a beautiful, vibrant day celebrating folks from all colors of the rainbow flag. One of the best in all of the US 🙂
SF Marathon – Usually in the back half of July. Very fun event to see all the runners take over the city. I’ve done both the 1st half marathon & the 2nd half marathon. It’s a very fun route. Enjoy as a spectator or a runner!
Outside Lands – Usually in August. A very fun music festival in the gorgeous Golden Gate Park. Past artists include: Paul McCartney, Red Hot Chili Peppers, The Killers, Elton John, Kendrick Lamar, Childish Gambino, & Megan Thee Stallion. Pro tip: Uber/lyft can get very expensive during the festival so think about your transportation ahead of time. Also if you don’t plan to go to the festival, I would avoid visiting SF this weekend.
Fleet Week – Usually in October. More than a million people gather to watch the Blue Angels fly overhead. It’s quite spectacular to witness. There’s also a parade to celebrate veterans & active duty military members
SantaCon – Usually in December. A fun day of drinking & merriment, where everyone dresses at Santa!
Overall Thoughts:
While folks often read/see horrendous things about San Francisco on the news, I think it’s one of the best cities in the US. Yes, there are some homeless people, but this isn’t unique to SF. Yes, there are some neighborhoods to avoid. Yes, cars do get broken into (seriously don’t leave anything, and I mean ANYTHING, in your car at any time). But truly San Francisco is magical. It’s charming. It’s a foodie’s playground. It’s a nature lovers’ heaven. It’s inclusive. It’s has everything. I just love it! It has so much to offer in such a tiny footprint (Fun fact: San Francisco is only ~7 miles by 7 miles). In a weekend, you would barely scratch the surface, so start planning your second trip, before you even take the first 😉
Make sure to fill out your Check Mig before you arrive and before you leave (within 72 hrs before/after). This is required for entry into Colombia.
In general, I found it pretty reliable to use my credit card to pay everything (especially in Bogota & Medellin), but in smaller towns it’s a good idea to have some Colombian Pesos on hand.
Uber is incredibly reliable, cheap & useful in the big cities.
Didi is a great resource (& very cheap) for getting groceries & food delivered.
In Medellin, tourists tend to stay in El Poblado or in Laureles (which are the most expensive & nicest parts of Medellin). While yes they can be quite “gringo” I admittedly really liked them. What can I say, I’m a sucker for tons of cute cafes. Also, they are pretty safe so that’s an attractive feature.
There is some crime in the form of robberies (I luckily didn’t experience this), the main tips are to not walk at night, not wear flashy jewelry or clothes, & not get super drunk. Another phenomenon I heard about is that the dating apps target men where they get drugged & then robbed- so be aware of that.
Medellin can be known for prostitution & drugs, but if you’re not looking for it, you won’t really run into it or notice it (at least I didn’t!).
Food in El Poblado isn’t actually that cheap because it’s mostly tourists that hang out there.
Public transit is very cheap & it’s safe/reliable in Medellin!
There is a rainy season in Colombia so account for that in your trip planning.
CITY: Bogota
HOW LONG: 4 NIGHTS
ACCOMMODATION:
I stayed at Botanico Hostel Bogota and overall liked it! Good safe location. The hostel had lots of cute areas to sit and hang out. Fairly easy to meet people. Small kitchen to cook. There was yoga & salsa classes, as well as a hostel dinner you could join. It could be loud at night, but I had no problems sleeping since I use a bluetooth enabled eye mask to blast white noise.
The staff were overall helpful & available 24 hrs per day, which was incredible helpful given I got super sick during my time here. Not sure if I picked something up in Mexico City before flying here or whether I got something that hit very quickly in Bogota, but regardless I was miserable. It was very nice that the staff were always around to help if I needed it.
The only downside (which really isn’t the hostel’s fault), but there are lots of water outages in Bogota. Each district gets assigned 24 hr periods of no running water. Normally that would be fine, but when you are sick and need to use the restroom (a lot) & showers to feel better, this was less than ideal. They did have basins of water to manually flush the toilets, but still not what you want when very sick.
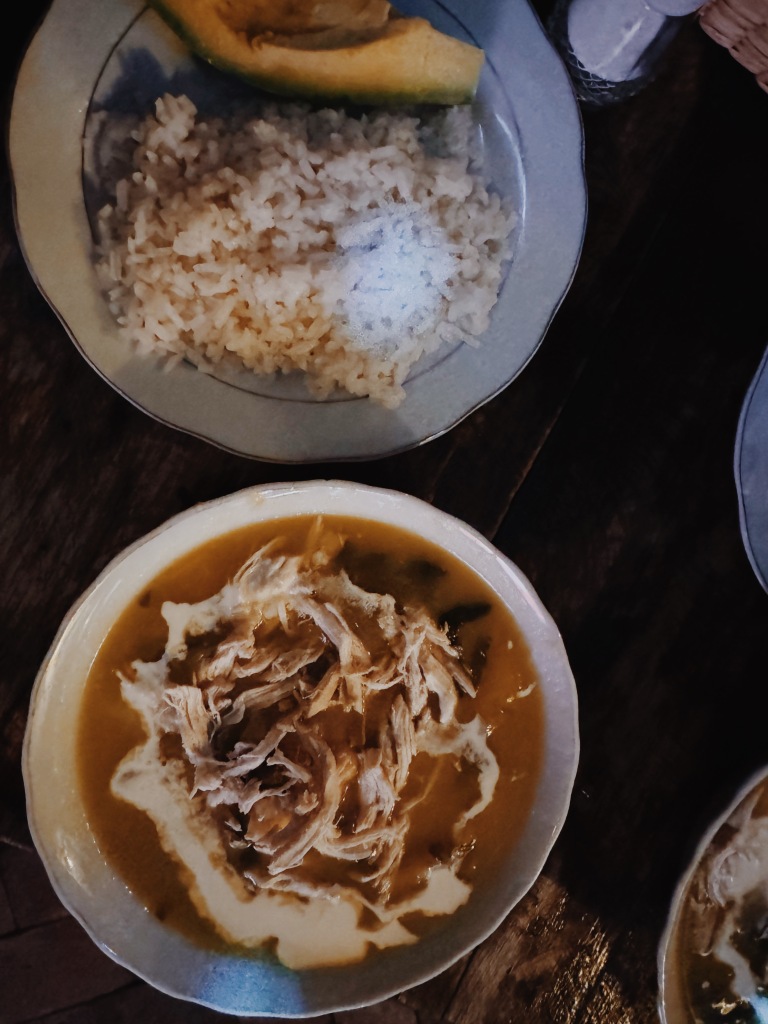
Where to Eat:
As I mentioned, I got pretty sick so I didn’t eat much of anything while here but I would highly recommend Orígenes Café, where I got a smoothie bowl and a delicious breakfast sandwich & La Chopperia, where I got an awesome chicken burger.
Not sure I should mention this again, but my best advice for what to do in Bogota is NOT GET SICK! Unfortunately all I really was able to do was sleep & try not to die 🙂 When you travel this long, you are bound to get sick along the way, but it always sucks.
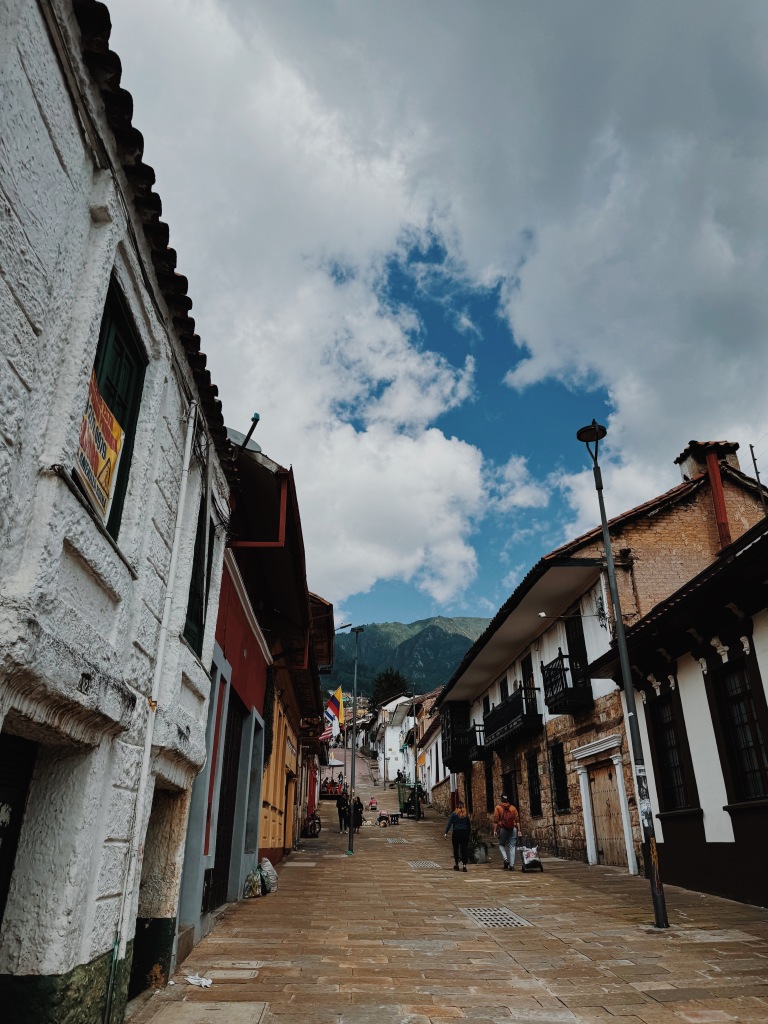
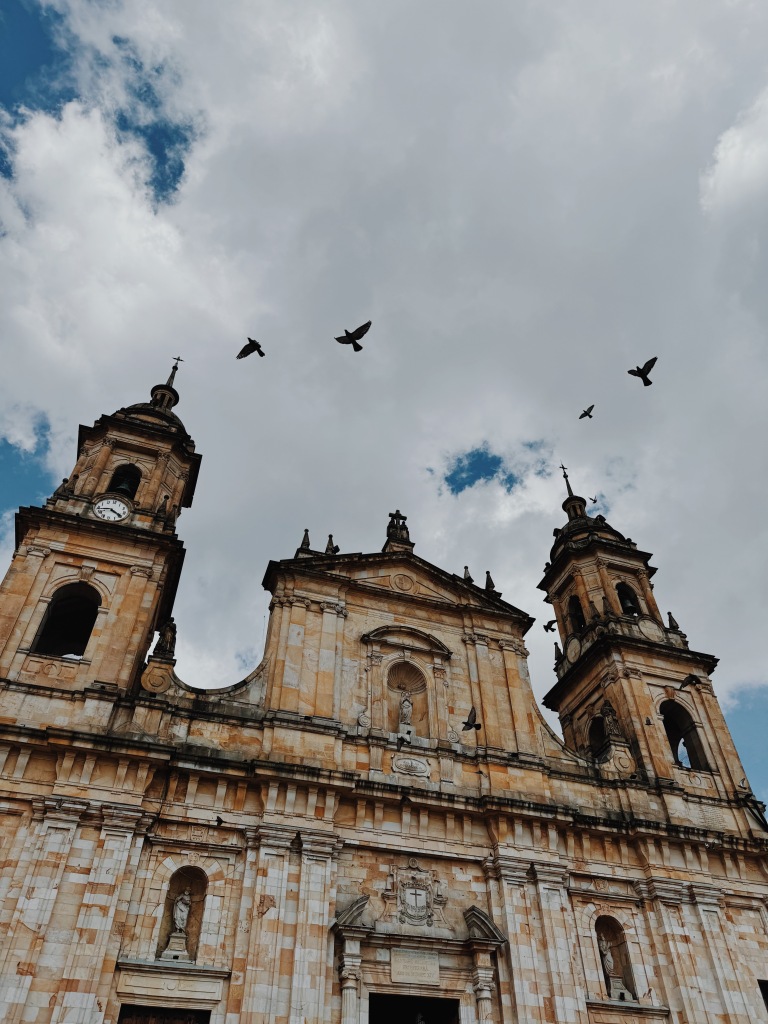
My last day I started to feel a little better so I managed to go on a walking tour to start to learn about the history of Colombia, but there is definitely other cool things here that I had to miss because I was sick
Candelaria Neighborhood
Overall Thoughts:
No major thoughts, however if you only are going to be in Colombia for a week, you can probably skip Bogota & head straight to Medellin or the northern coast like Cartagena, Santa Marta & Tayrona National Park.
CITY: Medellin
HOW LONG: 38 NIGHTS
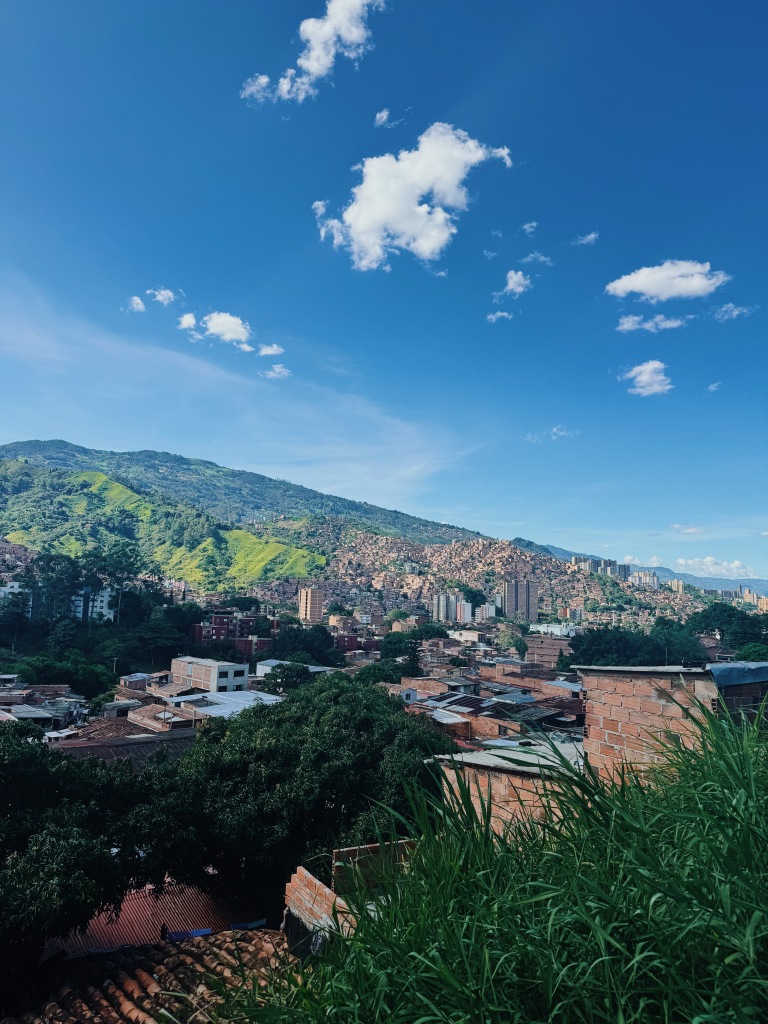
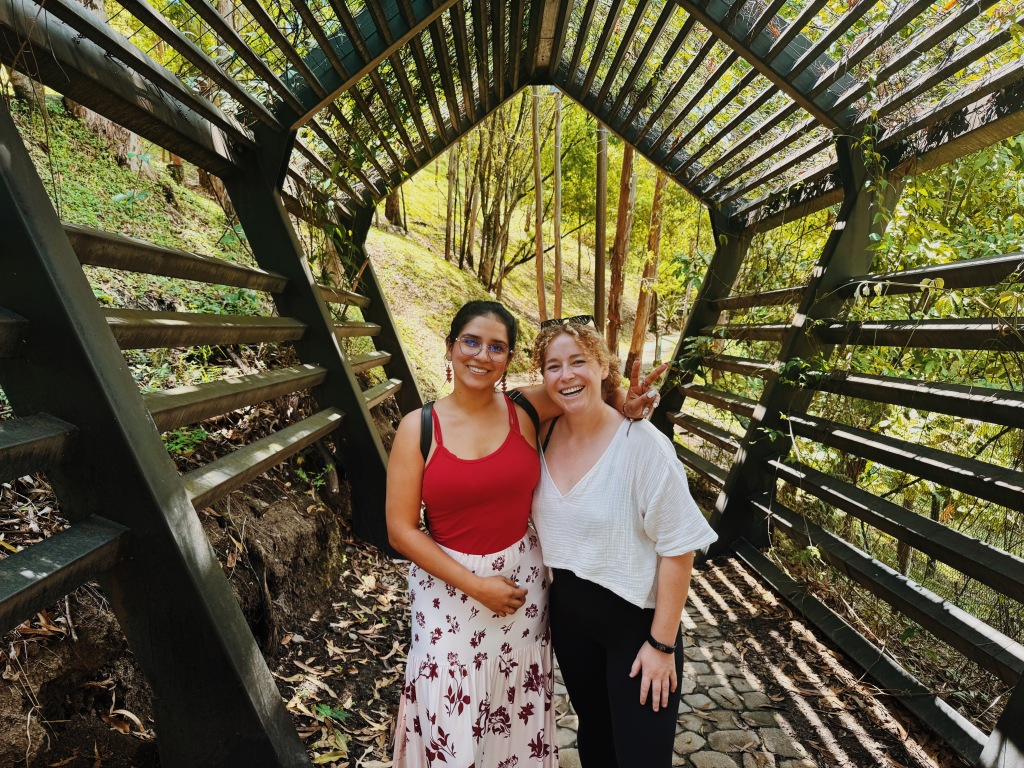
The goal of my time in Medellin (& really in Colombia all together) was to slow down, rest & catch up on life things before taking off again on my grand adventure. But to make it productive & give some structure I used my time here to take some Spanish classes! I took classes here. My daily routine included getting up for my 8:15am F45 class, then getting a yogurt bowl at Cafe Campesino, then going to my Spanish class from 10am-1pm. I loved my teacher so much that we’re going to continue classes over zoom while I’m back in California summer 2024. In the afternoons I spent my time at the airbnb catching up on never ending to-do list. When traveling life stuff falls to the wayside quite easily. It was so lovely having 6 weeks to knock out it all out! Figure out health insurance for the back half of the year: done! Execute a Roth conversion: check! Call my Grandpa: yep! Life is good in Medellin. I also met some fun people at the language school and it was so cool getting to be friends for a few weeks instead of the usual 48 hr friendships that happen at hostels. Also my good friend Sabrina from growing up (known each other since elementary school) joined me for my last two weeks (one week in Medellin + one week up North in Colombia). We genuinely spend more time abroad than in the US since she lives in LA and I’m in San Francisco (usually). Colombia was our 11th country & 5th continent together 🙂
Sabrina made it to Medellin!This gorgeous city
ACCOMMODATION:
I stayed at an Airbnb for my 6 weeks in Medellin. I knew I wanted a break from hostels and it was such a treat to have my own room & bathroom. I also loved being able to cook 90% of my meals in a lovely, beautiful kitchen! This place was a 10 min walk to Provenza (my favorite part of El Poblado). There are tons of cute cafes, restaurants and shops. There are gyms nearby & I always felt safe walking around (although at night I tended to Uber). Overall it was a good place, but I probably wouldn’t stay here again. I would get a place in either Laureles (another cute neighborhood) or find a smaller, cheaper spot. I had hoped the big co-living situation would bring a social element, but the roommates were a little weird (and both American) so that was a bummer. I did love the views from my window, especially during the crazy rainstorms 🙂
Room from my roomThe neighborhood of Provenza
Where to Eat:
I spent 6 weeks here and ate at many fun restaurants. The food scene here is overwhelmingly great. Come hungry! Here are some favorites:
Breakfast/brunch
Campesino Café – I had a little routine where I would have breakfast here every morning between my workout class at F45 and the start of my Spanish classes. I LOVED their yogurt bowl – yum!!
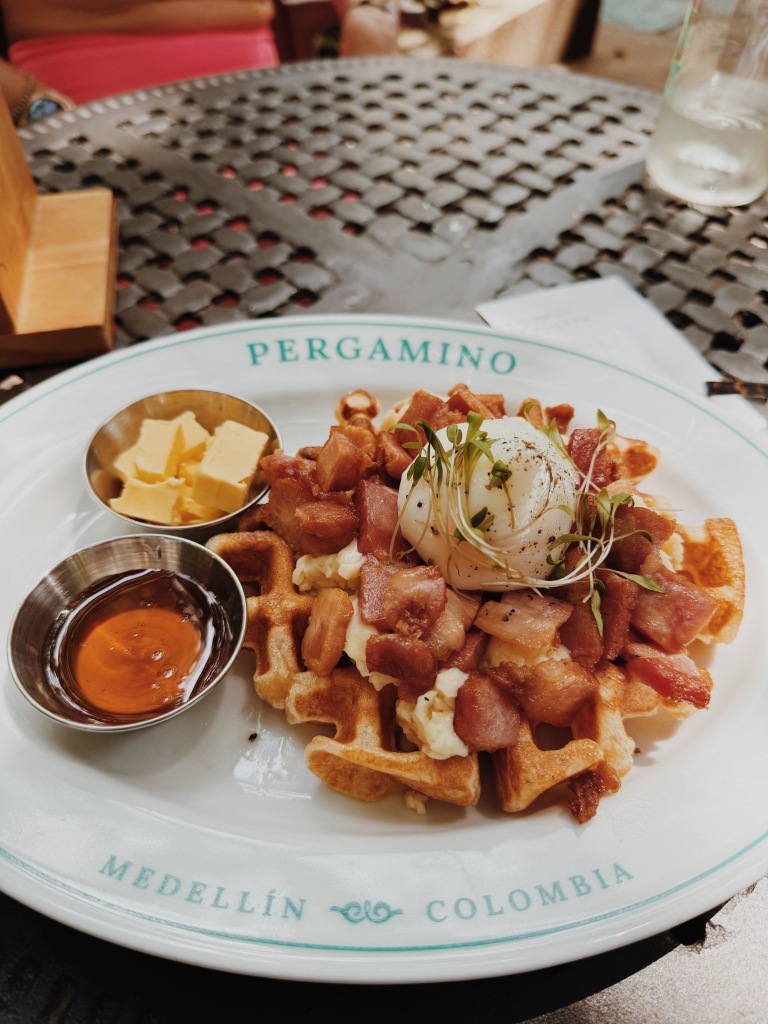
Pergamino – I had brunch with my friend Lucy here (fun fact: we met on the Salkantay Trek in Peru 5 years ago and she now lives in Medellin). Very trendy & great coffee (according to others).
Café urbania – cute, but small coffee shop with some small bites. Great spot to park yourself with a computer.
Hijamia – Popular, upscale brunch spot with a few locations in El Poblado. I went to the Manila location & it was buzzing with people on a Sunday morning.
Crepes & Waffles – another great local brunch chain. It’s very popular so expect a line. Also the menu is robust so you’ll definitely struggle to pick just one meal!
Época – Another great brunch spot on one of the main walking streets in Provenza
Ely Cafe – Upscale, snazzy brunch spot located in a cool building Very cool spot with yummy Limonada de Coco’s – my favorite new drink!!
Crepes & WafflesCafé Macanas PROVENZAPergaminoPergamino with Lucy!Ely CafeCafe Campesino
Lunch or Dinner
Ajiacos y Mondongos – I had a fun lunch with my Spanish teacher here. Ajiacos is a popular Colombian soup (mostly from Bogota) and it was great to mix some cultural experiences into the Spanish class. Excellent food here!
Chef Burger Provenza – a great burger spot right in Provenza. Food was yummy & service was great.
Lucio Carbon y Vino – I had a fancy dinner with Sabrina in Envigado – incredible Caesar salad and caldron de champignons
37 Park – I walked past this place a billion times before actually eating here. Loved the decor. Food was not what I expected but everything was delicious. Deconstructed spring salad and deconstructed grilled cheese 😂 fries were delicious too!
Pizzaiolo – really good pizza in the heart of Provenza
Arepa Rellenas – Tammy & I loved this place. Very casual, cheap spot for lunch or a quick dinner. It was around the corner from our language school so it was toooo convenient.
Ajiacos y Mondongos with WendyChef Burger ProvenzaGerman Street FoodLucio Carbon y VinoPizzaioloDessert pizza at PizzaioloArepas Rellenas with TammyLimonada de Coco!!!!
Dessert
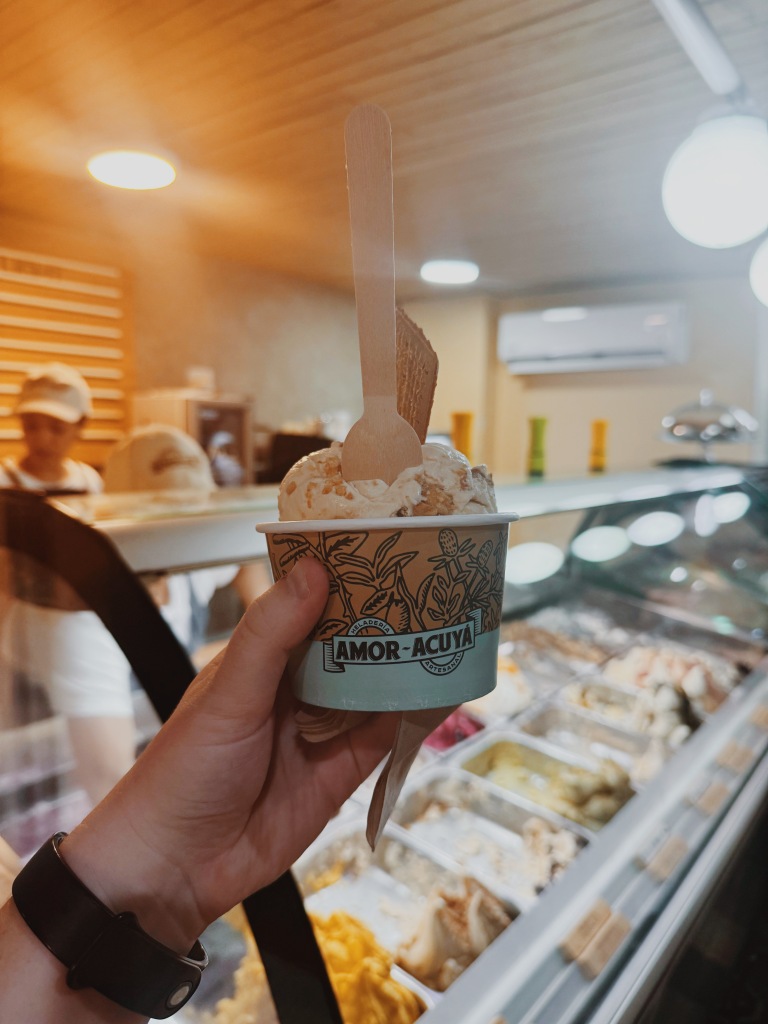
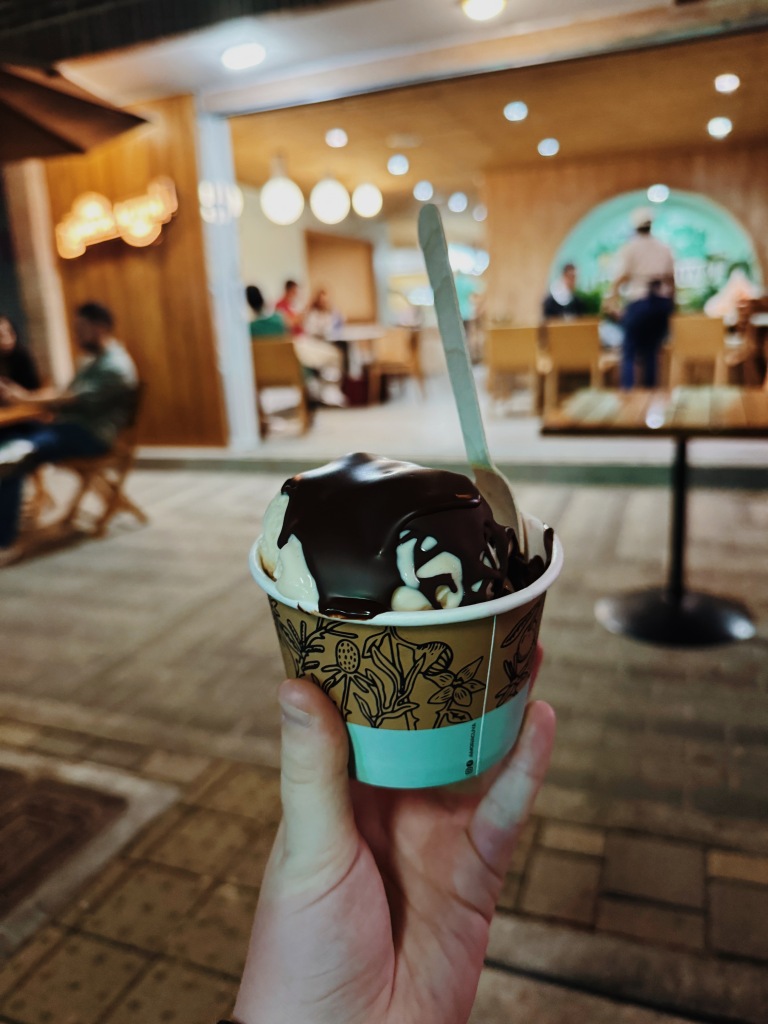
Amor Acuya – my favorite ice cream in Medellin!! So many great flavors that rotate all the time! Pro-tip: ask for the hard chocolate shell sauce 🙂
Magic sauce
What to do:
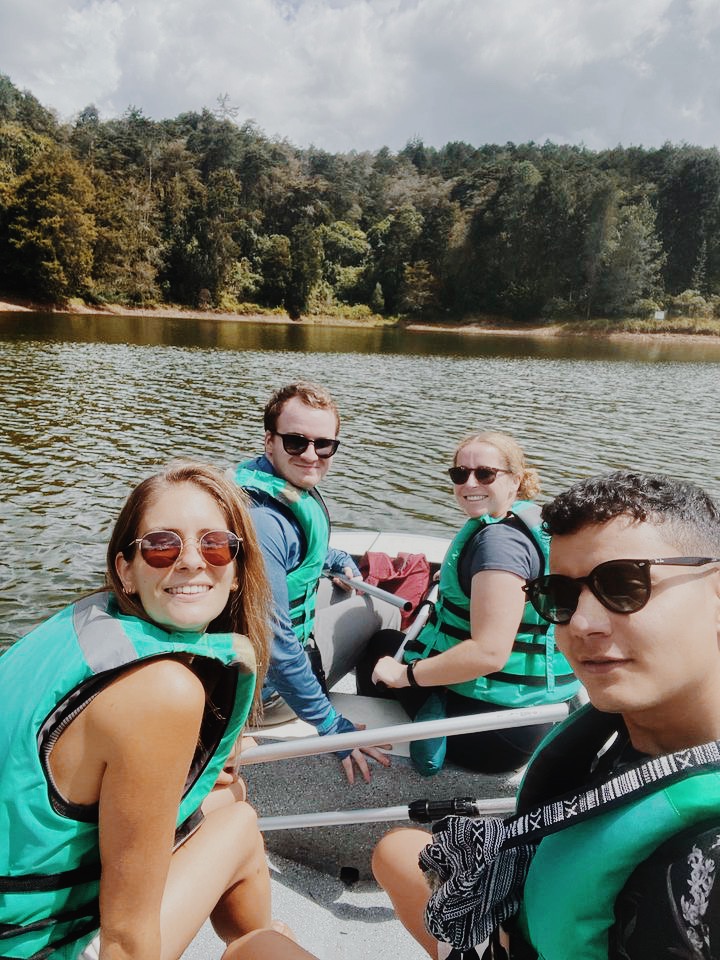
Parque Arvi – huge park that you need to take the gondolas to (fun fact: Medellin was the first city in the world to use gondolas as part of their public transportation system). We went to a butterfly sanctuary, hiked and paddled around in a boat.
Eoin & TammyMedellinGondola – coolest public trasnit systemLooking down at Medellin from the Gondolas
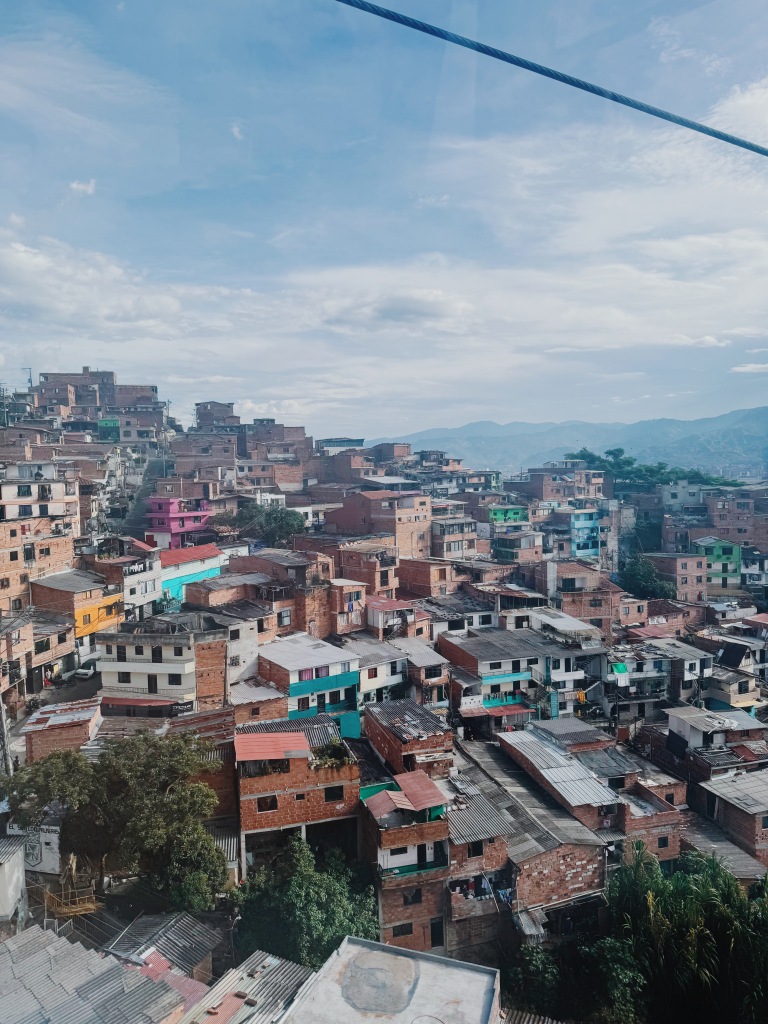
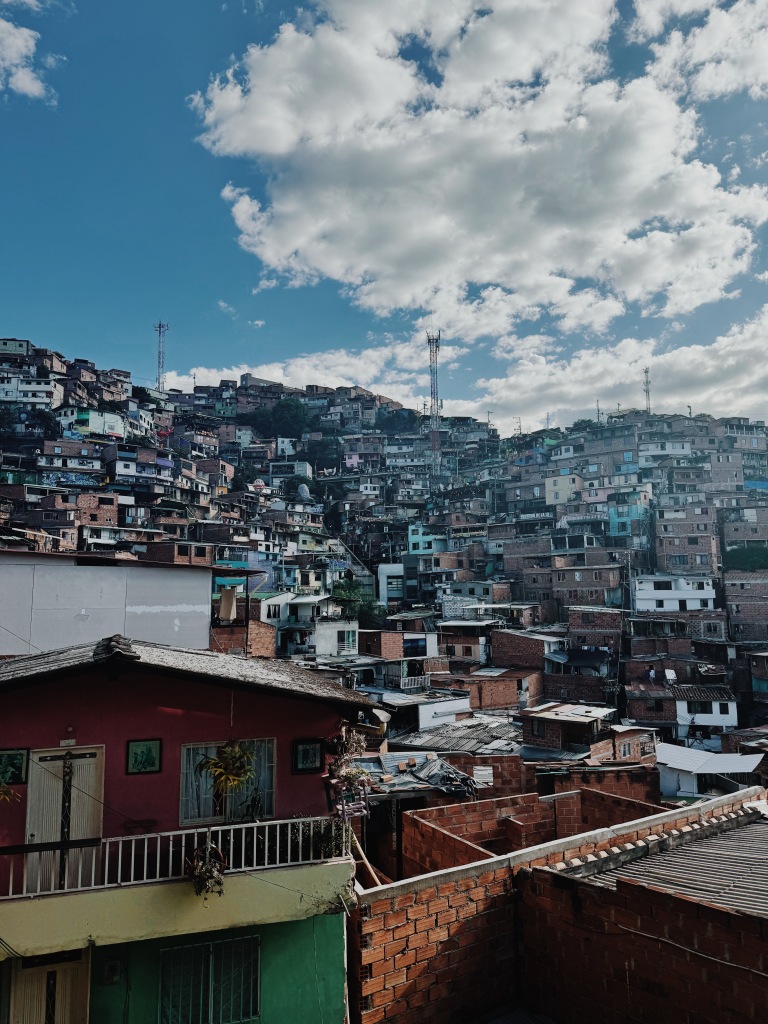
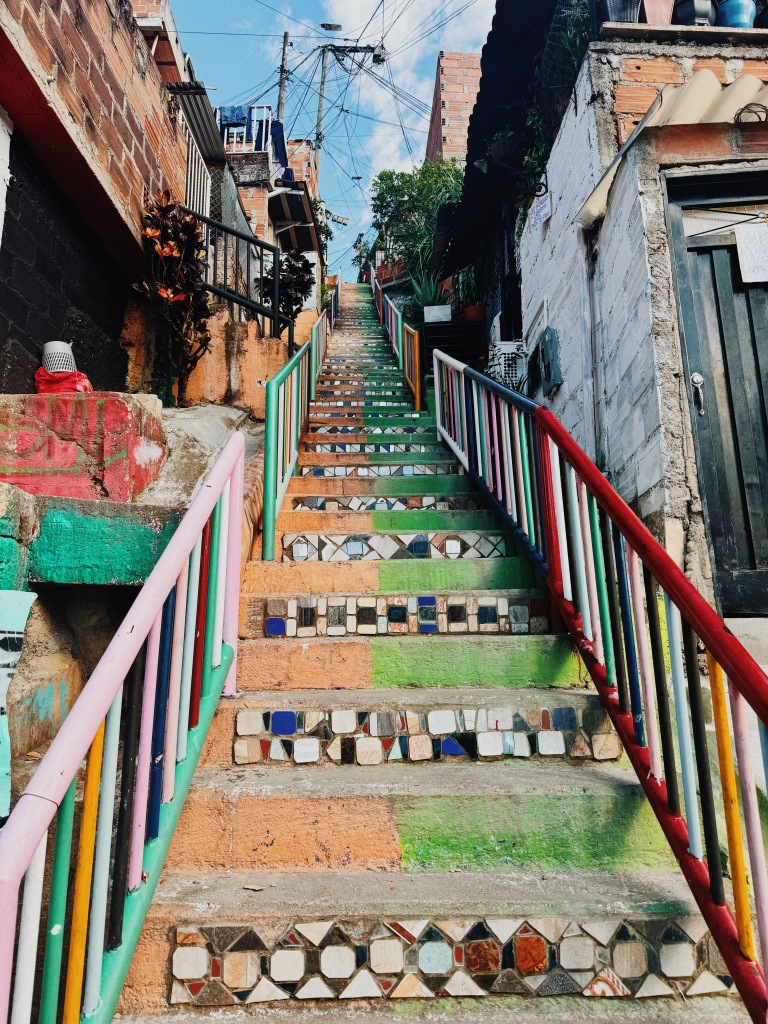
Comuna 13 – what used to be considered the most dangerous neighborhood in the most dangerous city, is now a thriving cultural center of Medellin. Very cool to take a walking tour and learn about its rich history.
Comuna 13Beautiful stairs all around Comuna 13Great views of MedellinSo much street artA sweet treat on the hot day
Pueblito Paisa – fun spot to check out in the city. It’s a tourist attraction that embodies the spirit of all things Paisa (the term for people from Antioquia). “This is a replica of a typical turn of the century Antioquia town comes complete with its own traditional stone fountain in the middle of the town square, and is surrounded by a church and rectory, the mayor’s office, a barber shop, and a one-room school house.” Read more about it here.
Medellin is so green!Profesora Sara showing off Colombian’s love of the Chocolate & Cheese comboProfesora Wendy!
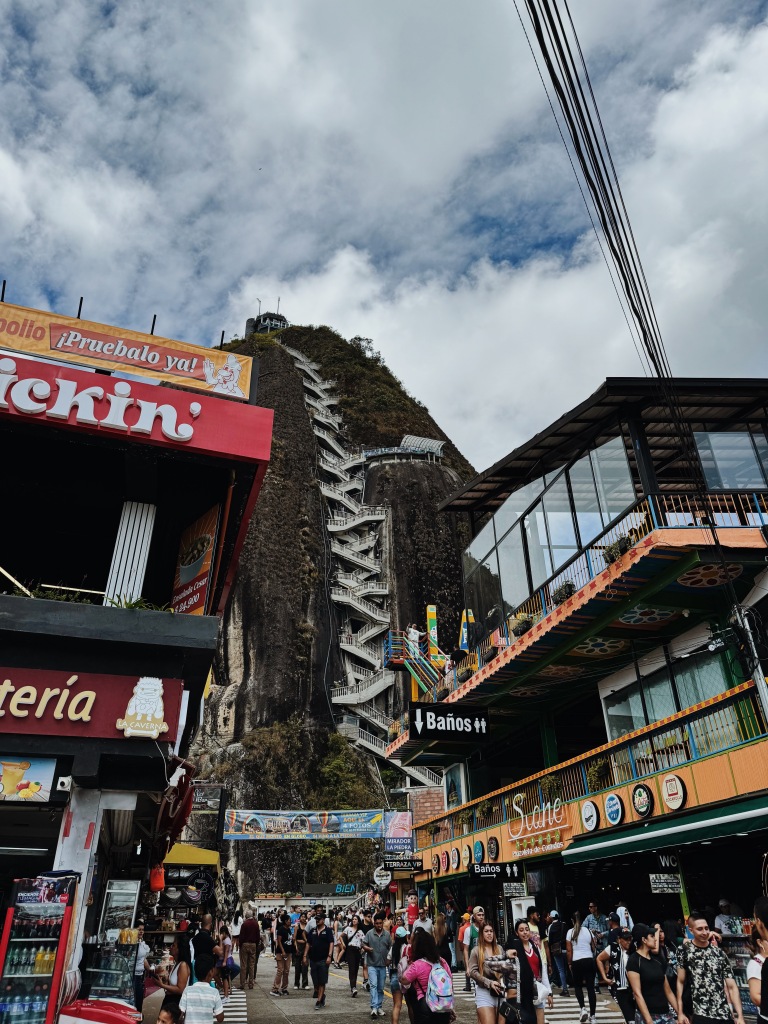
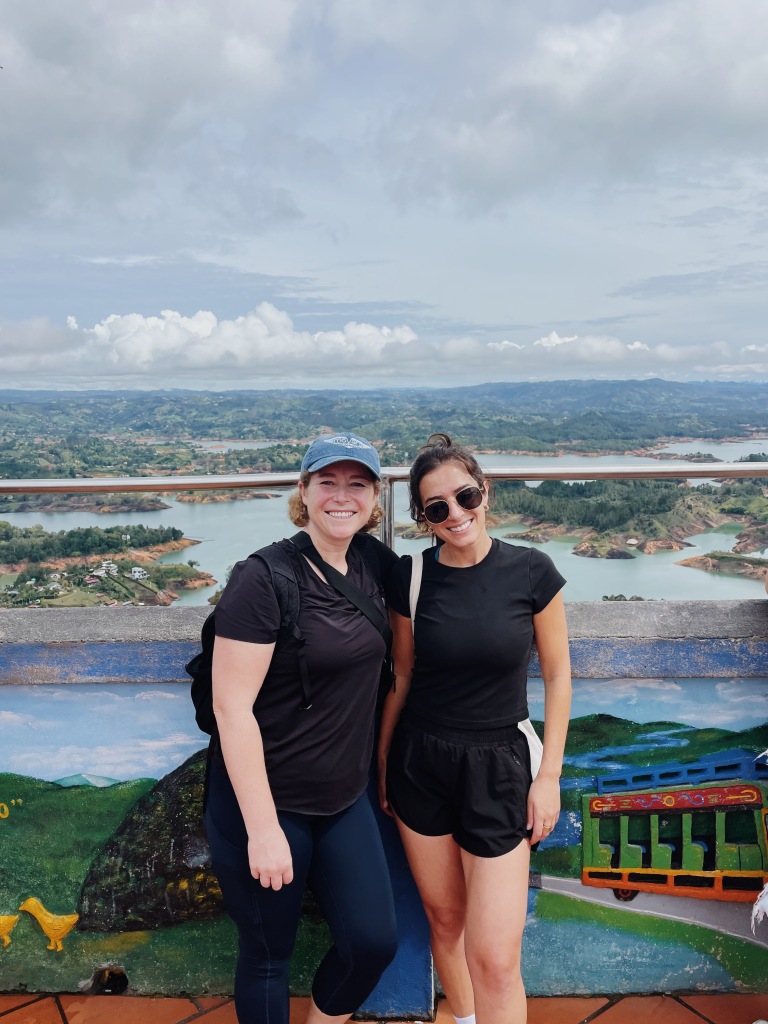
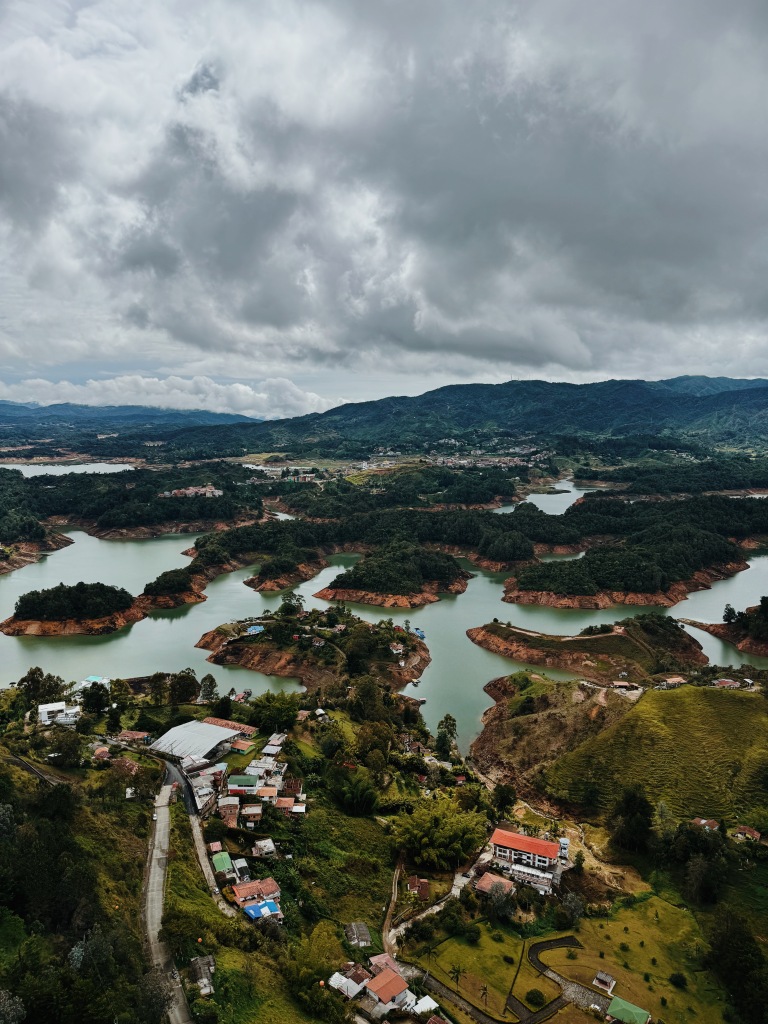
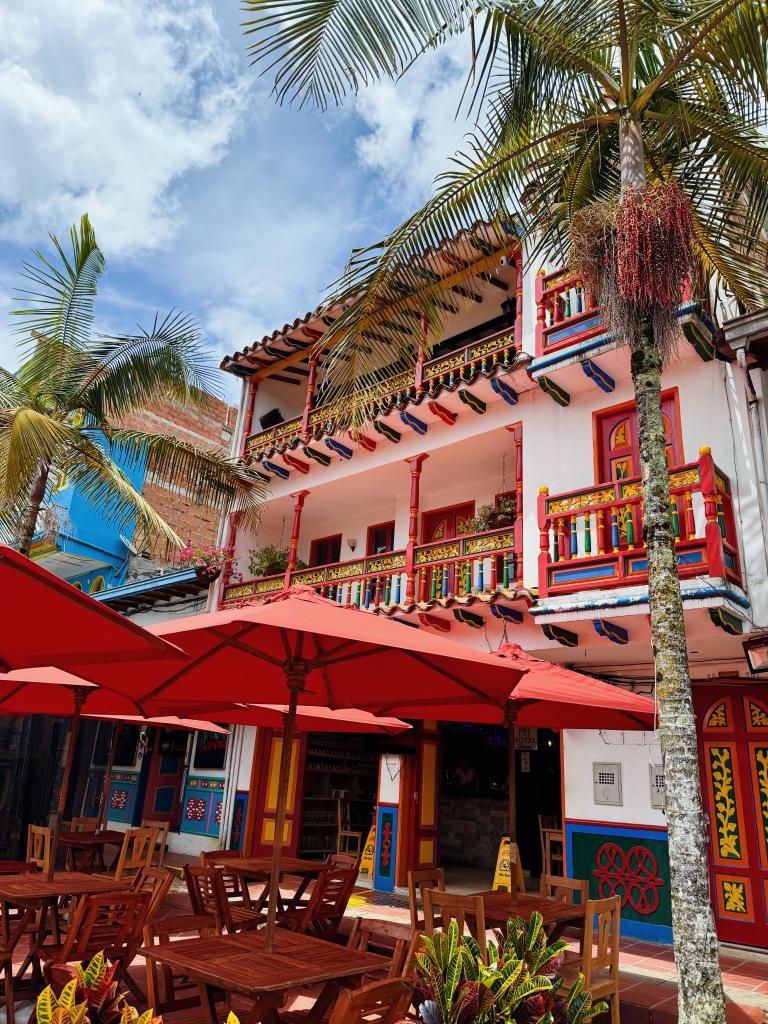
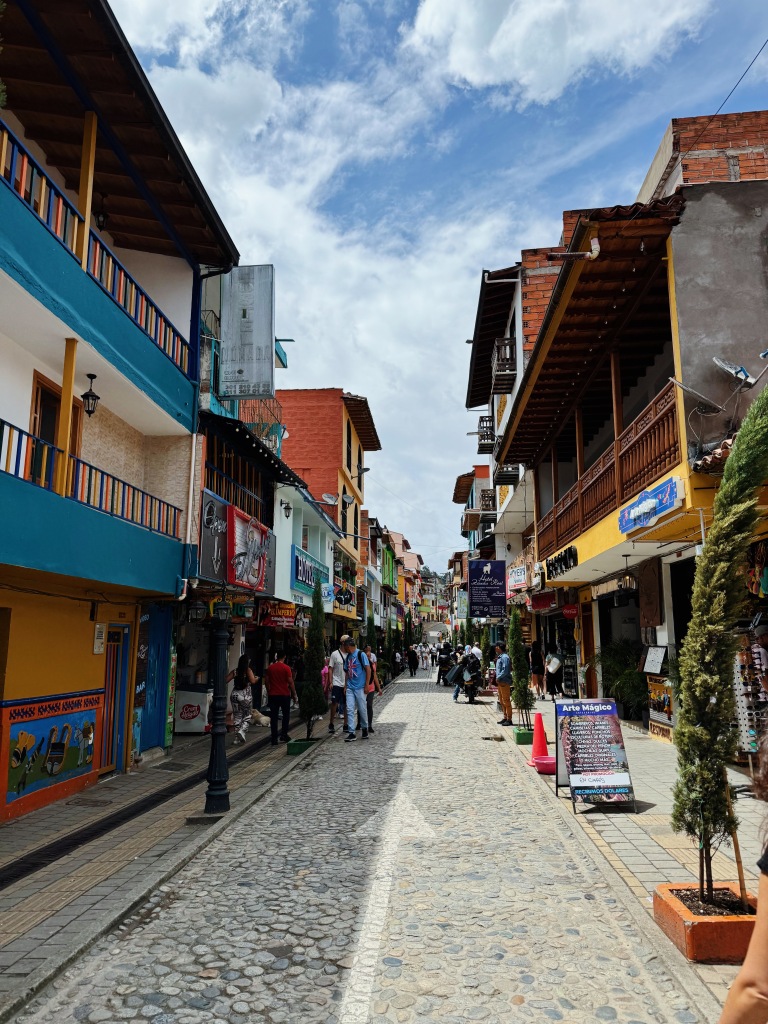
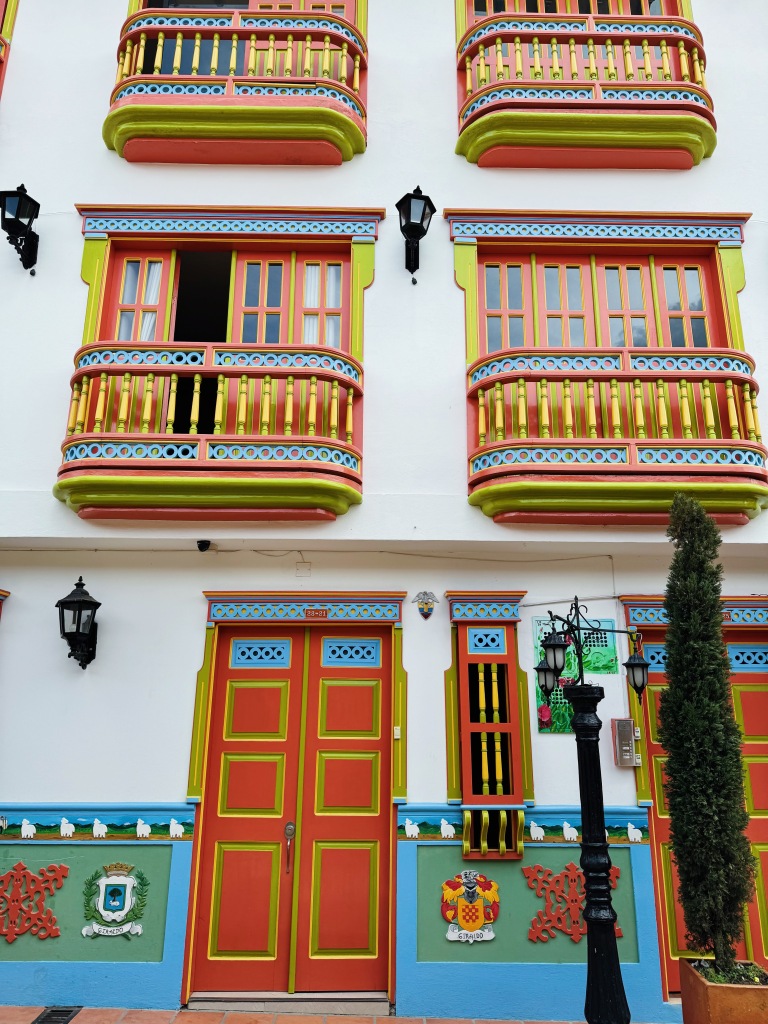
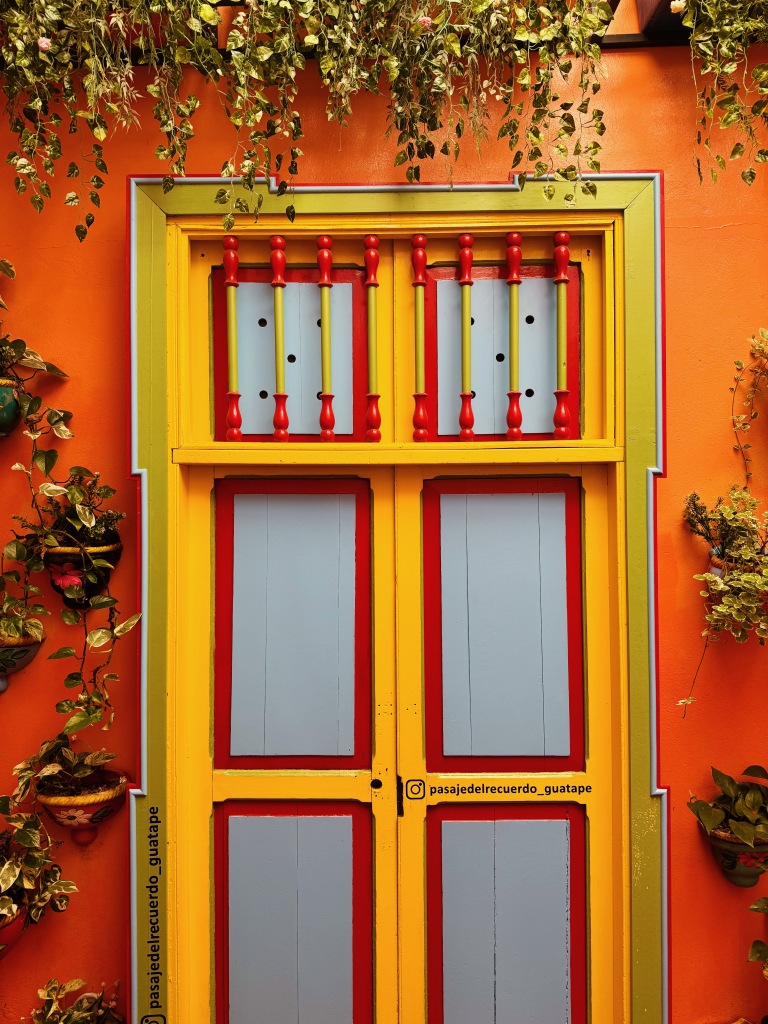
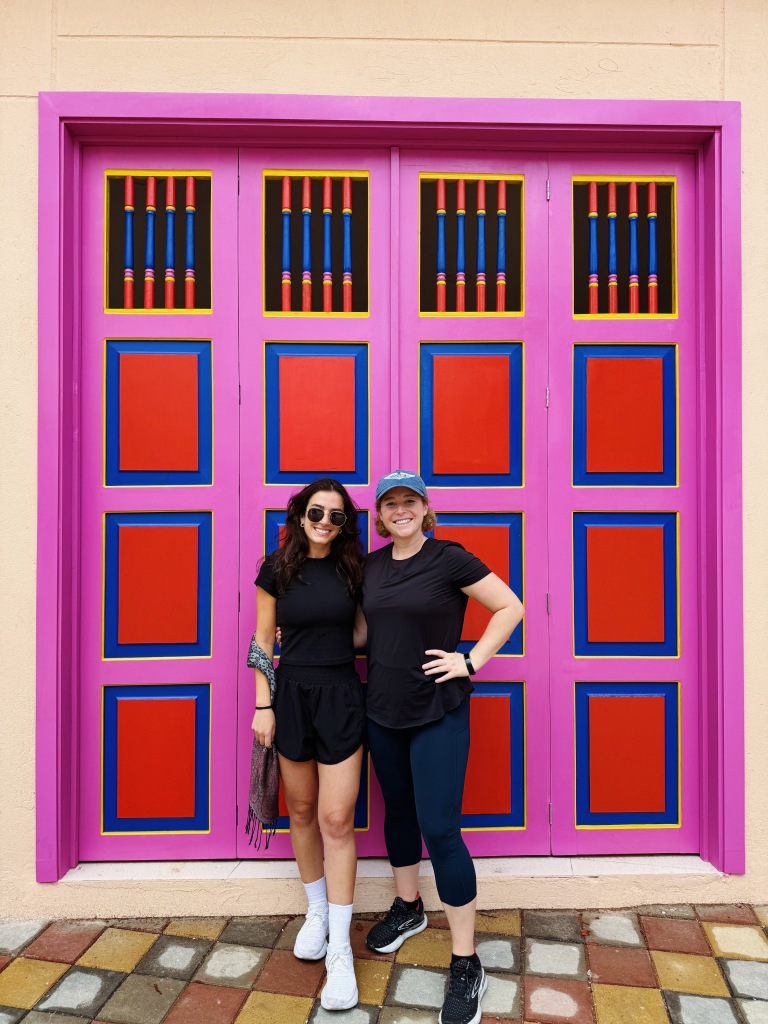
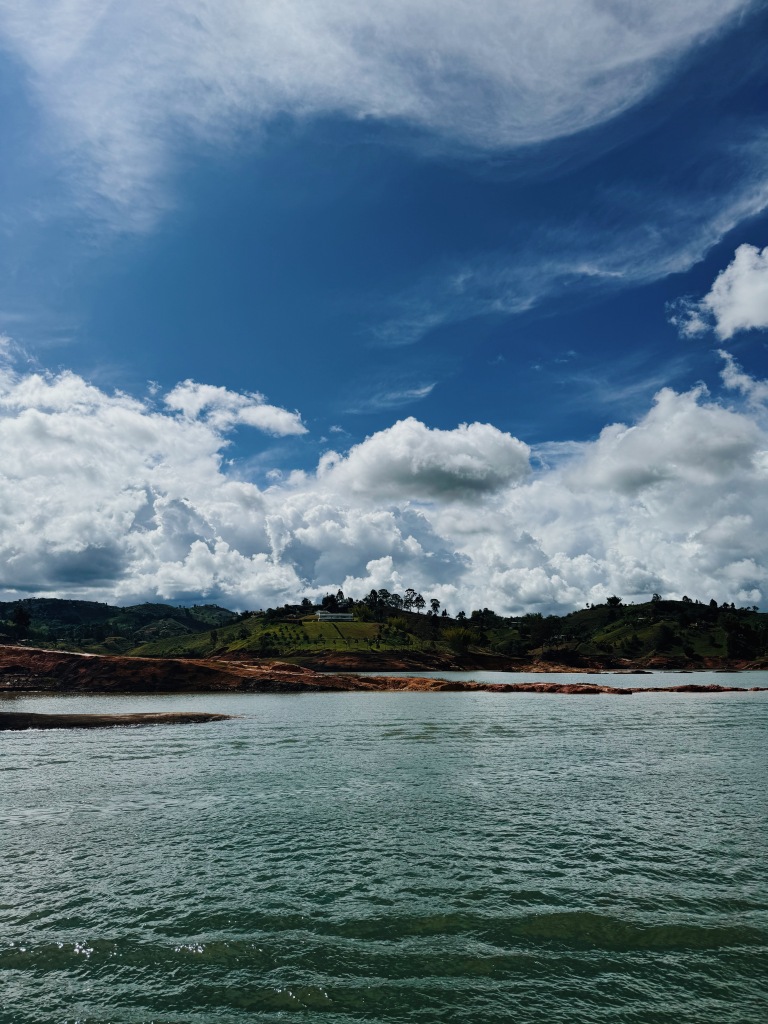
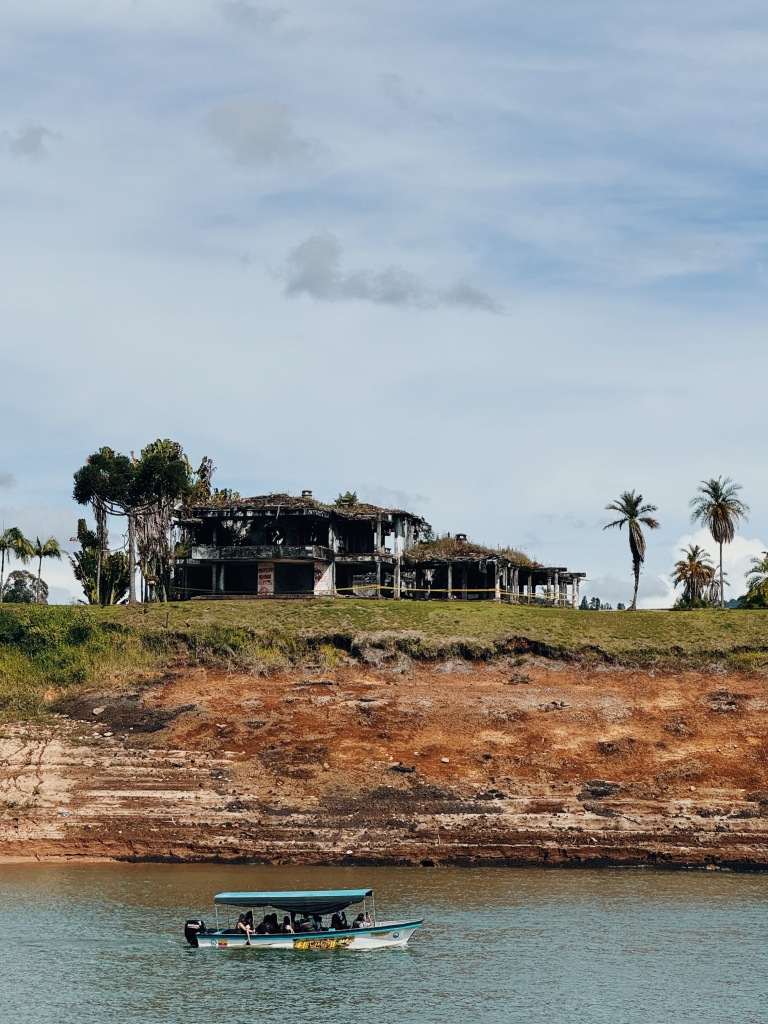
Guatapé – a must day trip from Medellin (we did this one). This colorful city is ripe for plenty of Instagram shots and you’ll get a chance to hike to the top of the Peñol Rock. You’ll finish the day tour with a boat ride where you’ll see one of Pablo Escobar’s abandoned mansions.
Climbing El PeñolWe made itThe views made it worth itThe colorful GuatapéSo charmingBoat ride Abandoned mansion
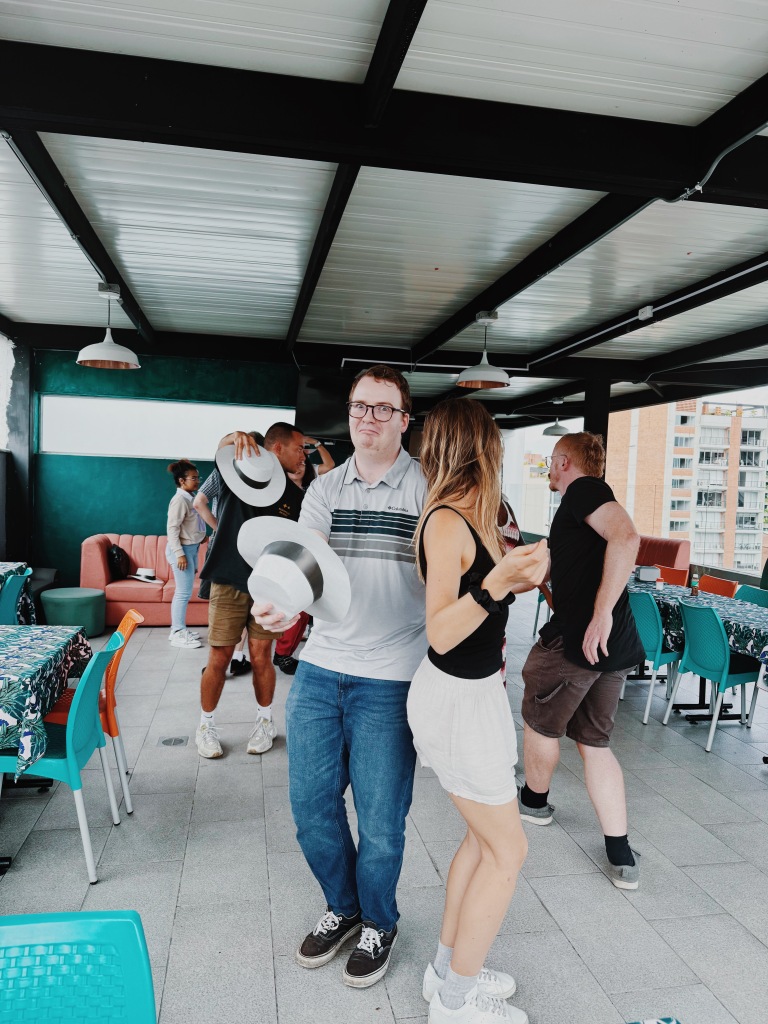
Go to language exchanges to meet other travelers & locals. I primarily went to practice my Spanish with locals, but there were plenty of English speaking travelers who couldn’t speak Spanish at all which provided an opportunity for locals to practice their English! Pro Tip: Try Gringo Tuesdays or DanceFree if you are staying in El Poblado.
Get a massage at Azkara Spa & Wellness. They were fabulous and massages were very reasonably priced.
Go dance some Salsa or Bachata! So many opportunities in Medellin to dance 🙂
Salsa lessonsSalsa lessons
Overall Thoughts:
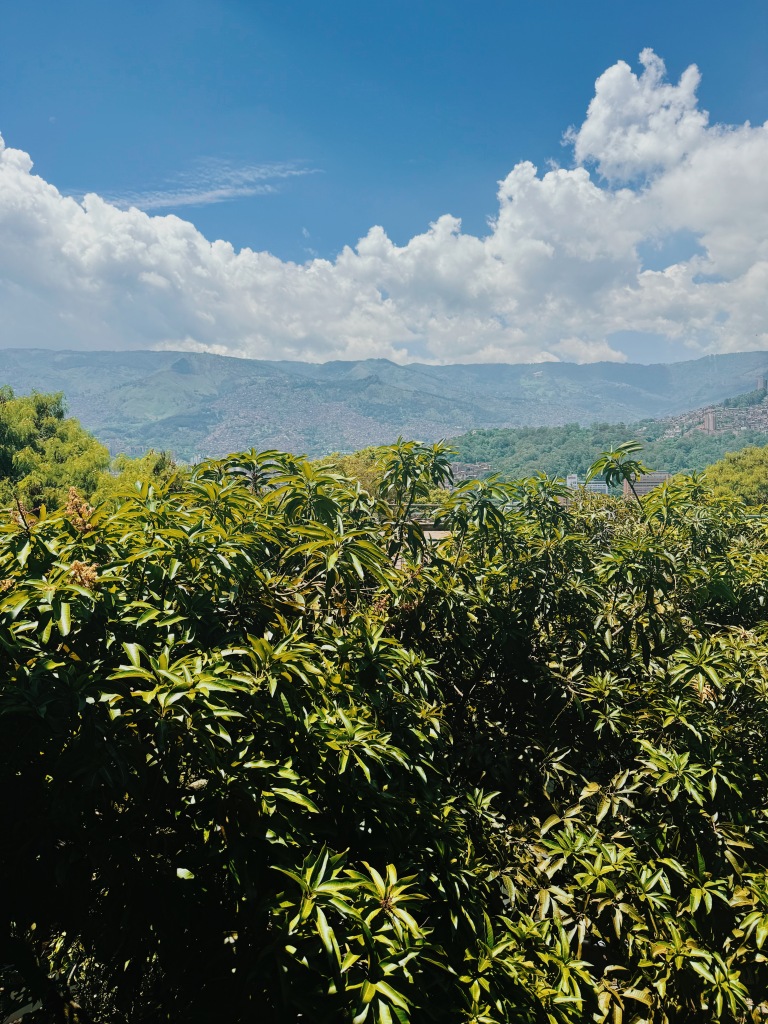
I don’t even know where to begin. I just loved everything about Medellin (except having to be cautious about walking alone at night – that was annoying). Medellin is so green, it basically feels like you are living in nature, but you are also in a major city. Even though I was there in rainy season, the sun still came out plenty. The people are SO kind & generous. They were so patient with my Spanish & genuinely so excited that I was doing my best to learn their language – I loved it! It really opens up the travel experience to be able to communicate in someone’s native language.
Medellin has a great work/life balance and everything is just so chilled (sometimes hard for my American brain, but I eventually settled in). For example, every time I was checking out at the grocery store, it took a minimum of 10 min even if there was only one person ahead of me in line. I just had to learn to embrace it haha.
Also, if you have ever wanted to learn Spanish, the best way to do it is to go live in a Spanish speaking country & take classes. Medellin/Colombia is known as a great option because they have a very neutral/easy accent & they talk slower than other Spanish speaking countries. Guatemala is also known as another good option!
Medellin is a great spot to just come hang for a few days, weeks or even months! Bring your laptop & work remotely. It’s just awesome! I can’t wait to go back 🙂
Medellin is full of natureMy time in Medellin would be incomplete without my incredible Spanish teacher: Wendy
CITY: Minca
HOW LONG: 3 NIGHTS
ACCOMMODATION:
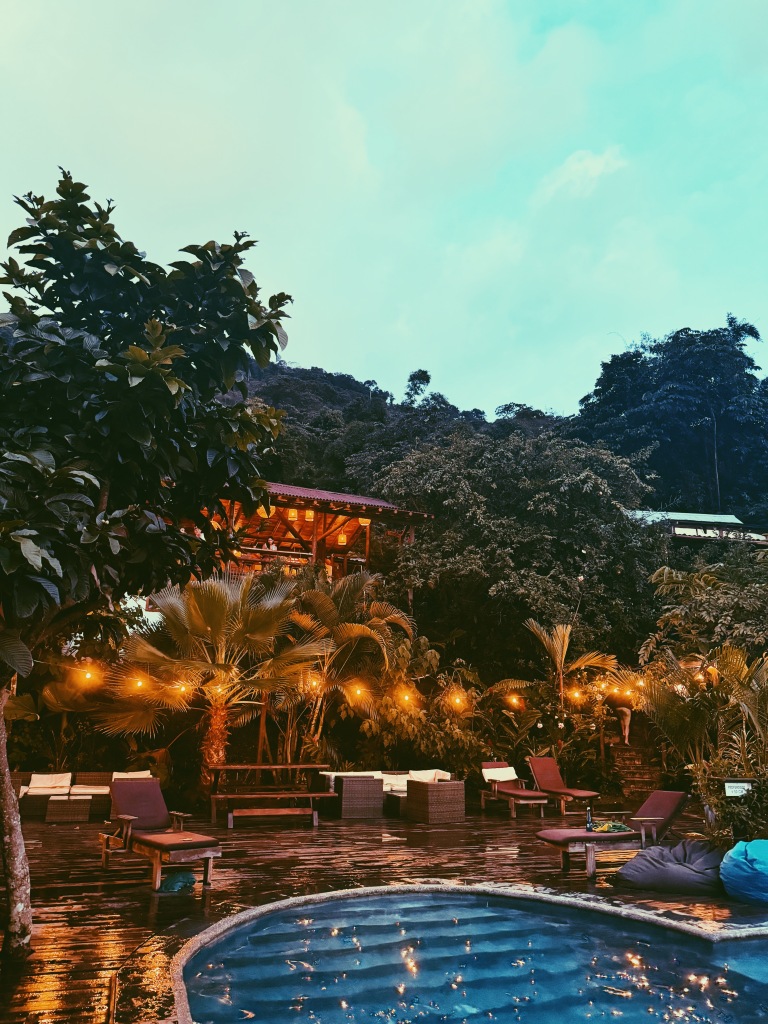
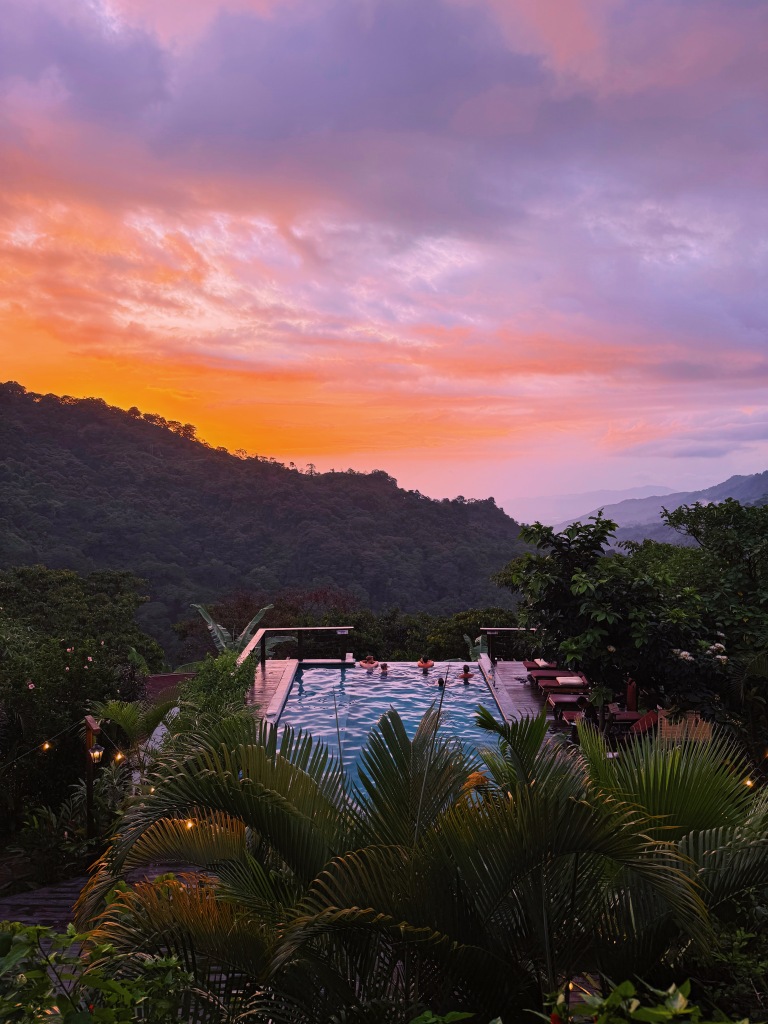
We stayed at Masaya Casas Viejas Hostel. It’s actually not technically in Minca, as you have to take a 4×4 vehicle for about 30 min up into the mountains/jungle to get to the actual hostel. But let me tell you – it’s worth it! It’s a little oasis nestled high up in the clouds. There’s an infinity pool, hammocks, chaise lounges, co-working areas, yoga in the morning, and delicious food. Beds are comfy & wifi works most of the time 🙂 It was very easy to meet people since you don’t leave the property much, unless you head out to a waterfall hike! Would absolutely recommend this place 9/10 (just wish the showers had warmer water, but hey you can’t complain being this remote!)
The cutest hostelDreamiest sunset viewsThe hostel life
Where to Eat:
At the hostel restaurant 🙂 Not too many options. Some folks headed into Minca for lunch (3 hr hike away) but generally people ate at the hostel. Luckily the food was very good!! Each meal had tons of great options to choose from.
Great breakfast optionsLunch
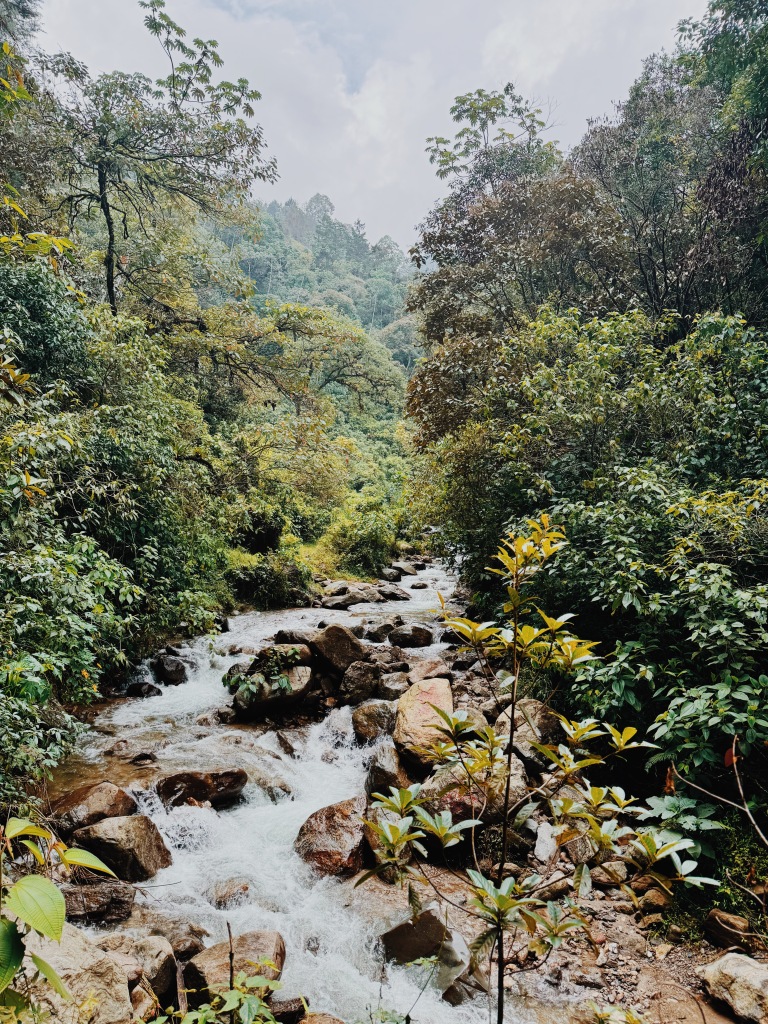
What to do:
Relax & enjoy the views 🙂 You can do some waterfall hikes, but Sabrina & I chose to just chill our time here. We did some yoga, lots of reading, played Monopoly Deal & President with all our new friends, and enjoyed the gorgeous sunset over the jungle.
This is a perfect spot to spend a few days (3 nights max I would say), to just recharge amidst your backpacking trip & make some friends who are likely heading in the same direction as you!
So many hours playing cards
Overall Thoughts:
I really enjoyed it here. After 6 weeks in Medellin I was slightly worried about the jarring nature of jumping back into backpacking, but this was a perfect way to ease back into it. We met so many fun, interesting people & I loved my lazy days. Finally finished a book I had started 3 weeks prior!
CITY: Tayrona National Park
HOW LONG: 3 NIGHTS
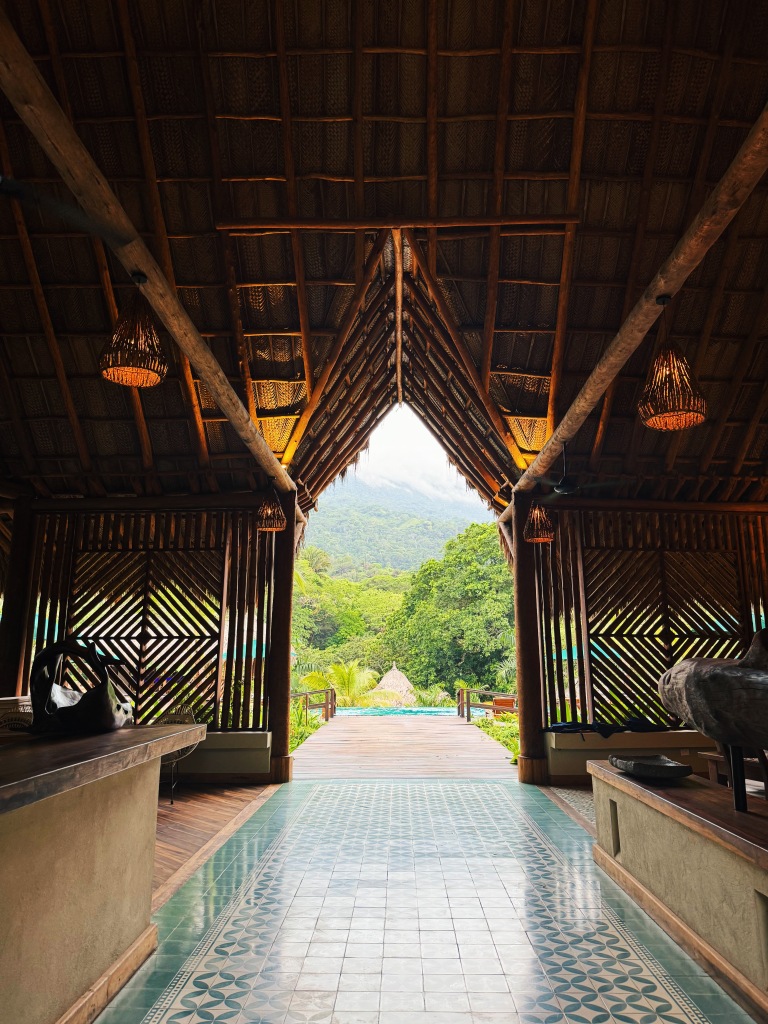
ACCOMMODATION:
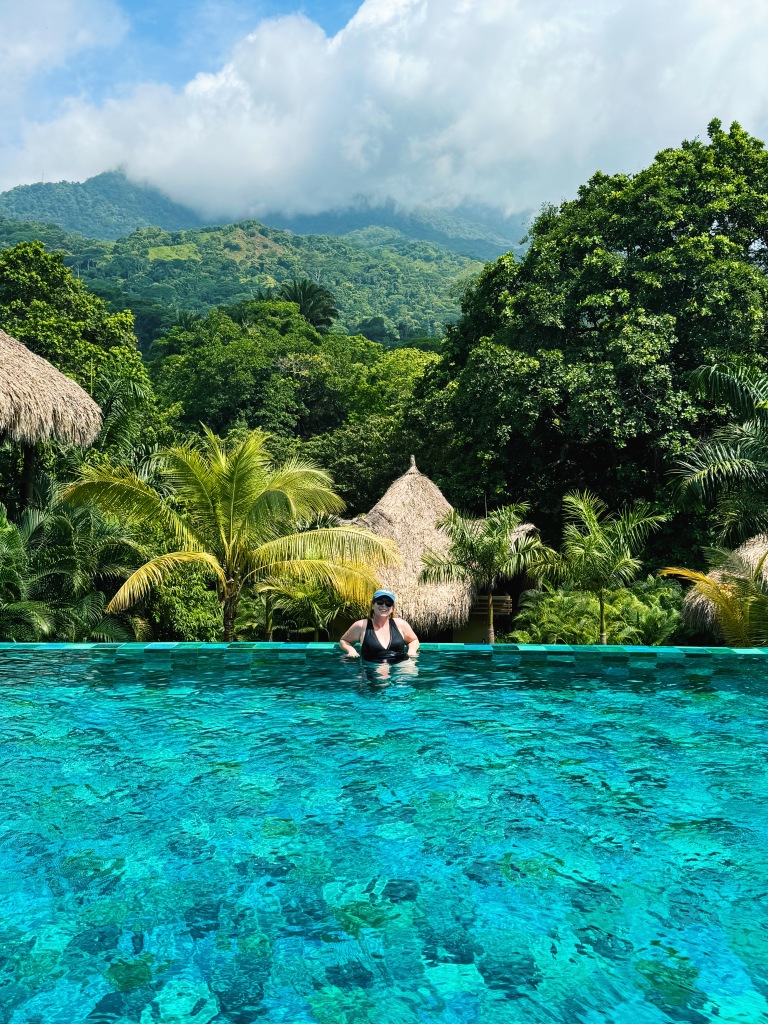
Holy moly this was paradise on earth. Senda Watapuy is a dream. DO NOT HESITATE to book here!!! We loved every part of our stay. The room was incredible (they installed mosquito nets to address bugs). The private pool was amazing (love being able to skinny dip in the morning). The food at the restaurant was great. The grounds were fabulous. A true jungle oasis.
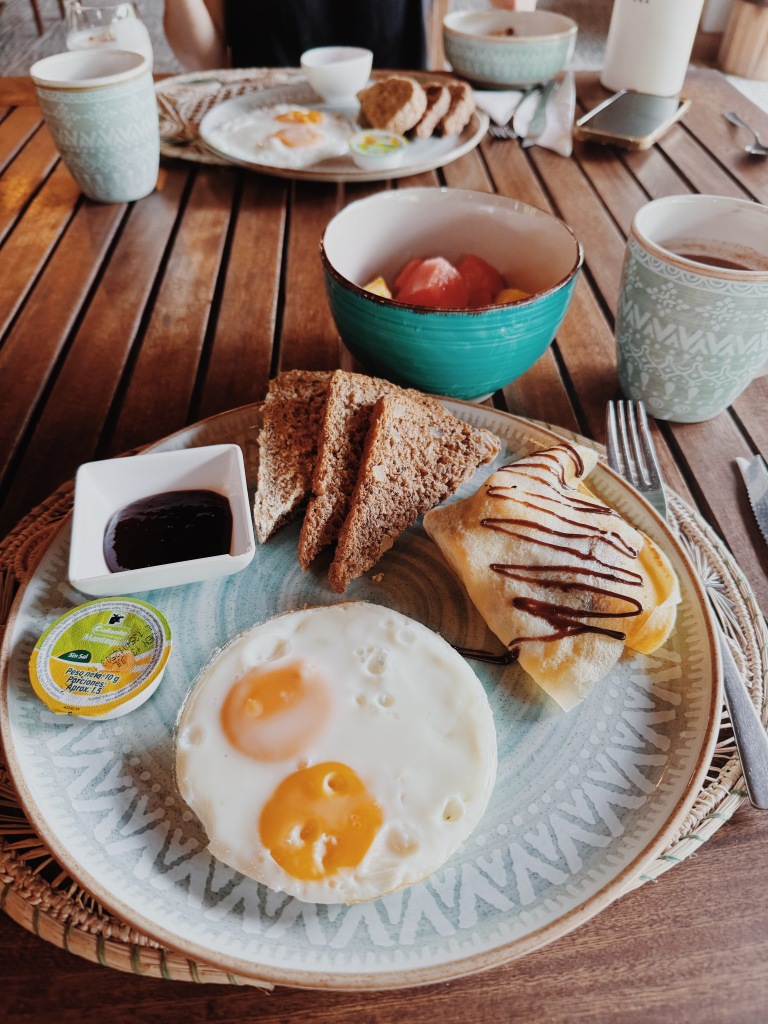
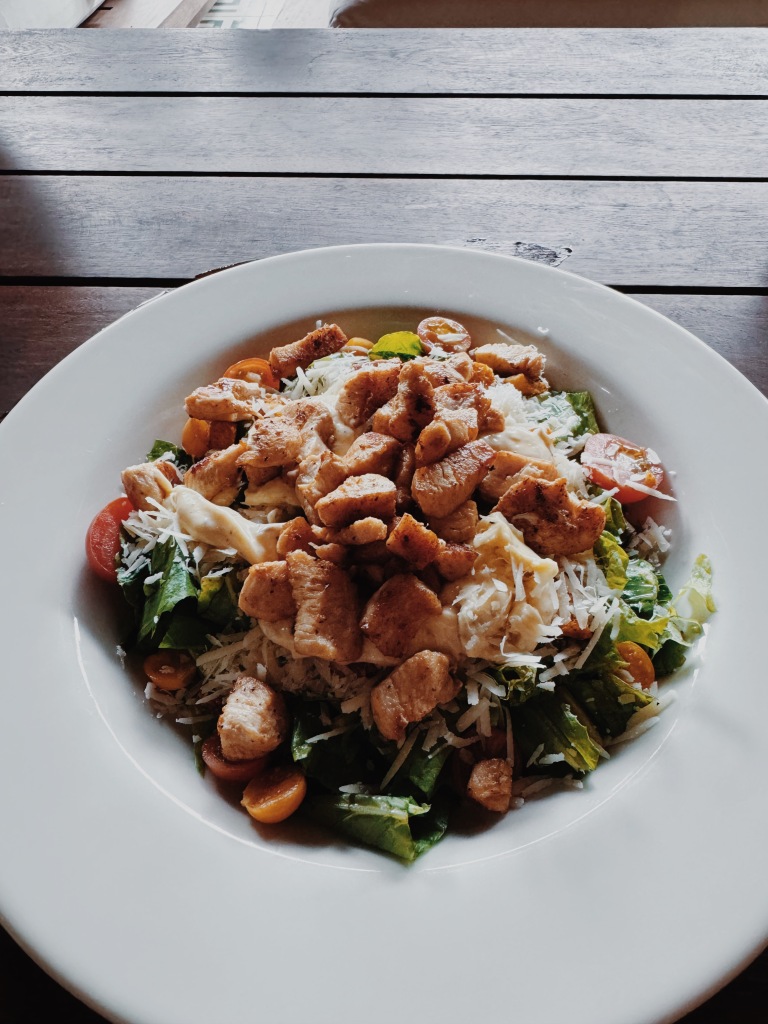
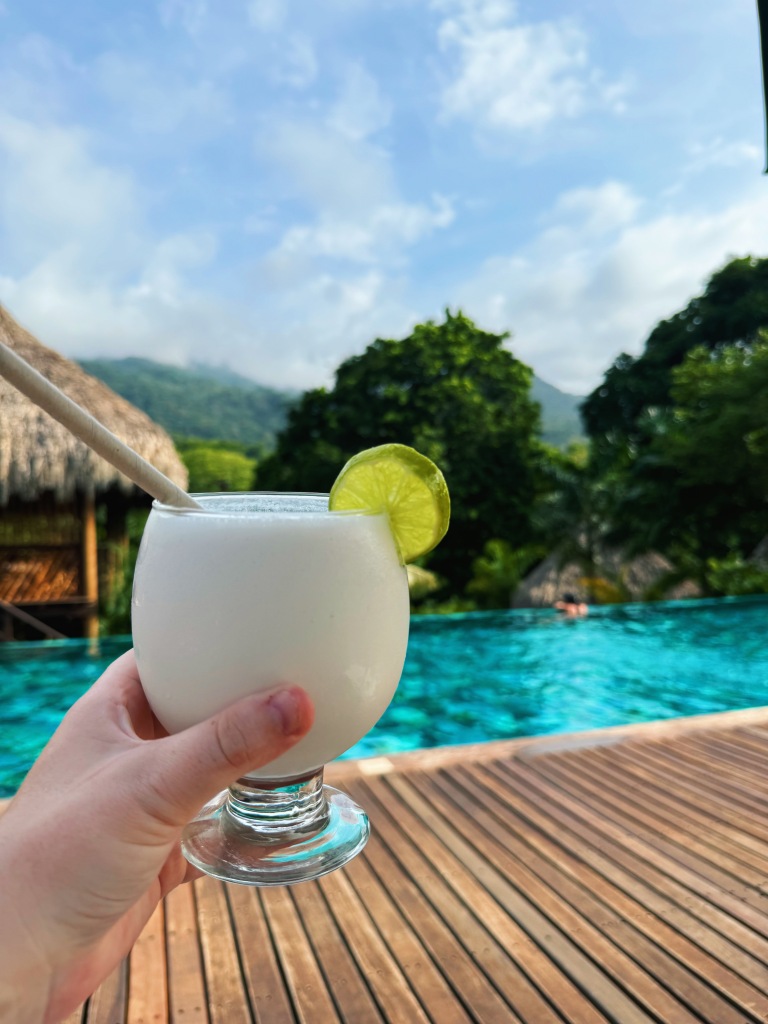
Once again, you are mostly stuck at the hotel in terms of food but the good news is that I loved the food here. Very expansive menu, but in classic form, I fell in love with their caesar salad and ate that most meals. One cool thing they offered was that you could order food from the menu on your phone and specify if you wanted to eat it in the room, at the pool or at the restaurant – very convenient.
Free breakfastI was obsessed with this salad!
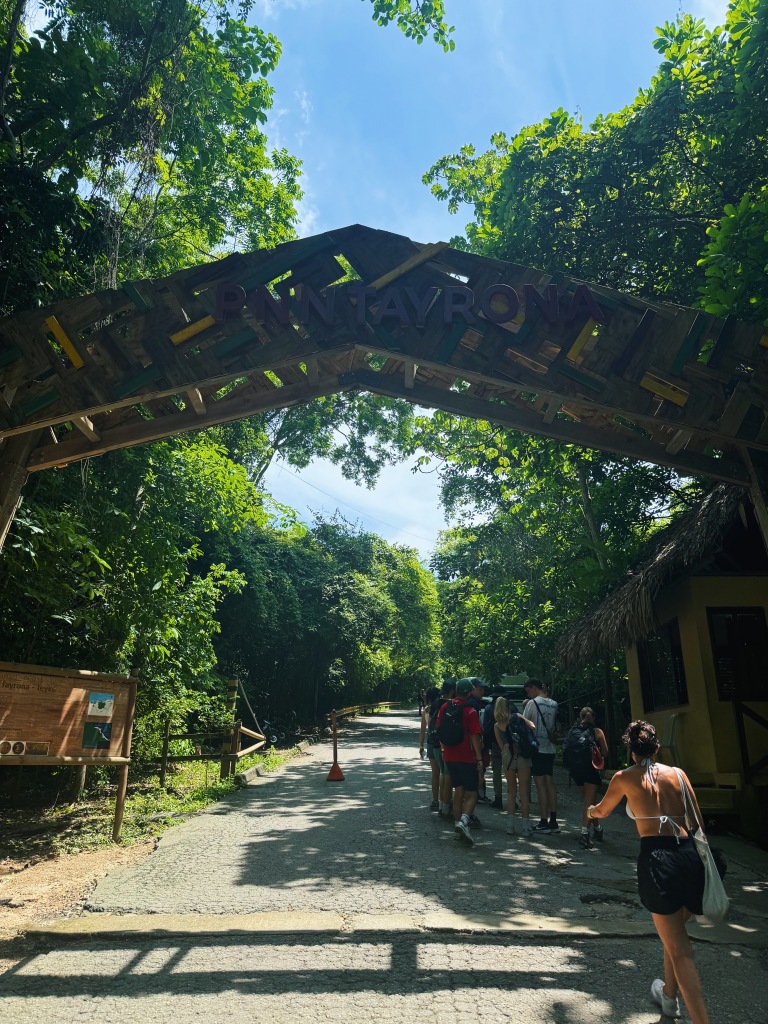
What to do:
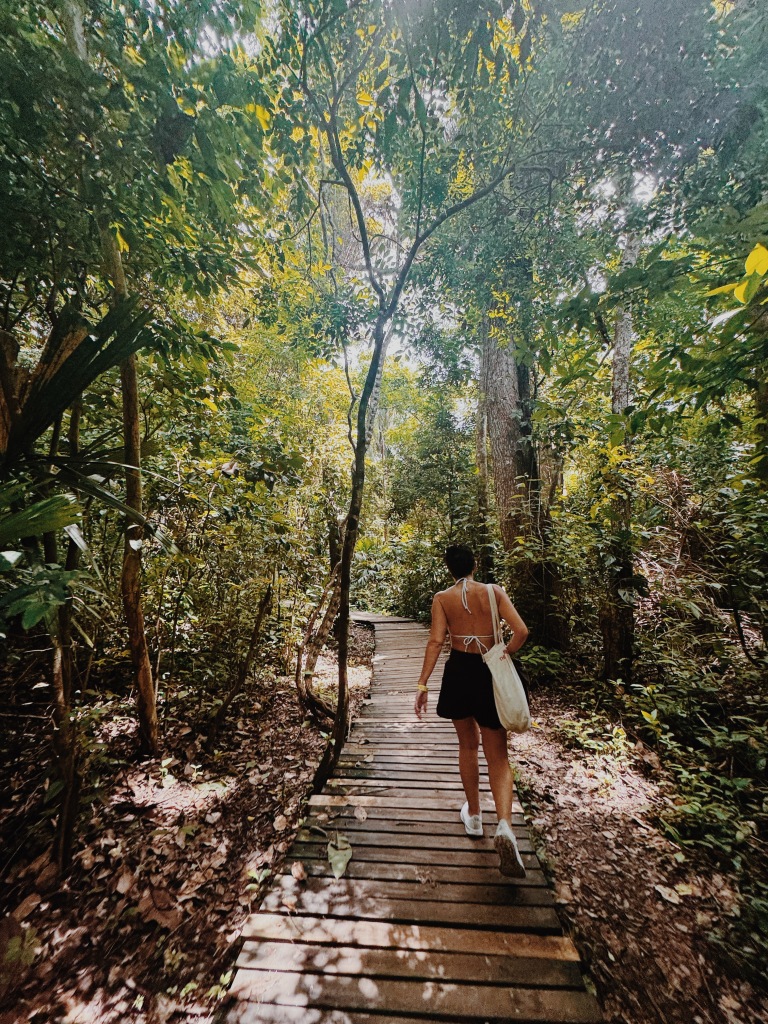
The main thing to do in this region is hike in Tayrona National Park through the jungle to the beautiful beaches. However, our hotel was right at the edge of the park so while we did go into the park for a short hike, we decided we preferred to spend our time reading by the pool, with views of the gorgeous jungle.
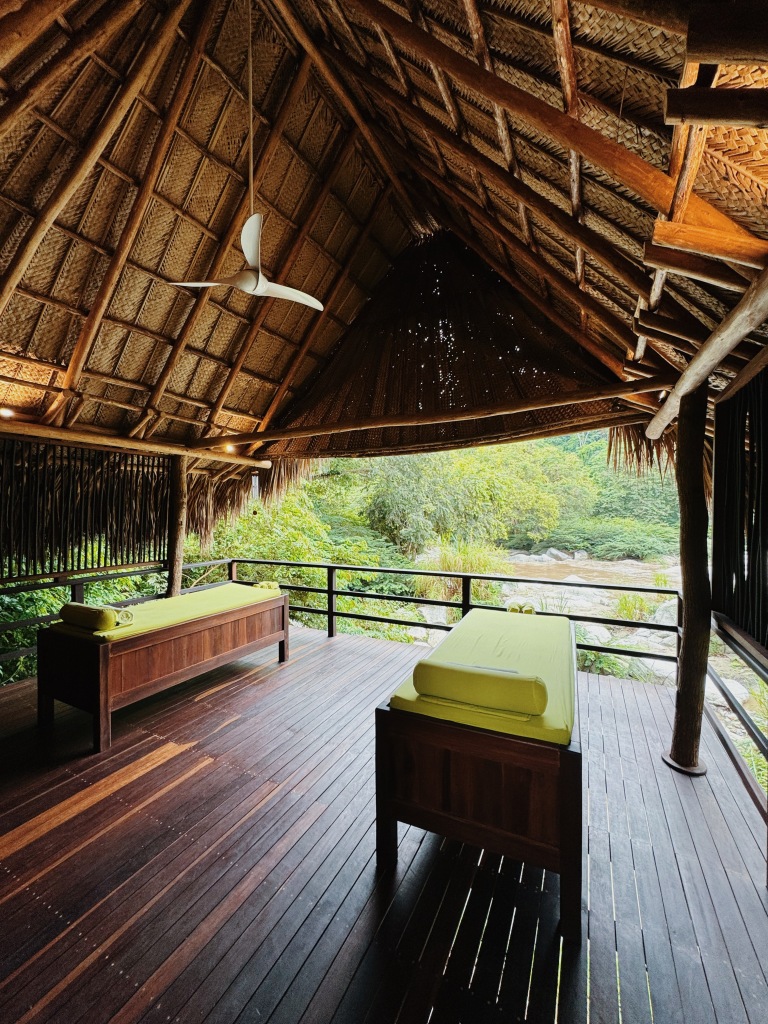
We also got some massages.
Riverside massages
You can literally walk to the park entrance from the hotel, which is nice though! Bring sunscreen, bug repellent and water!!
Overall Thoughts:
This was such a treat! 10/10 would absolutely recommend this place (mostly talking about the hotel) to anyone. I felt like I was on a true vacation.
Does it get better than this?Cheers!
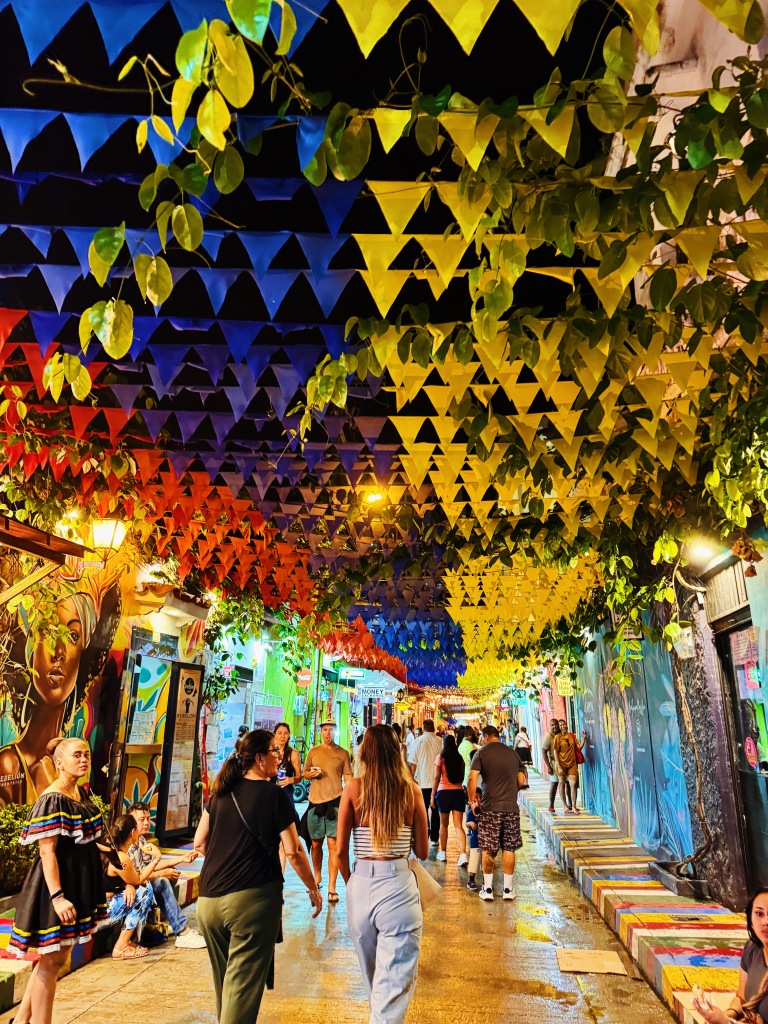
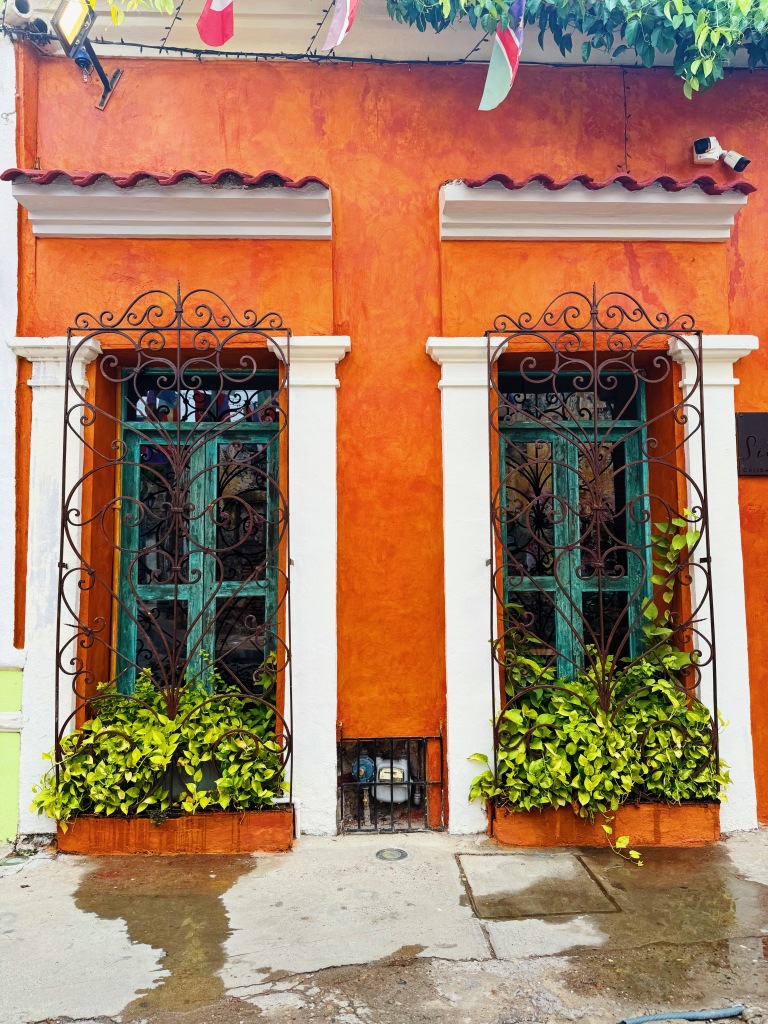
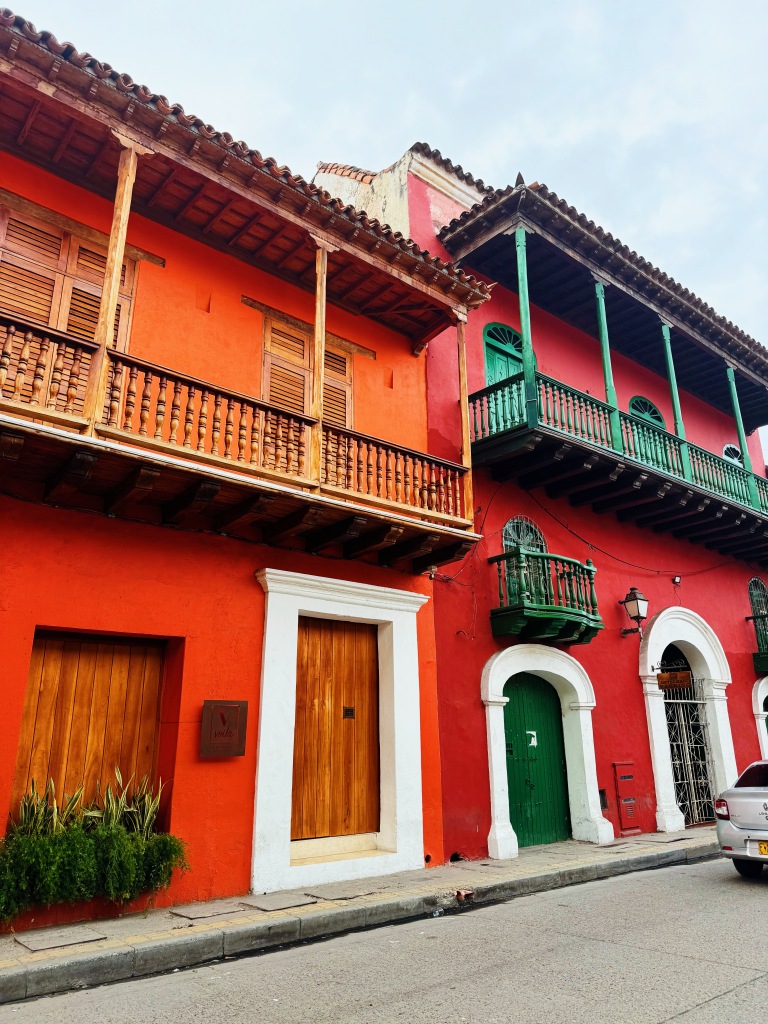
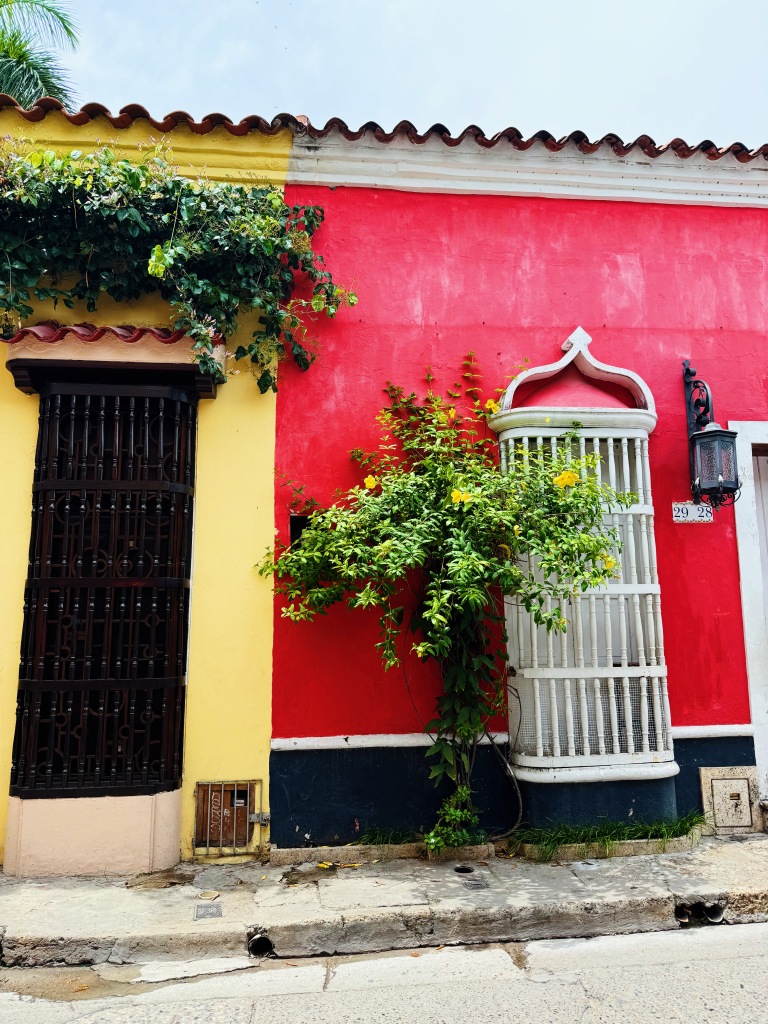
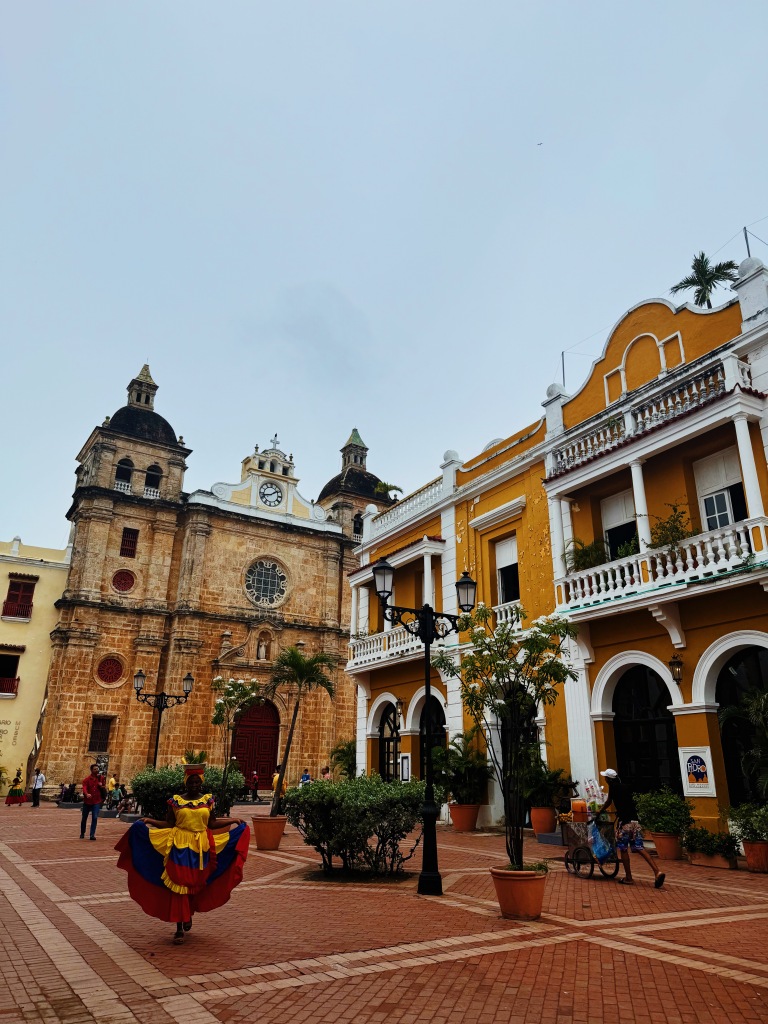
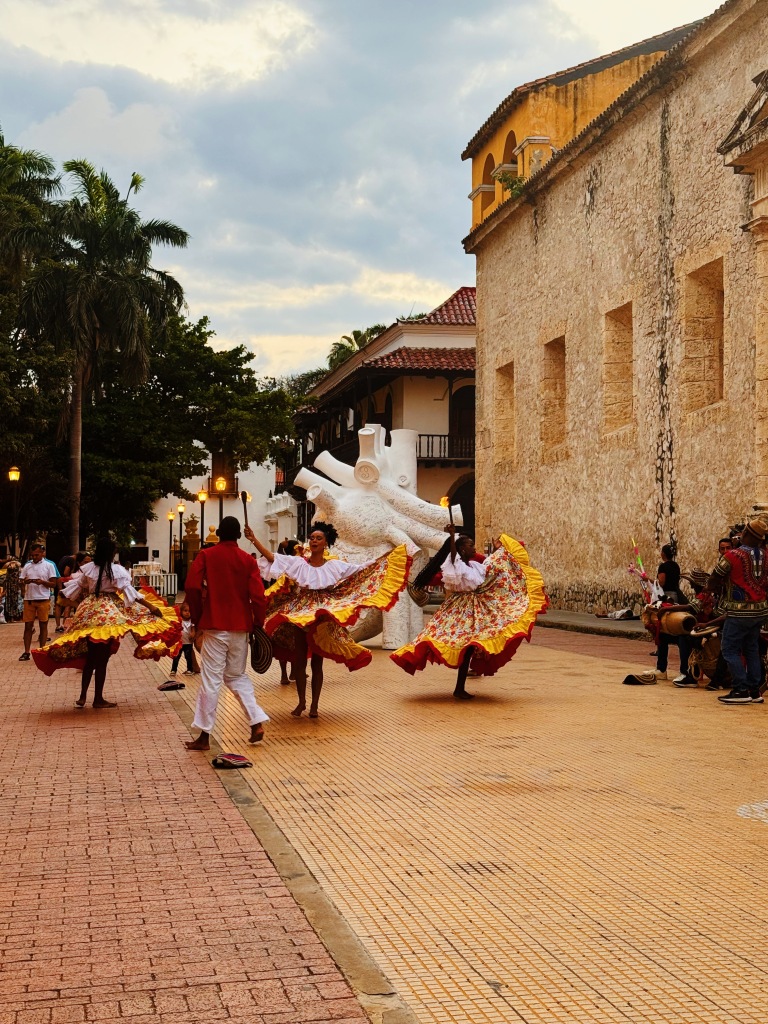
CITY: Cartagena
HOW LONG: 2 NIGHTS
ACCOMMODATION:
I stayed at Los Patios and wouldn’t recommend it. It’s in a good location, but they have a lot to improve. The AC barely worked, so we asked to lower the temp 1-2 degrees and it turned to an ice box. The dorm room floor stayed dirty the entire time. Very hard to meet people. When I asked the front desk about where the start of the walking tour was she said there are no walking tours in Cartagena other than theirs, which is just a straight lie. Very bizarre as there are like 10 free walking tours I found online. The hostel is so loud that you really can’t sleep at night or morning. I’ve stayed at 100+ hostels and this isn’t it. 5/10
Where to Eat:
Brioche bistro Moderno – service wasn’t great but the food was fabulous! Delicious brunch food in the center of the walled in city.
Nía Bakery – I had an iced chocolate with 100% cacao. Very light, not too sweet & yummy on a hot day (aka every day in Cartagena). Very cute cafe with a swanky vibe.
Pascal – Another great cafe/breakfast spot just outside the walled in city. Cute decor & strong AC. Had a great breakfast sandwich.
Munchy cream – fun ice cream spot with tons of toppings, which is my favorite!!
BriocheMunchy
What to do:
I only had one full day here so I optimized with a morning walking tour to hit the highlights and one last cheap massage before heading back to the US. Would highly recommend Relax Spa Cartagena de las indias for a spa treatment while visiting Cartagena. If you have more time here, I hear the island day trips or overnight trips can be quite fun!
Overall Thoughts:
Cartagena was so colorful and beautiful!! I would’ve happily stayed here another day but not another week because it was so HOT, & I am not really a beach or party person, which Cartagena is known for. Overall it was a cool spot though!
BUDGET FOR 12 DAYS of traveling IN Colombia:
Fun to have two different types of budgets in this post, but admittedly my type of fun might different than most haha.
Accommodation: $532 ($44 per night) Our stay at Senda Watapuy drove the average up, but it was worth it!!
Food: $199
Groceries: $0
Activities: $167 (massages + walking tours)
Local Transportation: $172
Miscellaneous: $83
Total: $1153 (Daily average: $96)
——————————————————————————–
BUDGET FOR 38 DAYS living IN Colombia:
Accommodation: $1157 ($30.44 per night)
Food: $335
Groceries: $327
Activities: $859 (includes $665 for 6 weeks of Spanish Class)
Local Transportation: $250
Gym: $234
Miscellaneous: $91
Total: $3253 (Daily average: $85)
Transportation to next destination: $0 (I booked my flight home to California with points – yay!)
Once again, I am about to head out on the road! After a whirlwind visit home in California for my 30th birthday(!!!), I am taking off for a slightly different stint of my trip. I have a week in Mexico with my sister for a wedding, but then I take off solo to Colombia where I’ll be staying in Medellin for 6 weeks to study Spanish at a language school! I’ve talked about this before, but at the three month mark of backpacking, I get really burnt out and need to stay still to recuperate. I built this part of the trip in very intentionally. I’ll be staying at an airbnb, where I’ll have my own room and going to class everyday. I’ll be cooking and signing up for a gym. I am SO excited to have a bit of a routine and not have to pack up over & over again. In fact, I get to unpack for 6 weeks!! Truly what a dream.
Because this is quite the different type of trip, I get to pack a little differently. Other than needing outfits for a wedding (which thankfully was casual enough that I could wear clothes that I’ll also wear out & about in Colombia), I only need to pack fairly generic outfits for school, going to the gym, and an outfit or two to go out to dinner, etc. Additionally, I am not going to a bunch of different climates, so overall it’s a relatively simple packing approach.
Big news: I am trying out Tortuga’s newest backpack, the Travel Backpack Lite 40L. It’s the updated version of my last backpack of theirs (the Setout). Nice to travel with a brand new backpack! It’s the perfect carry on size & with their packing cubes, you can optimize every square inch of it. I actually had room leftover when I packed all the below into it. I’ve also added the Tortuga Travel Sling, the new Tortuga Packable Daypack (to replace my 5 year old one), & the Tortuga Tech Organizer, which means I’ve achieved my goal of being a walking evangelist for all Tortuga products haha.
Think through how the clothes will feel in heat. Linen & lightweight materials will be best.
Make sure that every top works with every bottom and works with every shoes. Use a capsule wardrobe as inspiration.
Less is more! I can’t emphasize this enough. You CAN do laundry. You CAN buy anything you feel like you ended up needing on the road. I promise!
If you are planning a longterm trip, don’t forget to check out all the things I wish I had known before setting off on my first big trip!
PACKING LIST FOR Colombia:
CLOTHES
3 pairs of Lululemon Fast & Free Crop’s – I’ll be joining a gym while in Medellin so I need more workout leggings than I normally take.
1 pair of Lululemon Align pants – can be used for working out/walking around town or I can dress it up.
1 pair of Lululemon joggers- since I’ll be living in an airbnb, I wanted a more casual, comfy pair of pants to throw on when I am home in the evenings.
1 pair of jean shorts
2 Rompers (one is just a copy of the other that I had made in Hoi An)
2 jumpsuits I had made in Hoi An (inspired by my Madewell Jumpsuit)
2 Cute shirts (one linen for the heat, one basic cute grey shirt)
4 sports bras
5 athletic shirts (for running + sleeping in). One is from Vuori & one is from Lululemon. I need more of these shirts this time around since I am planning to go to the gym everyday in Medellin
Waterproof sandals (will act as my water shoe as well as my cute shoes- I never said the backpacker lifestyle was glamorous haha)
Pair of white sneakers (bought these in Japan)
Light Patagonia puffer – good for chilly planes/busses & for when I visit countries that are a little cooler, even in the summer. It also smushes down fairly small so it’s a great backpacker jacket. I’ve also used it as a pillow in a pinch.
1 Swimsuit (I don’t foresee doing much swimming on this trip, but it’s always smart to bring one)
Sunglasses (Warby Parker)
Hat
Rain coat (Patagonia; you can pack it up into its pocket so I can easily attach it to the outside of my bag via a carabiner)
Running belt – I don’t use it often since my Lululemon Fast & Free’s have a pocket for my phone, but every once in a while it comes in handy.
Tortuga Packable Daypack – This is their latest version of their daypack! Very excited to try it out. It packs into itself if you don’t want to use it. This is my personal item for flights.
Tortuga Travel Sling crossbody bag (I put it into my daypack on travel days). I use this out and about on a daily basis. It fits my iPad mini & passport in the back zipper pocket. In the main pocket I can put keys, credit cards, cash, AirPods, chapstick, sunscreen, etc.
ELECTRONICS
Computer + Charger
iPad
iPhone + Charger (I get a 6 ft cord so I can always reach the plug from my hotel dorm bed!)
AirPod Pro’s
Headphones (Bose; noise-cancelling for travel days)
AirTag (This is a no brainer these days; provides peace of mind incase I am forced to check my bag or when it’s below me in a bus. Always nice to confirm it’s still with me!)
TOILETRIES (I USE A BUNCH OF LITTLE TOILETRY BAGS TO KEEP THESE ALL ORGANIZED)
Toothbrush
Toothpaste
Floss
Any medication you take
Retainer
Deodorant
Tiny roller perfume
Makeup
Makeup Remover (I’ve become obsessed with cleansing balm for this because it isn’t a liquid, & it’s highly effective at getting makeup off at the end of the day!
Razor
Conditioner + Shampoo (Get containers to put your products into & refill on the road!!)
Face wash
Hair Brush
Pocket Hand Sanitizer– I keep one in my backpack and one in my sling/purse. Great in general, but also for when inevitably there is no soap at a random bus stop bathroom 🙂
Tiger balm (I picked this up in Southeast Asia and it’s now a staple in my bag. Great for mosquito bites and just feeling a little sick. It’s kinda like Vick’s vapor rub).
Ibuprofen
Hair ties and bobby pins
Moleskin
Bandaids
Cough drops
Topical steroid cream for bed bug bites or regular bug bites to help with itchiness
MISCELLANEOUS
Passport – no explanation necessary 🙂
ID (I bring my driver’s license)
Travel Credit Card (no foreign transaction fee; I have the Chase Sapphire Reserve (hello lounge access!)+ Capital One Venture Card)
Debit Card (Charles Schwab has the best one because it reimburses ATM fees from any ATM in the world 🙂)
Record of your plans (I make folders within my email inbox to keep track of everything or you could print out a copy of your itinerary)
Extra Passport photos
Thumb drive with all documentation if desired
Sarong/beach blanket- My roommate got this for me! Perfect for any countries where I need to cover up more as well as the beach or to dry off from a swim. I didn’t bring my quick dry towel with me this time since my apartment/airbnb provided a towel for the duration of my stay.
Water Bottle
Ear Plug
Eye Mask (you can either go the classic eye mask route or get one like this that almost acts like your eye mask + ear plug since you can play white noise through the built in bluetooth speaker- pretty cool!)
Lock (for staying in hostels or locking my bag.) Get the combo lock so you don’t have to worry about tiny keys. I take two to be able to lock two different compartments in my bag AND so I can keep my computer/passport/iPad compartment still locked when I use the other one to lock a locker within a hostel.
3 carabiners – I just attach them to my backpack and over the course of the trip they will hold everything from my water bottle, shoes, rain jacket and more. You will not regret having a few on hand.
Pack of playing cards
Face mask (I’ve used this while feeling sick as well as on a dusty motorcycle ride)
2 pens for writing postcards & for my Spanish classes
Everything I’m taking with me!
Here is what I packed in each packing cube:
Swimsuit, 3 sports bras, 8 socks, booty shorts, bralette5 shirtsTwo jumpsuits, two rompers, jean shorts, 5 pairs of leggingsPacking cubes all packedAll packed up! 40L Tortuga Lite Backpack, Tortuga Packable daypack (personal item), Tortuga Sling bag, and my airport outfitBack on the road, all decked out in Tortuga gear 🙂